Rhino to Revit
 |
In this guide we will take a look at how to send Rhino geometry to Autodesk Revit® using Grasshopper. |
Rhino.Inside.Revit allows Rhino shapes and forms to be encoded into, and categorized as Revit elements. It is important to note that the easiest and quickest way of moving geometry into Revit may not be the best method. Determining which the final goal of the forms in Revit can improve the quality of the final Revit data structure and increase project efficiency.
Revit data model is based on a categorization system. Determining the best categories and subcategories to use will allow the elements to be drawn and scheduled properly. The challenge is that not every Revit category is available for each method discussed here.
There are 3 main ways to classify and move Rhino geometry to Revit. Each successive strategy increases the integration within a BIM model, but each strategy also takes a bit more planning. The 3 ways are:
- Using DirectShapes can be quite fast and takes the least amount of organizing. The limited organization and speed make DirectShapes best for temporary drawing sets such as competitions and early design presentations. DirectShapes may not the best for late project phases.
- Developing Loadable Families with Subcategories works well for standalone elements in a model or elements that might be ordered or built by an independent fabricator. Being part of a Family, these objects could have their own set of drawings in addition to being part of the larger project drawings.
- Use Rhino geometry to generate Native Revit elements is the best way to generate final Revit elements. While it is not always possible to create everything with native elements, native elements normally integrate best with the rest of the Revit team. These objects can potentially be edited without any dependency on Rhino.Inside.Revit. While the creating elements in this way can be limited, the resulting elements are native Revit elements.
When determining which method and category to use, reference this list of Revit Categories and the type of Families they can accept from Rhino.Inside.Revit.
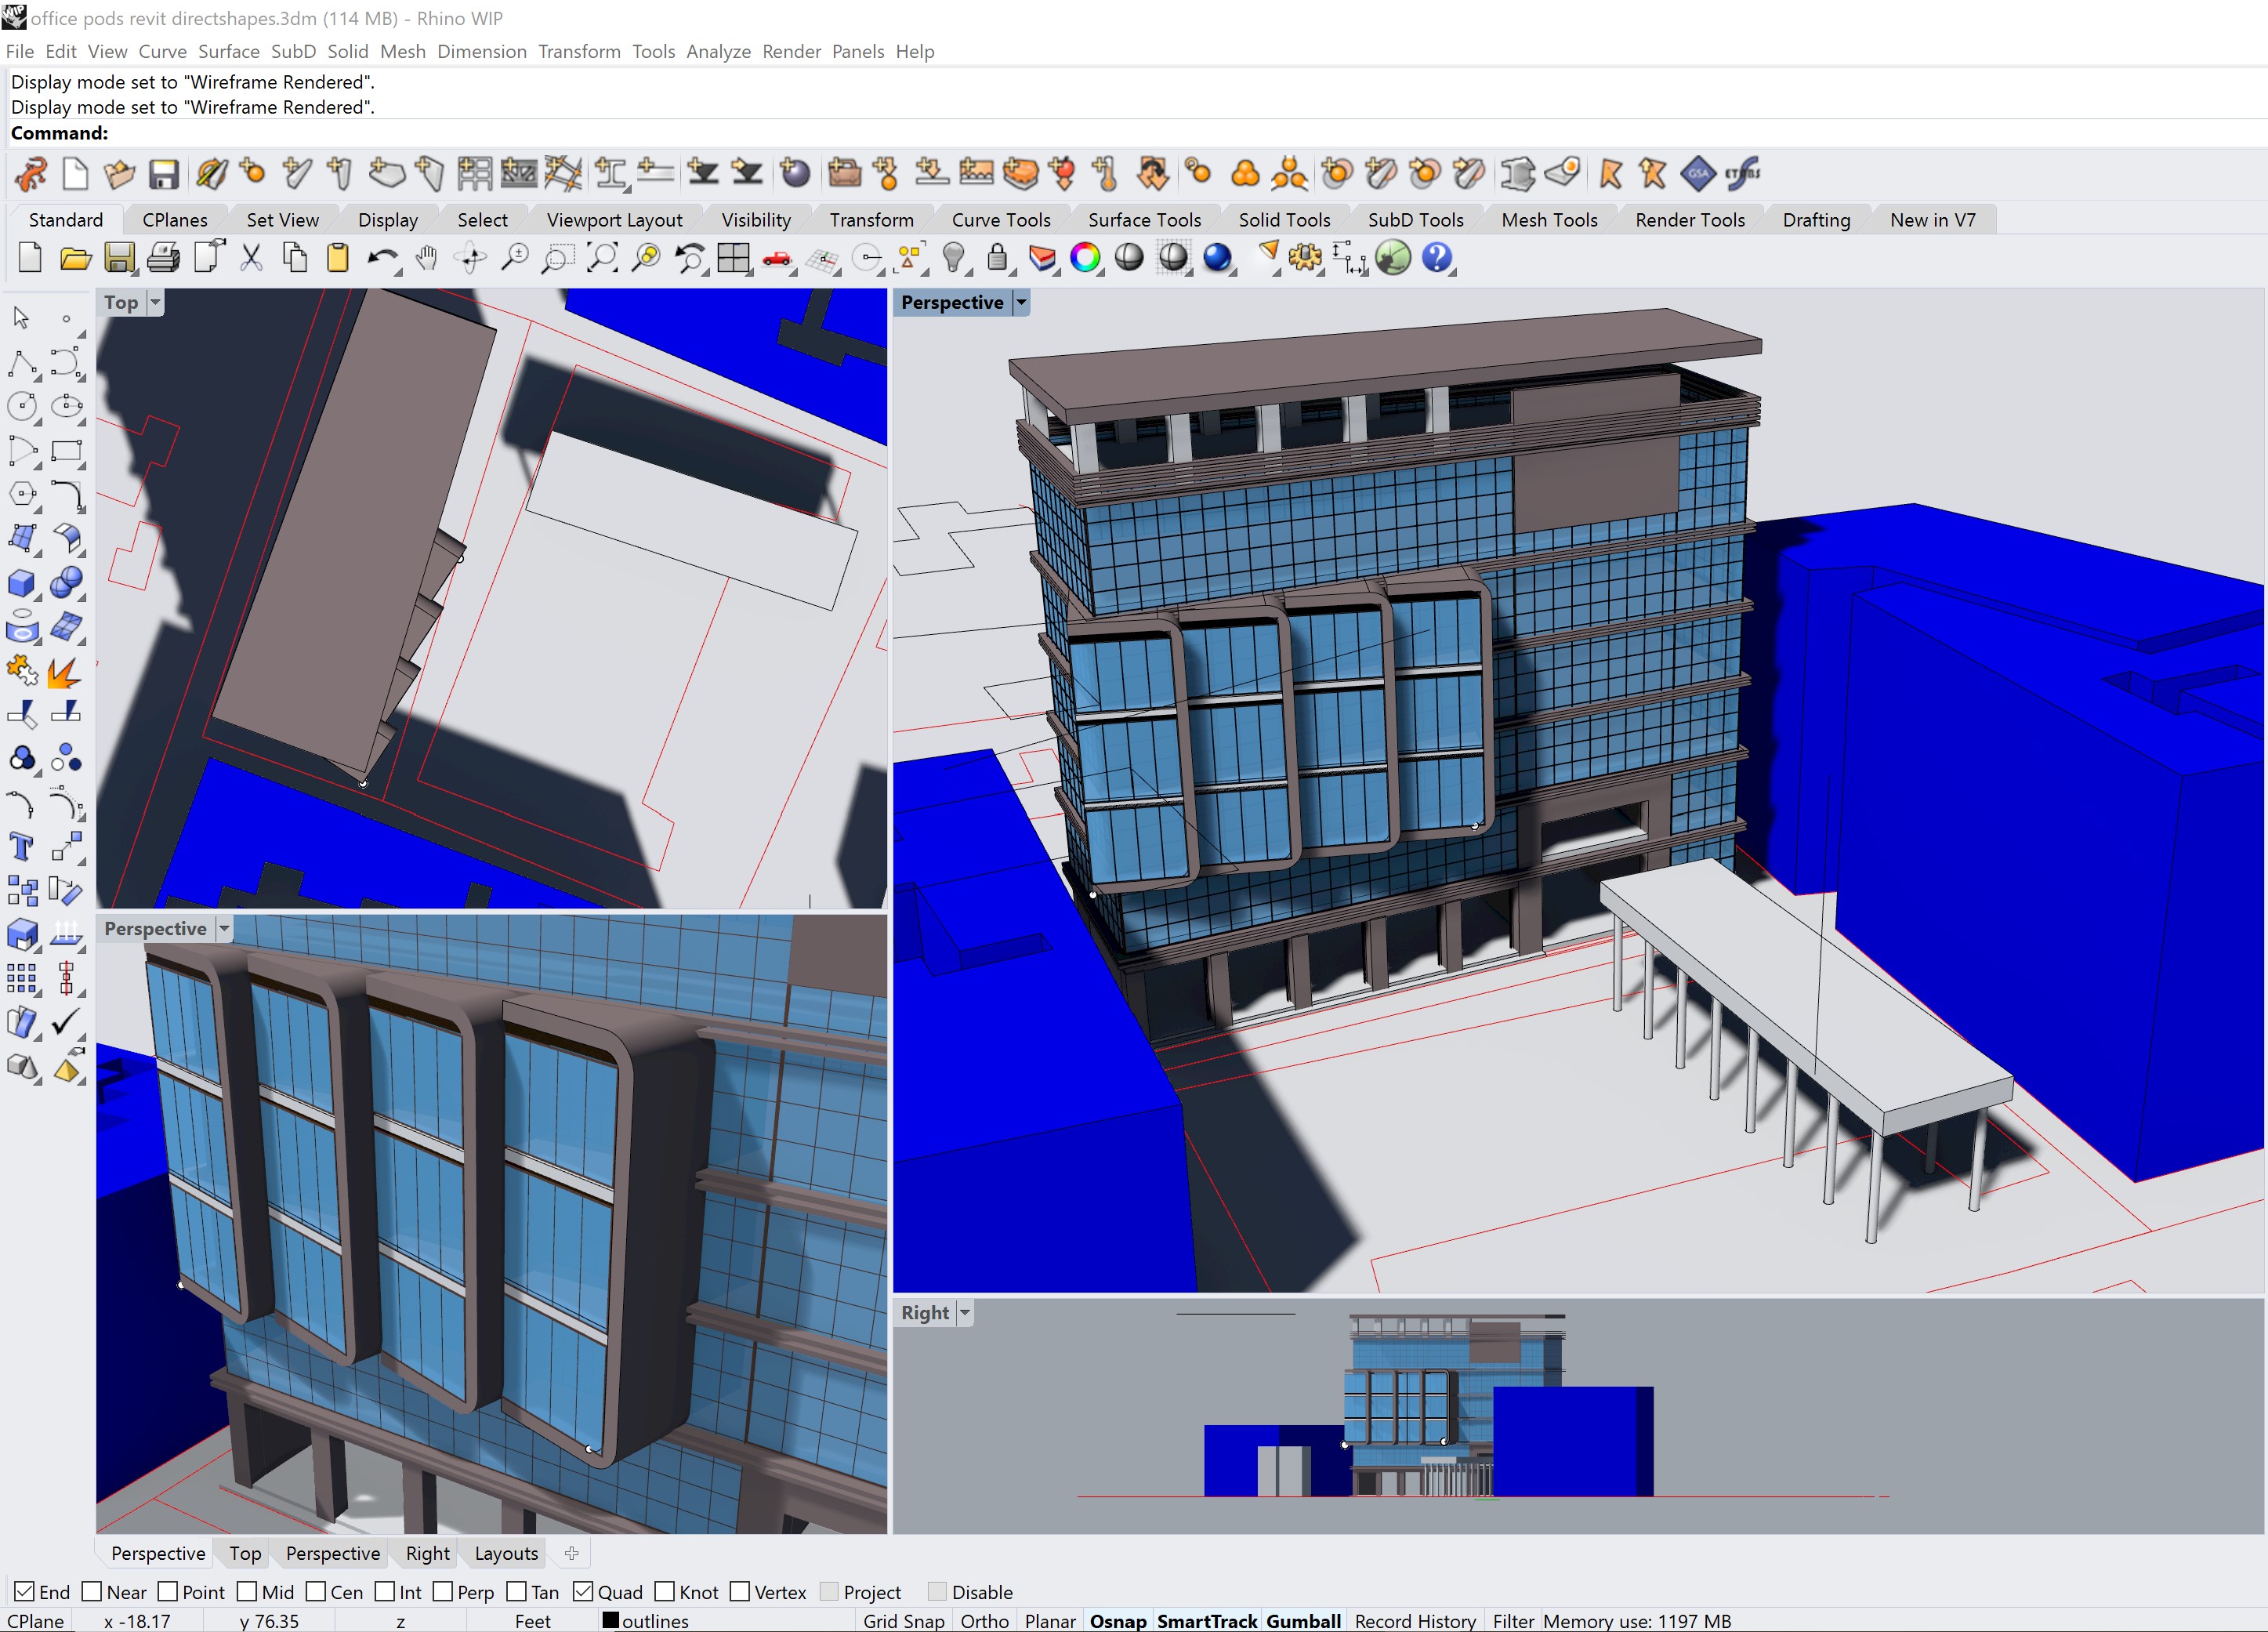
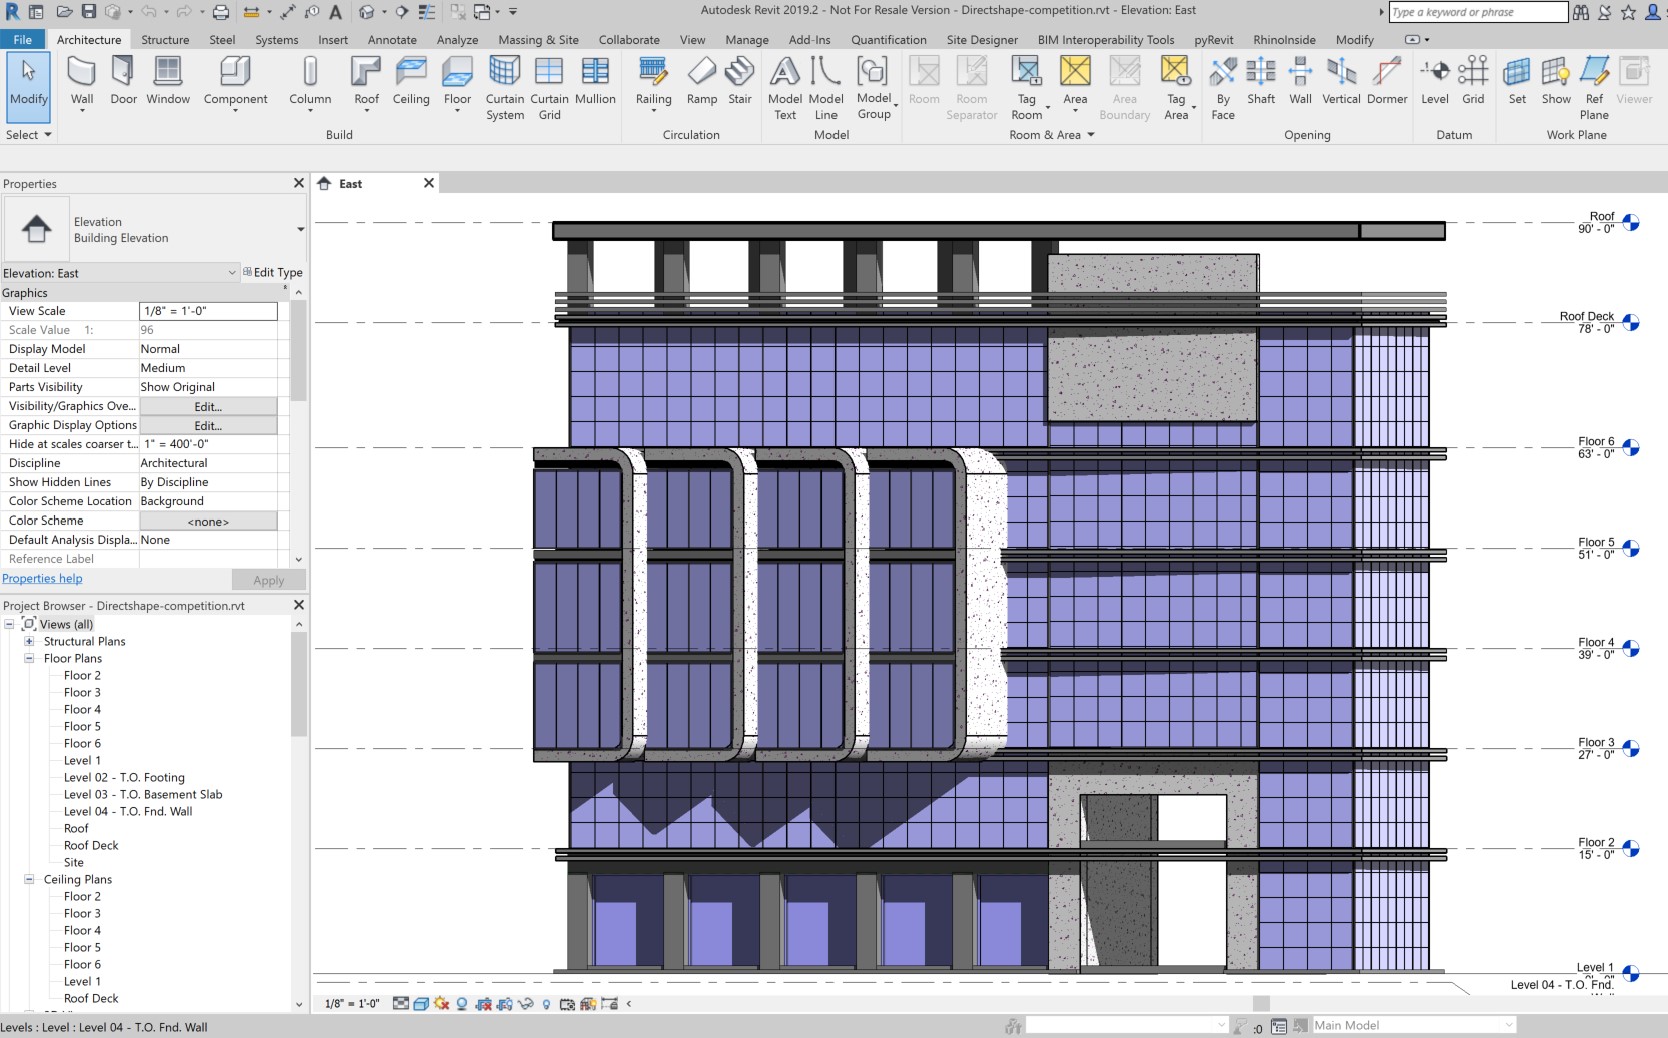
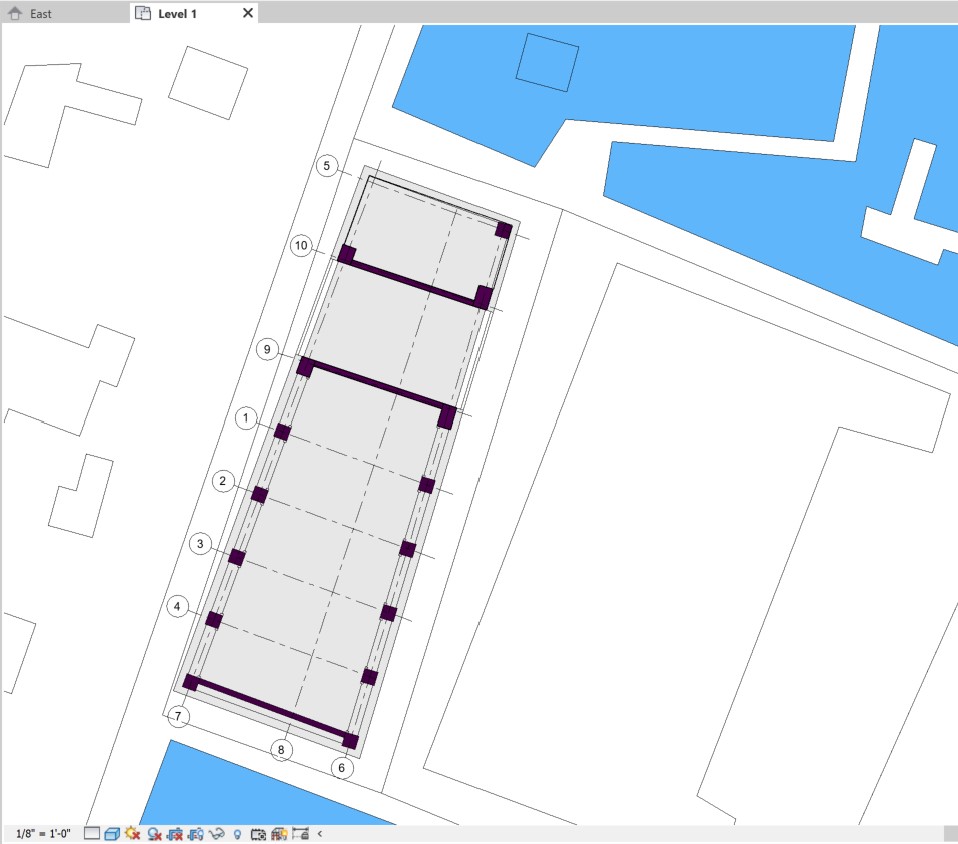
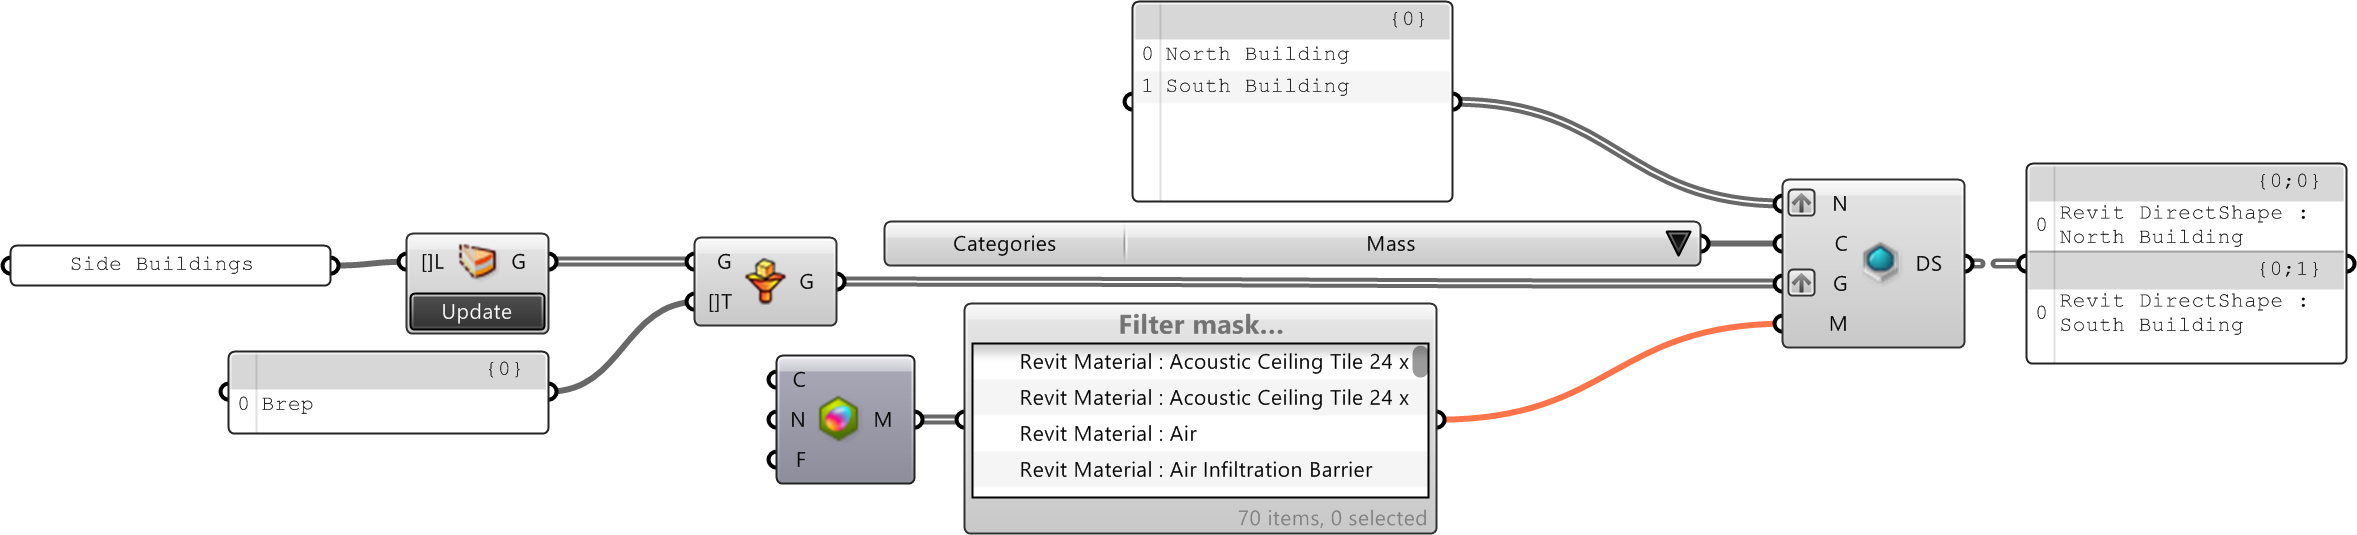
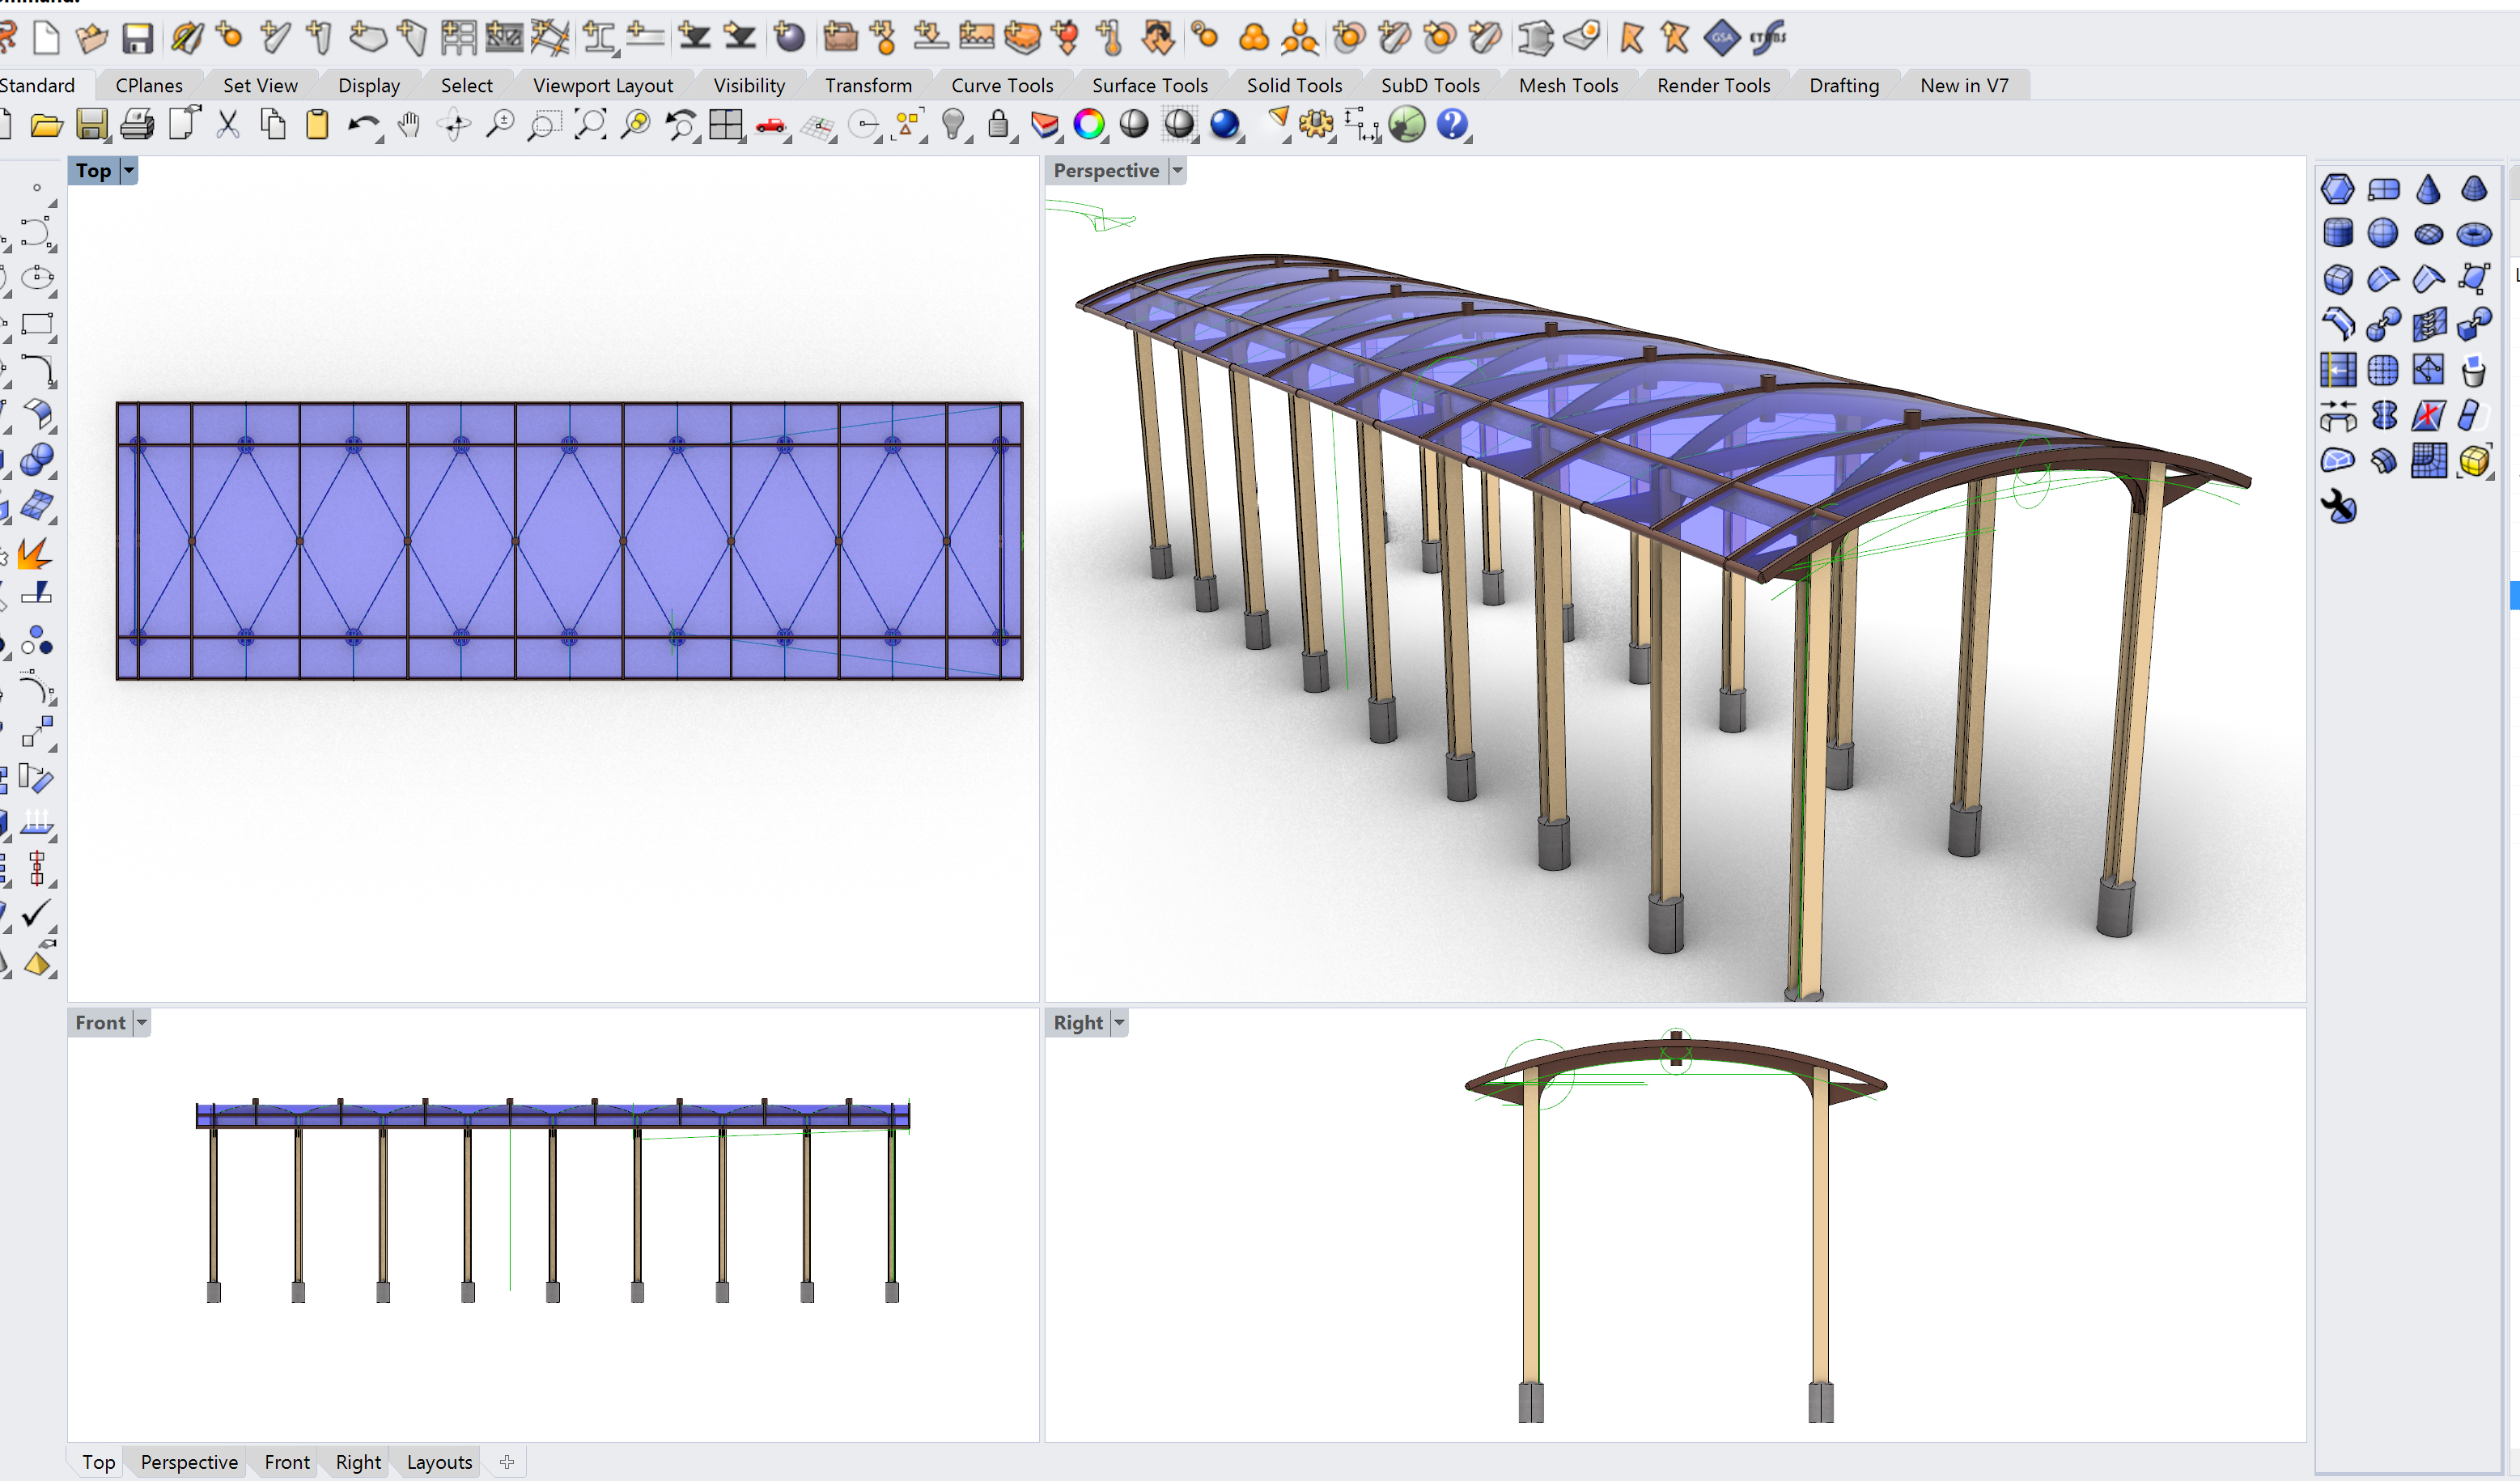
Here is a Rhino model and quick Revit drawings for a competition model using DirectShapes:
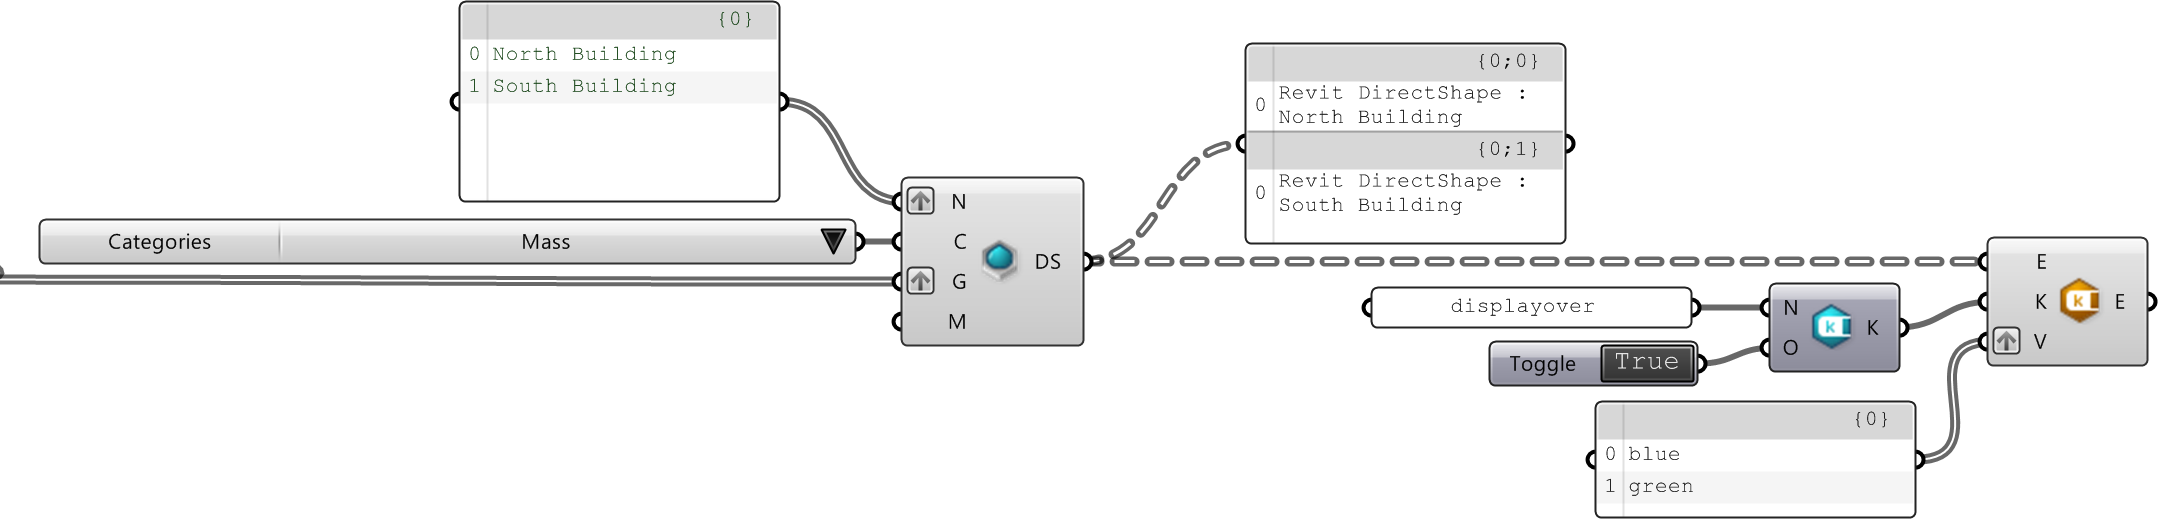
Through a simple Grasshopper script, objects can be categorized for elevations:
And plan views using the categories to control graphics:
Rhino objects as DirectShapes
DirectShapes are the most obvious and many times the easiest way to get Geometry from Rhino into Revit. DirectShapes are generic Revit elements that can contain and categorize arbitrary non-parametric geometry inside the Revit model. However, since the geometry is not parametric, Revit does not know how they are created and can not resolve interactions between DirectShapes and other native elements. An example is that native Revit walls can not be extended to reach a DirectShape roof geometry.
Good reasons for using DirectShapes include:
- Temporary models used in a competition or early design study submission for quick drawings.
- Placeholders for part of the building that is still changing during design development. For instance, while the floor plates might be finished, the façade might be in flux in Grasshopper. Using a DirectShape as a placeholder for elevations and other design development drawings may work well.
- A completely bespoke component or assembly that cannot be modeled using Revit native Families.
DirectShapes can be placed in any top level Category enabling graphic and material control thru Object Styles:
For additional graphic controls between elements within a category, Rule-based View Filters can be applied with custom parameter values. DirectShapes cannot be placed in subcategories but the source geometry can be imported into Loadable Families and be assigned a cubcategory (discussed later in this guide):
In addition to pushing Rhino geometry into Revit as DirectShapes, it is also possible to create DirectShape types that can be inserted multiple times for repetitive elements:

 |
DirectShapes created from smooth NURBS surfaces in Rhino may be imported as smooth solid or converted to a mesh by Revit. If the NURBS is converted to a mesh, that is a symptom that the NURBS geometry was rejected by Revit. There are many reasons for this, but very often this problem can be fixed in Rhino. |
For a deeper look at Directshapes and detailed ways they can be used see the DirectShape Guide.
Rhino objects as Loadable Families
Rhino objects imported as forms inside a Revit family allow for inserting multiple instances of an object and also assigning subcategories. You can use subcategories to control the visibility and graphics of portions of a family within a top level category.
Wrapping Rhino geometry inside Loadable Families have many advantages:
- Repeated objects can be inserted multiple times allowing forms to be scheduled and counted correctly
- Forms in loadable families can be edited by Revit if needed.
- Forms placed inside Family/Types can be placed in subcategories for further graphics control and scheduling.
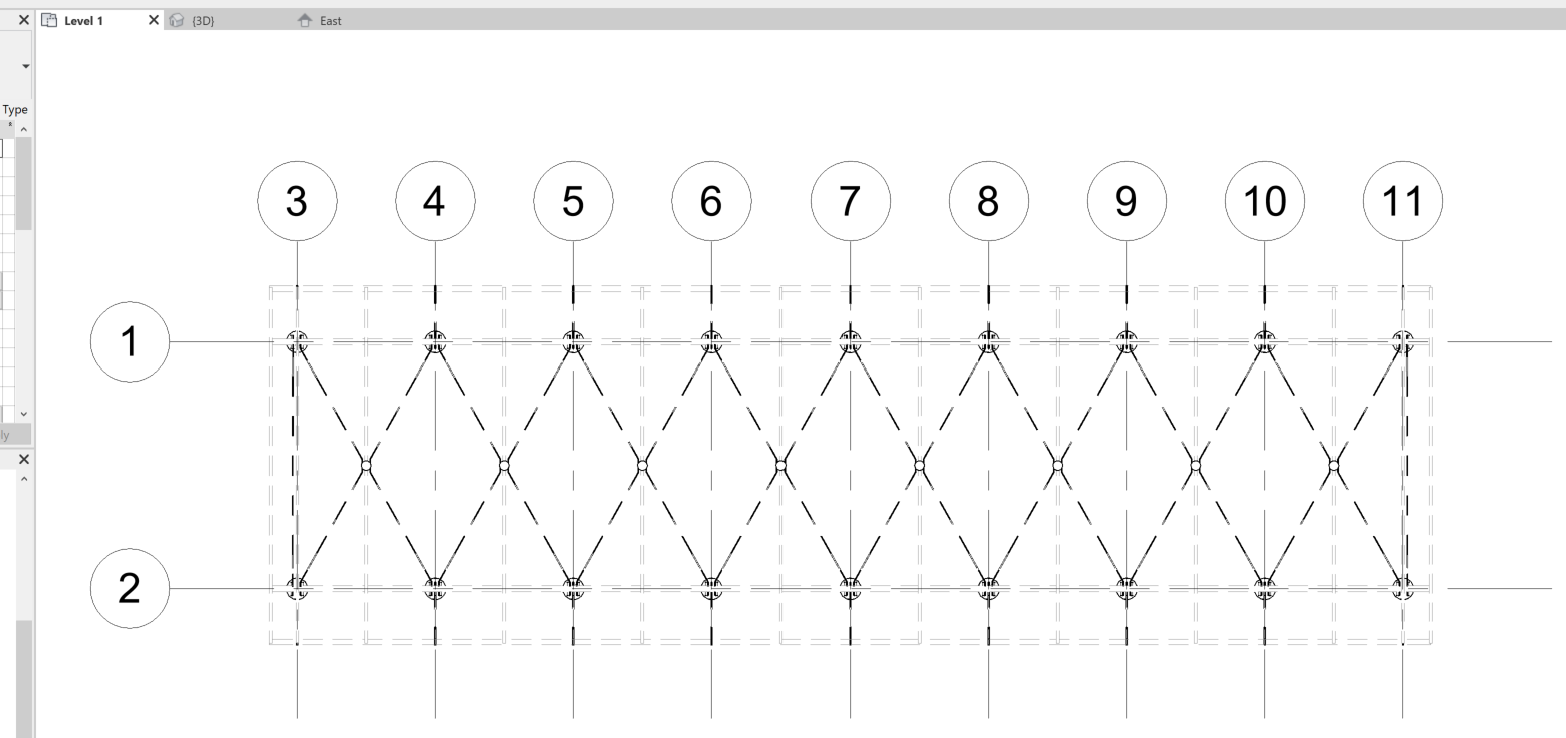
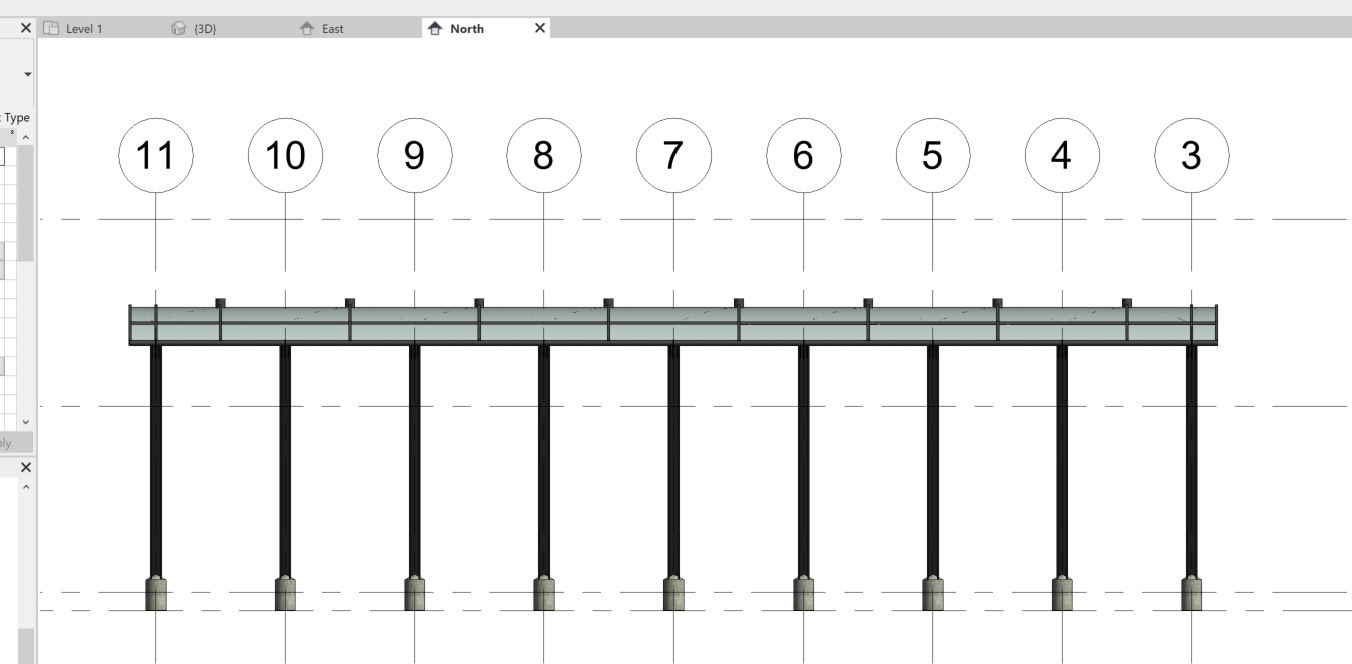
As an example, here is an exterior walkway canopy in Rhino. It is a structure that will be built by a specialty fabricator. The small footings will be poured on-site and the rest of the walkway assembled above. Therefore, the footings are part of one family and the rest of the structure part of another family.
By mapping Rhino layers to subcategories in Revit an automated translation can be used. Graphics and materials can be controlled in Revit per subcategory and view:
The process of creating subcategories is covered in this video:
Below is the key part of the definition to create a new Loadable Family in Revit. The Family is created at the black
 New Component Family
component. Inputs include the a family template, the name of the new family and the category the family will belong to. In addition the
New Component Family
component. Inputs include the a family template, the name of the new family and the category the family will belong to. In addition the
 Component Family Opening
component is used to create Forms that will be placed within the Family. The Form component will accept the BREP geometry, Visibility, Subcategory and material for each form. If the sub-category does not already exist, the
Component Family Opening
component is used to create Forms that will be placed within the Family. The Form component will accept the BREP geometry, Visibility, Subcategory and material for each form. If the sub-category does not already exist, the
 Add SubCategory
component can be used to create of assign a subcategory before sending them to the family creator component:
Add SubCategory
component can be used to create of assign a subcategory before sending them to the family creator component:
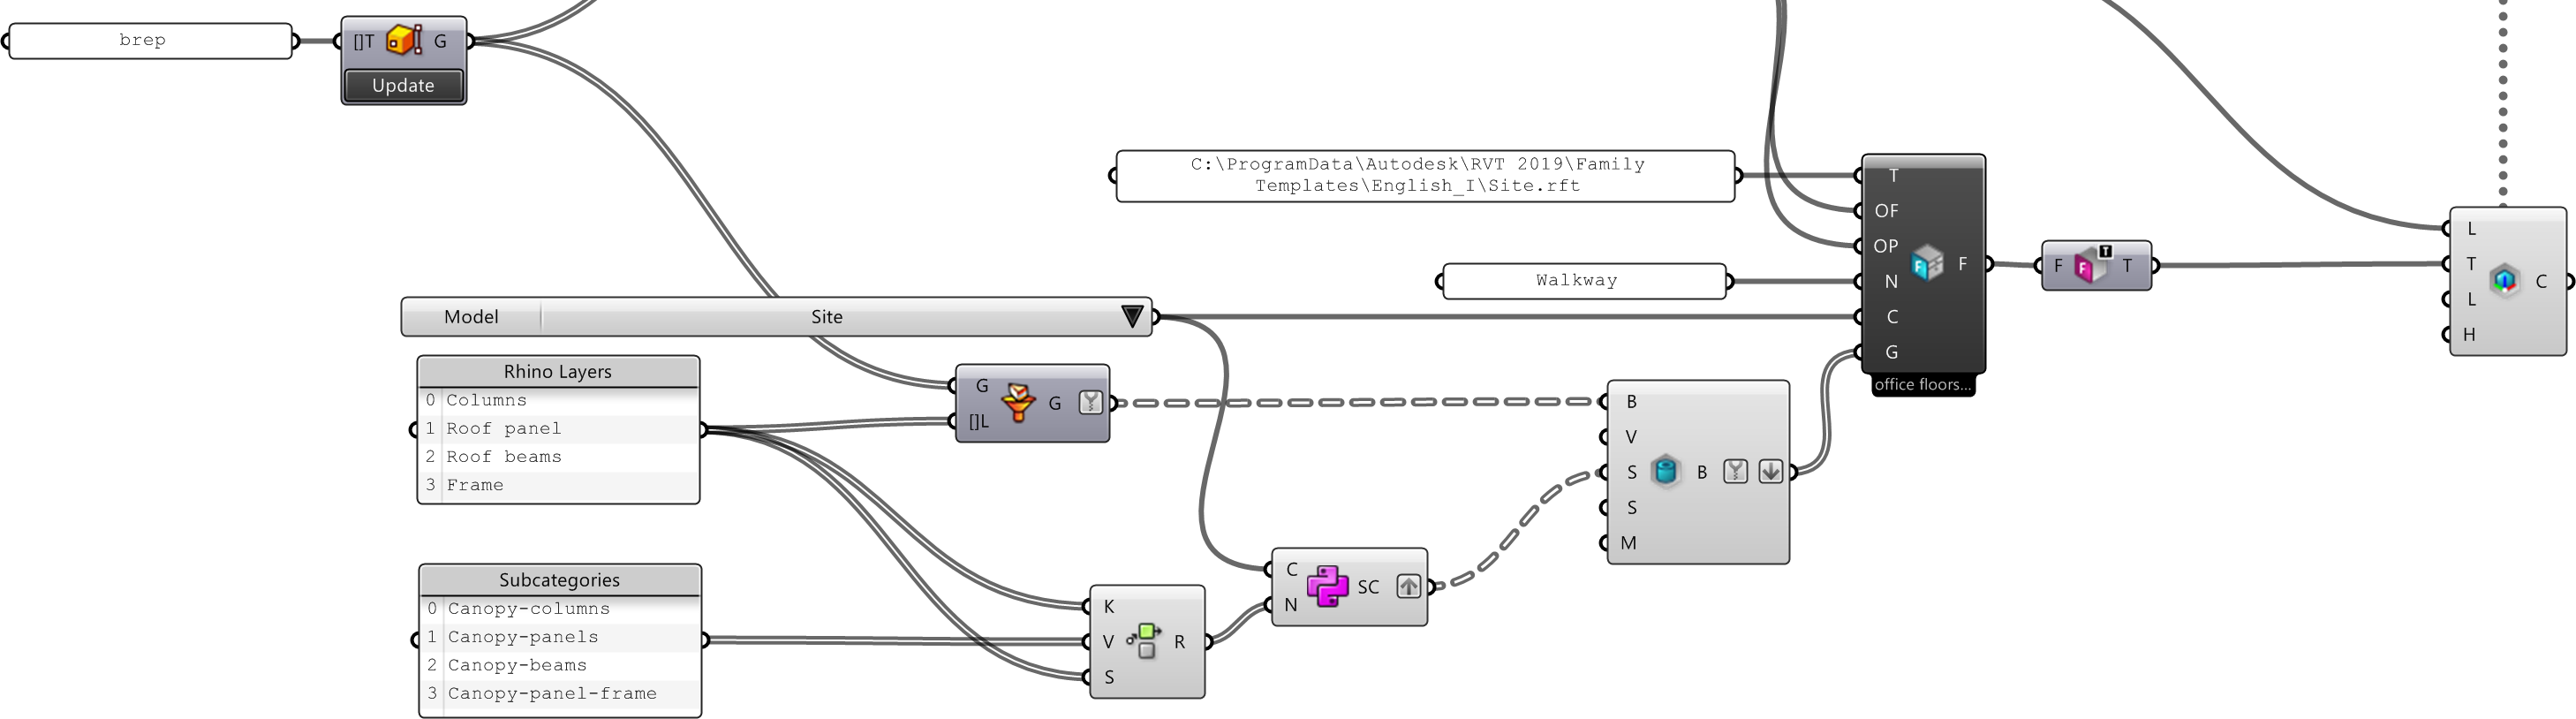
The subcategory component will create a new subcategory if it does not already exist.
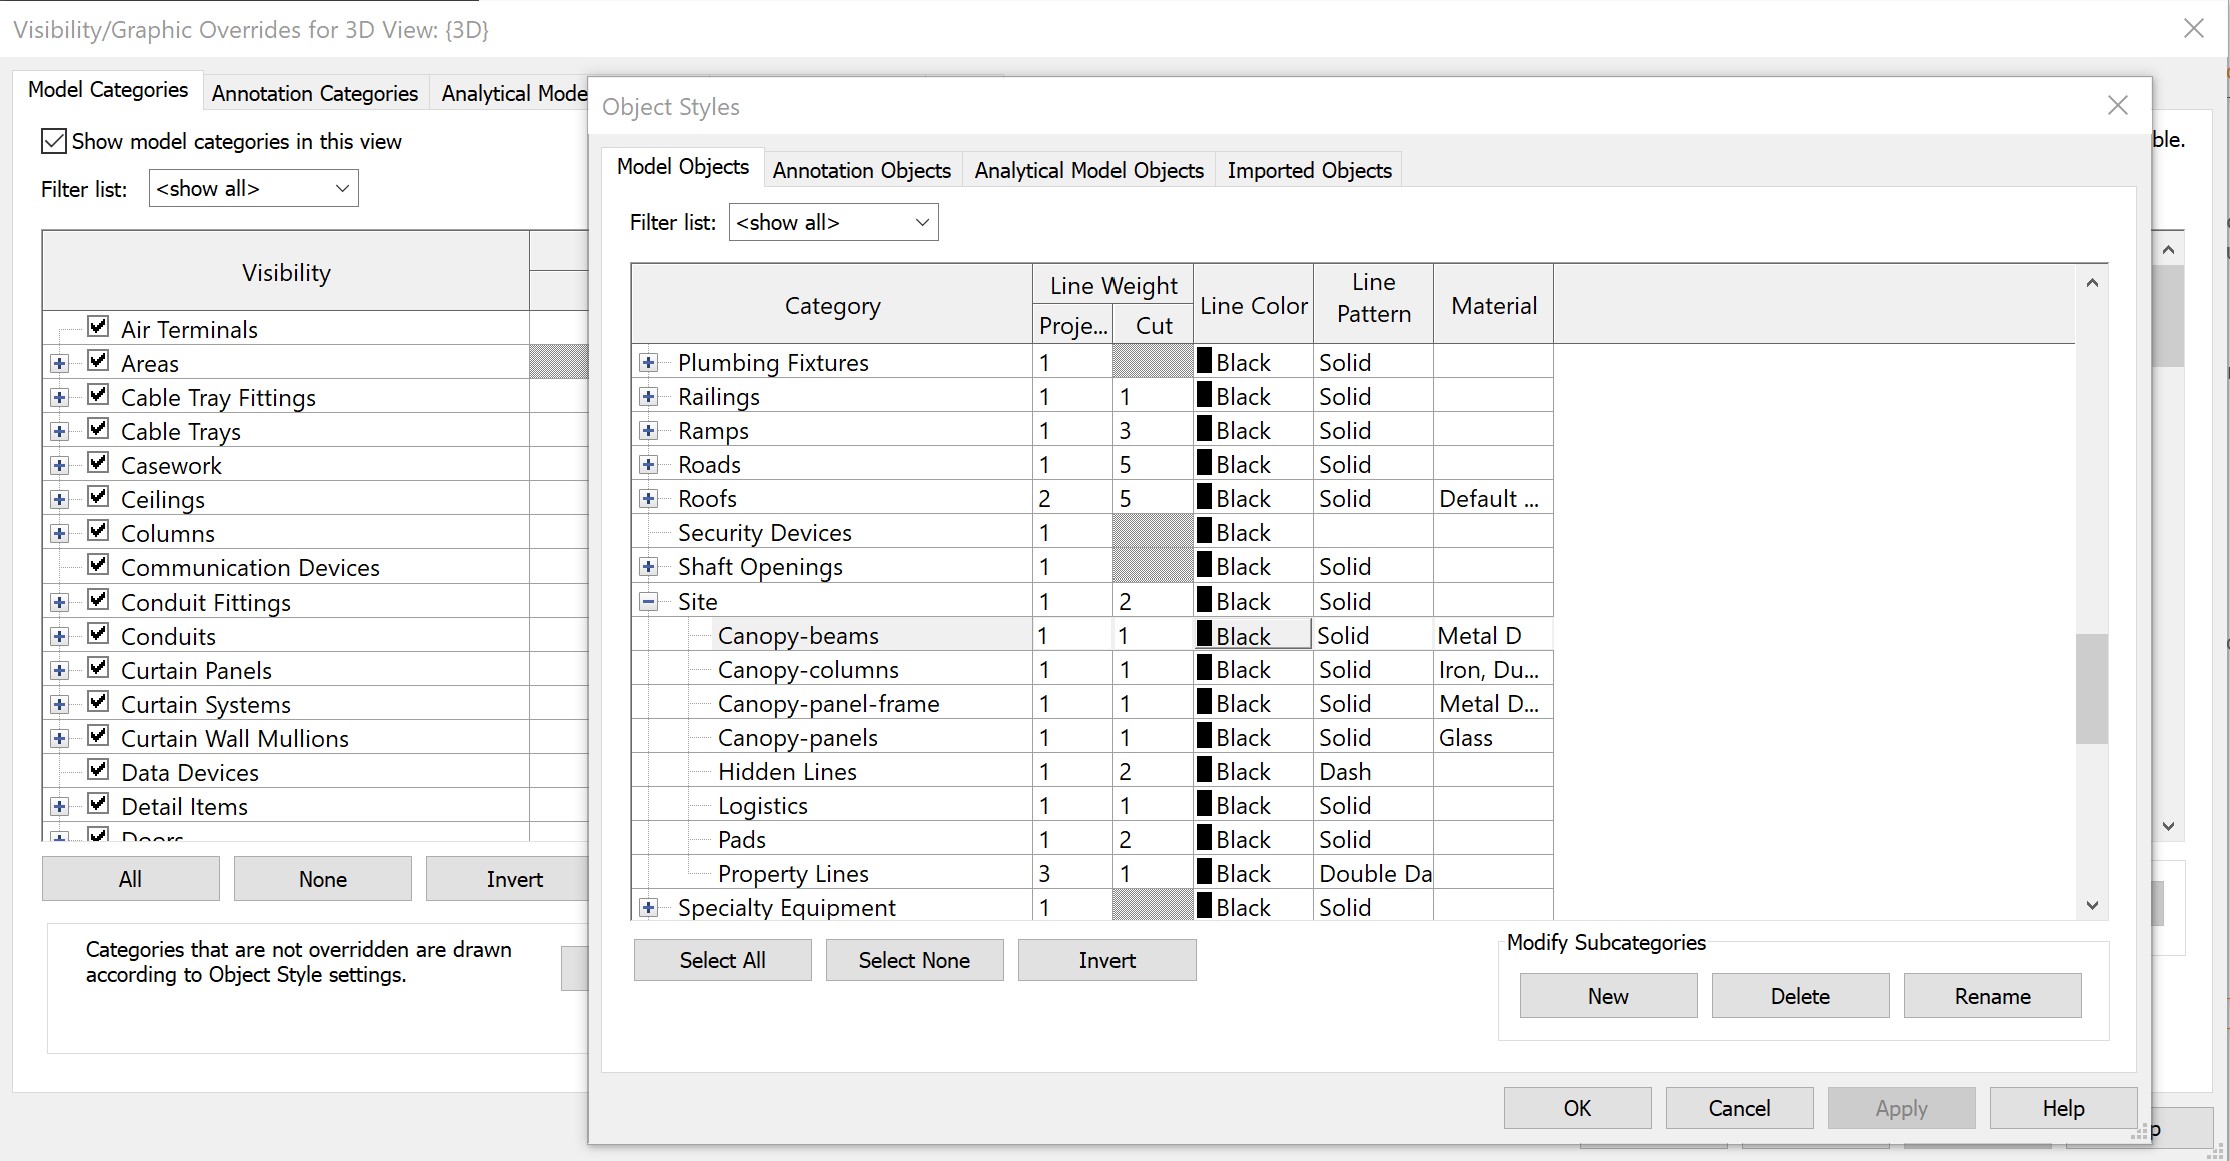
Subcategory properties can be edited in the Object Styles dialog:
Subcategories can also be used with Rule-based View Filters for additional graphic control.
Using Revit built-in System Families
Using built-in Revit System Families such as Walls, Floors, Ceilings, and Roofs can take the most amount of thought, however, the extra effort can be worth it. Advantages of native elements include:
- Great integration in the project BIM schema including maximum graphic control, dynamic built-in parameter values and all access to all common project standard BIM parameters as any native elements would have
- Elements can be edited even when Rhino.Inside.Revit is not available. The elements may have dimensions attached to them. The elements may be used to host other elements
- Many Revit users downstream may not realize these elements were created with Rhino.Inside.Revit
Here is a video on creating native Levels, Floors, Columns and Façade panels using Rhino.Inside.Revit:
For more information on working with each category of Revit elements, see the Modeling section in Guides