Revit: Types & Families
 |
When working with Revit or Revit API, we are mostly dealing with Revit Types and Custom Families. This guide takes you through the various Grasshopper components that help you query and create types and families. For a look at how these elements are organized within Revit, see Revit: Types & Families |
Querying Types
You can use the combination of a category picker components e.g.
 Built-In Categories
, the
Built-In Categories
, the
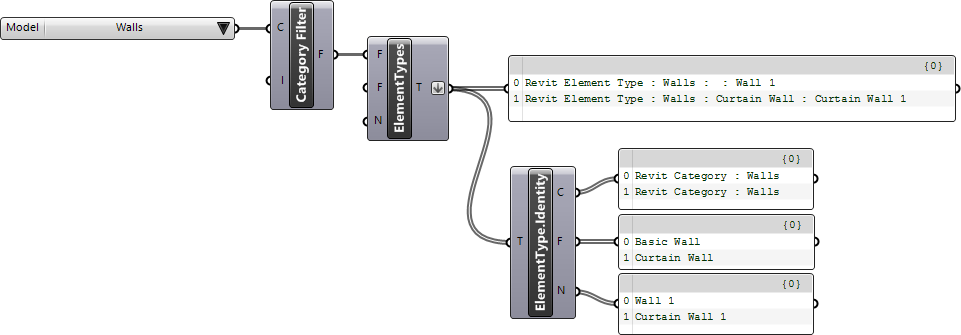
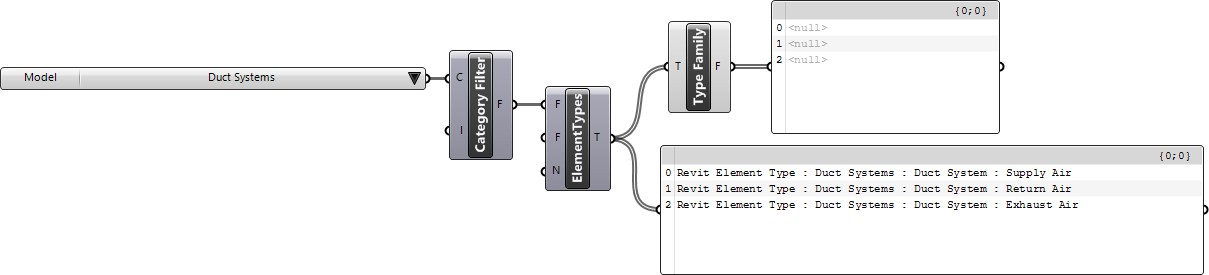
 Category Filter
component, and
Category Filter
component, and
 Query Types+ v1.0
component to collect types in a certain Revit category:
Query Types+ v1.0
component to collect types in a certain Revit category:

The
Query Types+ v1.0
component can further filter the list of types:

Querying Type Info
Use the
 Type Identity
to access information about that type. Please note that the Family Name parameter, returns the System Family name for System Types and the Custom Family name for Custom Types:
Type Identity
to access information about that type. Please note that the Family Name parameter, returns the System Family name for System Types and the Custom Family name for Custom Types:
Accessing Family of a Type
When querying the custom types that exist in a Revit model, we can find out the custom family definition that contains the logic for each of these types. We are using
 Family Types
component to grab the family of each type being passed into this component. You can download this component, as a Grasshopper user object, from the link below.
Family Types
component to grab the family of each type being passed into this component. You can download this component, as a Grasshopper user object, from the link below.

Notice that Duct Systems for example, is a system type and therefore have no associated custom family definition. Therefore the
Family Types
component is returning null.
Choosing A Specific Type
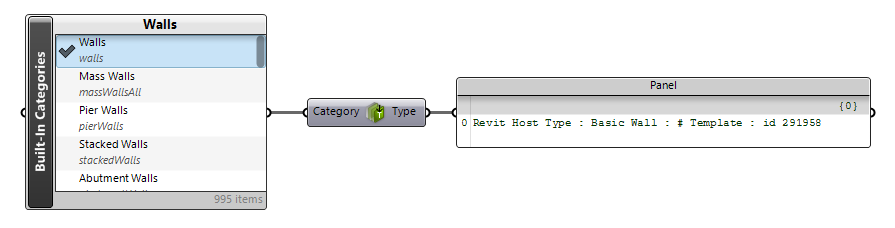
Built-In Categories
component allows selecting a specific model category e.g. Walls
You can pass the any of the categories above to the
 Element Type Picker
component to select a specific type from that category:
Element Type Picker
component to select a specific type from that category:

Determining Default Types
When a build tool is launched (e.g. Place Door), Revit will automatically select the last-used type for that specific category (e.g. Doors for Place Door tool). This is called the Default Type for that category. This information is helpful when creating elements using the API. Use the
 Default Type
component to inspect the default types for the provided category:
Default Type
component to inspect the default types for the provided category:
In case of families, the script value returned by this component will be the default DB.FamilySymbol representing the default type:

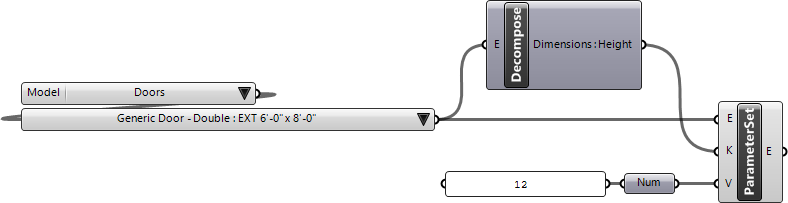
Modifying Types
Once you have filtered out the desired type, you can query its parameters and apply new values. See Document Model: Parameters to learn how to edit parameters of an element. The element parameter components work on element types as well.
Extracting Type Geometry
Once you have filtered out the desired type, you can extract the geometry for that element type using the
 Element Geometry
component. The
Element Geometry
component. The
 Detail Level
value list component makes it easy to provide correct values for LOD input parameter.
Detail Level
value list component makes it easy to provide correct values for LOD input parameter.
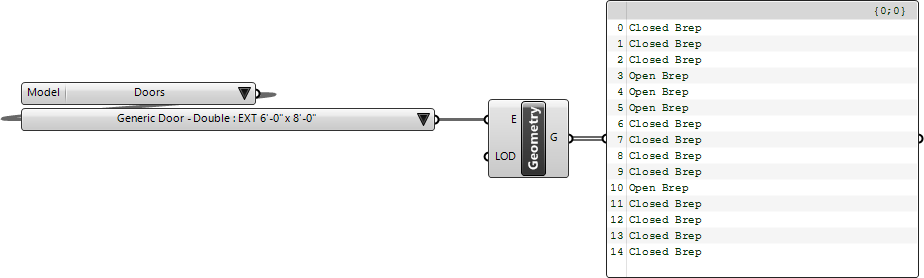
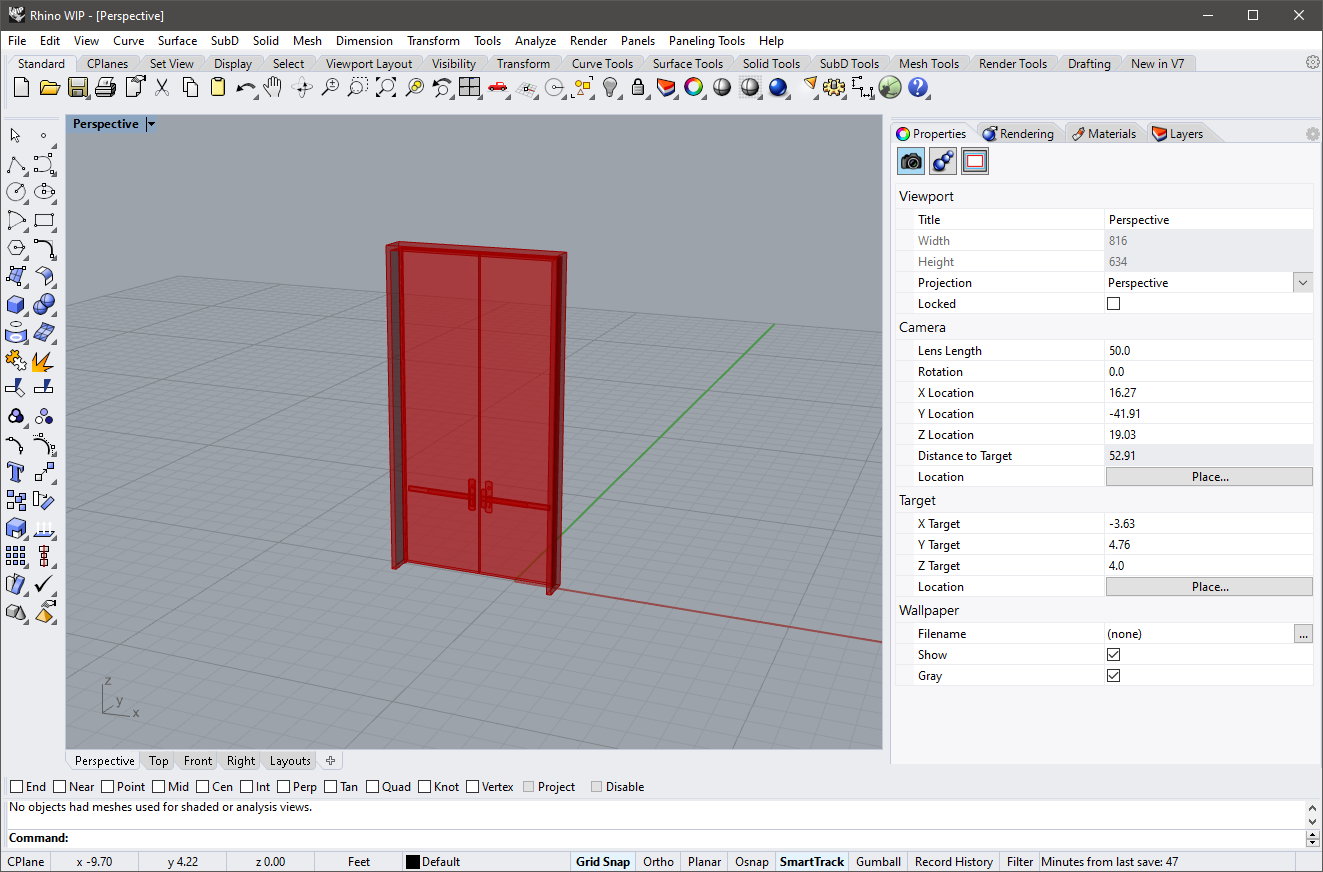
The
Element Geometry
component automatically previews the geometry in Rhino window.
Extracting Type Geometry by Category
The Element Geometry By SubCategory component shared here helps you extract geometry of a family instance alongside information about its subcategory definition inside the family. The example here extracts the geometry from a series of window instances
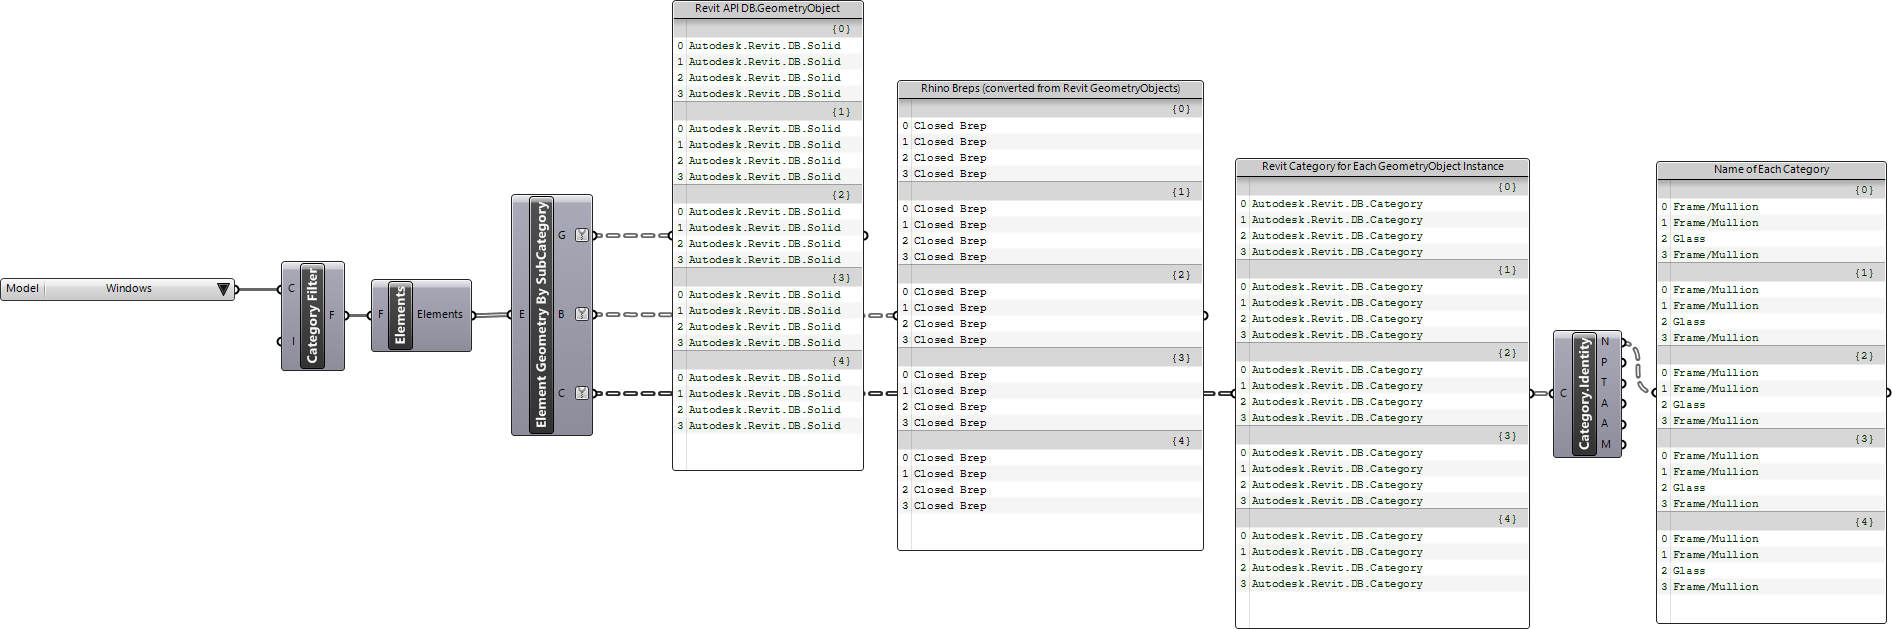
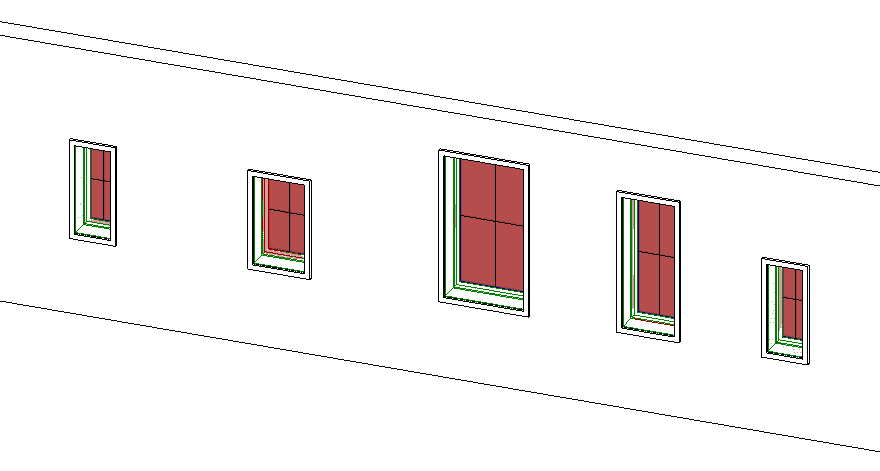
 Element Geometry By SubCategory
Place under Grasshopper User Objects folder. Find in Revit > Custom panel
Creating New Types
To create new types, you would need to find an existing type, use the
 Duplicate Type+ v1.0
component to duplicate that type with a new name, and adjust the desired properties.
Duplicate Type+ v1.0
component to duplicate that type with a new name, and adjust the desired properties.

Revit Project Browser now displays the new type under Families
Removing Types
You can use the
 Delete Element
component to delete types. Remember that deleting types will delete all instances of that type as well. If you don’t want this, find the instances and change their types before deleting a type from model.
Delete Element
component to delete types. Remember that deleting types will delete all instances of that type as well. If you don’t want this, find the instances and change their types before deleting a type from model.

Loading Families
Use the
 Load Component Family+ v1.0
component to load a new family file into your model.
Load Component Family+ v1.0
component to load a new family file into your model.
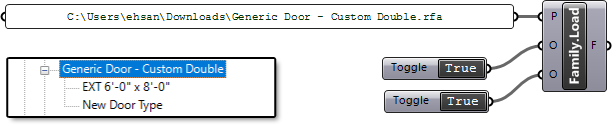
Revit Project Browser now lists the new family under Families
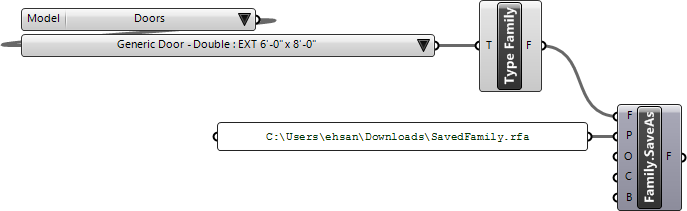
Saving Families
Use the
 Save Component Family+ v1.0
component to save a family into an external file.
Save Component Family+ v1.0
component to save a family into an external file.
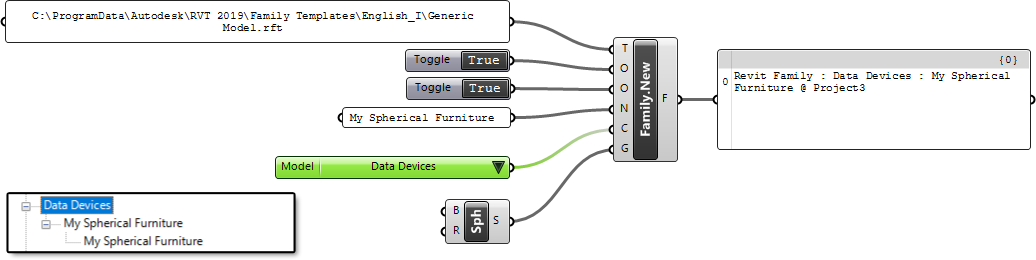
Creating New Families
Under current Rhino.Inside.Revit implementation, you can use the
 New Component Family
component to generate new Revit families and insert a new geometry into the family. Make sure to assign the correct template file to the component for best results.
New Component Family
component to generate new Revit families and insert a new geometry into the family. Make sure to assign the correct template file to the component for best results.

Revit Project Browser now lists the new family under Families
You can also pass the Generic Model template to the
New Component Family
component and set the category manually using the
Built-In Categories
component.
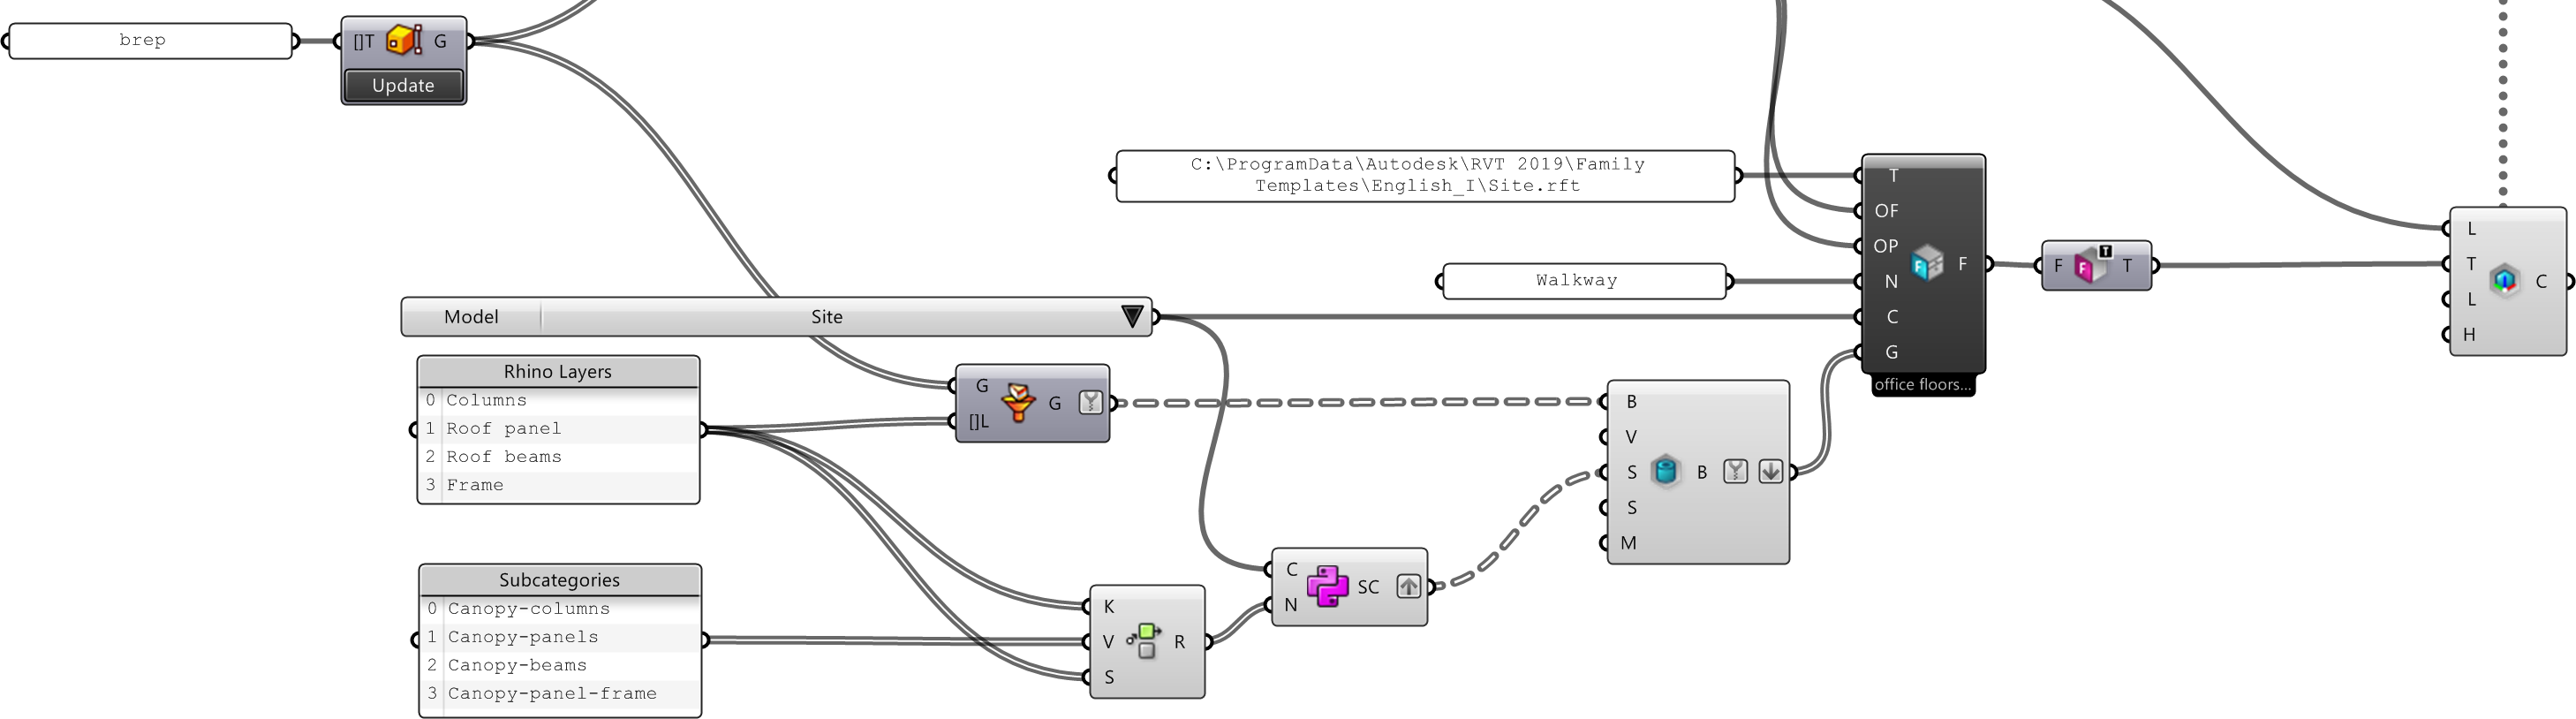
There are a series of components under the Revit > Family panel that will help you generate geometry for Revit families:
-
 Component Family Form
-
 Component Family Void
-
 Component Family Curve
-
 Component Family Opening
The Component Family components above can be edited in Revit, set the visibility, subcategory, and material of elements. For further details see the Rhino Objects as Loadable Families guide.
As shown in the example above, you can use the
 Construct Visibility
component to create visibility options for the generated geometry. This components provides all the options available in the native Revit Visibility/Graphics editor for family geometries.
Construct Visibility
component to create visibility options for the generated geometry. This components provides all the options available in the native Revit Visibility/Graphics editor for family geometries.
Editing Families
You can use the
New Component Family
component to edit existing families as well. Just pass the appropriate template and family name, the new geometry, and the
New Component Family
component automatically finds the existing family, replaces the content and reloads the family into the Revit model. Make sure the OverrideFamily is set to True and OverrideParameters is set appropriately to override the family parameters if needed.
Creating new Family Templates
Revit comes with a series of Revit Family Template (.RFT) files. These contain the necessary basic defaults to create loadable families for specific categories. Interestingly many of the most popular categories do not have templates built for them. Examples of these categories would be Walls, Roofs, Floors, Windows, HardScape, etc. It is possible to create family templates and create loadable Families in these popular Categories by following the steps below. A list of Default Templates and Categories that will support customer RFT files is listed in this spreadsheet.
The steps to create a new family template:
- Create in-place component using the needed category. i.e. Stairs
- Draw an object.
- Group that object
- Right-click on the Group and Save Group.
- Save that file and an RFA file.
- Open the RFA and delete any objects in it.
- Save
- Rename the RFA as an RFT using File Explorer.
- Use the RFT to create a new family in New component family.