Revit: Parameters
 GH Definition
 |
In this guide we will take a look at how to read the parameters from a Revit element using Grasshopper. To review how parameters are organized in Revit, see the Revit Elements:Parameters Guide |
Inspecting Parameters
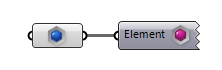
Let’s bring a single element into a new Grasshopper definition. We can use the
 Inspect Element
component to inspect the element properties.
Inspect Element
component to inspect the element properties.
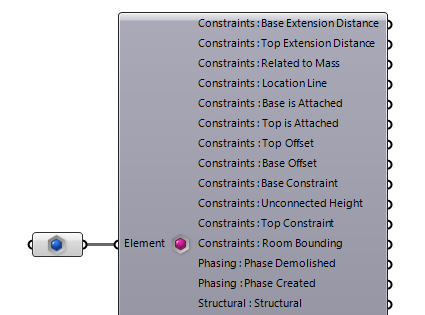
Now hold Shift
and double-click on the
Inspect Element
component to see a list of all parameters associated with given element. This will include built-in, project and shared parameters associated with the element.
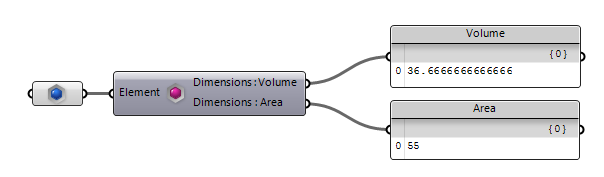
You can connect any of these properties, then Ctrl
and double-click on the
Inspect Element
component to collapse it to normal size. The component is smart to keep the connected parameters shown in collapsed mode.
To inspect an existing parameter’s definition use the
 Parameter Identity
component:
Parameter Identity
component:

Finding an Elements Parameter
To find a parameter associated with an element, pass the element and parameter name to the
 Query Element Parameters
component:
Query Element Parameters
component:

Parameter Scope
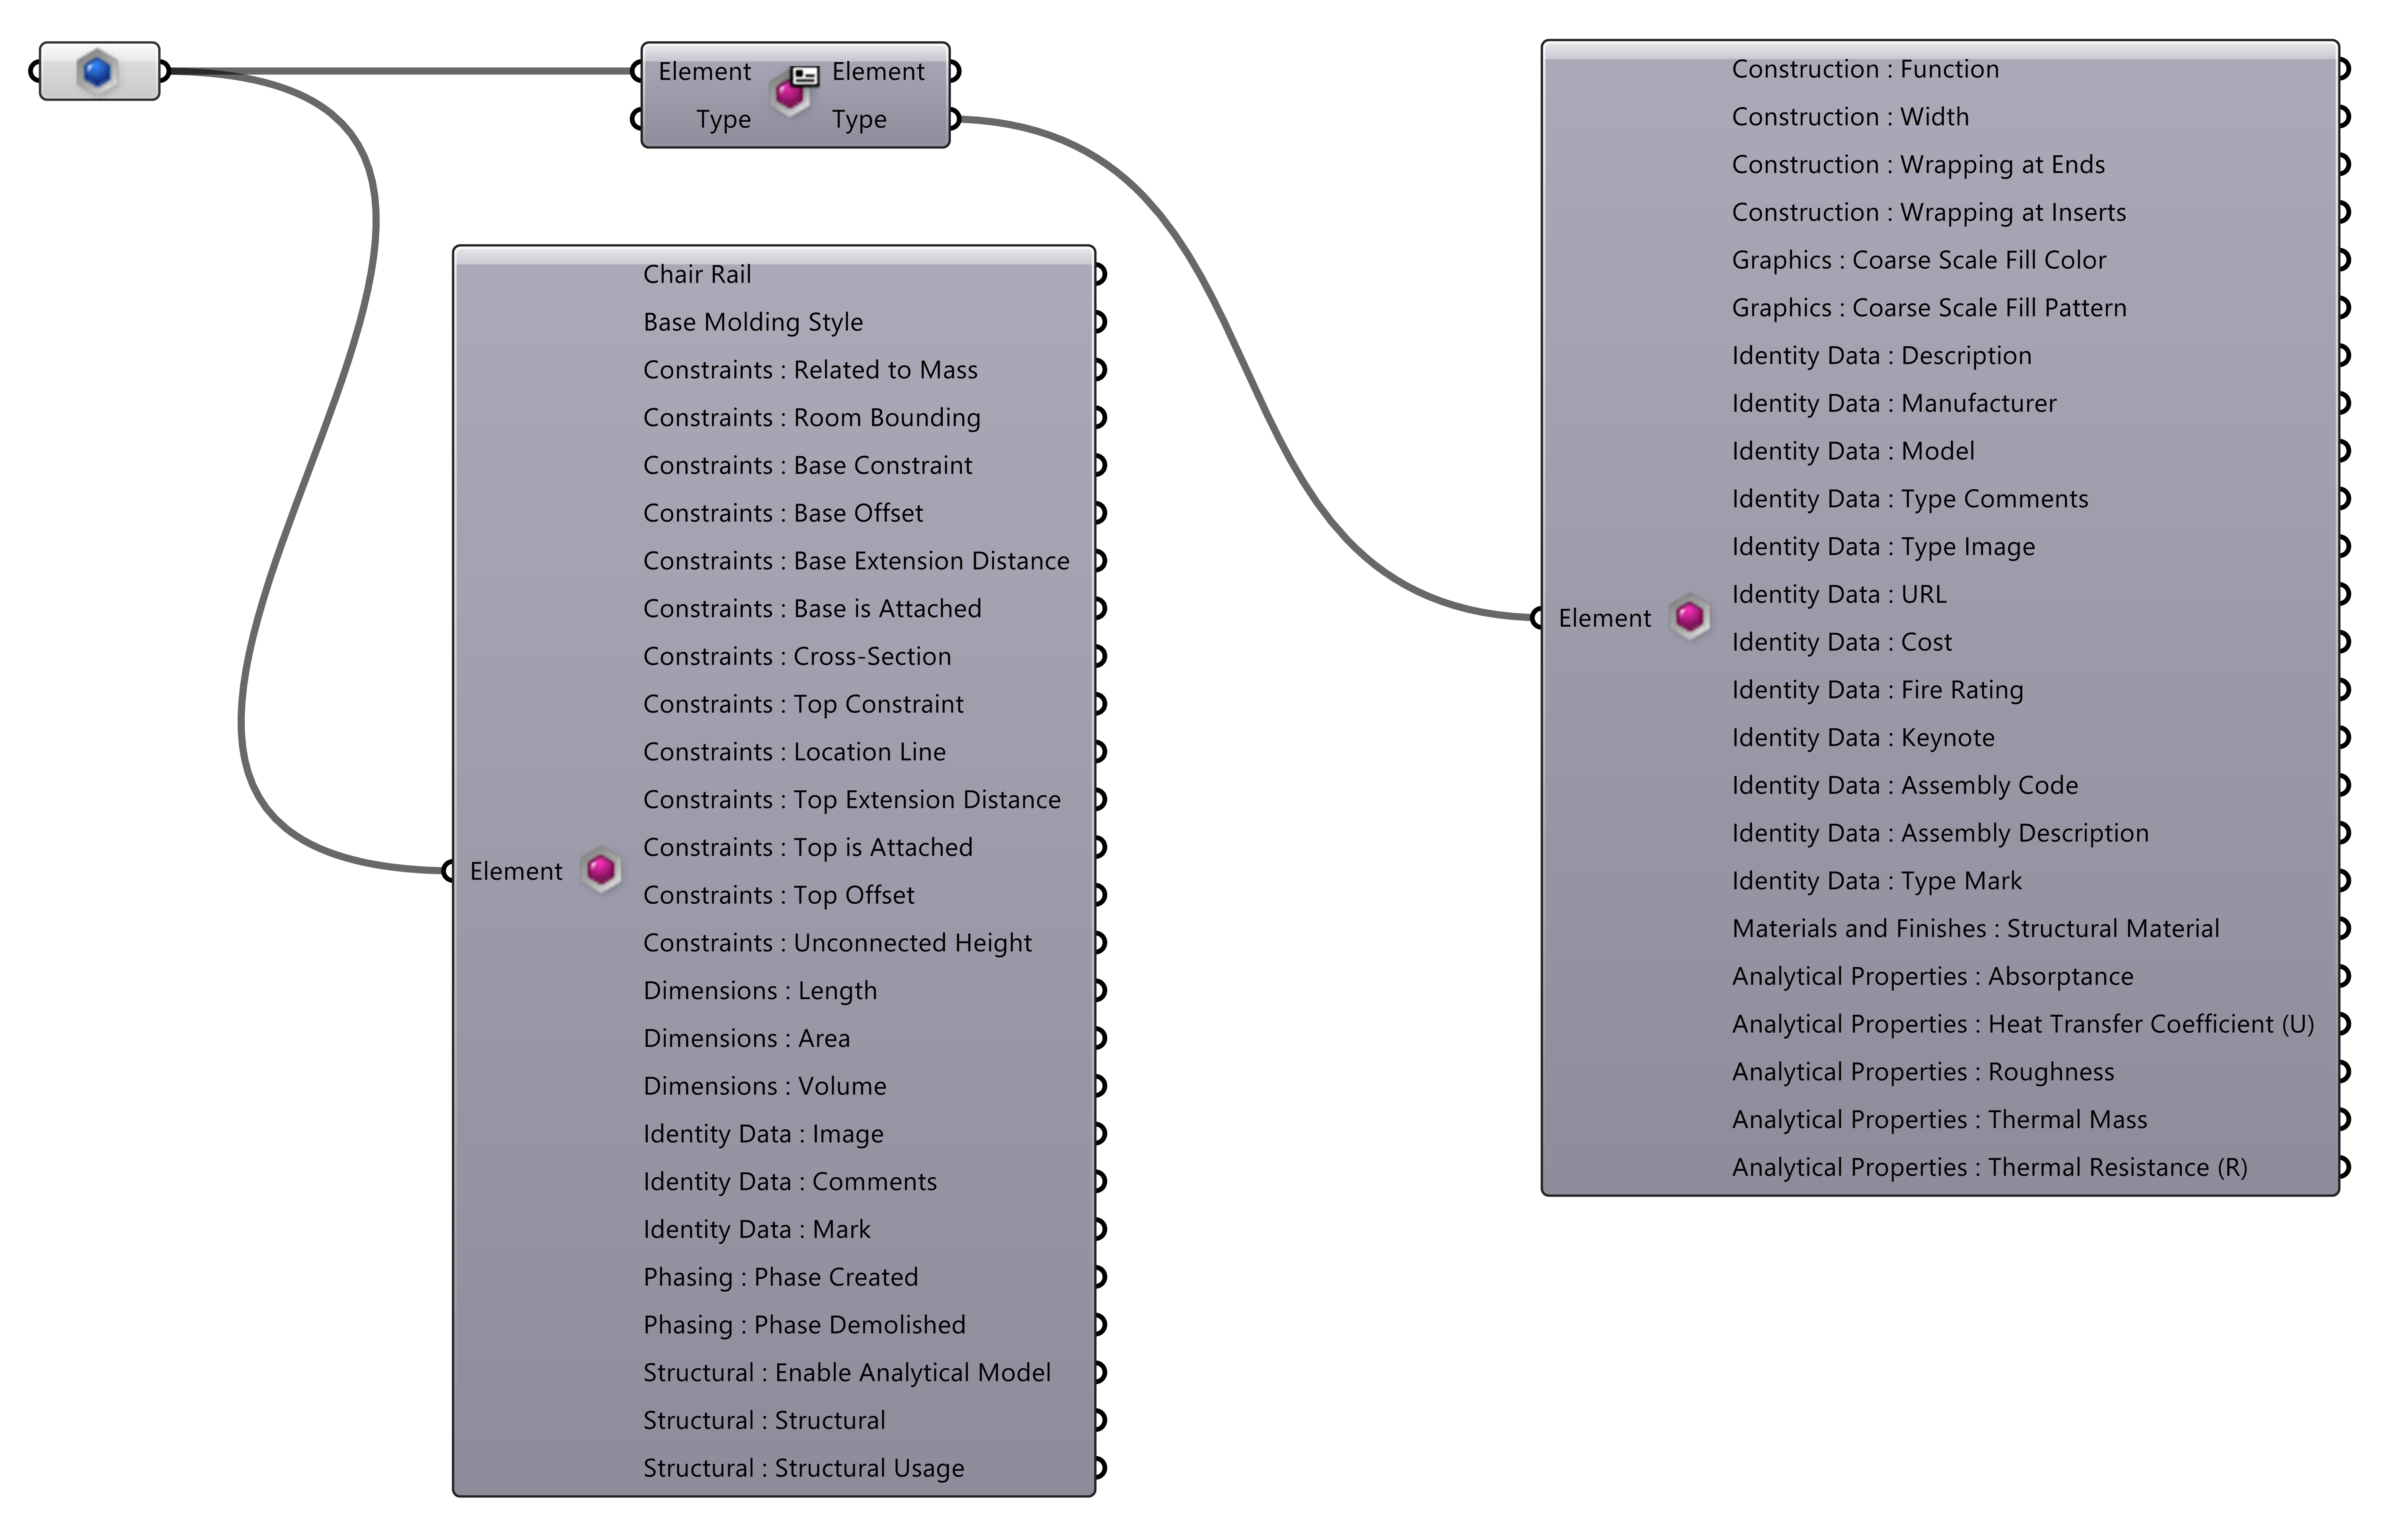
Parameters can be attached to the Element Type or singular Instance. Input the
 Graphical Element
directly into the
Inspect Element
component to inspect both the Instance Parameters. Get the
Graphical Element
directly into the
Inspect Element
component to inspect both the Instance Parameters. Get the
 Element Type
component into the
Inspect Element
component to inspect the Type Parameters. You can see that the available Parameters are different.
Element Type
component into the
Inspect Element
component to inspect the Type Parameters. You can see that the available Parameters are different.
Finding the Built-In Parameters
Use the
 Built-In Parameters
component to reference parameters that are built into Revit. Double-click on the title to search for part of the name of the parameter.
Built-In Parameters
component to reference parameters that are built into Revit. Double-click on the title to search for part of the name of the parameter.
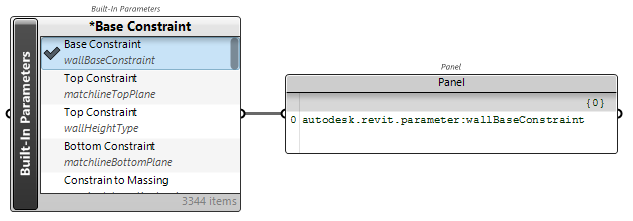
Reading Parameter Values
A language-safe way to query the values for specific parameter is to use the
 Parameter
parameter from the Revit Parameters panel
Parameter
parameter from the Revit Parameters panel
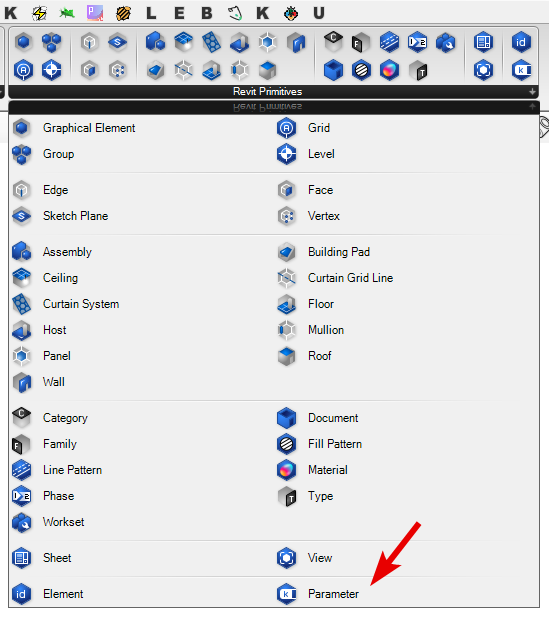
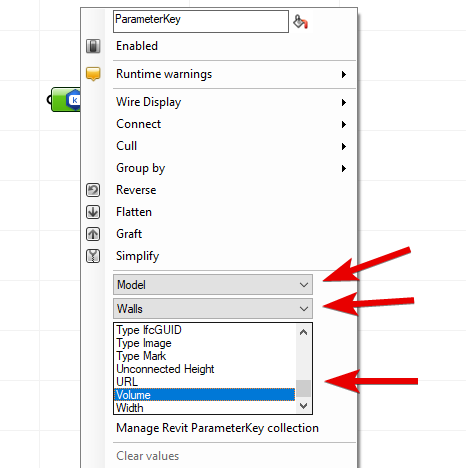
After adding this component to the canvas, you can Right-Click on the component and select the desired parameter
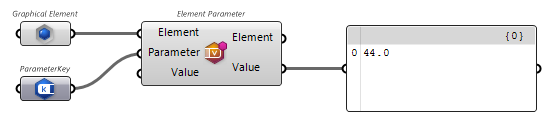
The output of this component can be passed to the
 Element Parameter
to query the value
Element Parameter
to query the value
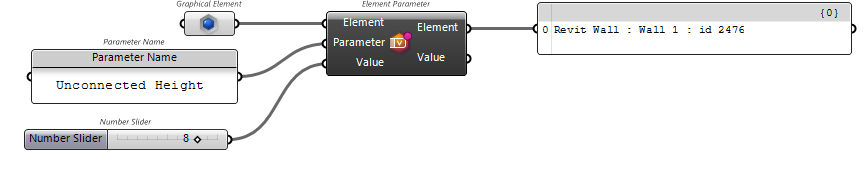
Another way of reading parameter values is by specifying the parameter name to the
Element Parameter
component to get the parameter value.

 |
Since we are specifying the name of parameter in a specific language, the definition will break if opened on a Revit with a different language |
When working with Shared parameters, you can also pass the parameter UUID to the component

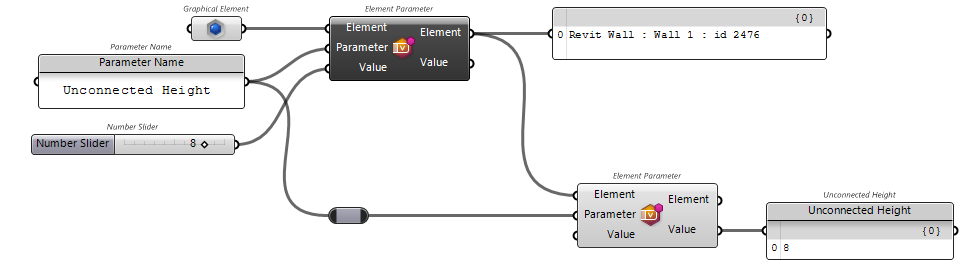
Setting Parameter Values
Use the same
Element Parameter
component to set a parameter value on a Revit element. Keep in mind that some parameters are Read-only and their value can not be overridden.
Notice that the
Element Parameter
component is only holding a reference to the Revit element. So when the parameter value is updated by the component, it is updated for all the components that is referencing that same element. This is different from what you might be used to when working with Grasshopper outside of Revit context.
Creating Parameters
The components under the Parameter panel in Grasshopper, allow you to create new Parameters in Revit.
The process in creating a few steps process.
- A Parameter definition must first be made.
- The Parameter then is added to the document
- For Project Parameters, additional Category and Group must be set. (Optional)
- Then the value of the Parameter may be set on the Element, Type or Global.
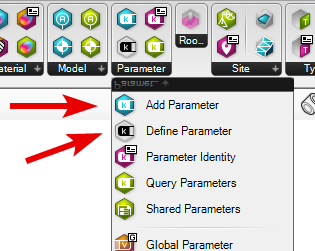
Parameter definitions can be created through the
 Define Parameter
component or be read directly out of a Shared Parameter File.
Define Parameter
component or be read directly out of a Shared Parameter File.
Once the definition is created, then the Parameter can be added to the project using the
 Add Parameter+ v1.0
component. If the scope of the parameter is Global, then the parameter value can now be set the
Add Parameter+ v1.0
component. If the scope of the parameter is Global, then the parameter value can now be set the
 Global Parameter
component. Project Parameters require additional properties to be set before used.
Global Parameter
component. Project Parameters require additional properties to be set before used.
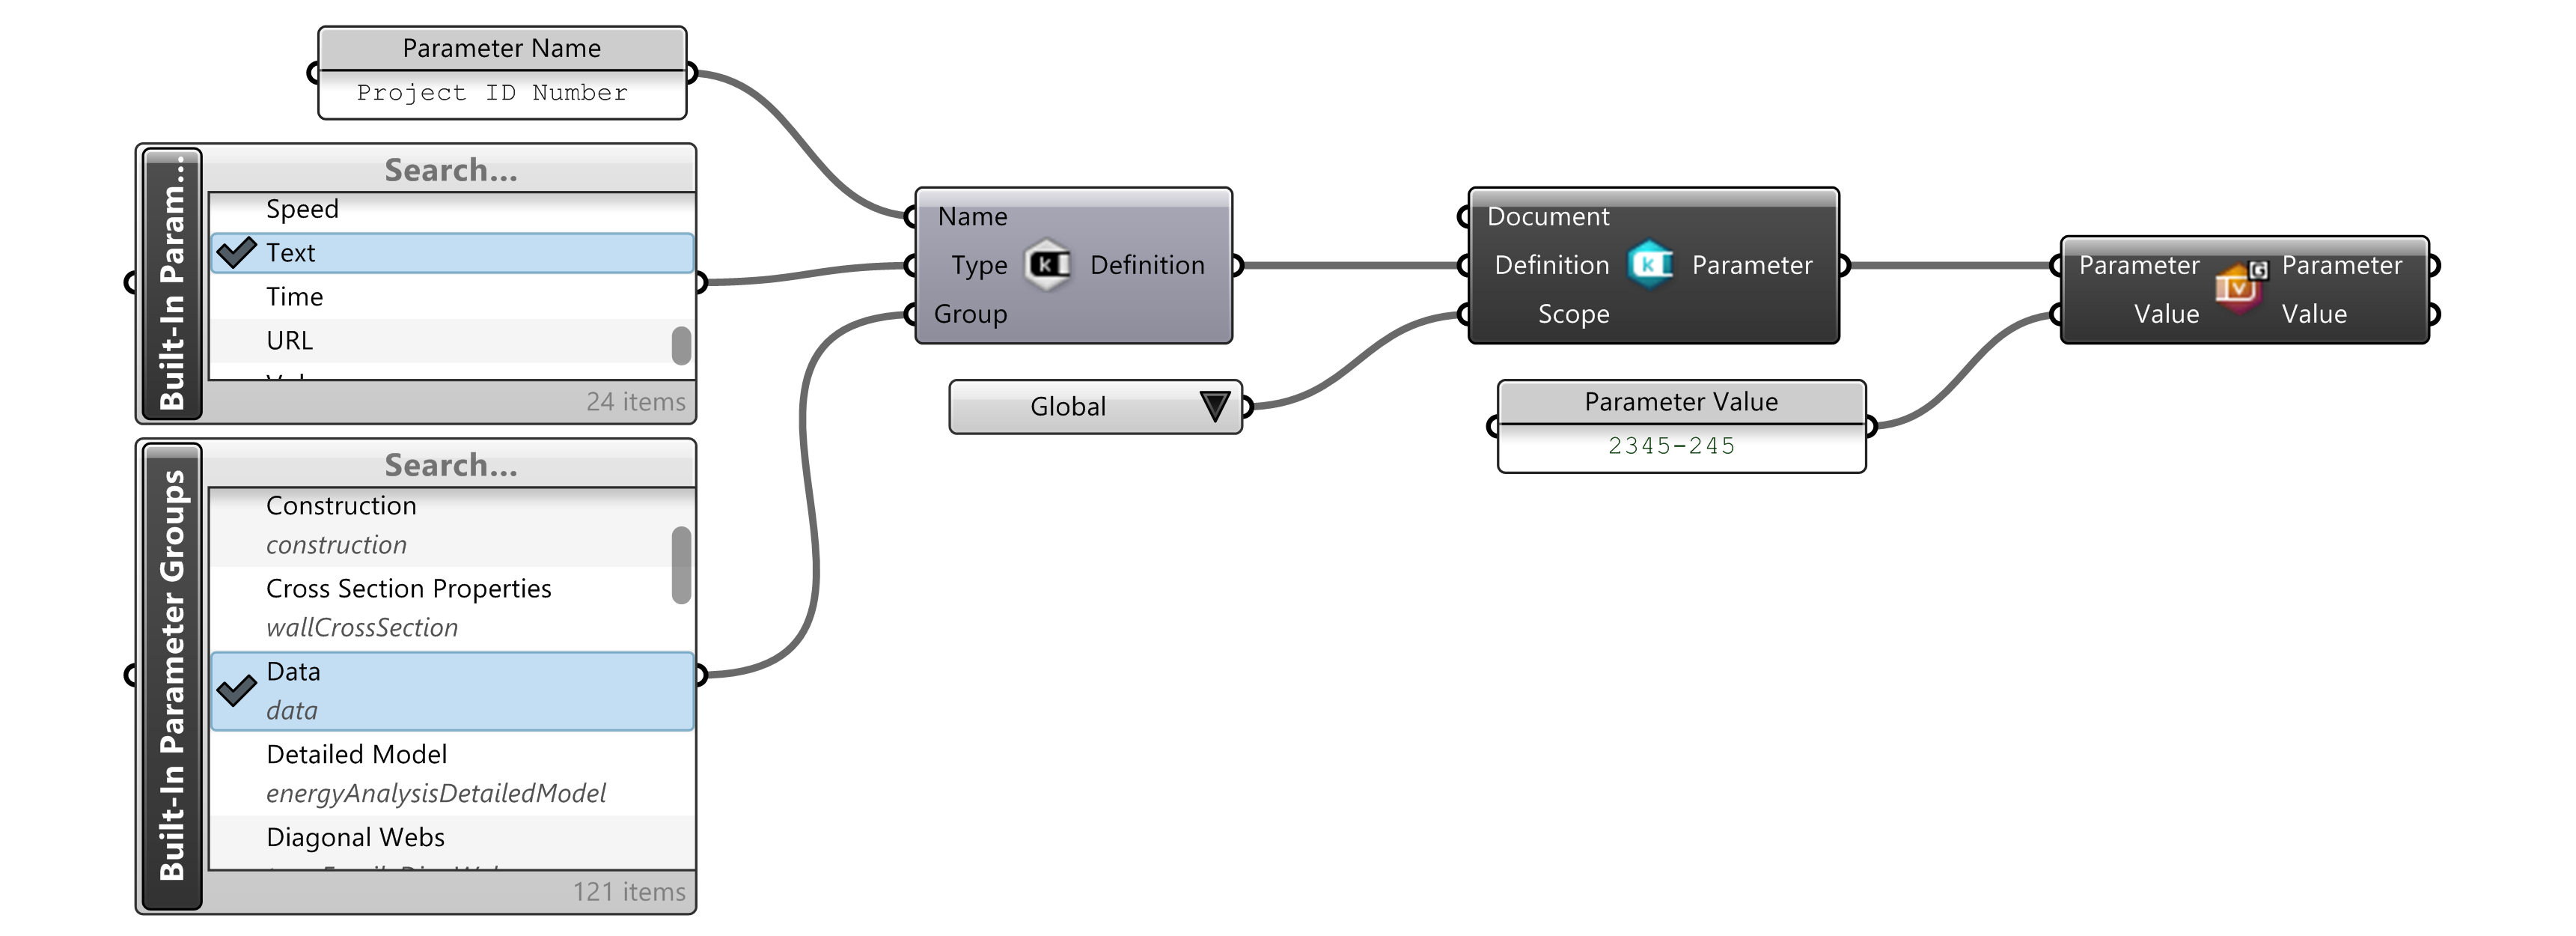
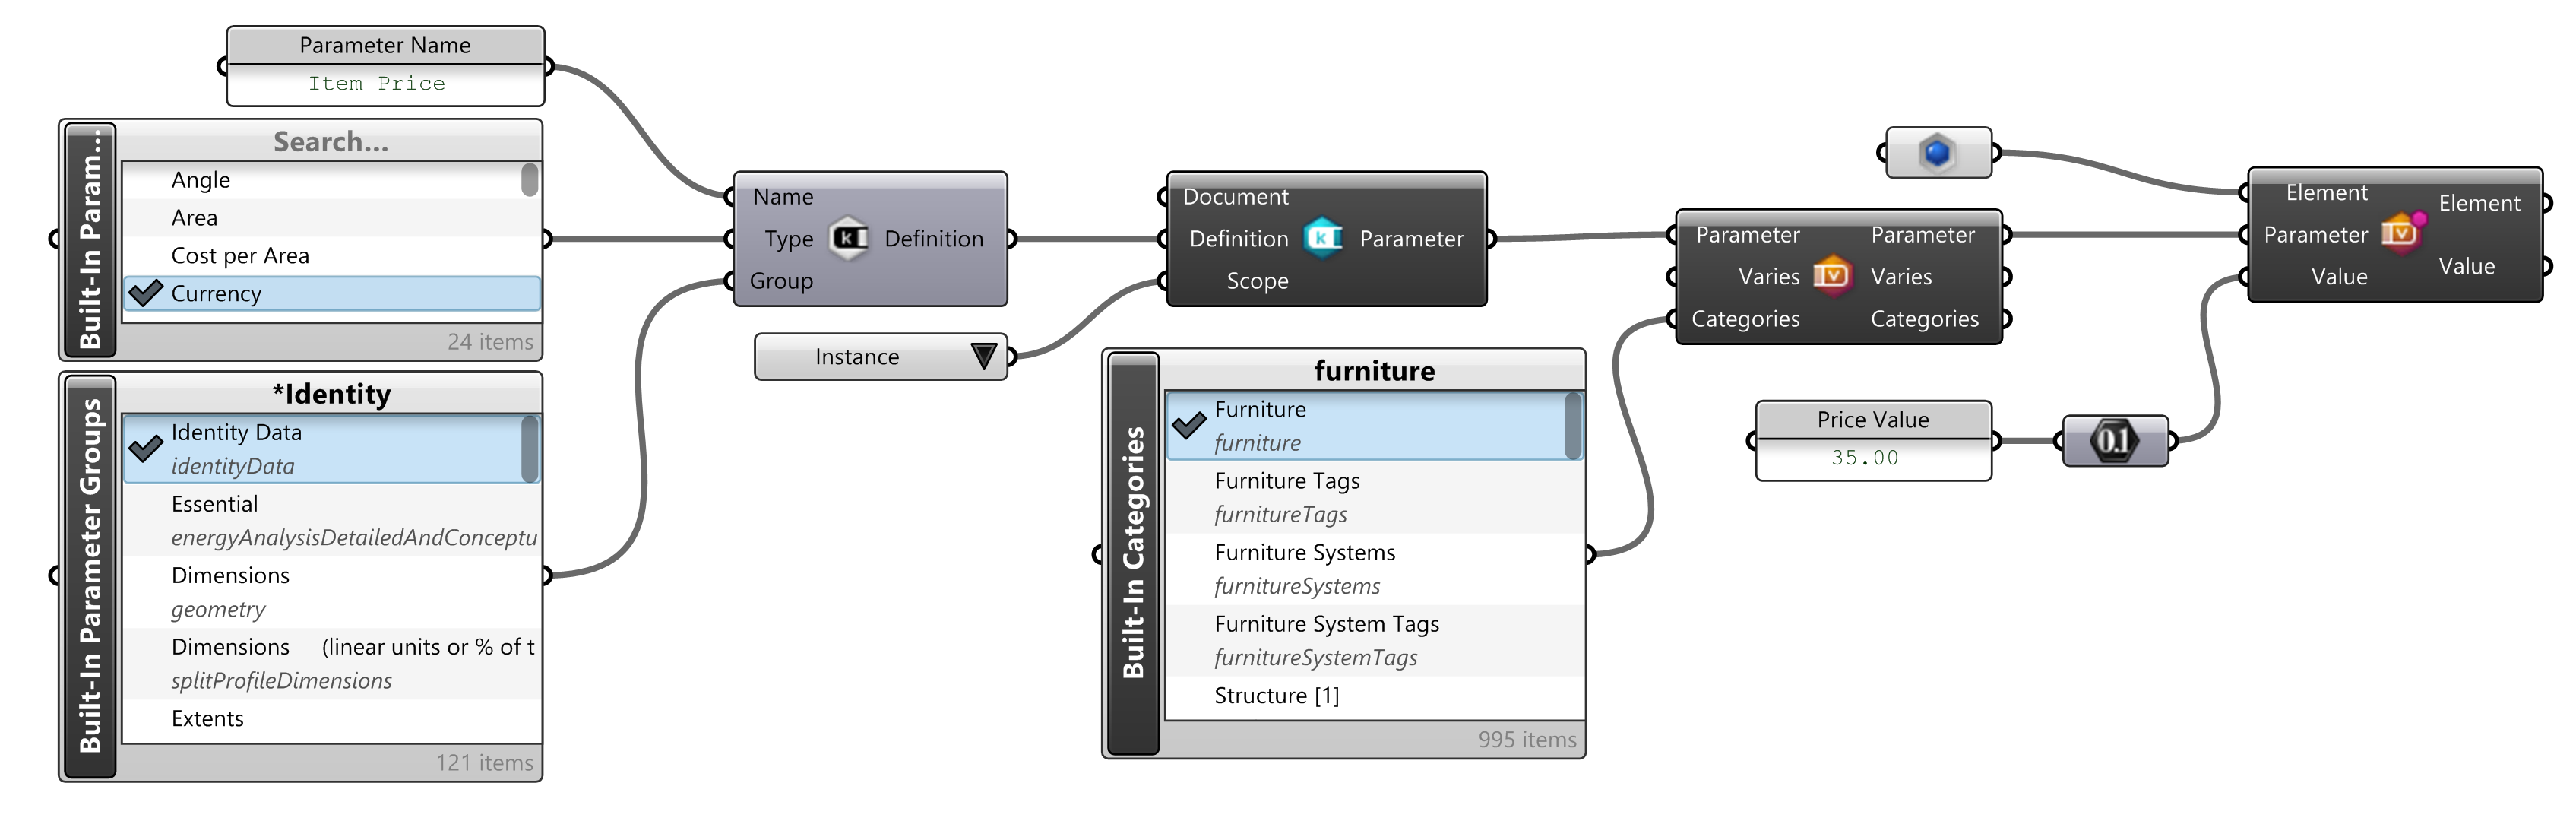
Adding a Project parameter
Project parameters have addition properties beyond a basic Parameter Definition. Project parameters belong to certain Categories and the values can vary across elements.
Create a new parameter by connecting the parameter name to the
Define Parameter
component on the canvas. Then use the
 Built-In Parameter Types
and
Built-In Parameter Types
and
 Built-In Parameter Groups
to set the parameter type and group inputs. The
Define Parameter
component will create a new parameter definition. This definition can then be passed to
Add Parameter+ v1.0
component to actually create the parameter in the Revit project. You can inspect the created parameter using the
Parameter Identity
component.
Built-In Parameter Groups
to set the parameter type and group inputs. The
Define Parameter
component will create a new parameter definition. This definition can then be passed to
Add Parameter+ v1.0
component to actually create the parameter in the Revit project. You can inspect the created parameter using the
Parameter Identity
component.
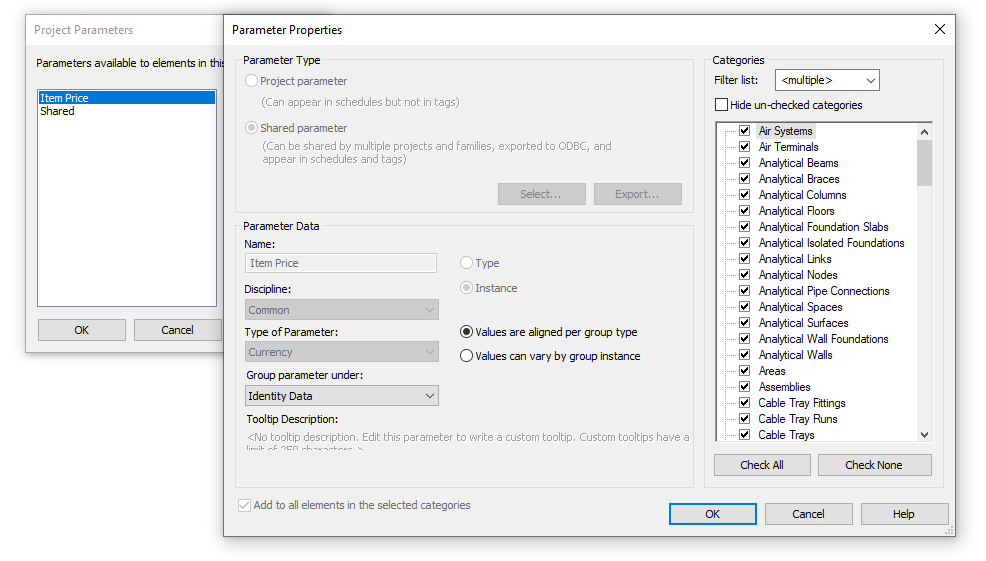
 |
Currently Revit API does not support creating project parameters directly. So project parameters created by Grasshopper are Shared Project Parameters |
Here is the parameter configuration in Shared Parameters:
The value of this parameter can later be read or set by passing the parameter name to the
Element Parameter
component. You can inspect the parameter value using the
Inspect Element
component, and passing the parameter into
Parameter Identity
component:

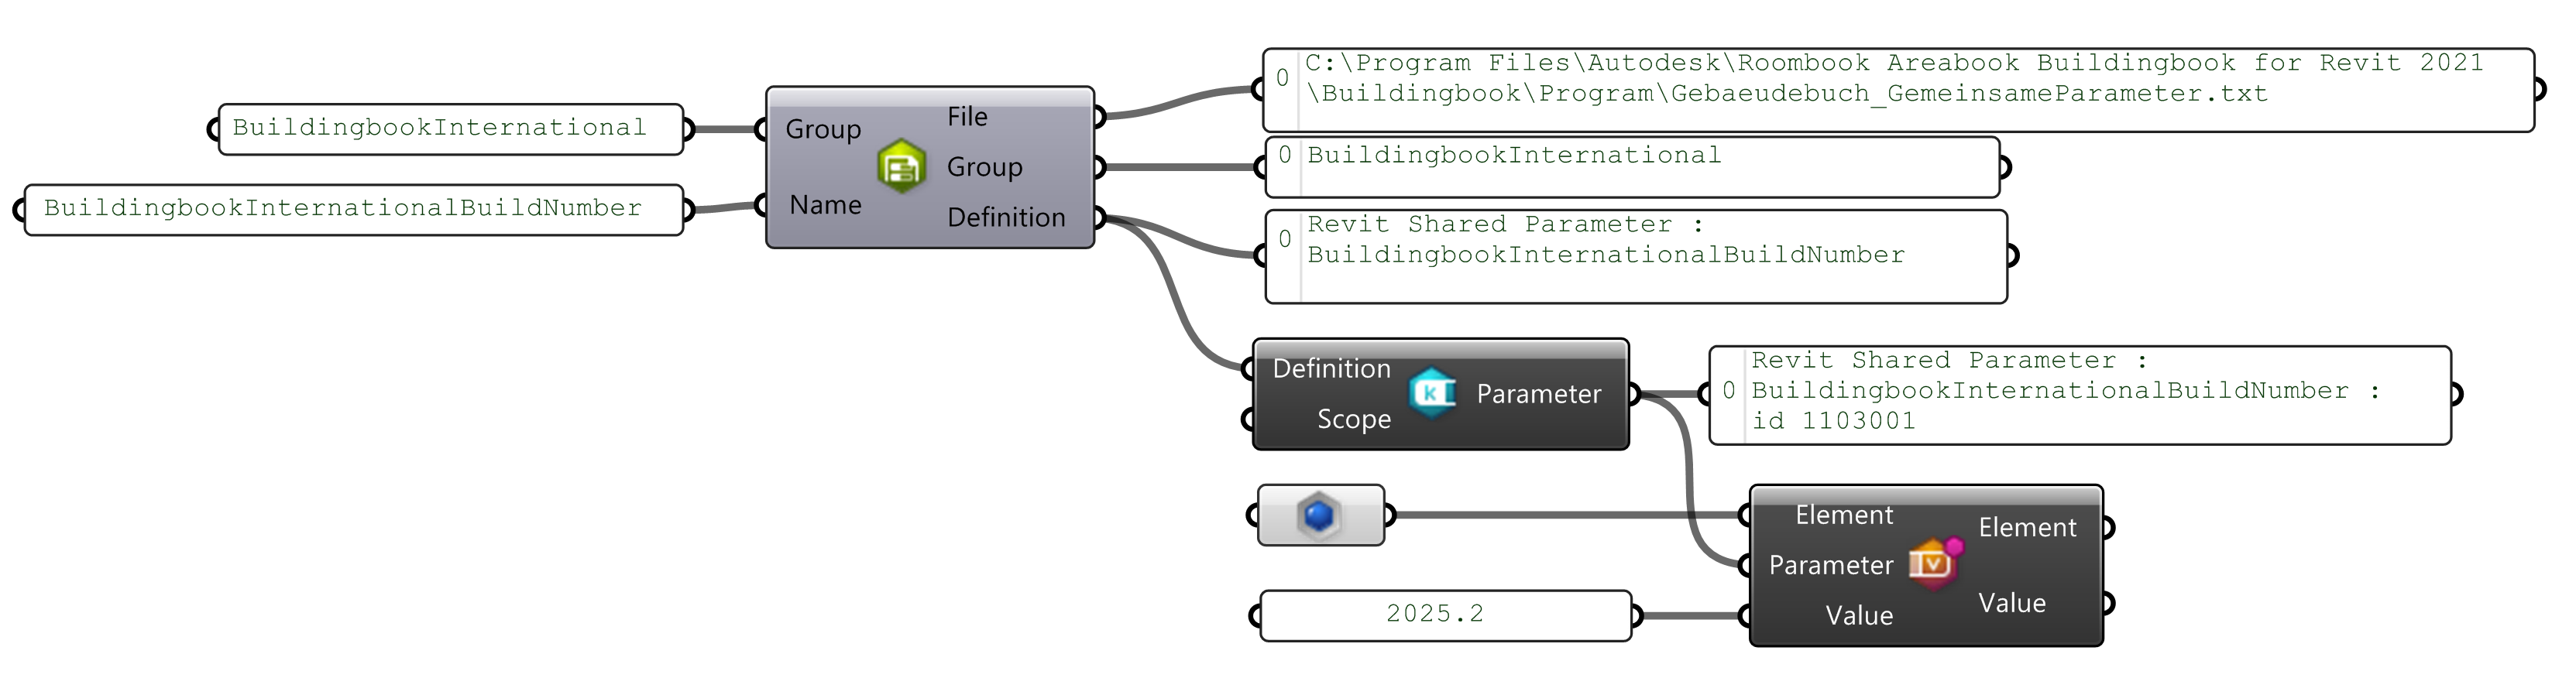
Shared Parameters File
Using the
 Shared Parameters
component to read the shared parameter file. This will return the current file path, the groups and the parameter definitions. The file only contains definitions, Parameters must be added to the current project before values can be set. The
Add Parameter+ v1.0
component adds the Parameter and
Element Parameter
component sets the value in the parameter on an element.
Shared Parameters
component to read the shared parameter file. This will return the current file path, the groups and the parameter definitions. The file only contains definitions, Parameters must be added to the current project before values can be set. The
Add Parameter+ v1.0
component adds the Parameter and
Element Parameter
component sets the value in the parameter on an element.
Global Parameters
Global parameters must be queried from the current project by using the Global scope into the
 Query Parameters+ v1.0
component. Then get or set the parameter value using the
Global Parameter
component:
Query Parameters+ v1.0
component. Then get or set the parameter value using the
Global Parameter
component:

Add Global parameters to a project thru the standard Add Pararameter Process.
Parameter Formula
Use formulas in dimensions and parameters to drive and control parametric content in a model. The
 Parameter Formula
component can be used to create Parameter Formulas using the syntax as covered in the Valid Formula Syntax and Abbreviations
Parameter Formula
component can be used to create Parameter Formulas using the syntax as covered in the Valid Formula Syntax and Abbreviations