One of the major improvements in Grasshopper 2 over its predecessor is the ability to attach additional data directly to any value in the document. This allows bundles of related data to move together through a document without the need for parallel wires and components.
You will have heard of meta data before, perhaps in the context of geo-location coordinates stored in digital photographs, or the artist name on an mp3 audio file, or the CC addresses in an e-mail header. The concept of meta data in Grasshopper is very similar to these examples.
This topic will discuss Grasshopper-flavoured meta data in full detail, starting with the basic terminology, then moving on to inspection and analysis tools, and finally to ways of modifying existing data and creating new data from scratch.
Terminology
Beyond meta data itself, there are three important terms to know and keep separate; entries, names and values. A bundle of meta data is a collection of entries, and each entry contains a name and a value. Every primary value (i.e. regular, old-fashioned, non-meta values) in a Grasshopper document can be linked with exactly one (1) meta data bundle. Since names must be unique within a single bundle, it follows that it is not possible to assign multiple entries with the same name to a single primary value.
To relate all this to the audio file meta data corollary mentioned above, imagine that an mp3 file has meta data containing the artist's name, the track's genre and the album cover art. The meta data of this file contains three names (Artist, Genre, AlbumCover) and three values ("Pink Floyd", "Progressive Rock",  ), paired up in three entries. The name and genre values are text, while the album art value is an image.
Here's an example of a possible hierarchy of entries, names and values in an imaginary Grasshopper meta data bundle. Again, we have three names (Display.Colour, Element.Material, Building.Floor) and three values (  ,
, "Aluminium 1100", 5). In this case the values are of type Colour, Text and Integer:
When meta data is displayed on screen as text, it tends to take a much more economical format, showing only name and value pairs:
Building.Floor: 5
Display.Colour: Pink 7
Element.Material: Aluminium 1100
The order of entries is undefined and may change at any time. It is thus not possible to access entries using an index, they can only be accessed via their names.
Names
There are few restrictions for valid naming of meta data entries, but there are some guidelines which are recommended but not enforced. The only rules which are enforced are as follows:
- No leading or trailing whitespace. These are removed automatically when typing names by hand.
- No empty text. Names need to contain at least a single meaningful character.
- No line breaks. Names need to be single-line entities.
- No wildcard characters. The asterisk
*and question mark?are not allowed, as they would interfere with matching names against wildcard patterns. - No hash character. The hash
#has a special meaning within names and may only appear at the very end of a name to indicate the value is transformable.
Our soft suggestions for creating custom names are four-fold:
- Do not use any whitespace characters, especially no tabs or exotic spaces.
- Use periods to separate various elements of a name, rather than other punctuation like underscores, colons, slashes or dashes.
- Use Word Casing for all parts of a name.
- Create names consisting of no more than three separate parts.
So instead of Building, replace the dashes with periods, remove the blank space and change the casing of the final element to get BuildingA.Element.Supplier.
As briefly mentioned above, meta data entries can be marked as transformable by appending a hash symbol at the very end of the name. When a primary shape is geometrically transformed, any transformable meta data it contains will be similarly affected. This is sometimes desired, sometimes not, which is why it is up to the user to specify for each entry whether it ought to behave in this way. This, incidentally, is one way in which Grasshopper 2 differs from most other meta data approaches, where geometrical transformations are either entirely meaningless or not propagated from primary to meta data.
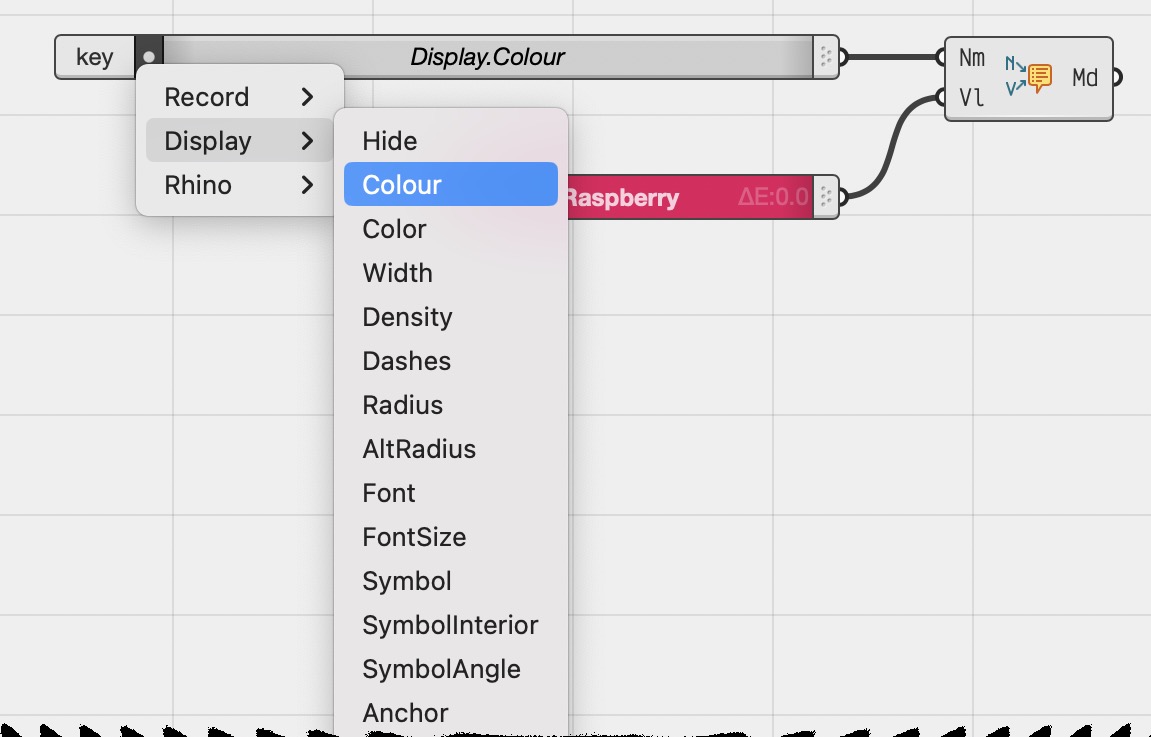
The main purpose of meta data in Grasshopper 2 is for users to attach their own meta values using names of their own choosing, so that information management can be vastly simplified. There are however a few standard meta data names which have meaning within Grasshopper. These are mostly related either to the display and baking of shapes. For example, it is possible to override the display colour of a shape, or to set the layer into which the shape is baked by assigning it a standardised meta data name. There are several dozens of these standard names and they can all be accessed via the Meta Name Picker object as per Figure 1.
Values
Grasshopper only supports a small number of types for meta data values, as dealing with a limited set of types simplifies all code consuming meta data and reduces the possibility of unexpected behaviour or even failures. All the allowed value types are listed in Table A.
| Type | Description |
|---|---|
Boolean |
A true or false value. |
Integer |
Both 32-bit and unbounded integer values are allowed. |
Number |
A 64-bit floating point decimal number. |
Angle |
A numeric value combined with an angular unit. |
Interval |
A numeric domain. |
Function |
A univariate function. |
Date |
A moment in time, including both date and time of day. |
Time |
A duration of time. |
Colour |
A colour, using any of the supported colour models. |
Gradient |
A colour gradient. |
Text |
A unicode string value. |
Guid |
A 128-bit globally unique identifier. |
Point |
A three-dimensional point. |
Vector |
A three-dimensional vector. |
Plane |
A three-dimensional plane consisting of an origin point and two axis vectors. |
Transform |
A three-dimensional linear transformation. |
Byte Array |
An array of 8-bit unsigned bytes. This type is only available when accessing meta data through code. |
Note that since text is one of the allowed types, it is possible to store data of almost any type anyway, since almost all data can be converted to and parsed from text. For example Breps and Meshes can be converted into JSON strings, and as such stored in meta data.
Inspecting Meta Data
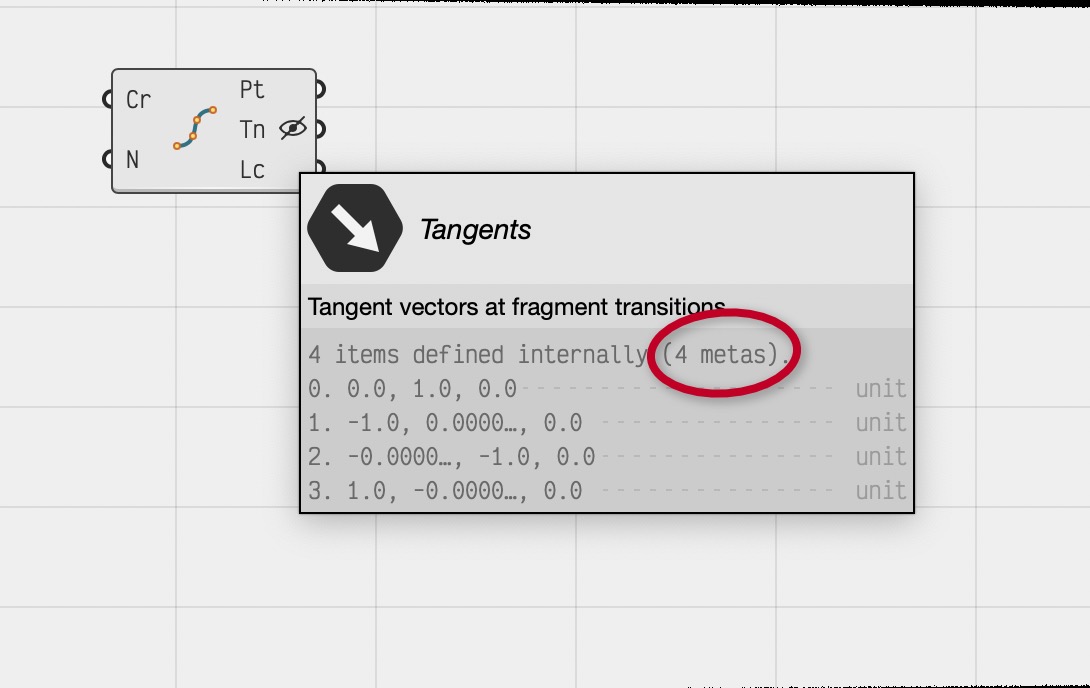
It is not usually obvious when primary data contains meta data, except when the meta data affects the display styling of shapes in the Rhinoceros viewports. A parameter's tooltip contains a very summary description of the meta data attached to its values. This amounts to nothing more than a single counter, as per Figure 2. Note that this counts the number of primary values which have meta data, not the total number of meta data entries, which may be much higher.
Looking at meta data on the canvas
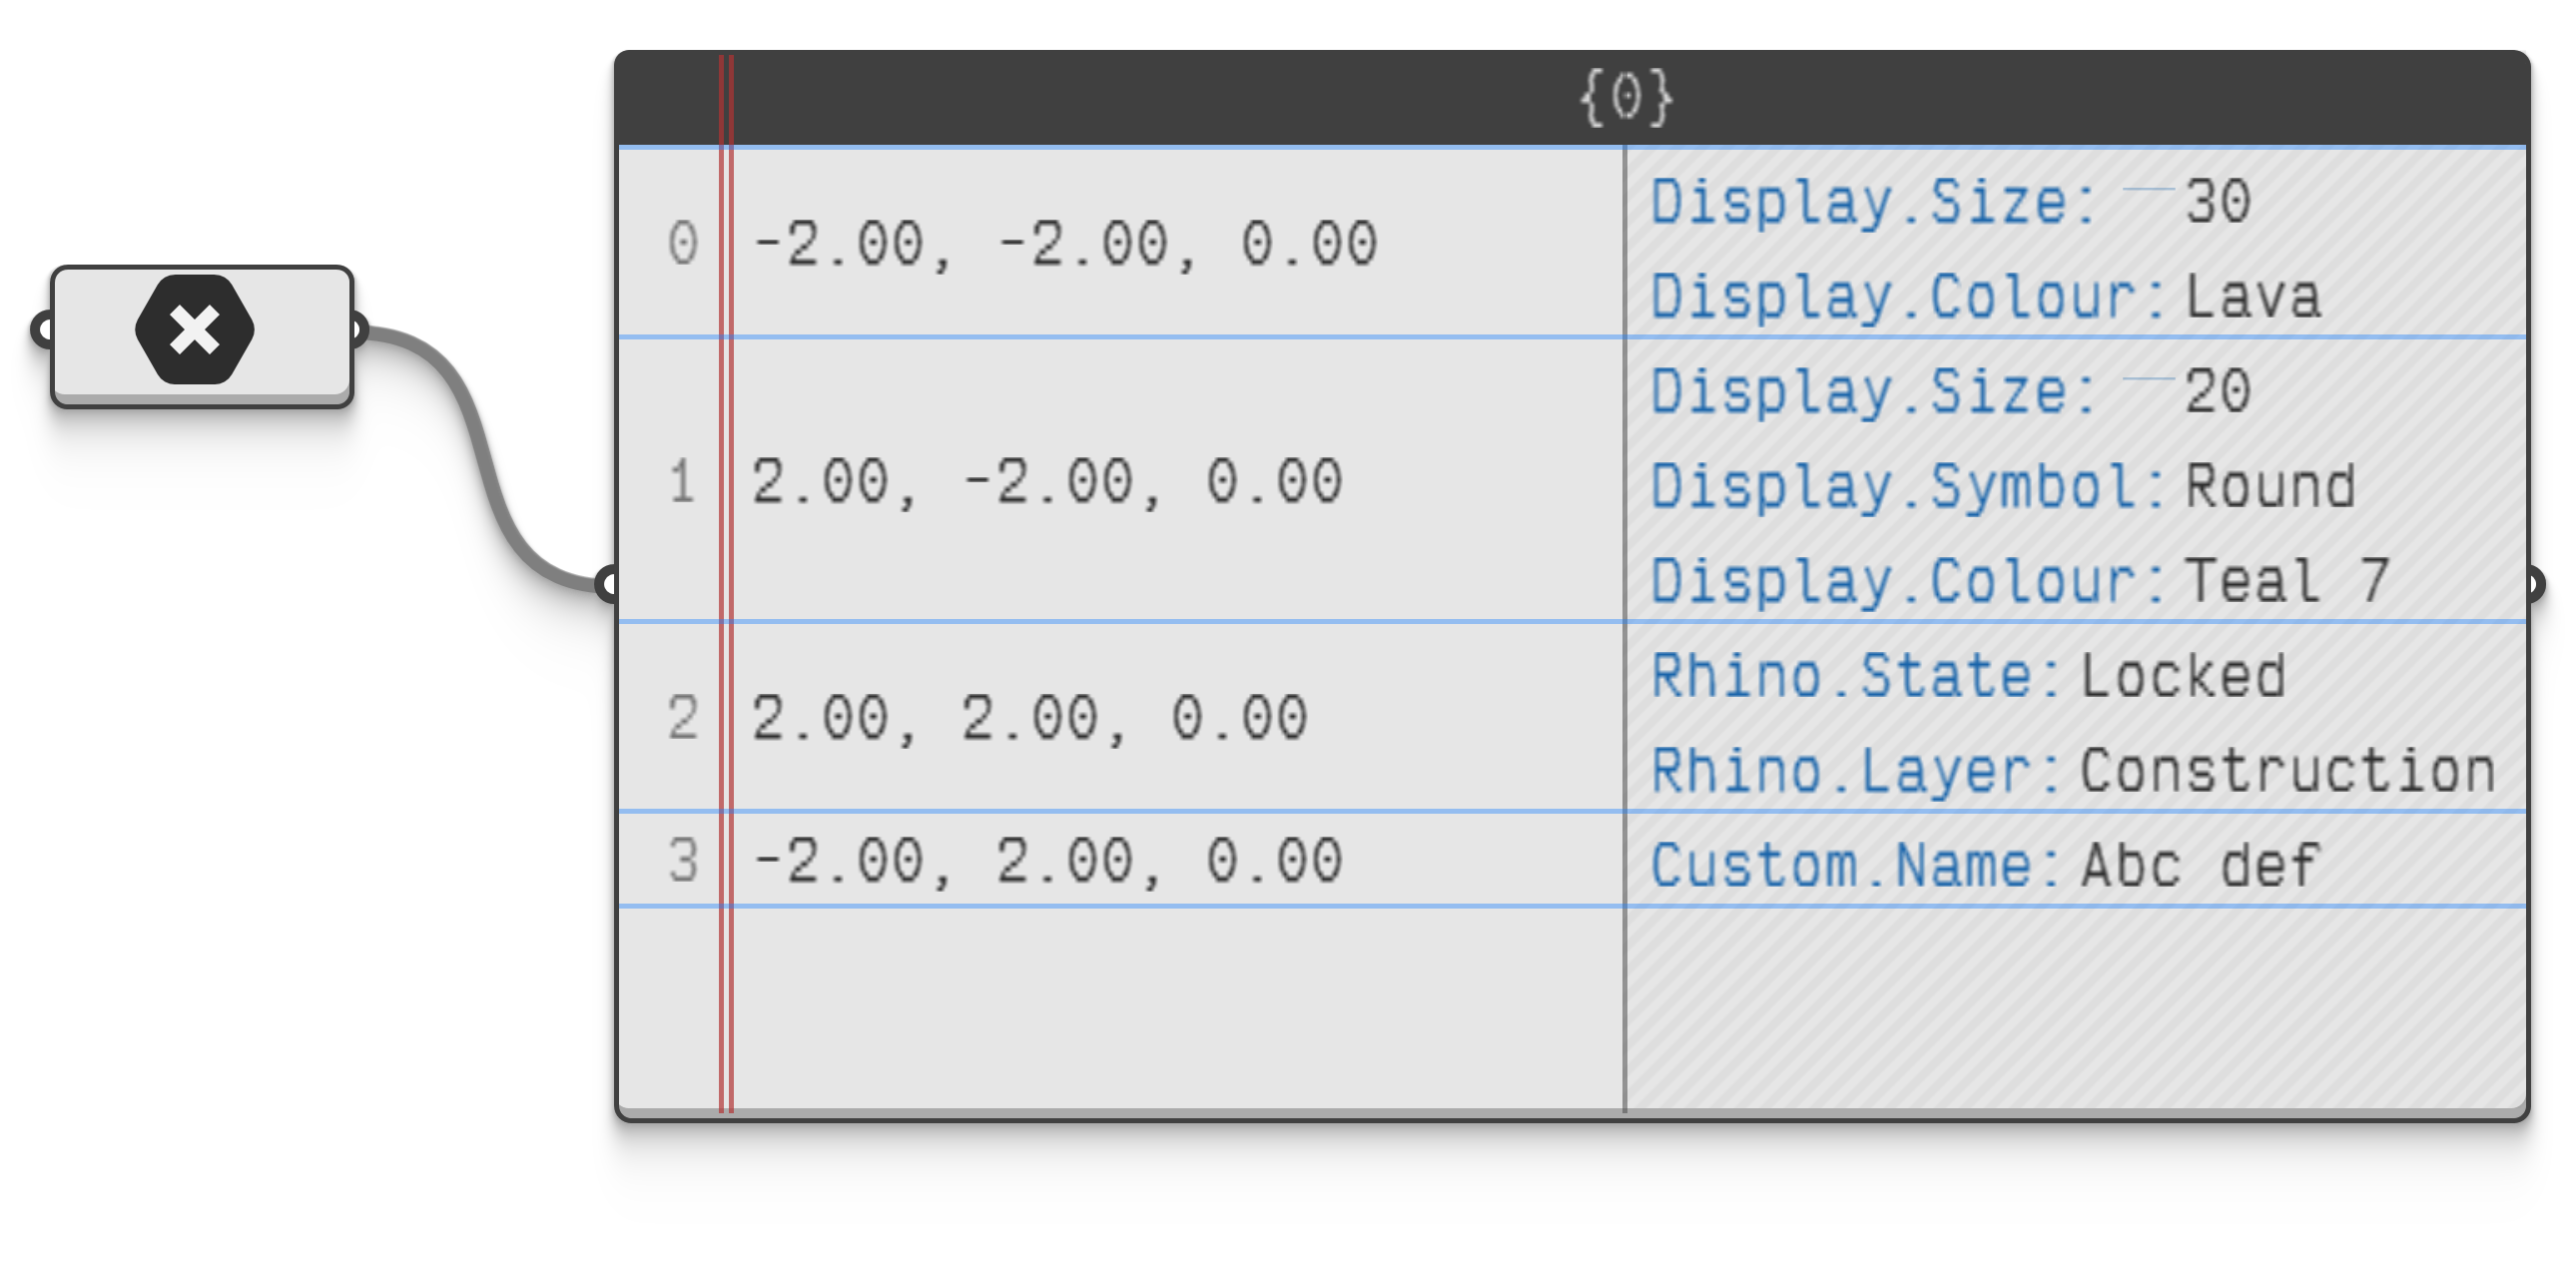
A more informative method to inspect the meta data is to use a Data Panel and enable the Meta Data column in the panel menu, as shown in Figures 3 and 4.
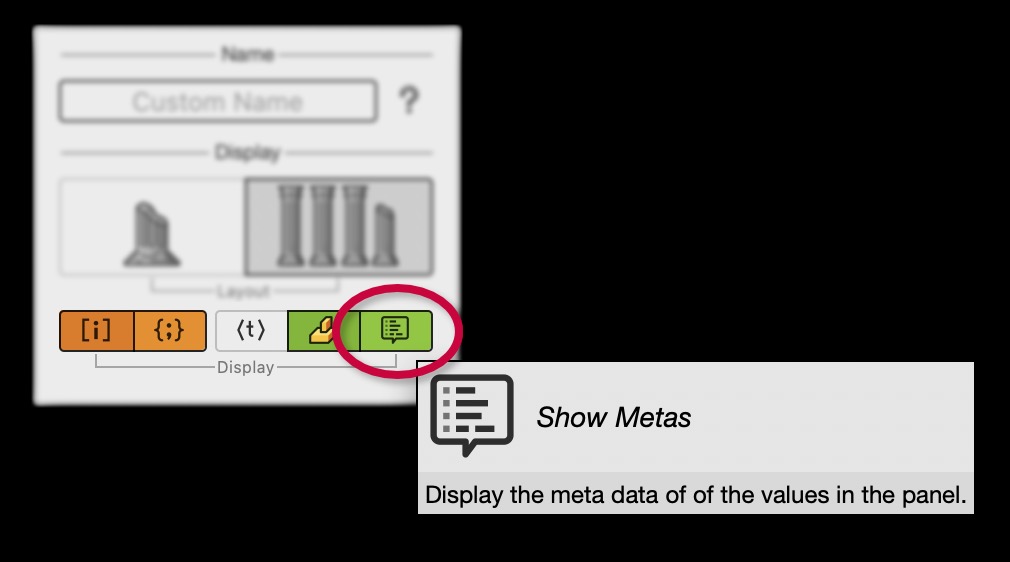
However, the amount of space in data panel rows is limited, so a large amount of meta data will either be very cumbersome to view and navigate, or not fit at all.
 Interactive in Grasshopper 2
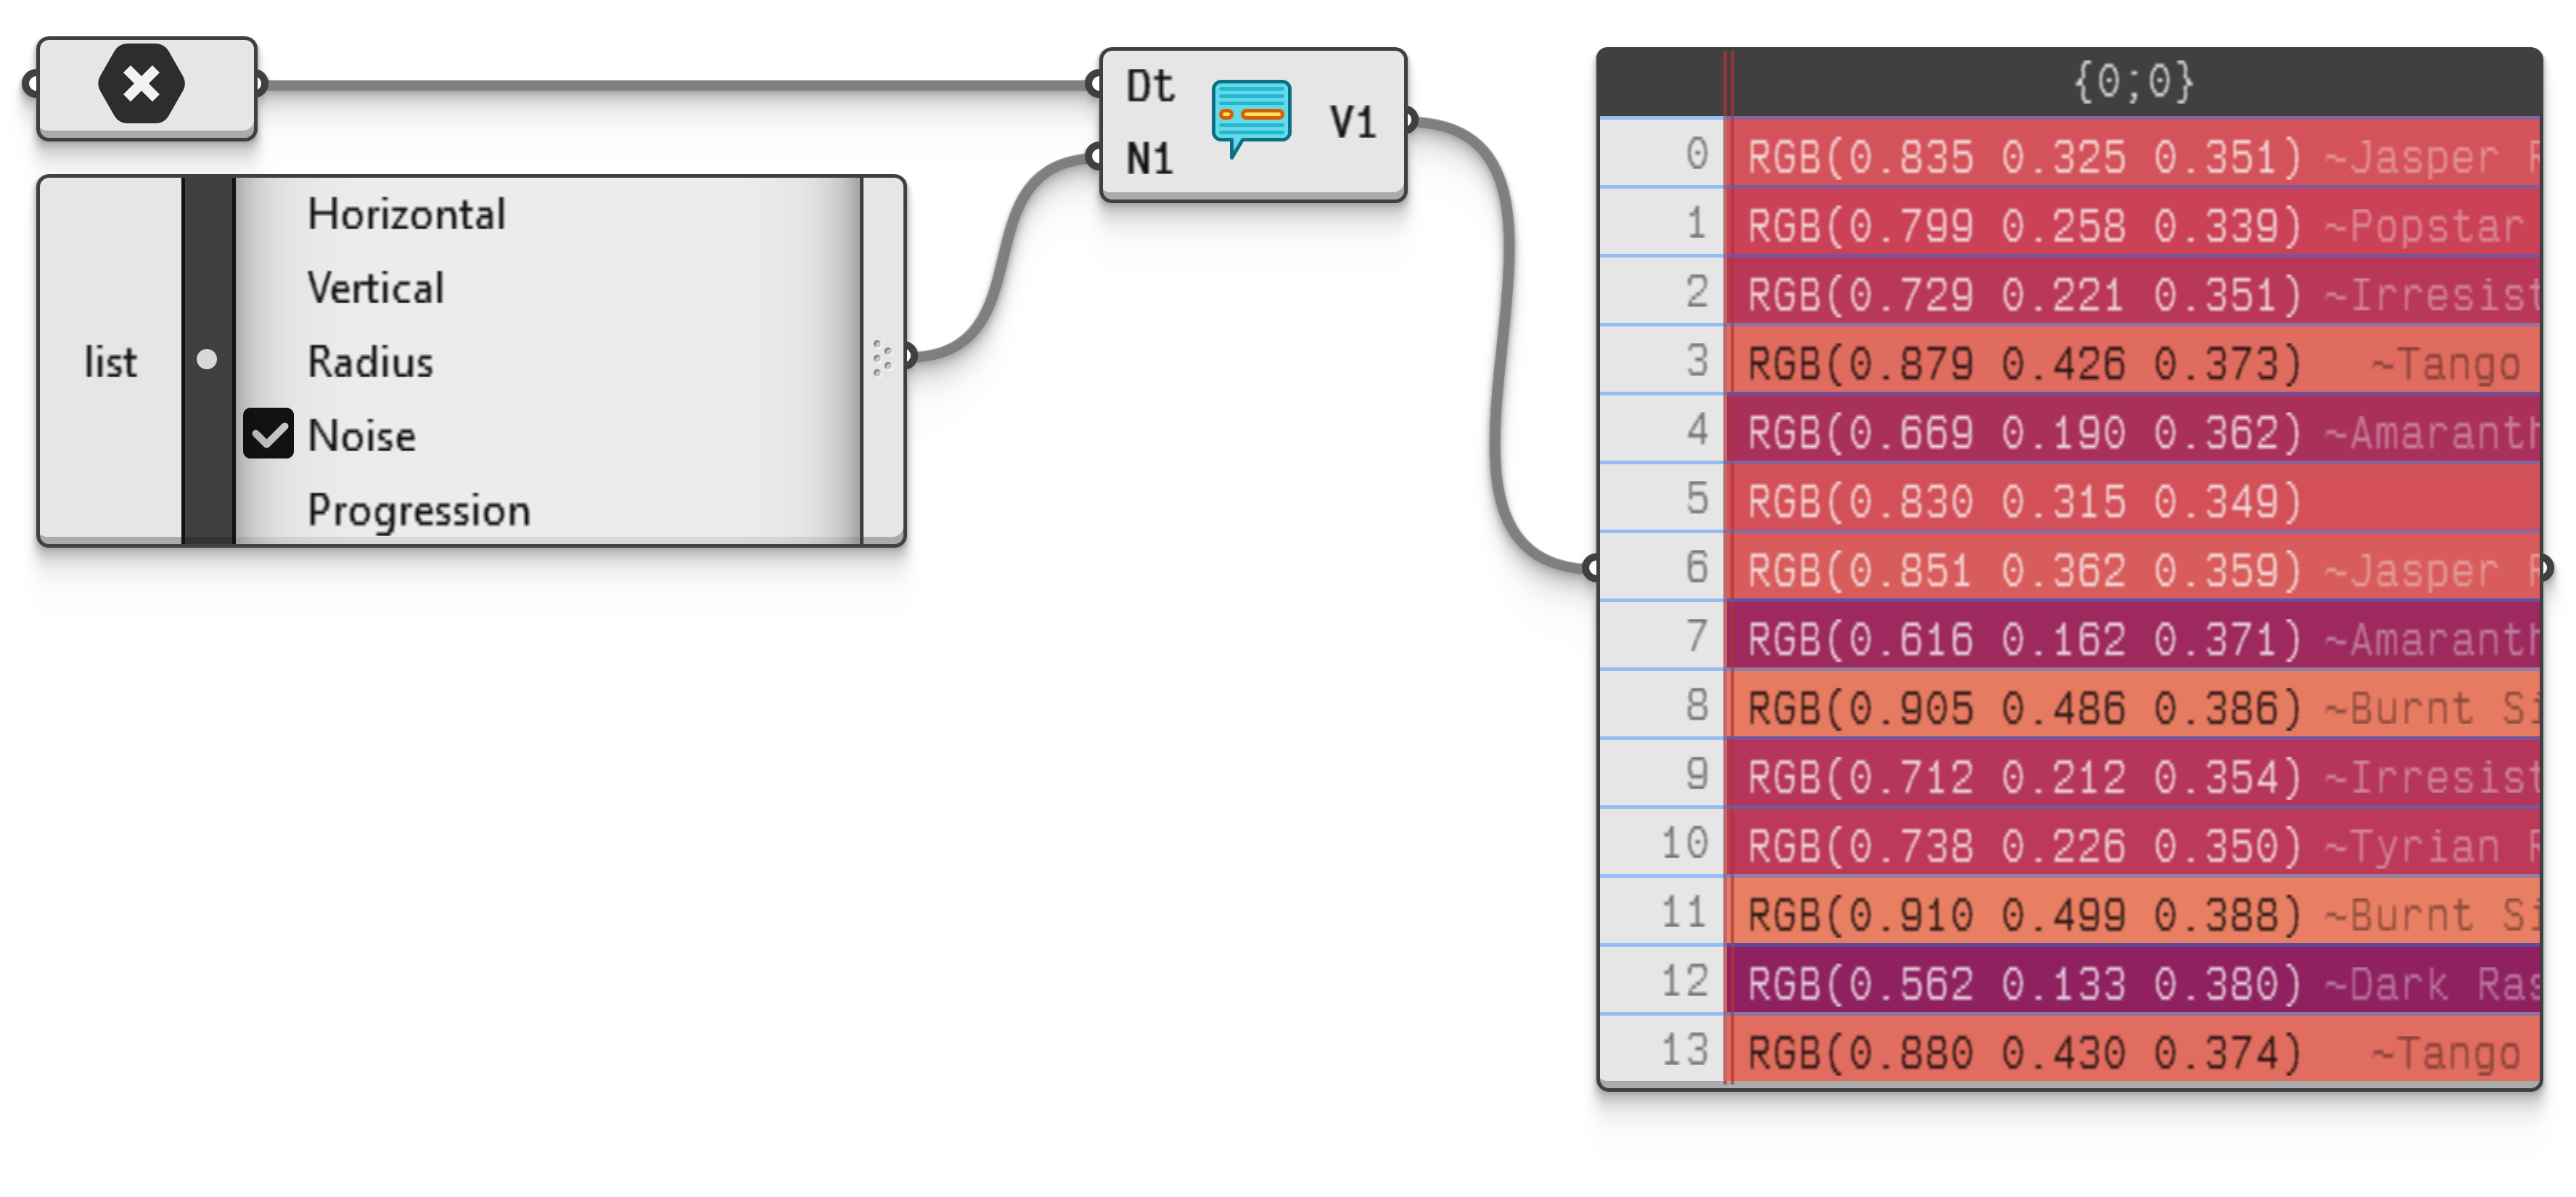
To inspect meta data in a more controlled fashion, one can extract meta values and turn them into primary values using the Extract Meta Data component, as shown in Figure 5. The example file contains many points, each with multiple meta data entries. These include both simple values like numbers, and complex ones like colours and gradients. The more complex types are always difficult to read when displayed in the meta data column of a data panel, but when they are promoted to primary data, the panel can do a much better job of drawing them.
 Interactive in Grasshopper 2
Components which may be useful when inspecting meta data in this way are listed in Table B.
| Description | Component |
|---|---|
| Harvest Meta Data promotes an entire meta data bundle to primary data. | 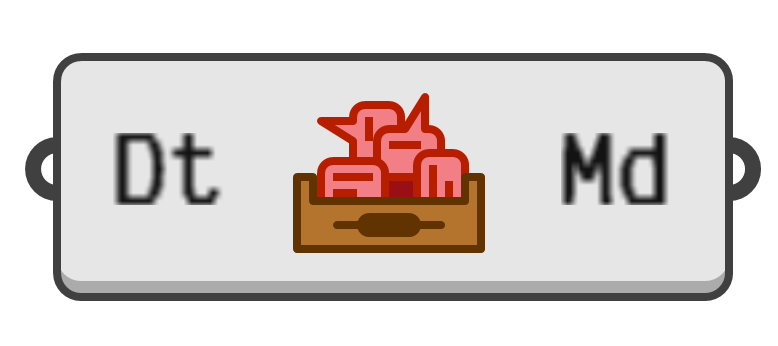 |
| Extract Meta Data promotes the specified meta data values to primary data. | 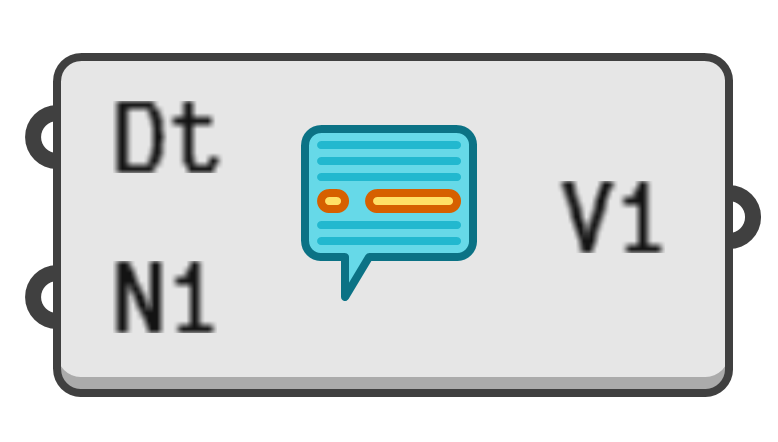 |
| Explode Meta Data turns a meta data bundle into names and values. |  |
| Dispatch Meta Data splits a collection of primary values based on whether their meta data passes any of the specified filters. |  |
Looking at meta data in the viewports
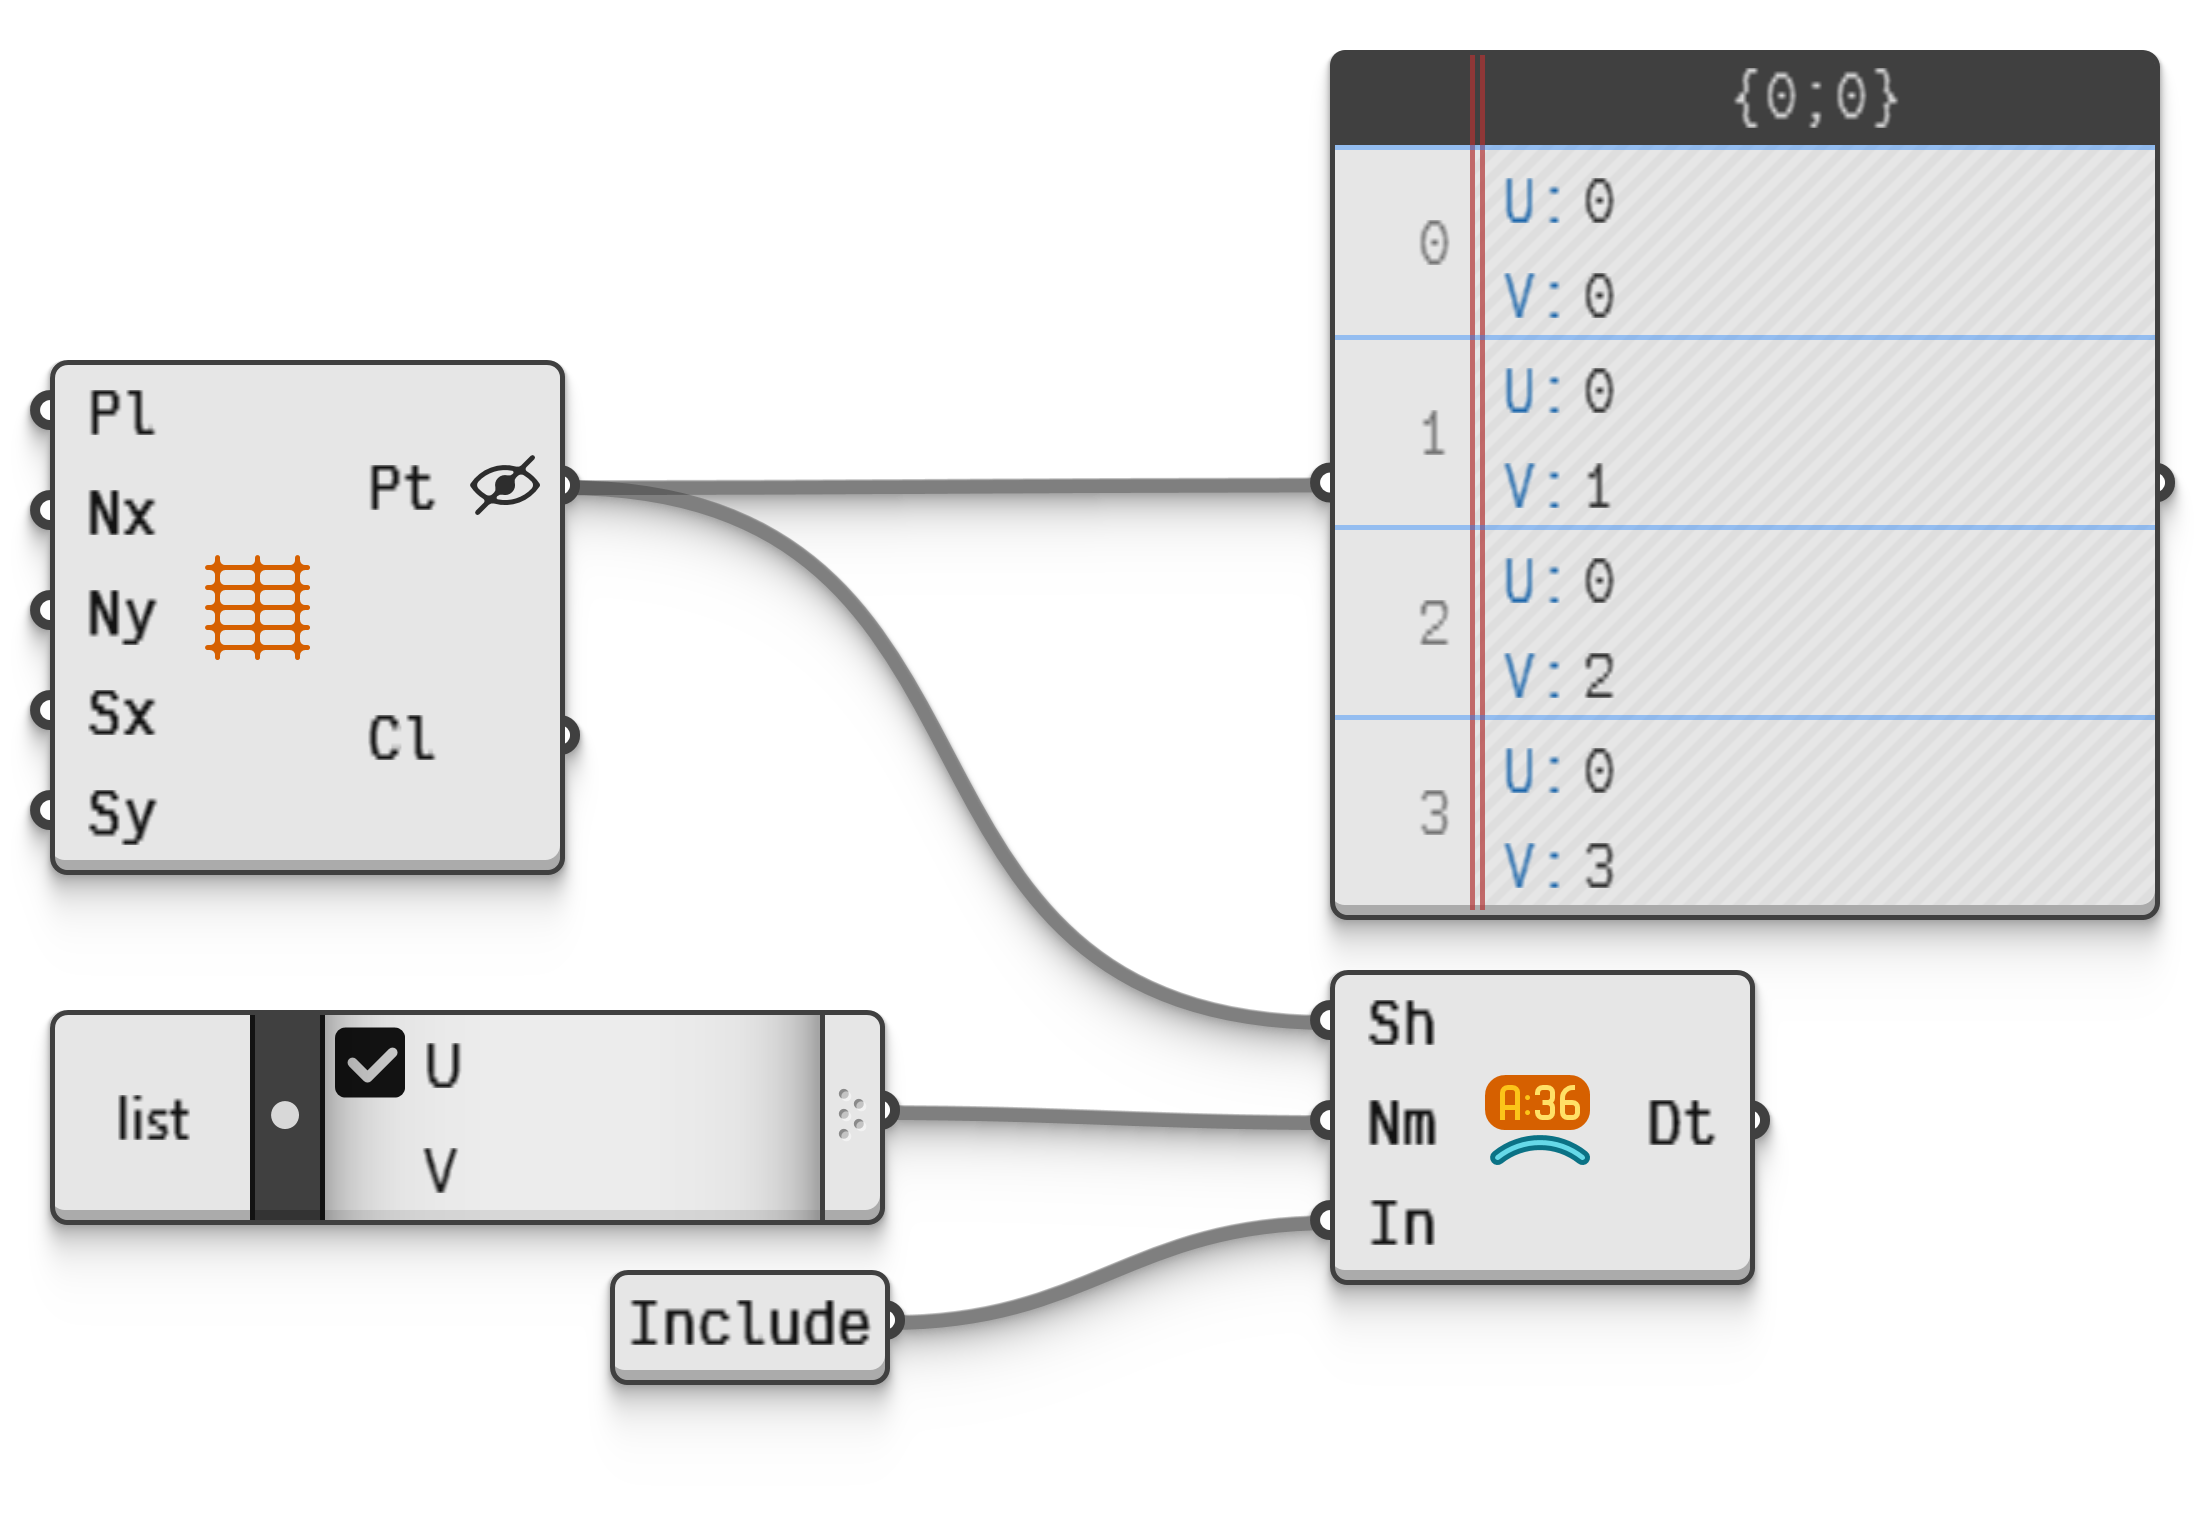
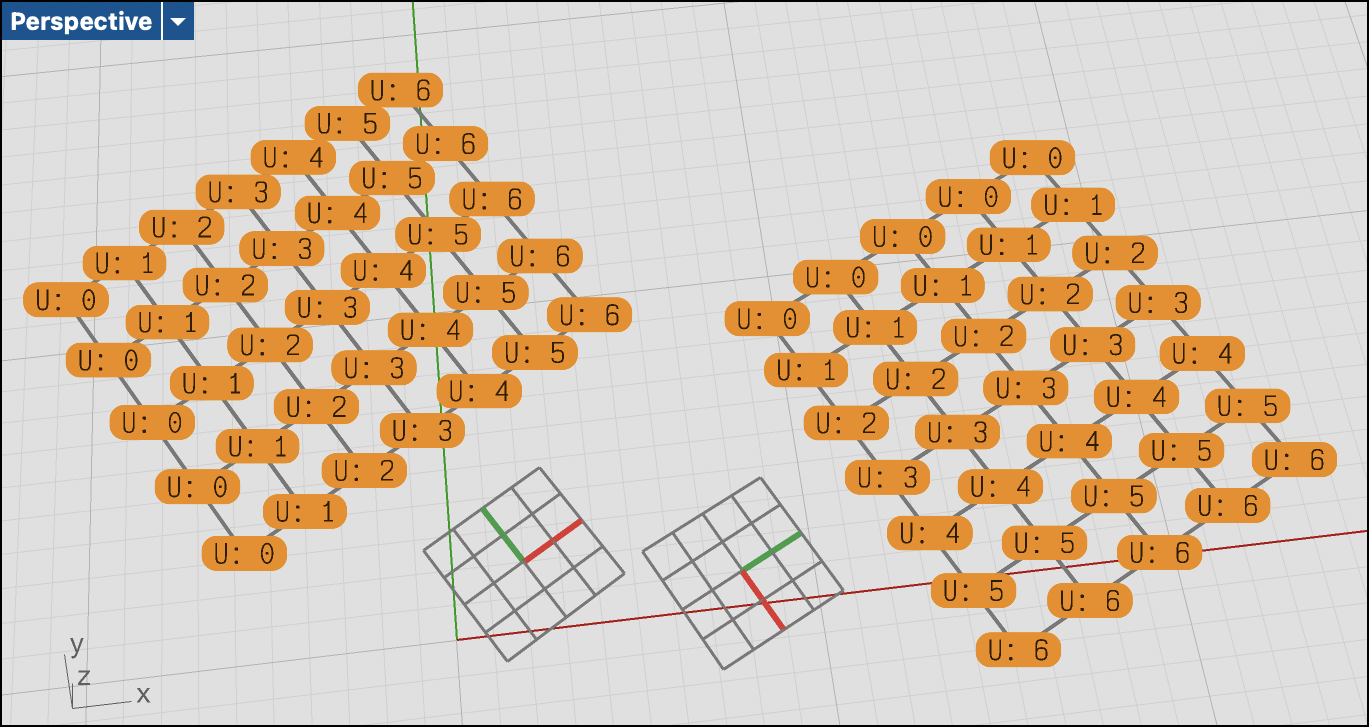
Viewing meta data in panels on the canvas is all well and good, but it omits the often very important spatial aspect. The easiest way to inspect meta data in the Rhinoceros viewports is to use a Dot From Meta component. Any primary shape with meta data attached can be connected to this component, along with a list of names to be displayed. This component outputs text dots with the meta data values as text, as per Figures 6 and 7.
 Interactive in Grasshopper 2
Since the dots are primary data, they can be baked into the Rhinoceros model and are themselves subject to meta data display overrides such as Display.Colour, Display.Font and Display.FontSize. See the Viewport Display topic for more details.
Finally, Display Rules allow for the customised styling of shapes displayed in the Rhinoceros viewports based on their meta data state. See the Display Rules topic for an exhaustive treatment of this complex toolset.
Modifying Meta Data
Generally speaking, meta data is created and occasionally overwritten, but rarely modified. In fact Grasshopper provides no components for operating on values inside meta data directly. If a meta value needs to be changed, it has to be promoted to primary data first, modified in that state, then converted into meta data again and ultimately assigned again, so that it overwrites the old, unchanged meta data.
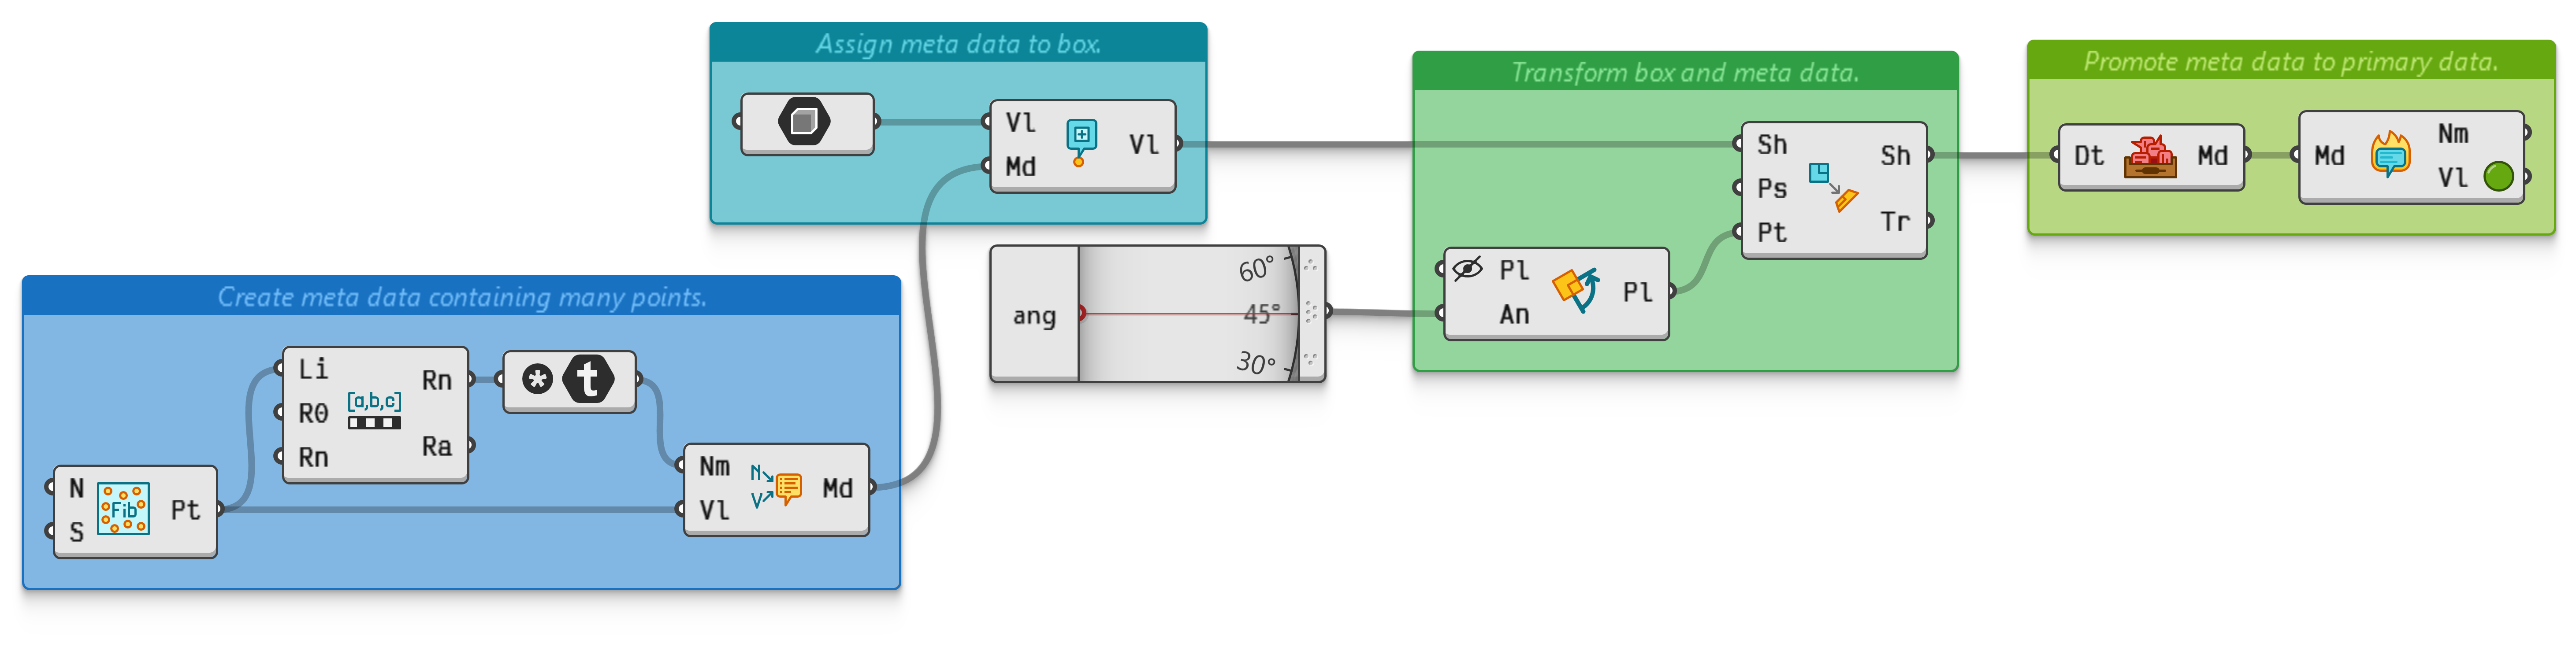
However, there is one way in which the above is not quite true. When meta data entries are marked as transformable and attached to a shape value which is itself then transformed, those entries will be modified according to the applied transformation. Recall that meta data names which end with the hash character # are considered transformable by Grasshopper. Figure 8 shows a working example of this mechanism.
 Interactive in Grasshopper 2
Creating Meta Data
As mentioned at the start of this topic, the raison d'être for meta data in Grasshopper 2 is to provide a mechanism for the user to attach their own custom data to values in order to simplify the bookkeeping logic inside files. To this end Grasshopper provides a range of features for creating and assigning meta data.
Parameter-Level Meta Data
Every parameter in Grasshopper provides a meta data modifier in its menu, as per Figure 9. This editor allows one to manually enter meta data entries to be assigned to every single value which passes through that parameter. The strong data is assigned to all values, even if those values already contain meta data with the same name. Weak data is only assigned when it doesn't conflict with existing meta values.
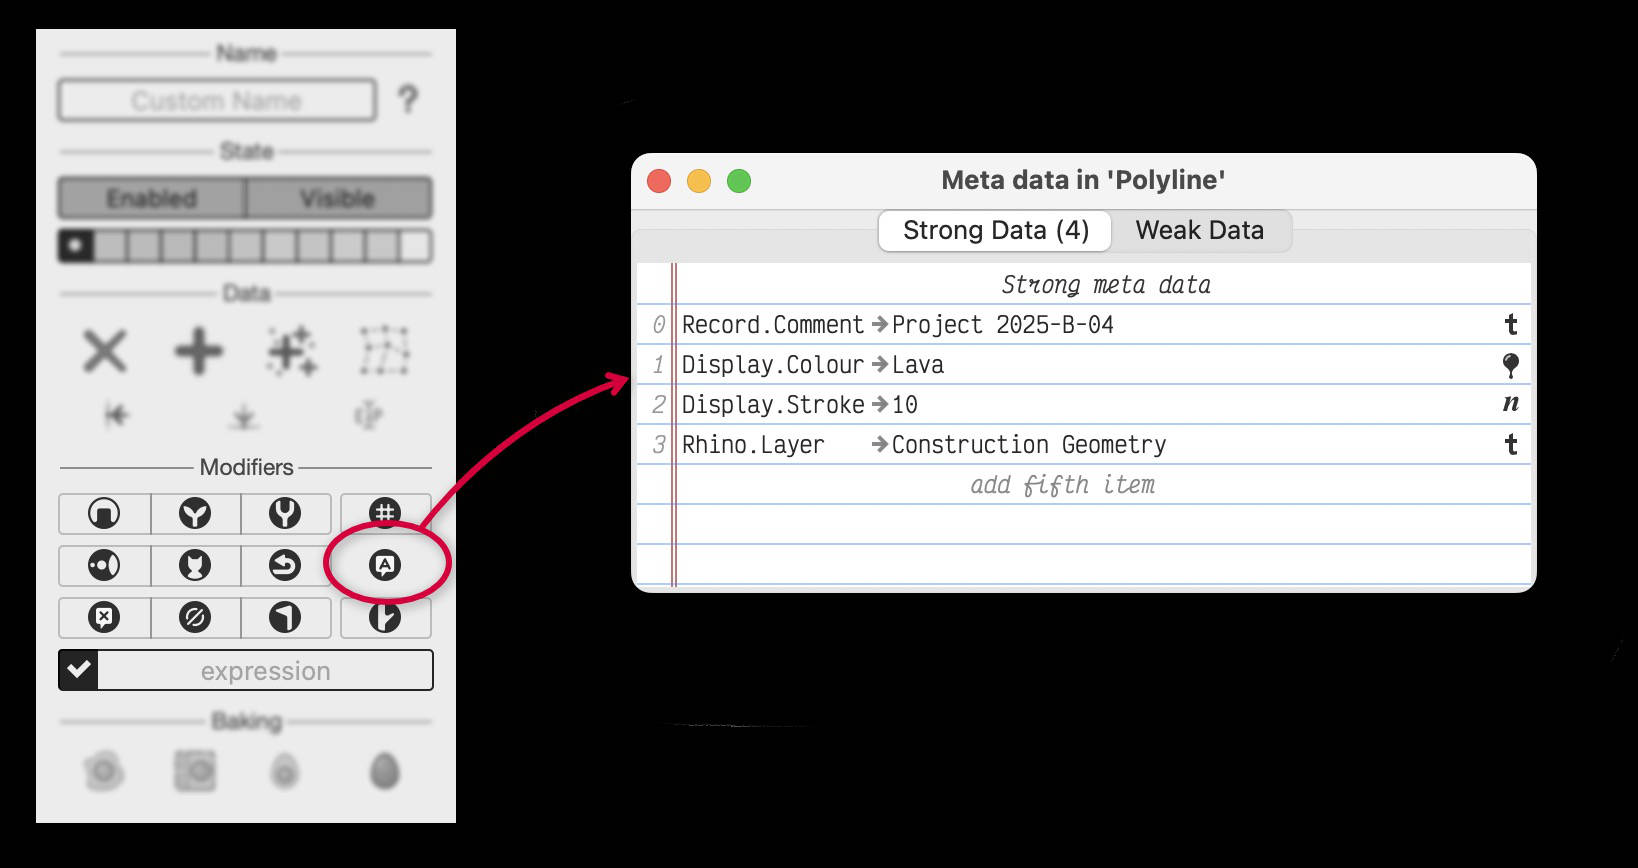
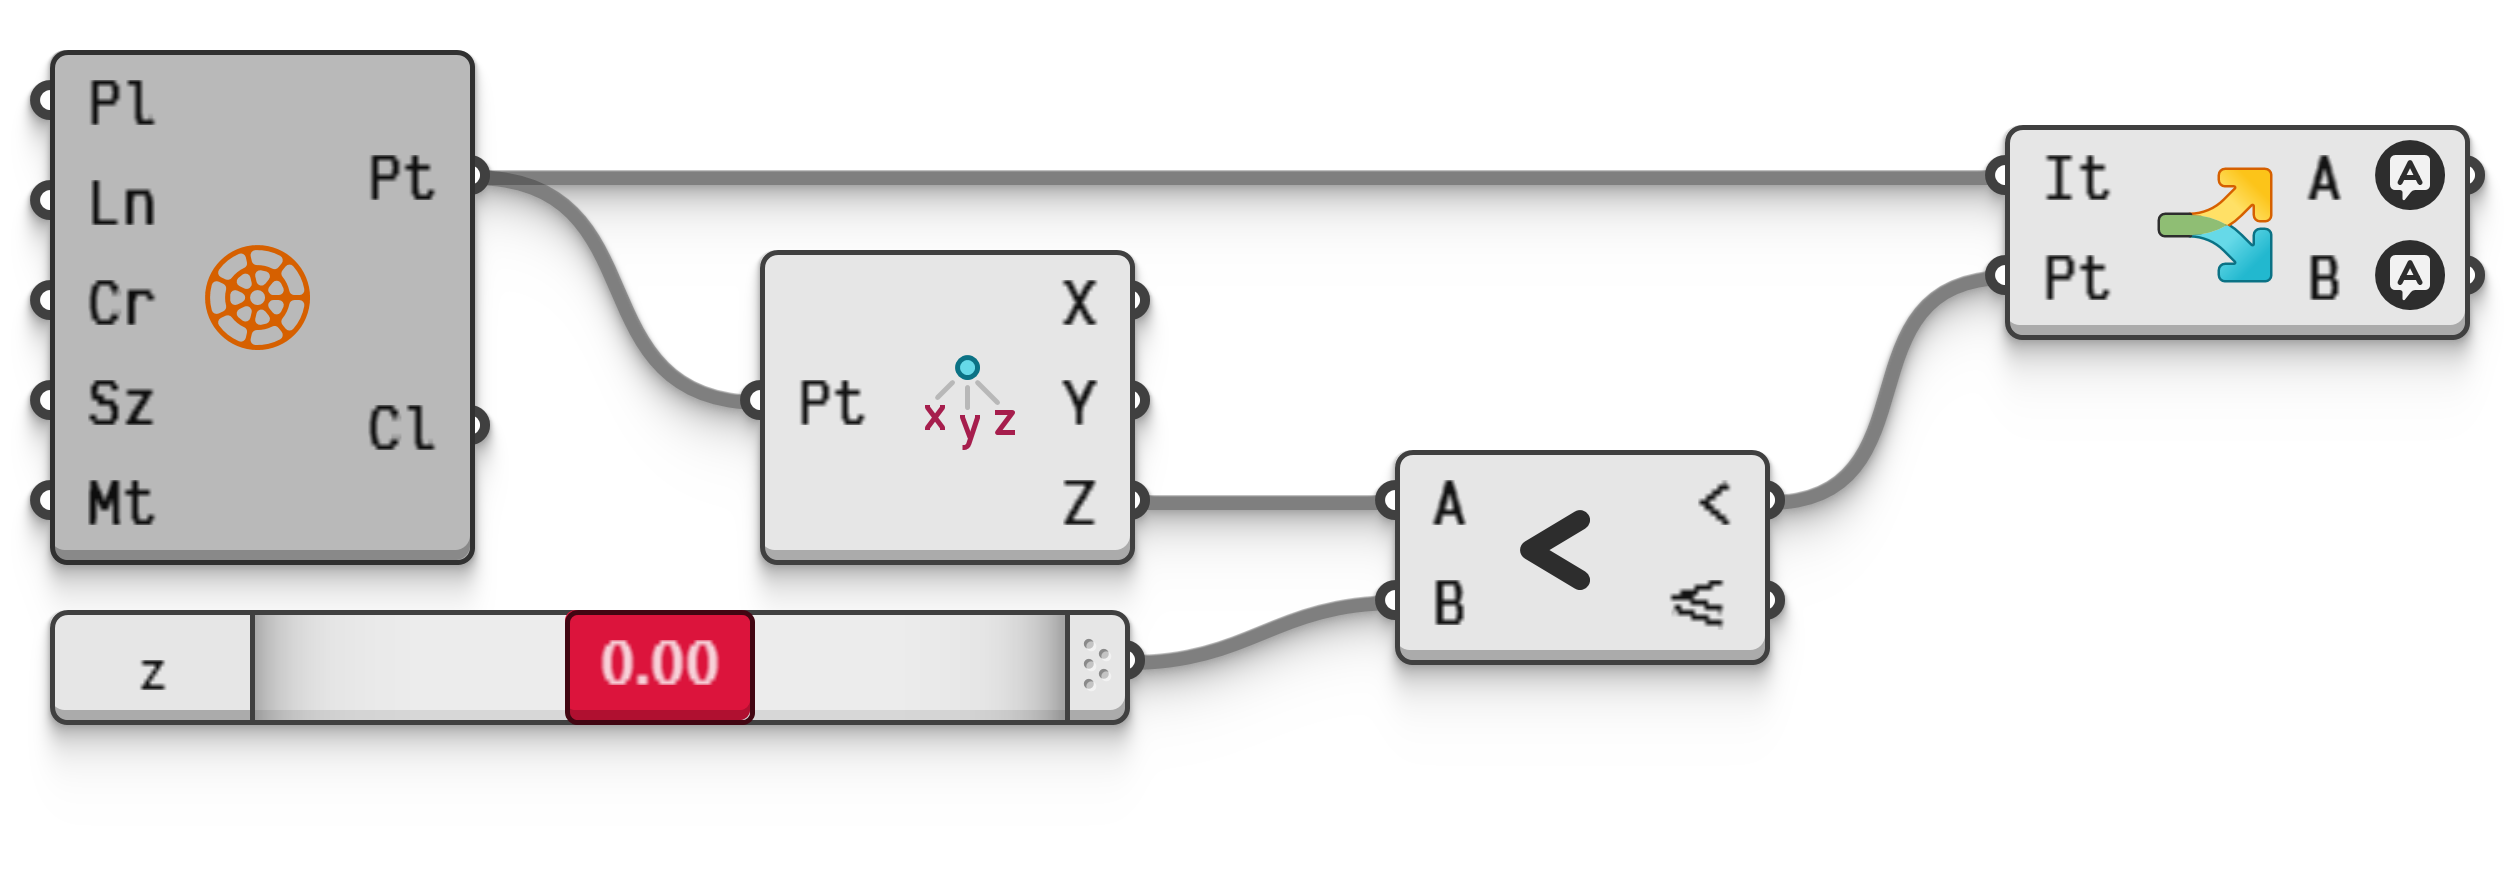
This mechanism for meta data assignment treats all values in the parameter equally, and as such is not suitable for targeted assignment. Figure 10 provides an example file which employs parameter-level meta data to change the colour and symbols of points in different parameters.
 Interactive in Grasshopper 2
Persistent Meta Data
When value-specific meta data is required, then the blanket approach outlined in the previous section is not an option. It is always possible to create and assign meta data with specific values to any existing value using dedicated components, but there's an easier way if the values are part of the persistent data of a parameter, i.e. if the values are defined internally, rather than collected from other parameters via wires.
The persistent data editor—available in all unconnected floating and input parameters—provides buttons next to every entry which open the meta data editor, as can be seen in Figure 11.
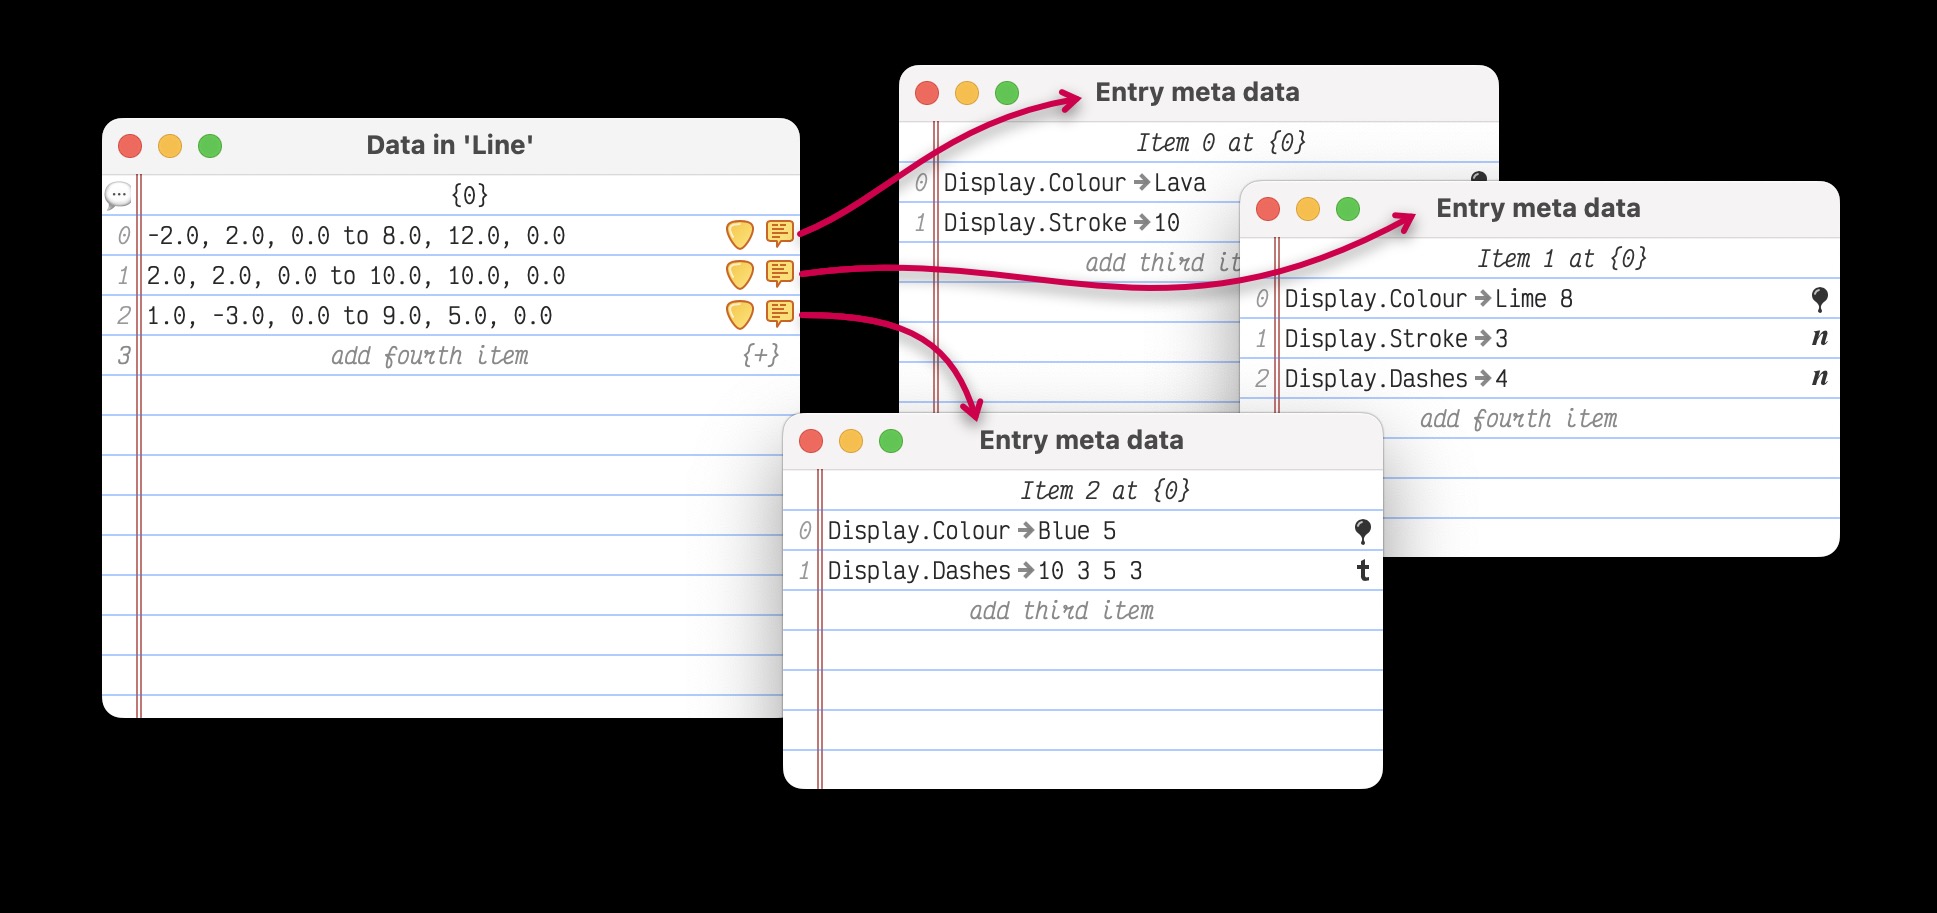
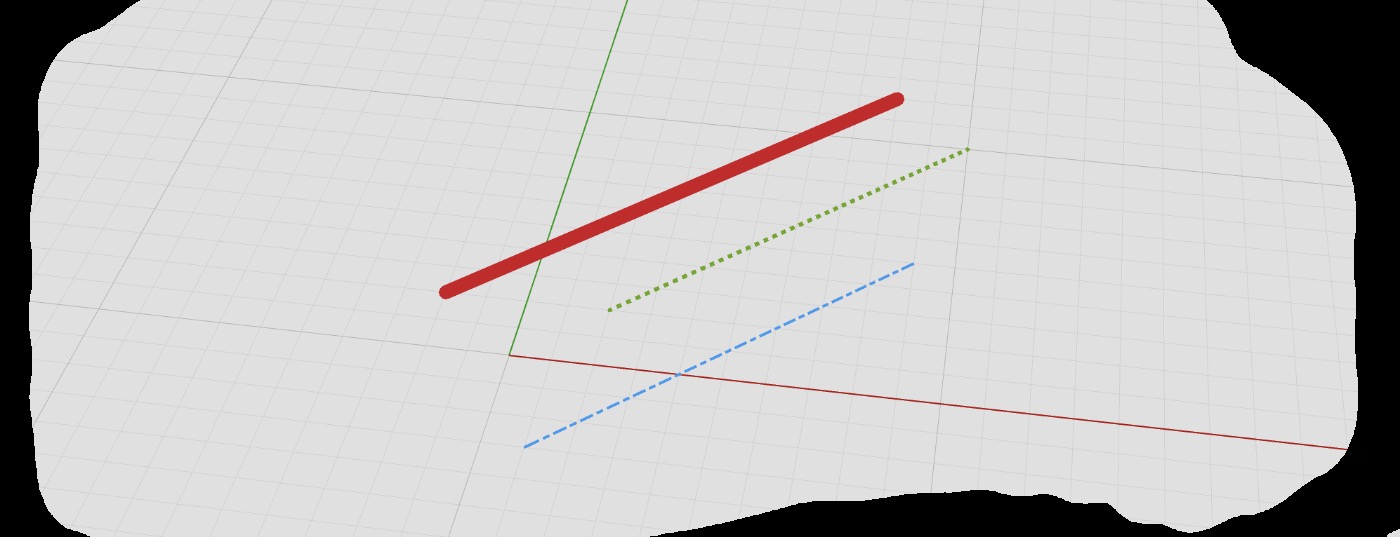
This meta data editor for persistent values behaves just like the strong and weak meta editor from the previous section; names and values for all desired meta entries must be manually typed. In the case of the example above, where the primary persistent data consisted of three line segments, the added persistent meta data caused those lines to be individually styled, as per Figure 12.
Meta Data Components
When meta values are not predetermined constants which can be entered by hand, then the previously discussed creation methods are unsuitable. In these cases, or in cases where the data is constant but can be computed from first principles, it makes more sense to leverage the computational capabilities of Grasshopper and create meta data using components.
There are three fundamental component for creating new meta data from names and primary data, outlined in Table ??.
| Description | Component |
|---|---|
| Create Meta Datum is used to create a single meta data entry by pairing up a meta name and a value. |  |
| Create Meta Data is very similar, but consumes a list of unique meta names and values to create meta data with multiple entries. |  |
| Meta From Inputs copies the names of the input parameters and pairs each input name up with the value provided to that input. |  |
It is important to realise that these components all create instances of the Grasshopper meta data format, but as primary data. I.e., these components output meta data bundles which haven't yet been assigned as meta data to primary values. This must happen subsequently using the Assign Meta Data component. Figures 13 and 14 show this process in action.
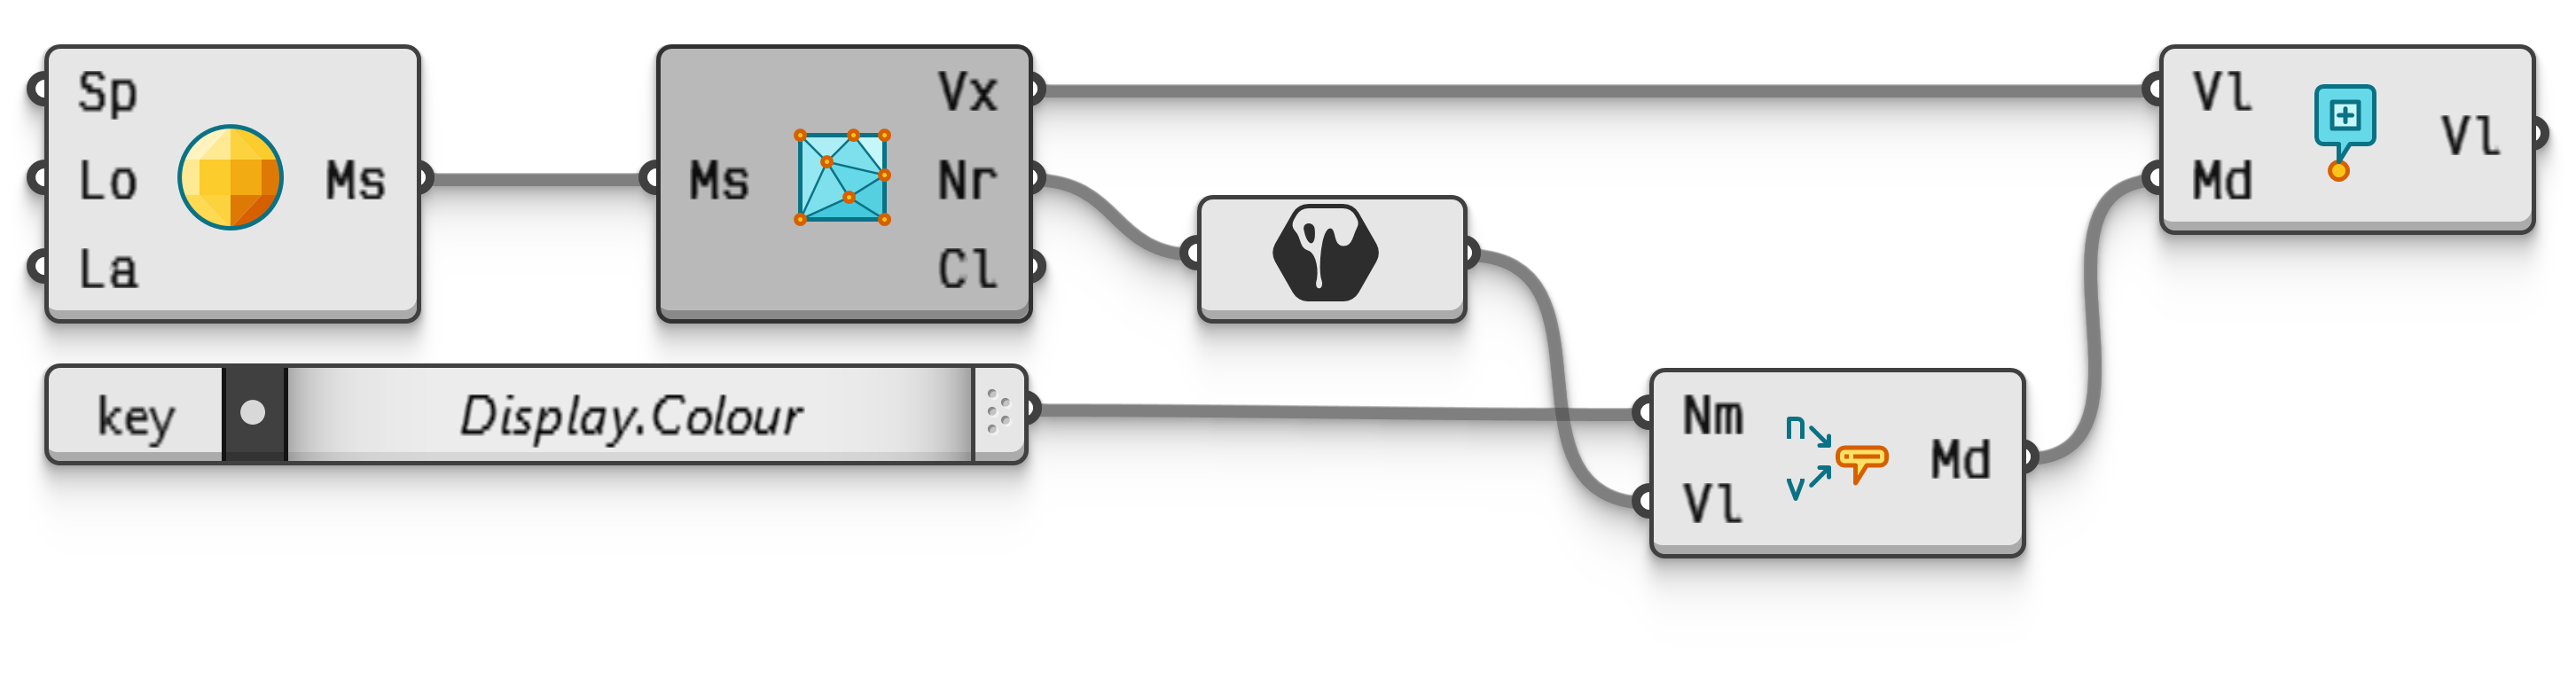 Interactive in Grasshopper 2
It is important to be able to create or promote meta data to primary data in order to modify or merge it. Grasshopper has no components for operating on the values stored in meta data, so any interaction requires that meta data is turned into primary data first.
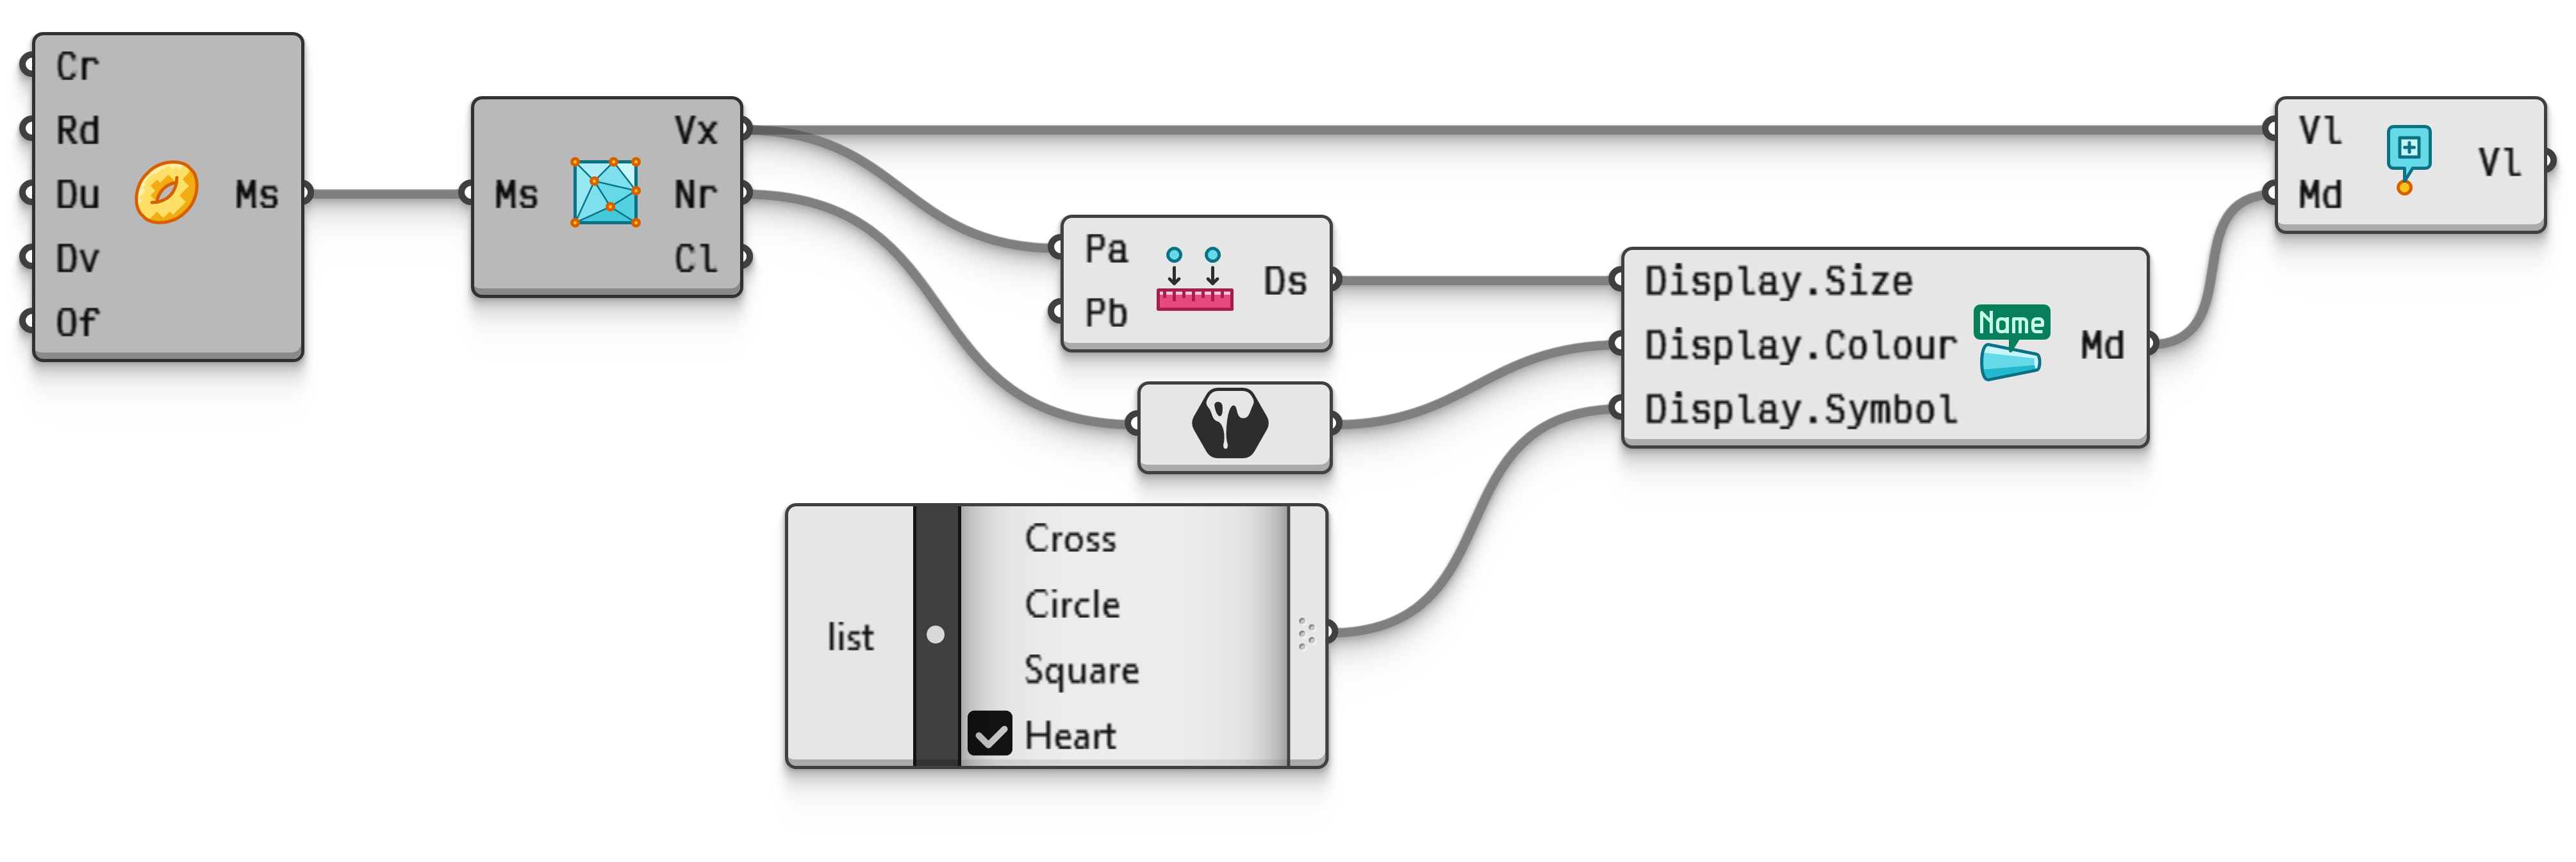 Interactive in Grasshopper 2
The many Assign✻ components in the Data.Meta dropdown panel combine the creation and assignment stage into one, allowing the user to assign one of the standard meta values directly to a primary value.