For
Drafting
Rhino 9's vast drafting toolset enables drafters to create 2D drawings that are visually appealing and convey technical detail and precision.
Rhino 9 transforms 2D drawing production by seamlessly linking precision floor plans, elevations, and sections to your 3D model, while shared Section Styles, symbols, and Markups streamline team workflow and keep designs coordinated throughout the project. And there’s more…
Technical Drawings: Dynamic drafting
Generate faithful 2D technical drawings from your 3D models! Place  ClippingSections
on the model where you need floor plans, elevations, and sections, then extract
 ClippingDrawings
directly in Rhino.
Non Rectangular Details
 Non Rectangular Details
are an important feature for drafters. Urban landscapes, consumer products or natural forms are often irregular in shape. Adapting a detail border to the design shape leads to better-fitting and visually appealing drawings.
Hatch: Make it, don’t fake it
Create your own  Hatch
patterns using Rhino 2D geometry! Use lines, arcs, circles, curves and create custom hatches for project-specific needs. You no longer have to depend on external libraries or be limited to existing *.pat files.

Section Styles: Save and reuse
For architects and designers who produce plans, sections, and elevations from their models, save your Section Styles and reuse on any object, layer, or clipping plane. Previously, every custom style was a one-off. Ten layers of concrete meant ten styles to edit. Now it is one.
One style named Concrete holds the hatch pattern, background fill, boundary linetype and color, and print colors. Change its hatch pattern scale and every section in the drawing set follows.
Complex Linetypes
Shapes and Text in Linetypes help architects and drafters turn complex drawing conventions into reusable line styles. Represent utilities, fences, wall types, and other repeated linework while keeping it connected to the curve.
Parallel Lines
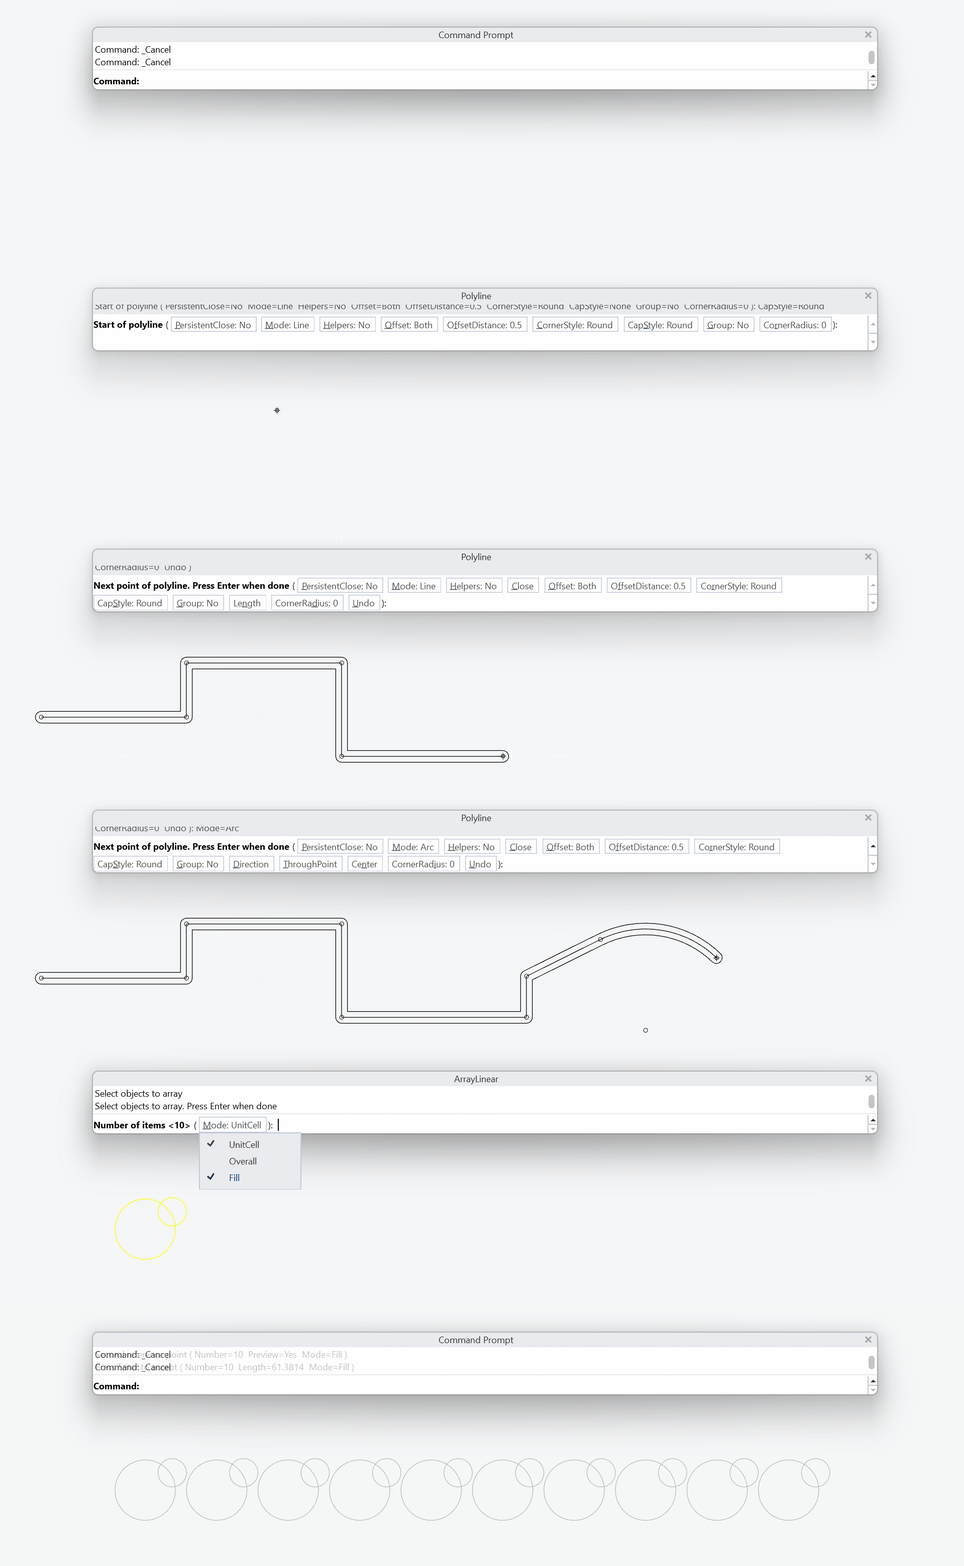
The new Offset option in the  Polyline
command enables parallel drafting. Architects and drafters can draw walls, pipes, streets, and other paired-line elements in one step.
Drafting Symbols
Drafting Symbols help architects and drafters create 2D drawings in Rhino with ready-made symbols for context, annotation, and drafting details. Using drafting symbols gives users a faster start, reduces repetitive drafting work, and helps keep drawings consistent across files and teams.
Geometric Dimensioning & Tolerancing
Create standards-compliant GD&T annotations for your engineering drawings. Rhino 9’s new  GeometricTolerance
annotation uses symbols in engineering drawings to communicate the acceptable variation in a part’s geometry for manufacturing.
Layout Groups: Organize your drawings
Organize complex drawing sets with precision. Layout Groups eliminate tedious naming conventions by intelligently grouping sheets by status, discipline, location, or any criterion. Streamline printing, exporting, and collaboration while cutting time spent searching through dozens of layouts.
Text is now richer
Get the best out of  Text
with new formatting options for tabs, numbered and bulleted lists, superscript and subscript. Add text masks to frame and highlight information. Create a closer visual connection between your text and drawings.
Black and White Switch: Turn off the lights
With a simple switch, your curves no longer disappear into your background! The new option automatically flips pure black or white curves and wires to the opposite color of the viewport background. Never lose a curve against a matching background.
Markup: Communication made easy
For architects and designers,  Markup
is an easy way to communicate with the design team directly on the model! Whether giving feedback on the 3D model or redlining 2D drawings, Markups are a great tool for collaboration.
Block Edit: Drill down
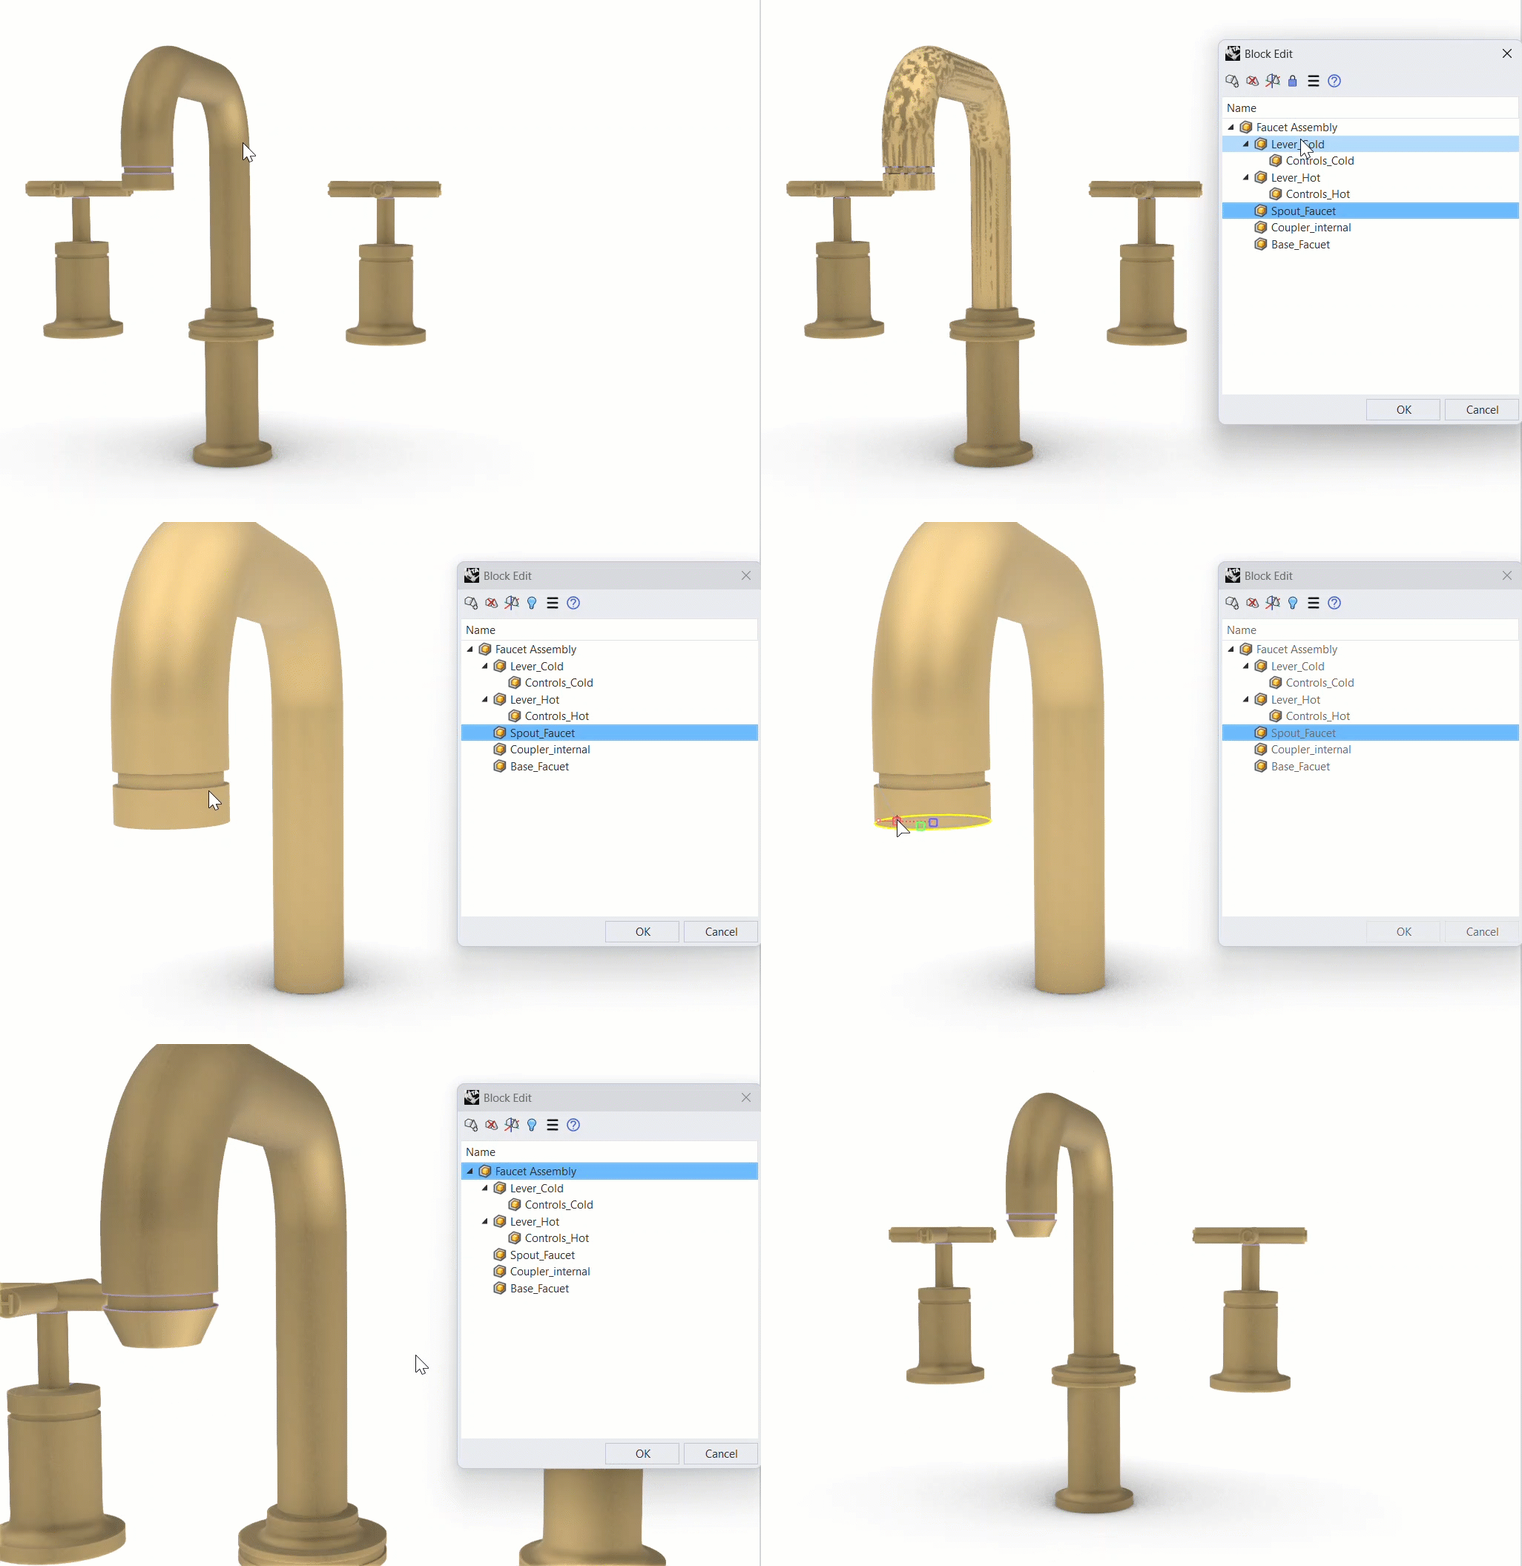
Editing blocks is now more precise and less disruptive. The refreshed  BlockEdit
workflow lets you isolate and edit nested geometry cleanly, even inside busy or non-uniformly scaled assemblies.
Overlap: Cleaning up
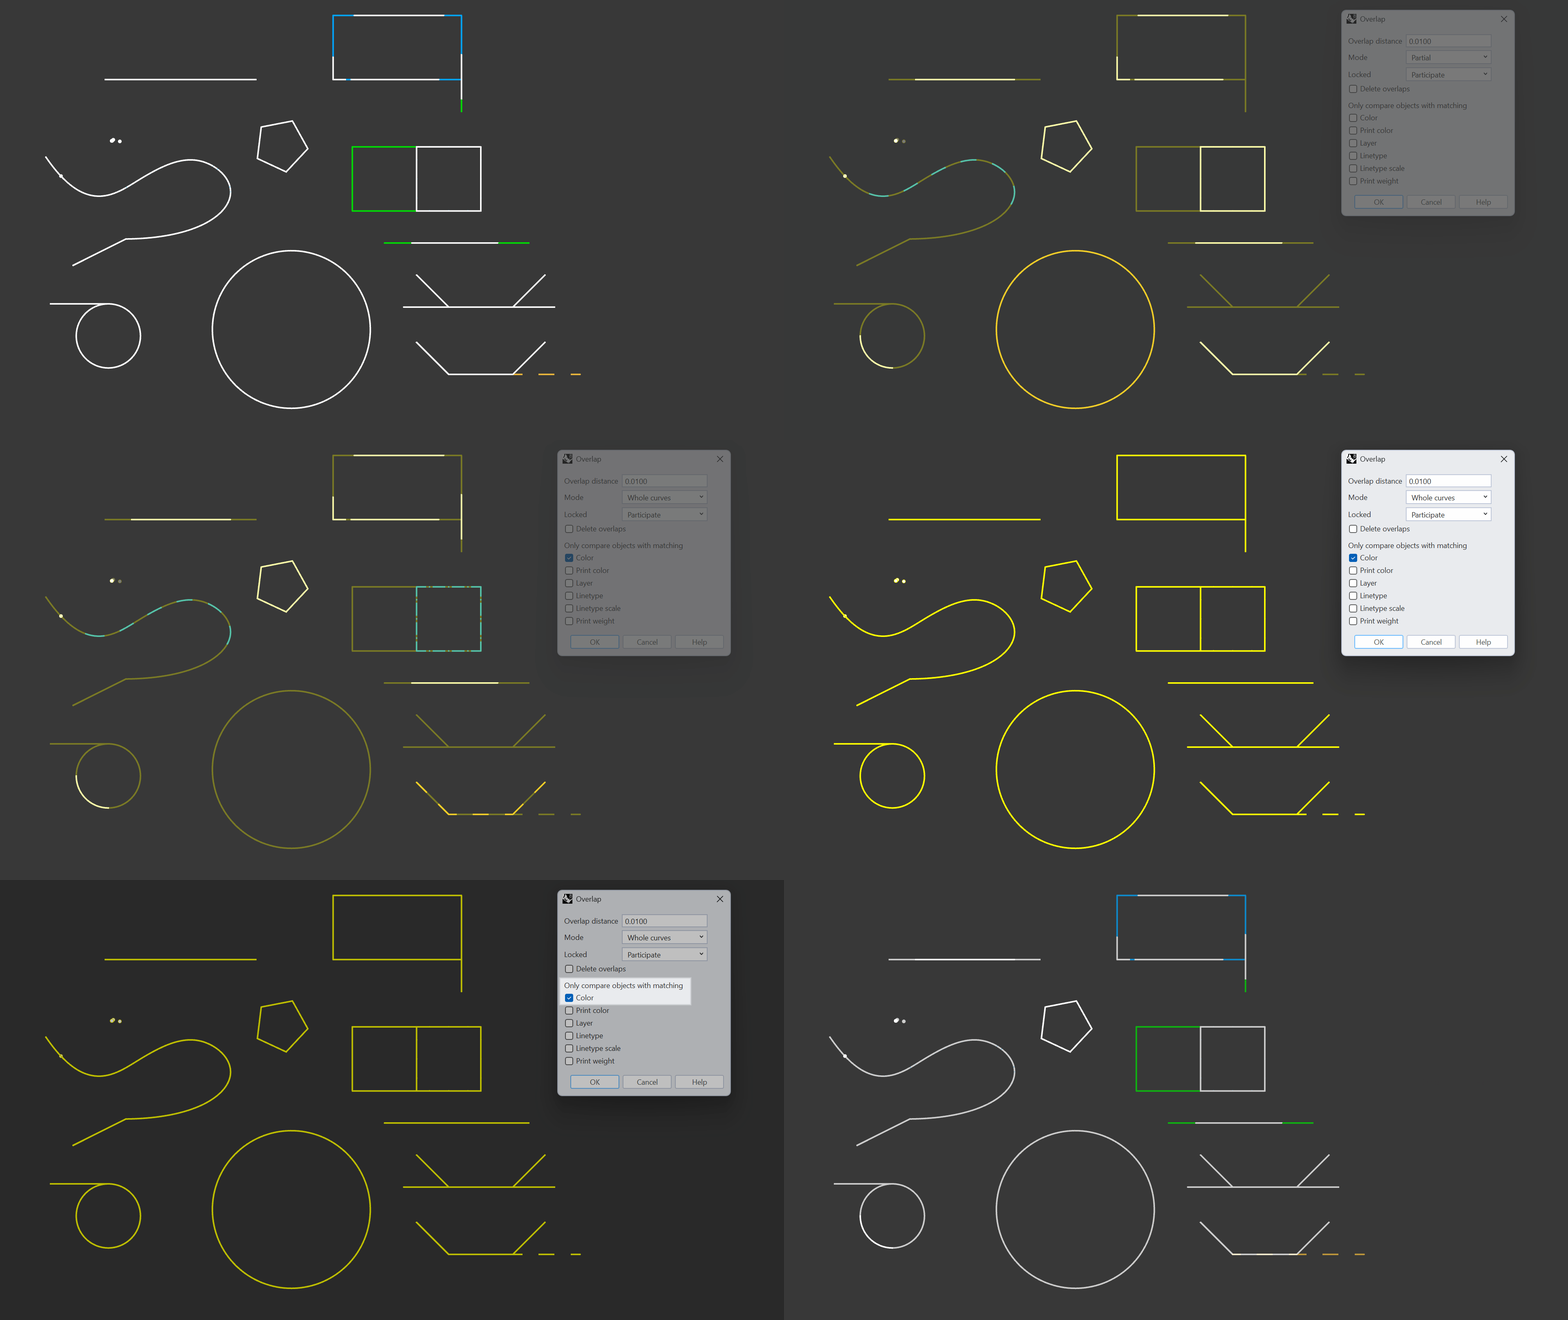
The new  Overlap
command helps you clean up messy 2D drawings by finding and selecting duplicate and overlapping linework within a user-defined distance. The command detects whole and partial overlaps as well as linework with different properties, making it easier to detect similar geometry as opposed to exact duplicates.
Use-Cases:
- Clean 2D drawings so you can more easily annotate, add hatches or change linetypes.
- Clean large/heavy files of unnecessary, near-duplicate geometry.
- Avoid issues with downstream operations selecting multiple or wrong geometry that can slow down your workflow.
- Improve toolpath creation (multiple passes over the same segment).
- Improve laser/plasma results (extra burn time, overcutting, inconsistent kerf).
Modeling Simplified
Rhino's model creation tools make it flexible, accurate, open, and very popular.
Rhino 8 adds new features to make modeling more playful and accessible. Combining these tools reduces friction for common solid creation/editing tasks. This allows you to stay in single Perspective view while modeling.
PushPull
PushPull simplifies and speeds up Solid Modeling by using curves to add or remove volumes from existing geometry.

Gumball
Quickly Move, Rotate, Scale, Copy, Cut, and Extrude geometry without typing commands or clicking a toolbar button. This makes the Gumball a versatile direct modeling tool for concept modeling interior and exterior architectural forms, certain furniture styles, SciFi models, and working with SubD objects.
Inset
Inset offsets edges inward on a mesh, SubD, or polysurface face: an easy way to make sub-faces that can be PushPulled to define a concept in a few clicks.
Auto CPlanes: Keep Your Perspective
Smarter CPlanes automatically align to eligible selections. It’s now easier to place and edit geometry in the right orientation, without having to cycle through multiple views.

Patterning
Rhino 9 includes a rich toolset for recreating uniform or gradient patterns in 2D or 3D.
Designing for production often means repeating the same element many times, precisely, and without doing it by hand. Rhino 9 gives designers and production teams the tools to array, scale, and map geometry across curves and surfaces, so patterns stay consistent, natural, and fully under your control.
ArrayCrv
 ArrayCrv
makes it easy to distribute and align objects along any curve, with interactive control over spacing, scale, orientation, and repetition. Industrial designers can quickly create patterns for products like speaker grilles, footwear, tire treads, or textured surface finishes, while automatically adapting objects to the shape of the geometry.
ScaleEach
Designers often include repeated elements or patterns in their work. Make your designs more realistic and visually appealing by applying a fade-in size using  ScaleEach
. No Grasshopper or coding required!
ShapeMap
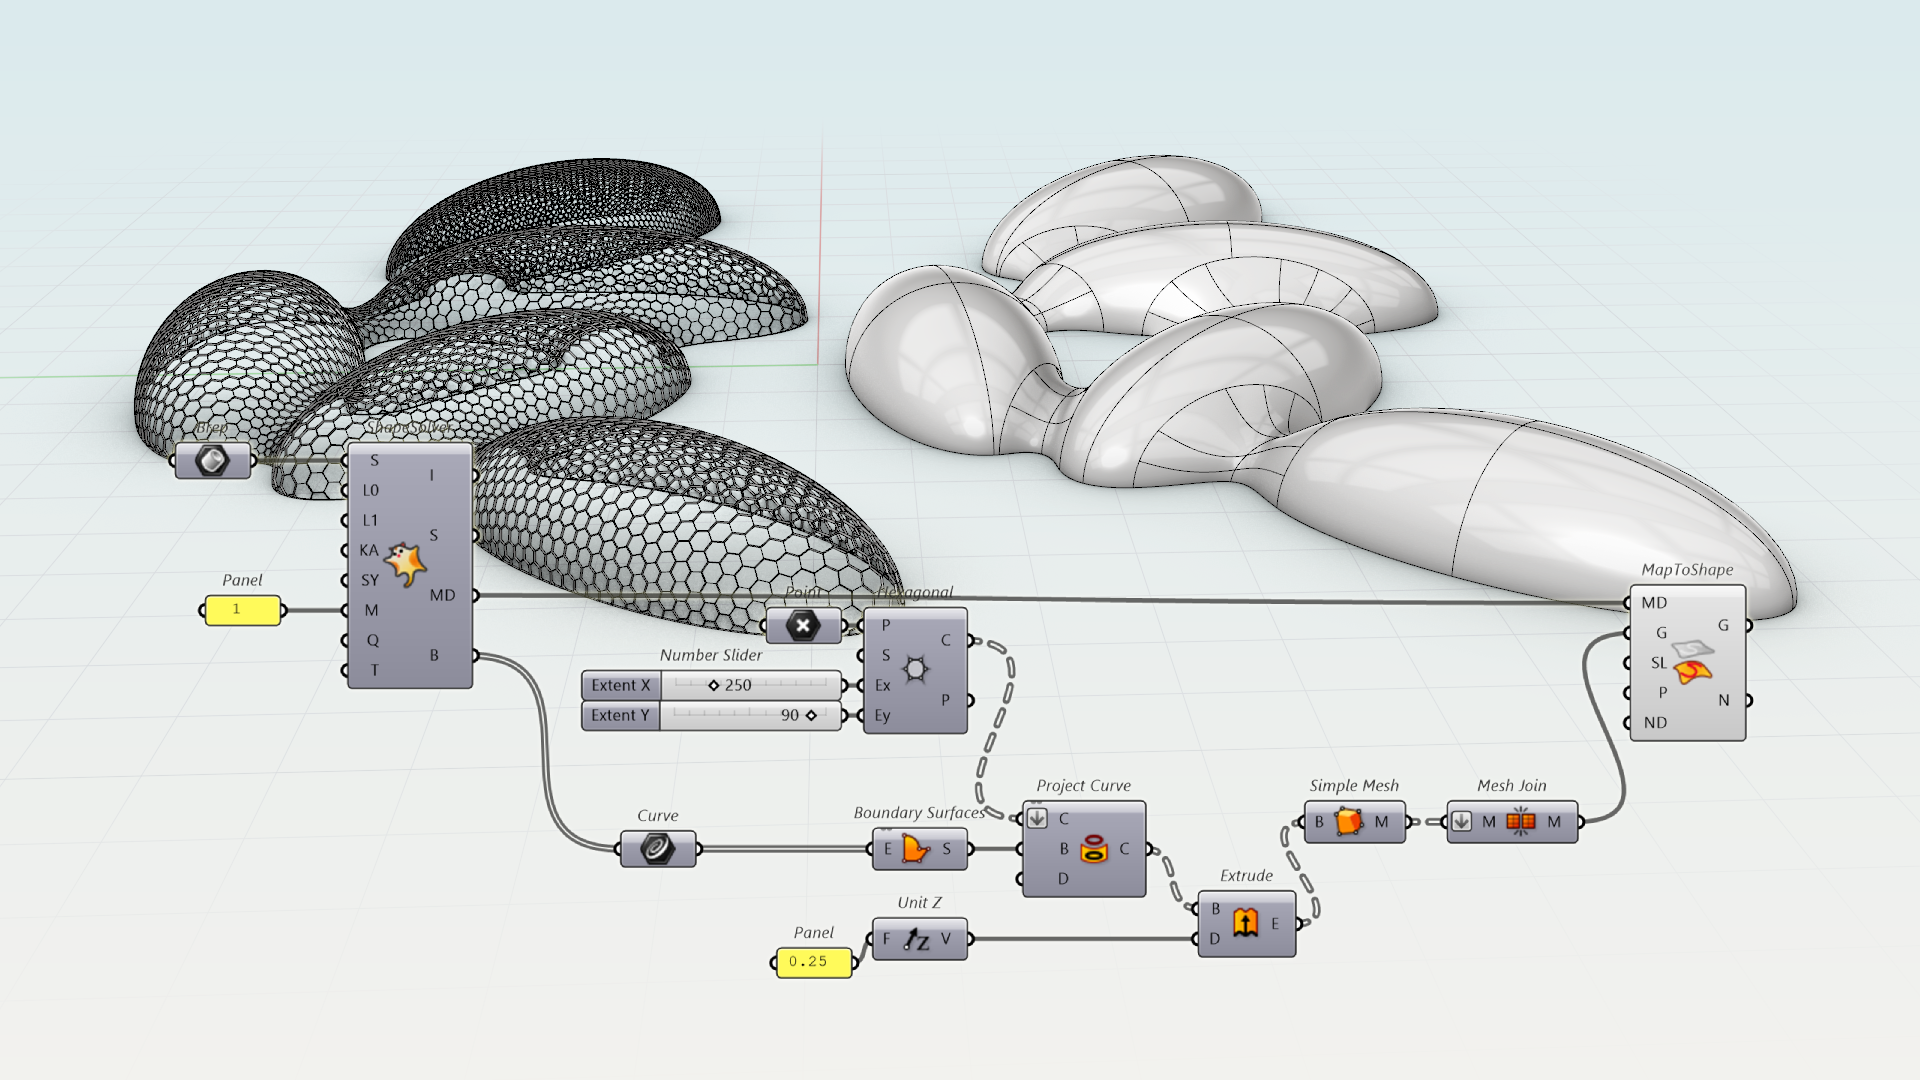
ShapeMap is a Grasshopper add-on that maps 2D curves or image-based textures onto a complex 3D shape with minimal distortion. This makes texture design on models intuitive and efficient. Great for jewelers, industrial, and footwear designers who need to wrap and adjust textures and patterns on their designs, without the complexities of long-winded parametric definitions.
User: Interface & Experience

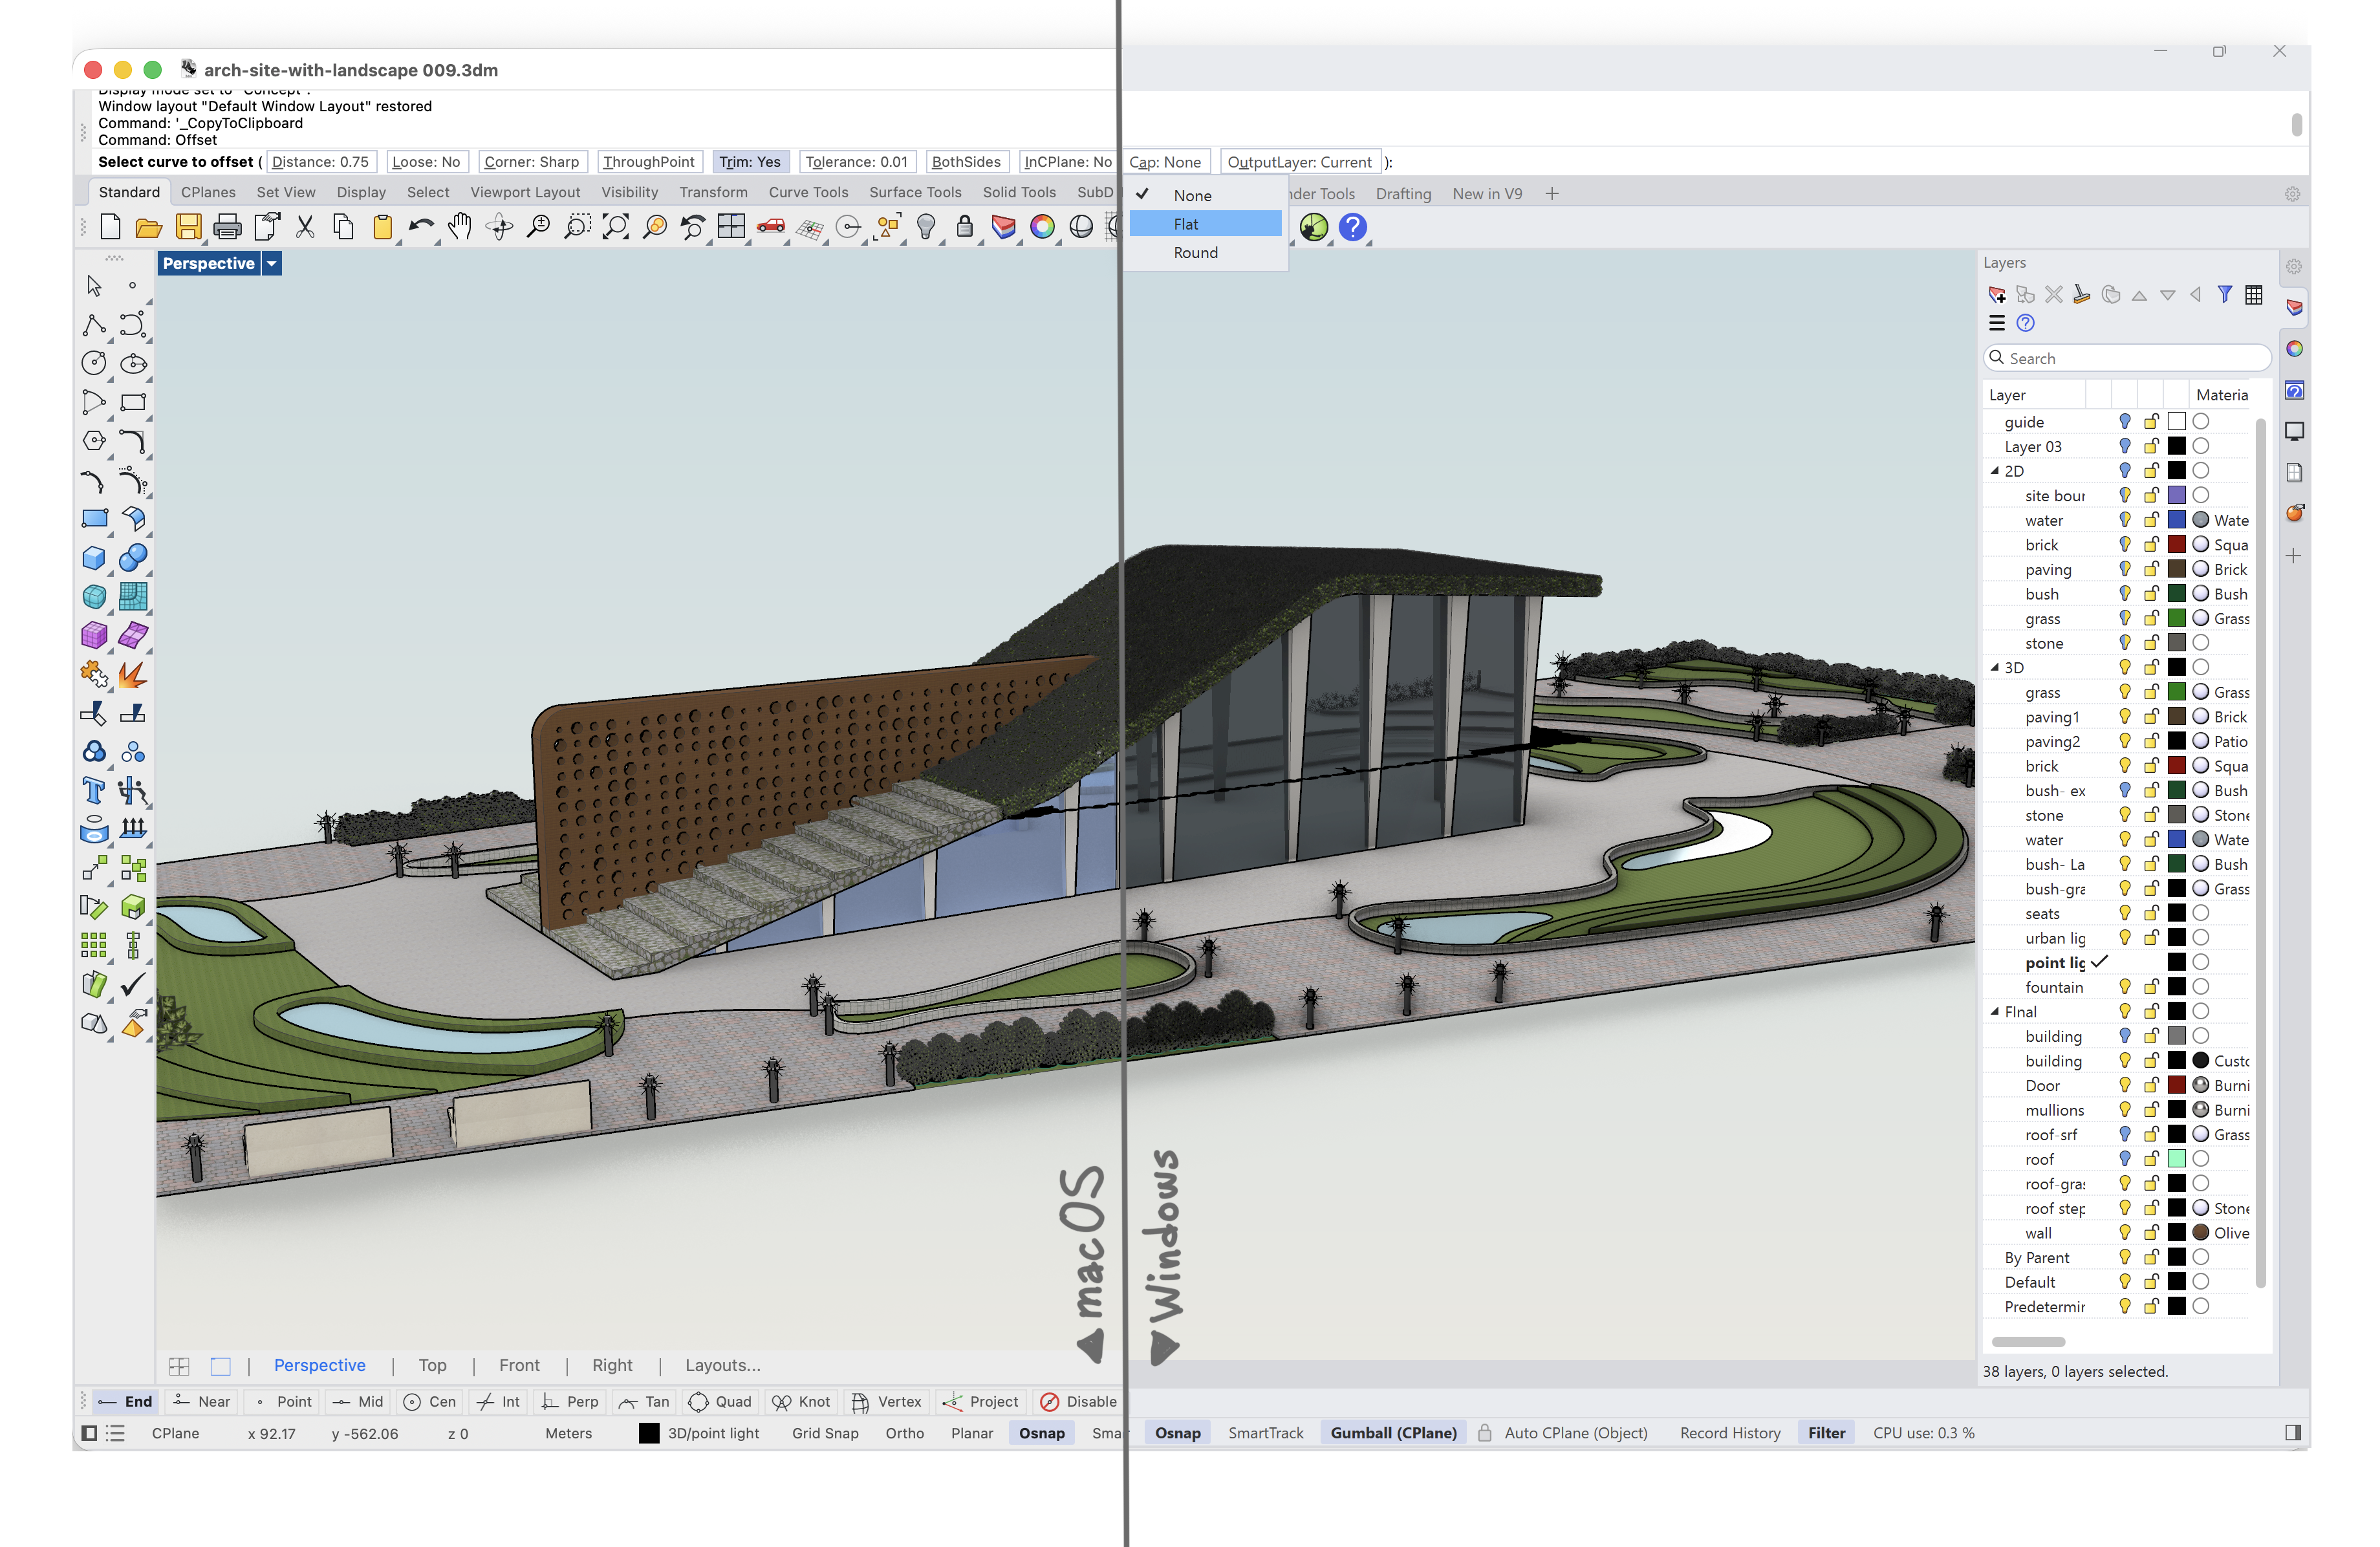
It takes a lot of thought process to granularly improve the look and feel of an existing interface, without disturbing users’ experience of a software. Rhino 9 takes a stab at it with a series of small and big improvements that integrate ergonomics, provide flexibility and customization options to cater for existing and new users.
Icon Redesign
Open Rhino 9 and you’ll immediately notice a clearer, smarter, and more intuitive interface, led by redesigned toolbar icons that improve usability. While Rhino’s versatility puts hundreds of commands at your fingertips, this update helps make them easier to navigate and learn.
UI: Global Changes
Reaching cross-platform parity should be the main headline here, yet there is so much more. Learn about the new command line, the menu with icons and many other goodies sprinkled around the UI to make your life easier.
Instant Aliases
Instant aliases enable users to run Rhino shortcuts as a single keystroke without pressing Enter. Try Instant aliases for your most common commands and streamline your modeling process!
Toolbars
For workspace perfectionists, toolbars are how you customize the buttons and commands in your interface. In Rhino 9, editing, saving, and sharing that setup is faster and far more reliable.
Options Migrate
 OptionsMigrate
makes transferring Rhino Settings a piece of cake! Share custom workspaces between computers, across teams, or in a classroom environment in a few clicks. Import your settings from a previous version to Rhino 9 or between your Rhino 9 installs.
Presentation & Visualization
Use Rhino to communicate, getting buy-in from clients, customers, and collaborators.
Presentation
Presentation is key: during nearly every phase of design, you need to communicate, getting "buy-in" from clients, customers, collaborators. Rhino 9 responds. Read on…
Concept Display Modes
Quickly communicate early-stage designs with a presentation-ready look straight from your 3D model.
Markup
For architects and designers, Markup
is an easy way to communicate with the design team directly on the model! Whether giving feedback on the 3D model or redlining 2D drawings, Markups are a great tool for collaboration.
Visualization
Try the Rhino 9 features that give you that additional level of control to make your renders look like the actual product.
Caustics & Dispersion
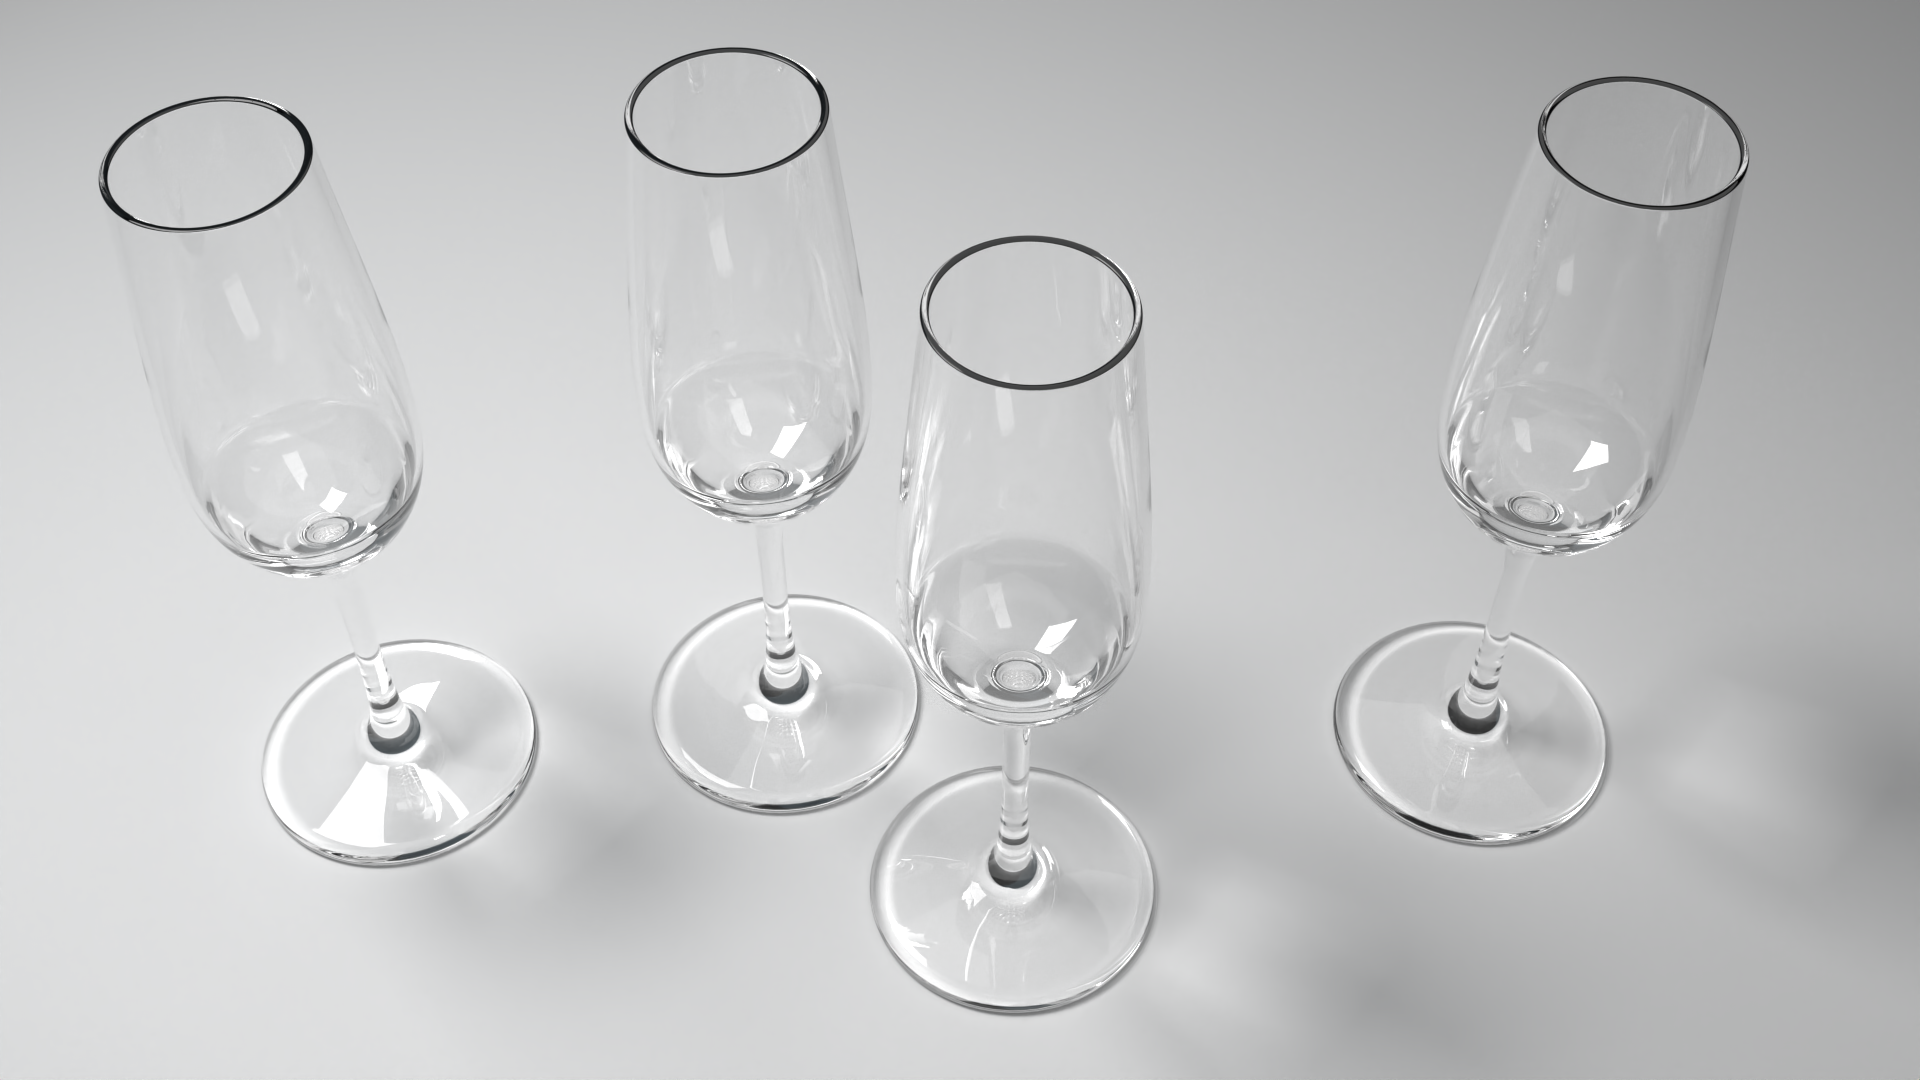
Capture the bright light patterns cast by glass, liquids, and polished surfaces with Caustics. Rhino now simulates light as it is focused through transparent objects and off reflective ones, so a wine glass, perfume bottle, or watch crystal casts realistic highlights onto the surrounding surfaces.
Decals
Bring your products to life by applying Decals in Rhino! In Rhino 9, you can add reflectiveness, textures, and bump maps to your decals.
Display Transparency
Rendered Mode is Rhino’s quick photorealistic display mode. It simulates a view of your scene that includes lighting and materials without the time-consuming calculations of the realtime render engine . Perfect for getting a sneak peek while continuing your modeling work!
Gem Materials
Give your jewelry more sparkle with new stock gemstone materials!. In Rhino 9, more preset gemstones are ready to drop onto your models, with no material setup needed.
Documentation
Communicate how to build your model.
Modeling is just one part of the design process; you also need to show how to build what is on the screen. We’ve refined many parts of the documentation workflow, from a completely reworked annotation-style interface, to better DWG support, and RichText throughout. Rhino makes it easy to convey accurately and clearly the what and the how of your design.
Grasshopper
The world's most beautiful programming language.

Grasshopper in Rhino 9 adds new workflows to your visual programming flow. Control your visualization and documentation chain parametrically. Connect Rhino to the canvas, and vice versa, using the new widgetry to bridge the gap between the two environments. Oh, and patterning made easy. Read on…
Render Materials
The new  Material
components make it possible to create and edit materials directly in
 Grasshopper
. Seeing a material in its entirety on the canvas can make it easier to understand and edit. The cherry? Obtain multiple material variants from a single definition!
Textures
Single Source & Endless Variables! Create multiple variants from a single texture definition. Modify certain settings while keeping other parameters the same and get multiple textures that can be applied to different objects. Keep your definitions clean and tidy.
Texture Mapping
Texture mapping adjustments in Grasshopper
can be varied automatically to reduce or remove the need for manual editing. This can be especially useful for repetitive elements that should visually be distinct from one another in the model. Vary the mapping of multiple objects using a single definition!
Hatch Patterns
Save time, maintain consistency, and keep your drawings flexible. Your hatches update automatically as your Grasshopper
model evolves. No manual rework needed.
Clip & Section
Grasshopper
now speaks Rhino’s drafting language: clipping planes, sections, and 2D drawings are now native, parametric objects. Place and drive real Rhino clipping planes parametrically, control exactly which objects and layers they clip.
ShapeMap
ShapeMap is a Grasshopper add-on that maps 2D curves or image-based textures onto a complex 3D shape with minimal distortion. This makes texture design on models intuitive and efficient. Great for jewelers, industrial, and footwear designers who need to wrap and adjust textures and patterns on their designs, without the complexities of long-winded parametric definitions.
Viewport Widgets

With the Interactive Viewport Widgets use any curve to control your Grasshopper
definitions in any
Rhino Viewport
. Enable more intuitive visual workflows that are easier to use and share, especially with non-expert users.
Content Viewer
Visualize almost any type of Grasshopper content on the canvas! The Content Viewer lets you inspect both geometry and non-geometry data without leaving your definition.
Value Picker
The new Value Picker component helps Grasshopper
users find, select, and filter values from long or variable lists. It supports single and multiple selection, making it easier to work with complex datasets and dynamic inputs in a more efficient and readable way.
Grasshopper 2
Hop onto the next level of Visual Programming
Two different beasts
Grasshoppers 1 and 2 ship side by side in Rhino 9. GH1 is mature, with a large plug-in ecosystem and years’ worth of accumulated files and workflows, and still receives new features and fixes. GH2 is newer and has fewer plug-ins, but includes metadata, looping, globals and mathematical improvements as native features. GH2 can open GH1 files, and generally either host or upgrade the components in those files.
Following are some of the key new features of GH2.
Metadata
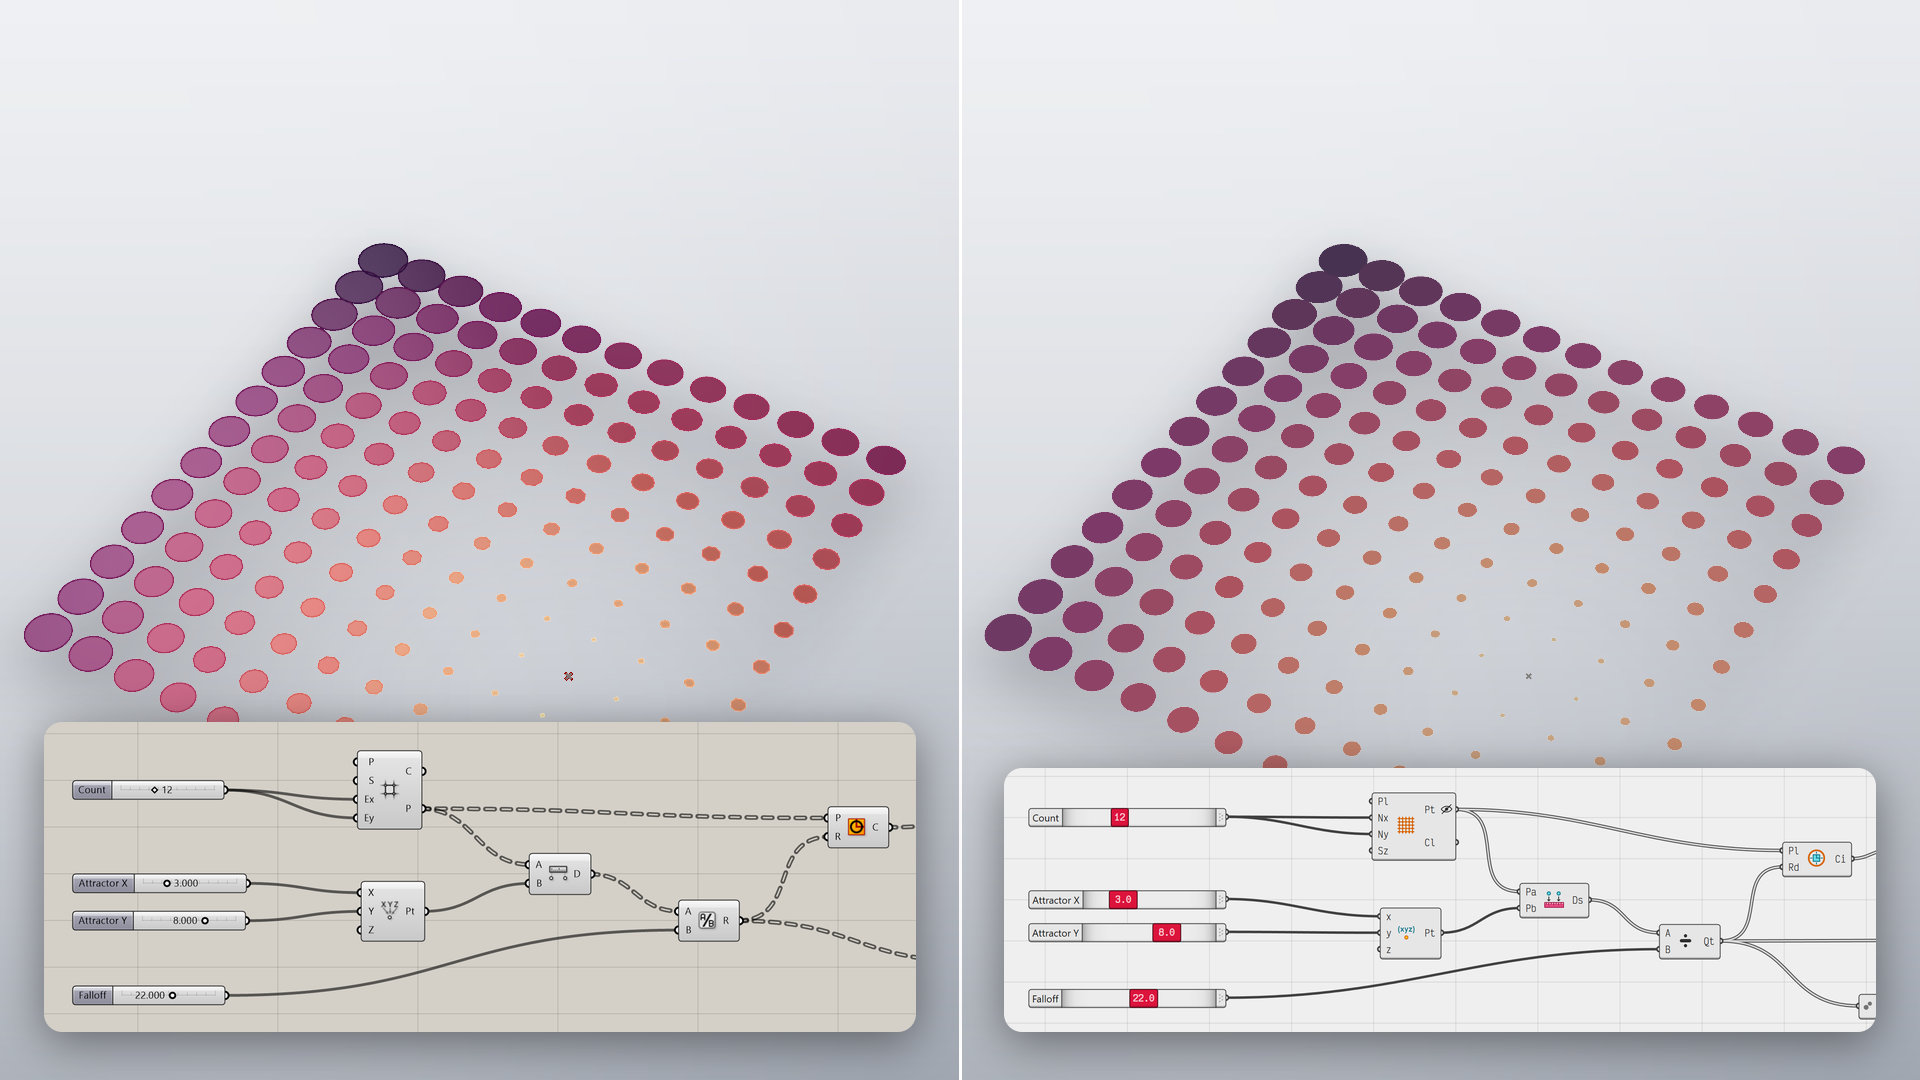
Metadata lets any value carry its own information, such as a zone, a material, or a layer name, without the need for separate wires or parallel bookkeeping. Metadata can be visualized in the Rhino viewports using custom display rules, which can assign properties like colors or dash patterns to shapes with metadata. Baking is now metadata-aware; the relevant object attributes, such as layer or name, will be assigned to the shapes sent to the Rhino document.

Performance
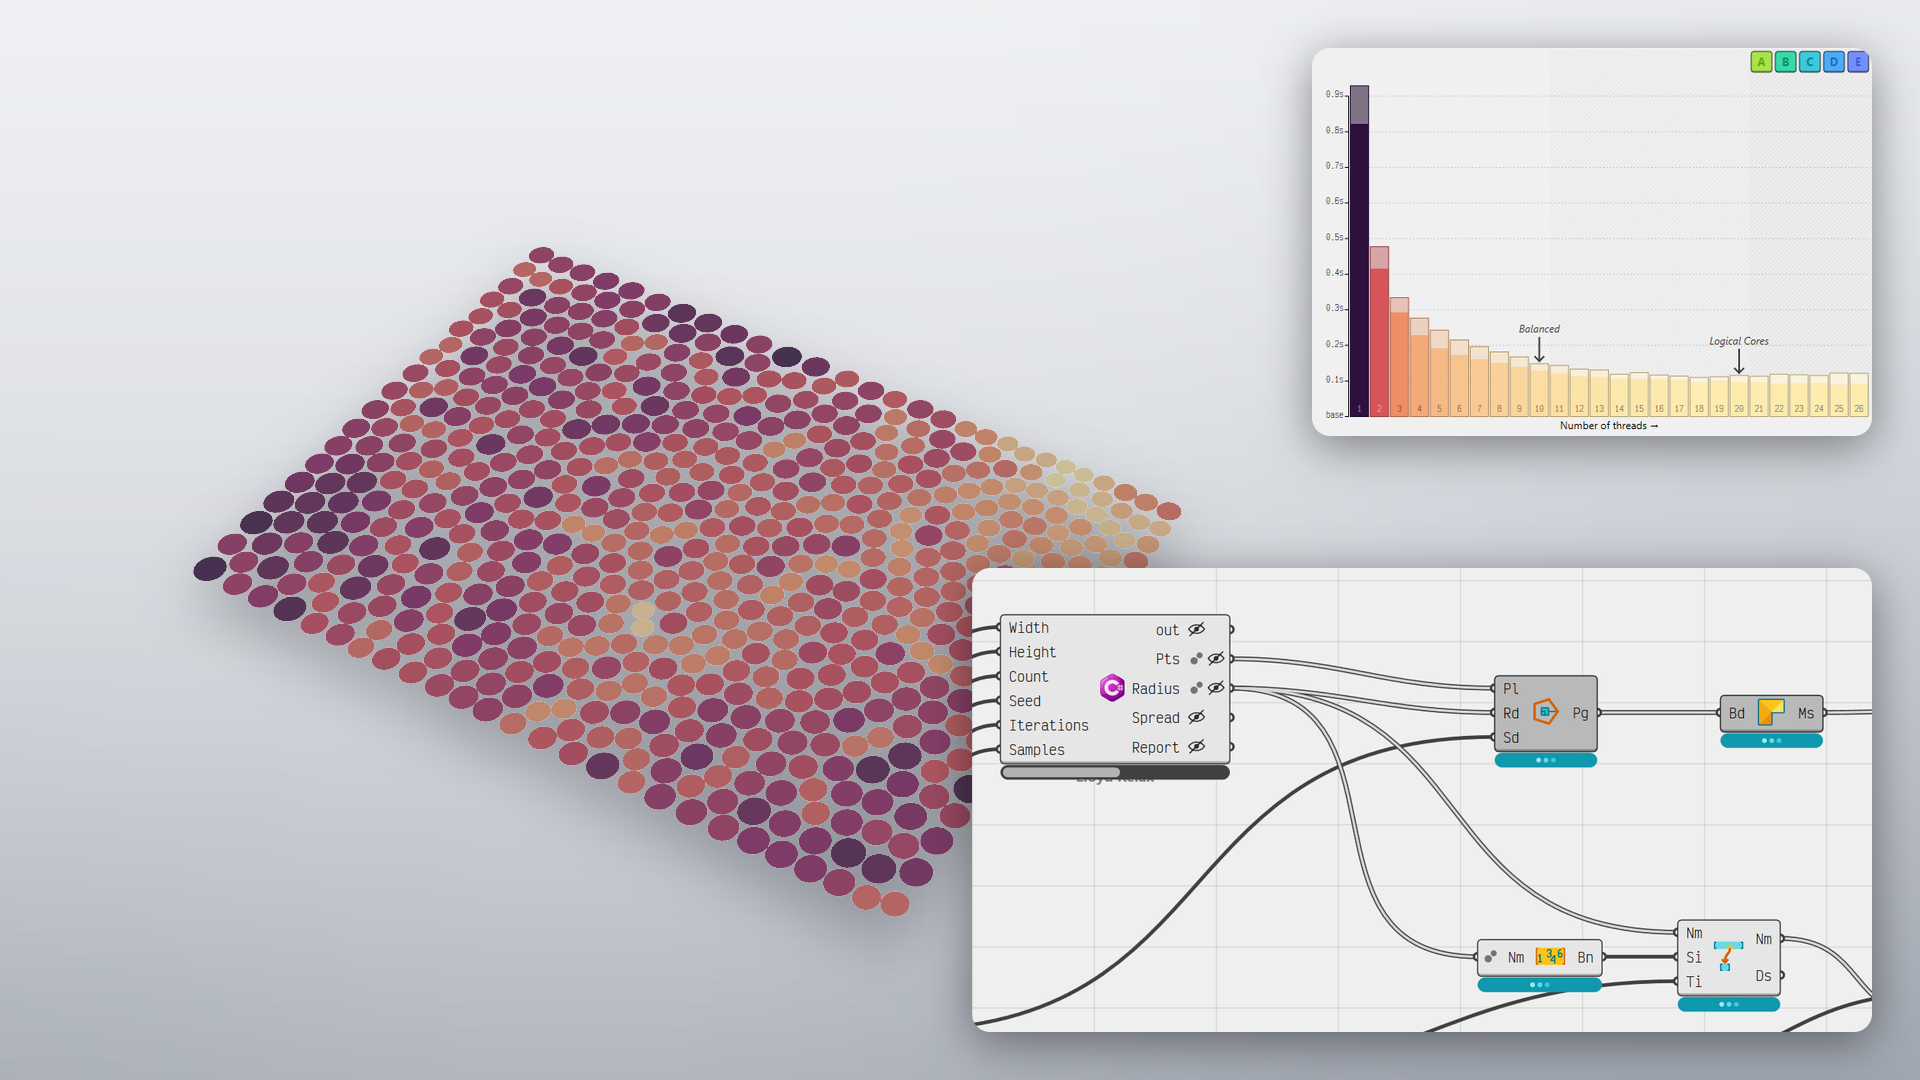
Component iterations run in parallel across all available cores, resulting in faster solutions. GH2 has much better cancellation support and keeps the interface live while computations are happening in the background.
Documentation
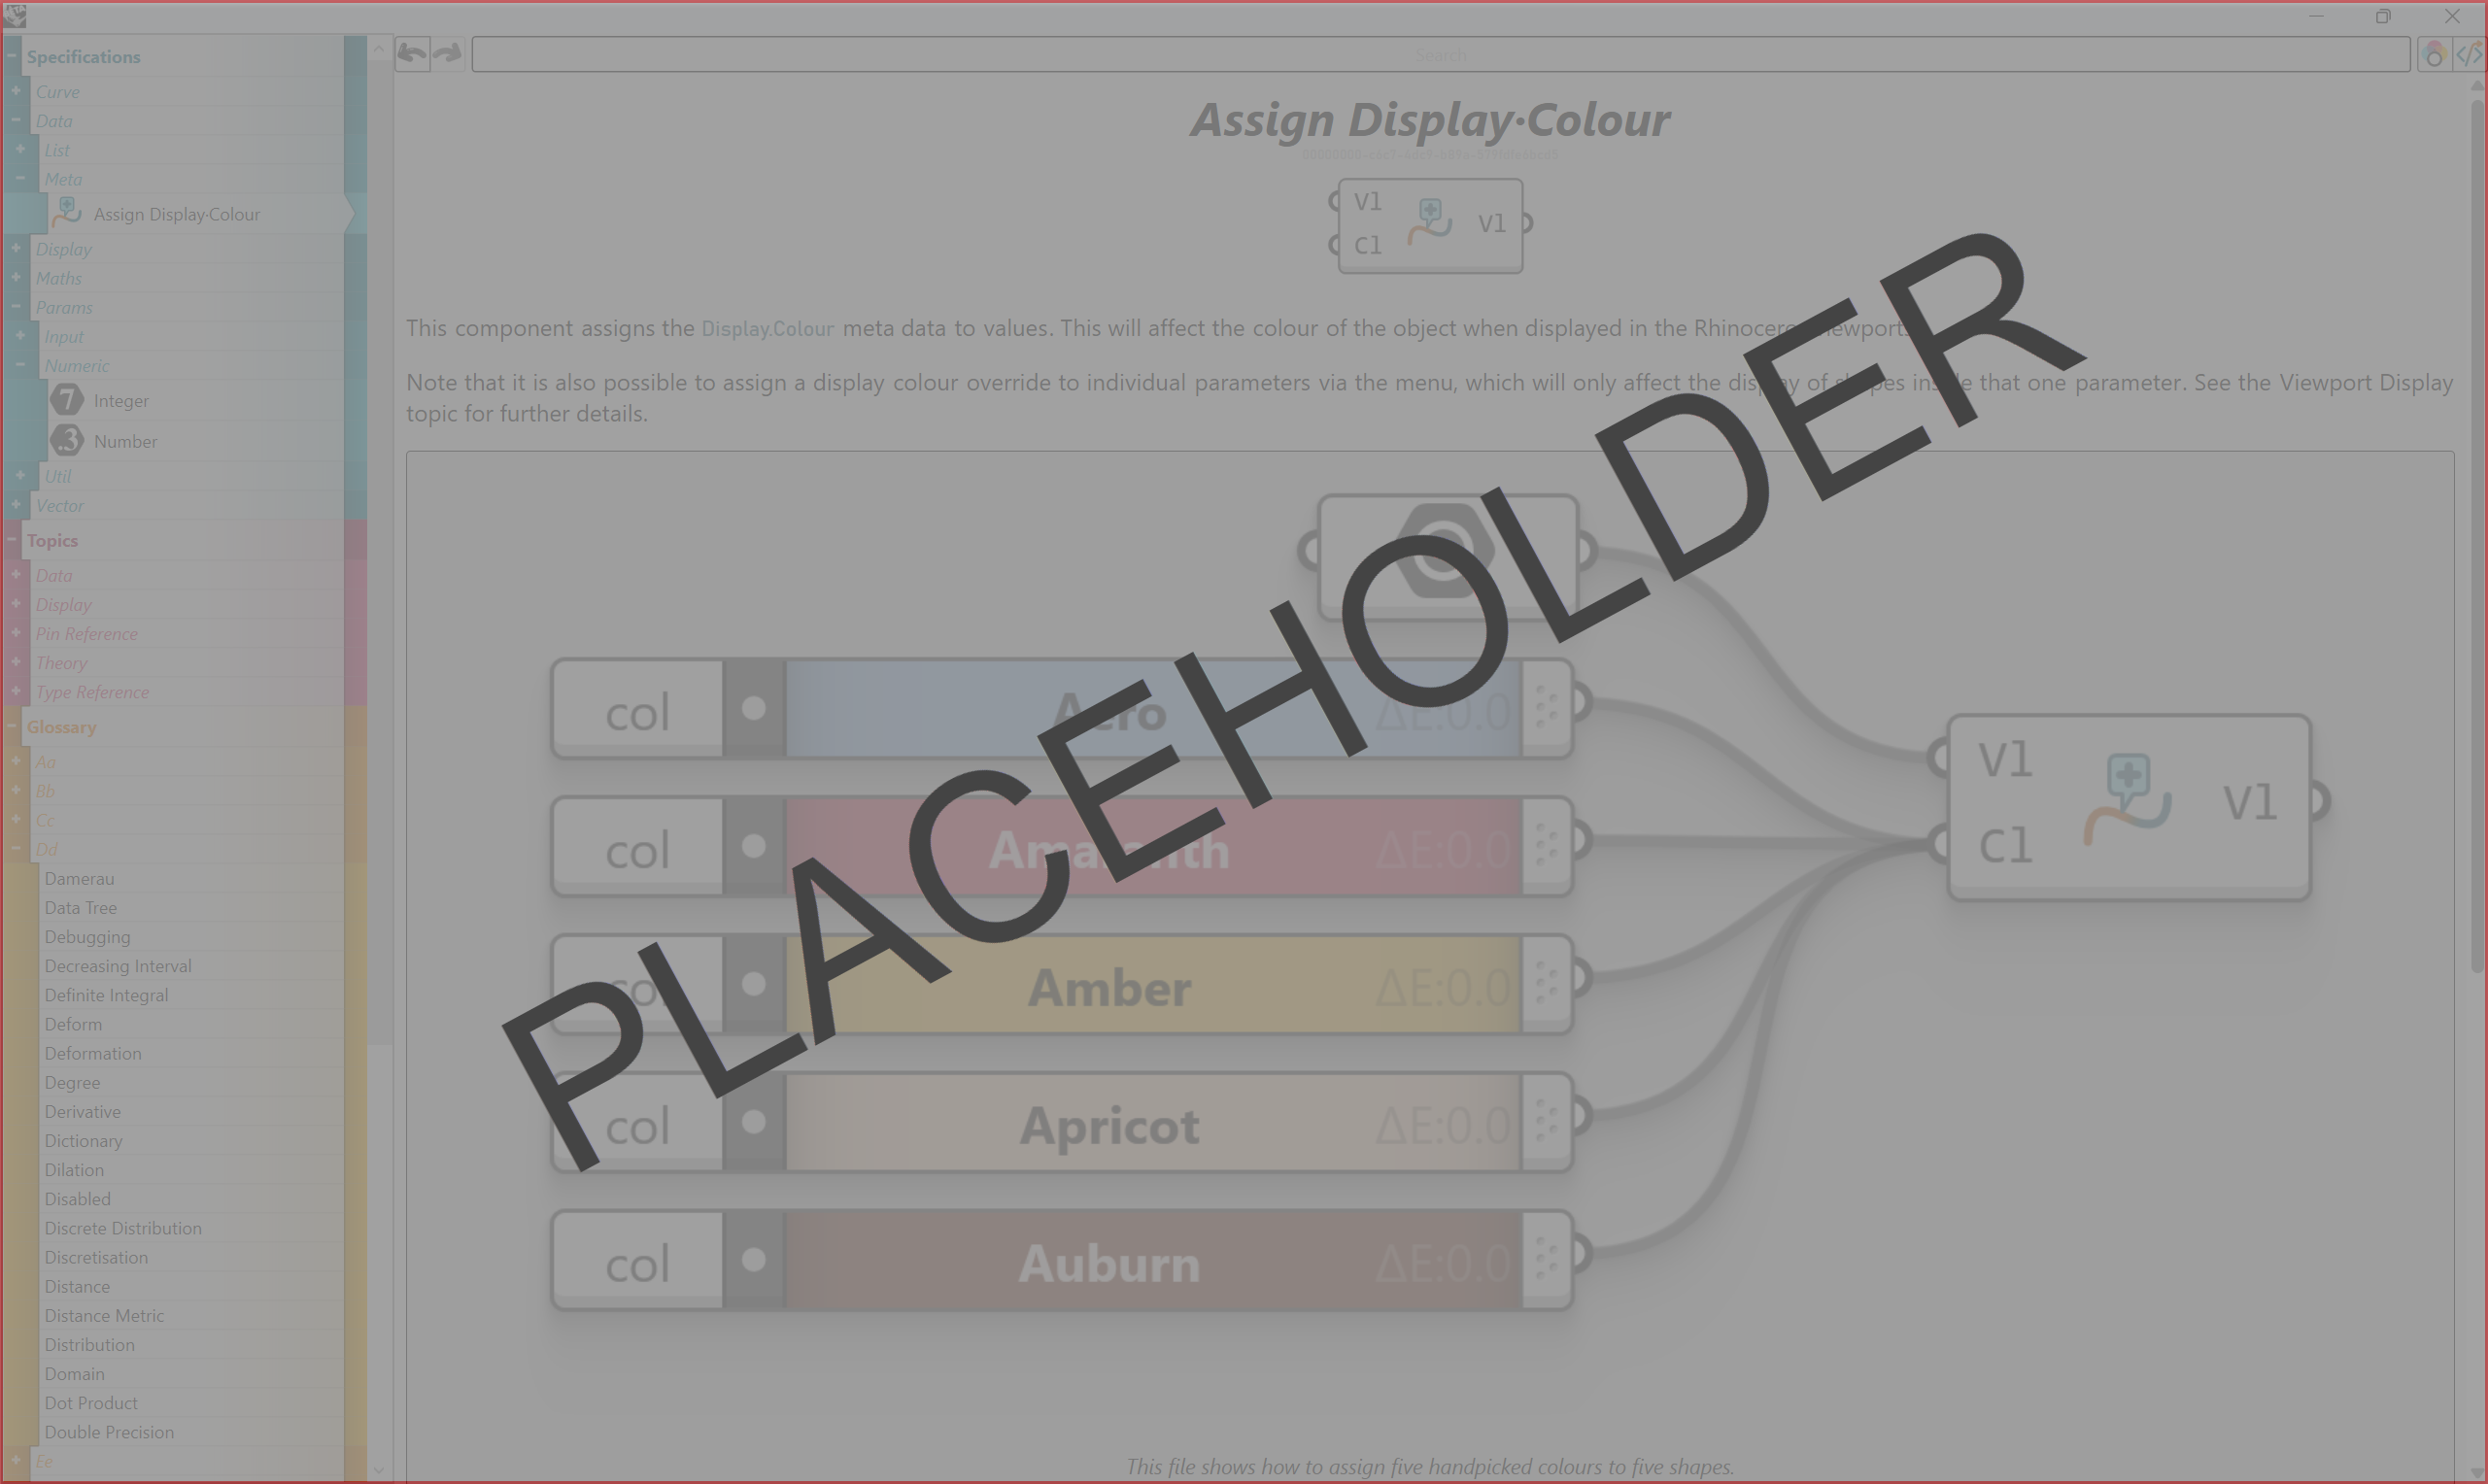
Help images show actual example files, which can be opened by dragging the image onto the GH canvas. We aim to provide example files for every component which ships with GH2, as well as a glossary entry for every technical term used. GH2 provides documentation tools, allowing plug-in developers to seamlessly fold their own content into the help system.
Mathematics
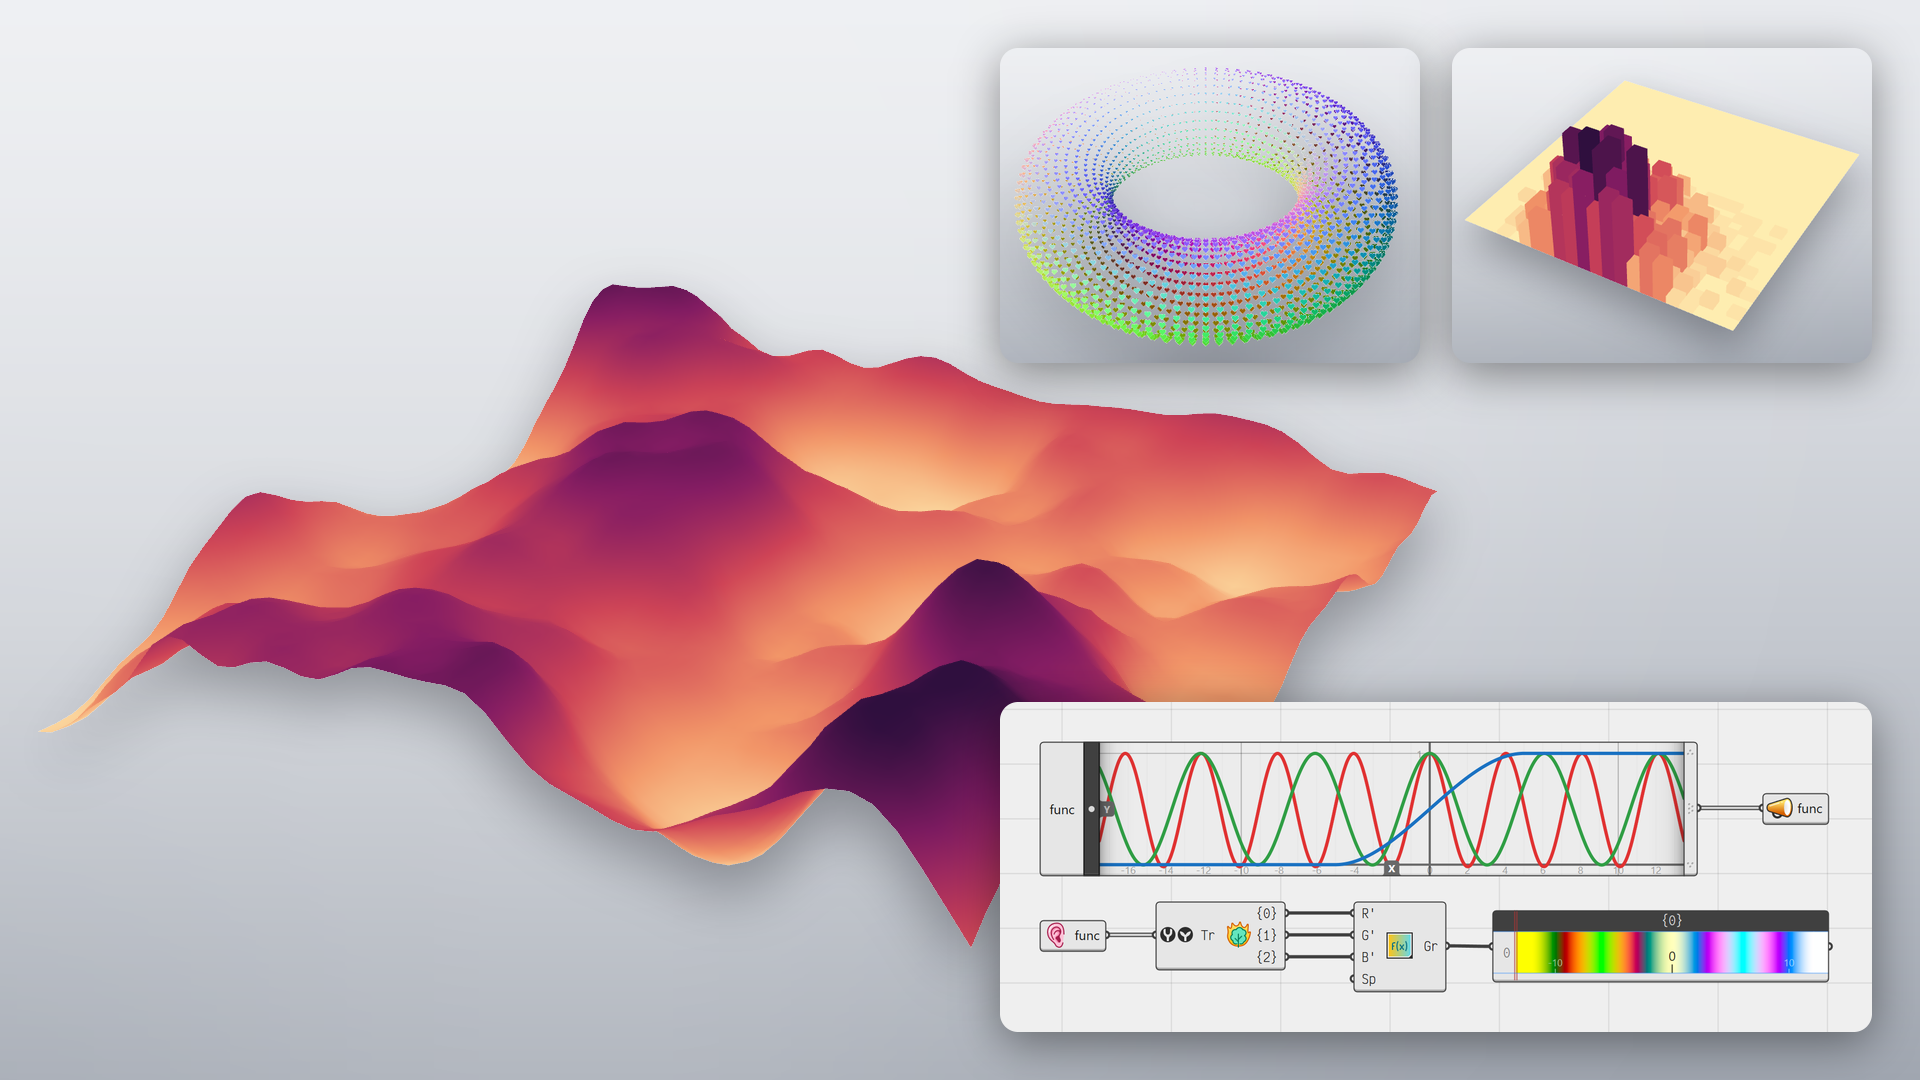
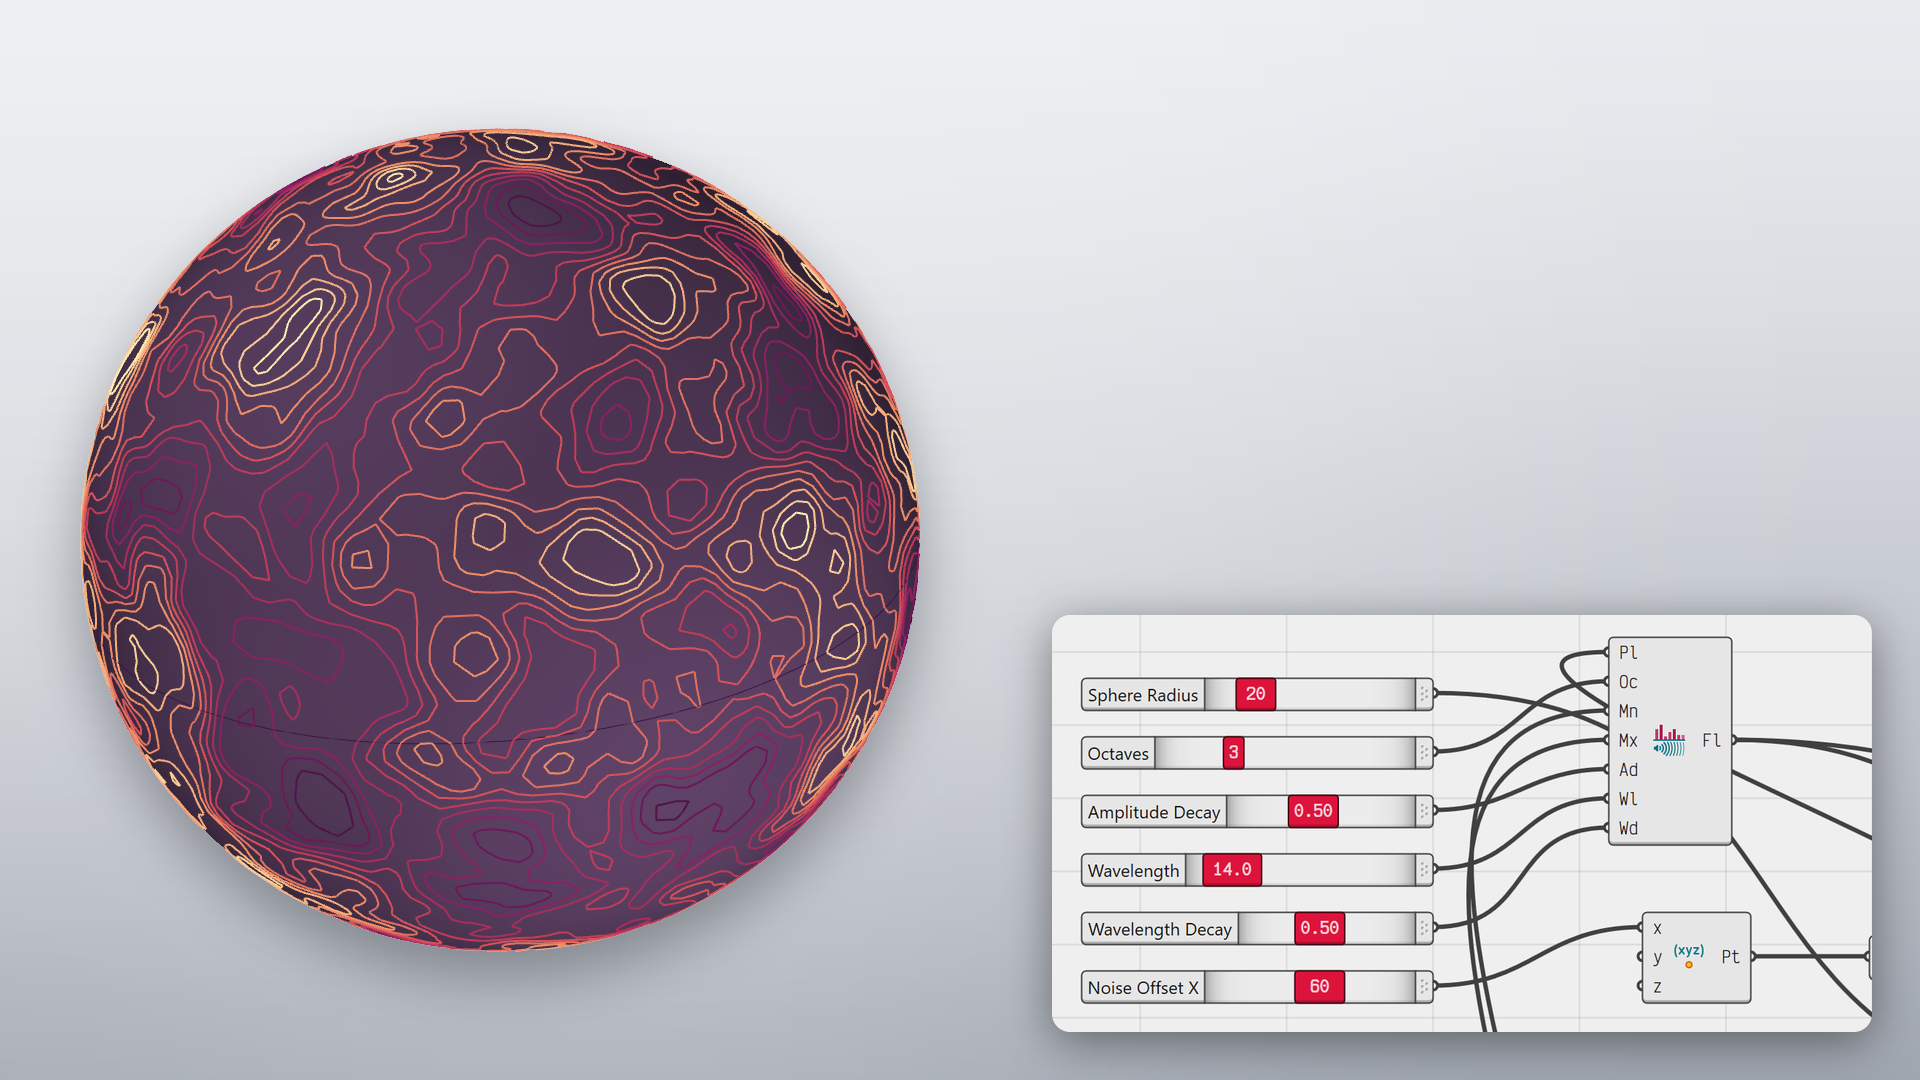
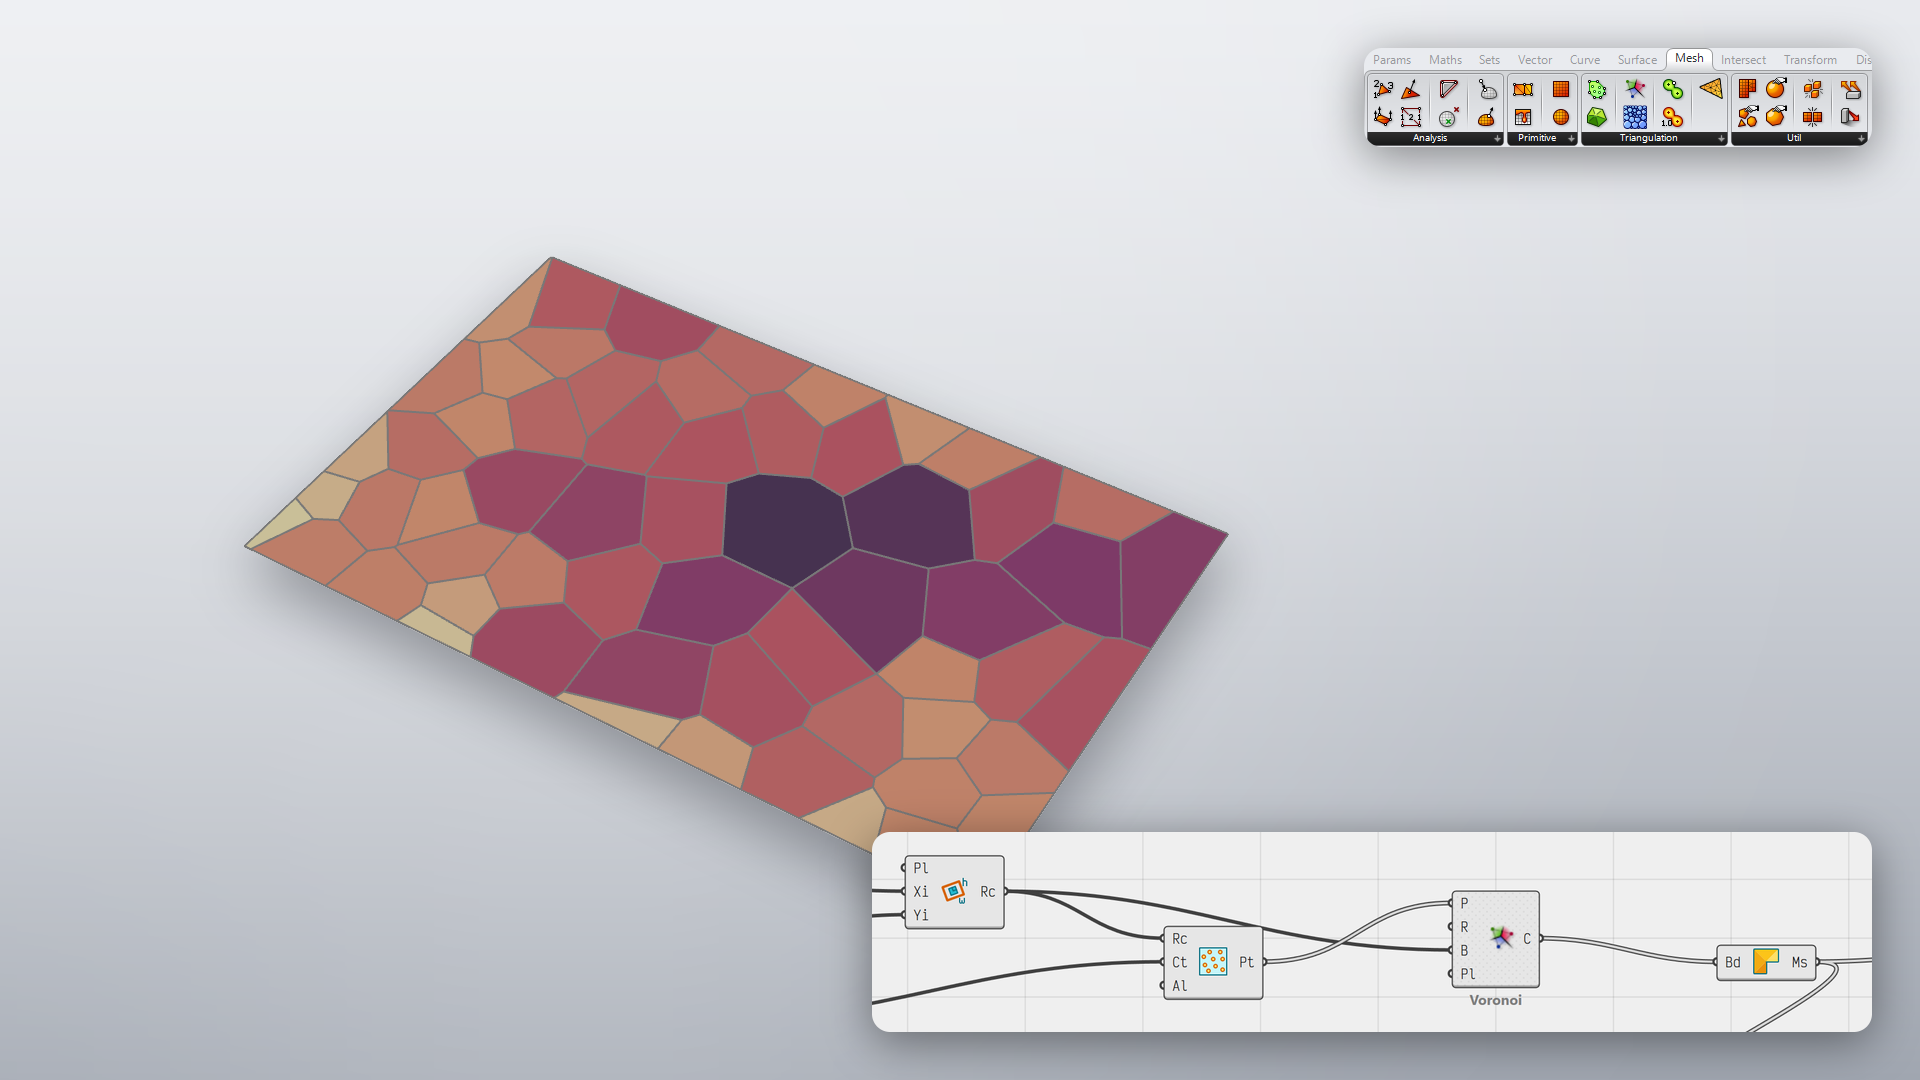
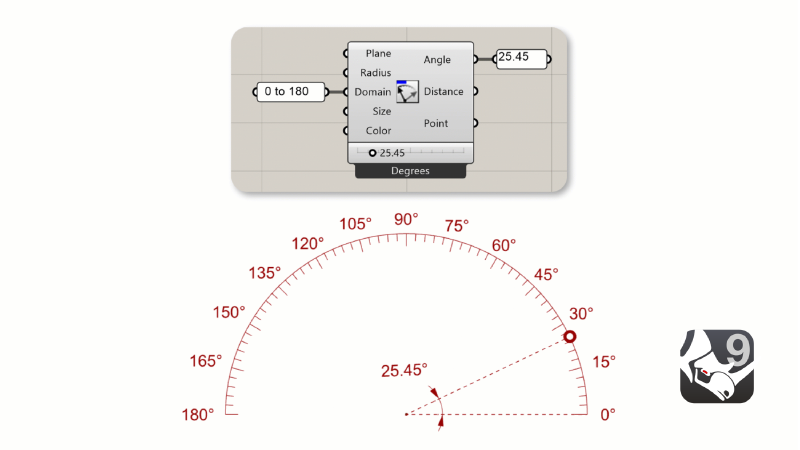
GH2 provides a broader mathematical foundation, including mature statistical and trigonometric tools, and rich support for scalar and vector fields. For example, angles, statistical distributions, and univariate functions are now native data types.
Globals
The Shout-Listen pattern in GH2 allows for the wireless sharing of values within and between files, making it easier to split big files into smaller, more manageable ones, or to clean up wire spaghetti within one file. Listen objects can also be used to read data directly from 3dm or text files.

Looping
Looping is built into GH2; clusters can feed their results back into themselves, for a set number of iterations or until a given condition is met. This opens up a new class of iterative algorithms, such as growth patterns, relaxation and stepwise simulations, with no need for plugins.

Scripting
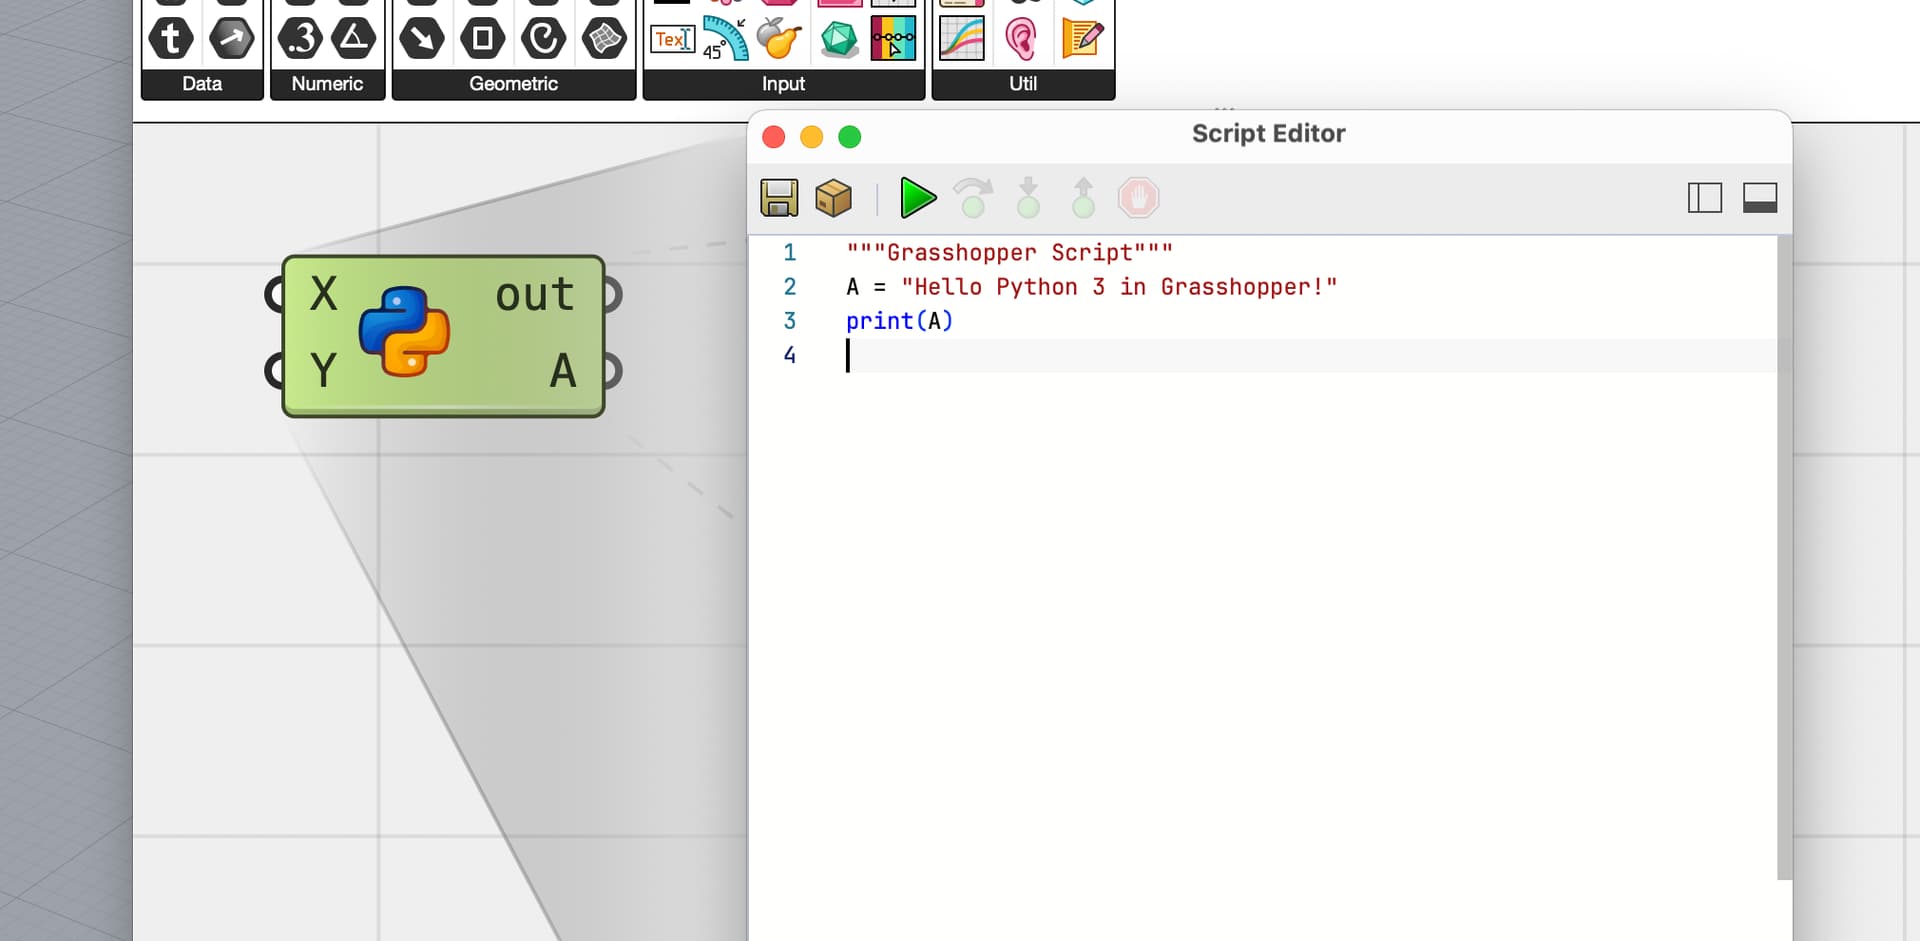
The script editor now supports the uncluttered Script mode consisting of pure statements, as well as the flexible SDK mode which allows the script to draw preview geometry, add options to the component panel, and run code at different stages in the process.
Like all standard components in GH2, scripts iterations run asynchronously and have full access to the metadata attached to every value.
Interoperability
GH2 provides a basic level of interoperability with GH1. Components can be dragged or copy-pasted from GH1 into GH2, where they can either be hosted or auto-upgraded to the nearest GH2 equivalent. GH1 and GH2 can send data back and forth via the use of shared ghdata files, which both versions can read and write.
Resources
Grasshopper 2 Documentation
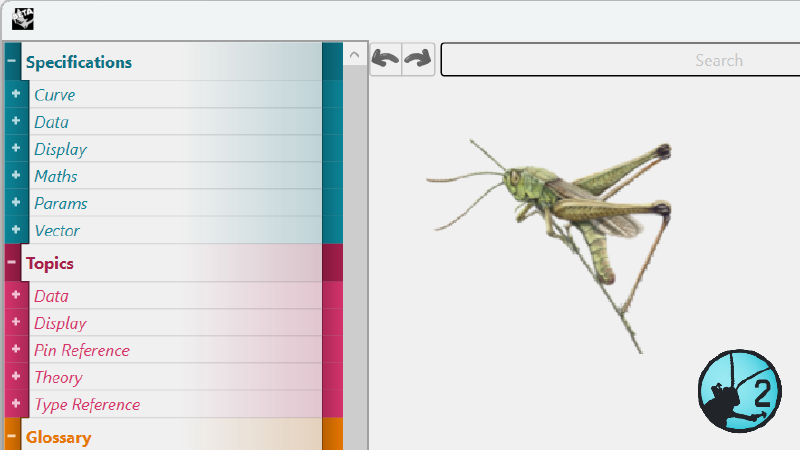
Access Grasshopper 2's online documentation. It includes a glossary of terms, in-depth topics and component specifications for Grasshopper 2.
3D Printing
Fabrication
3D Capture
Capturing existing 3D data in your project.
Large Projects & Collaboration
Rhino 9's collaborative file management tools designed and improved for large-scale projects and distributed teams.
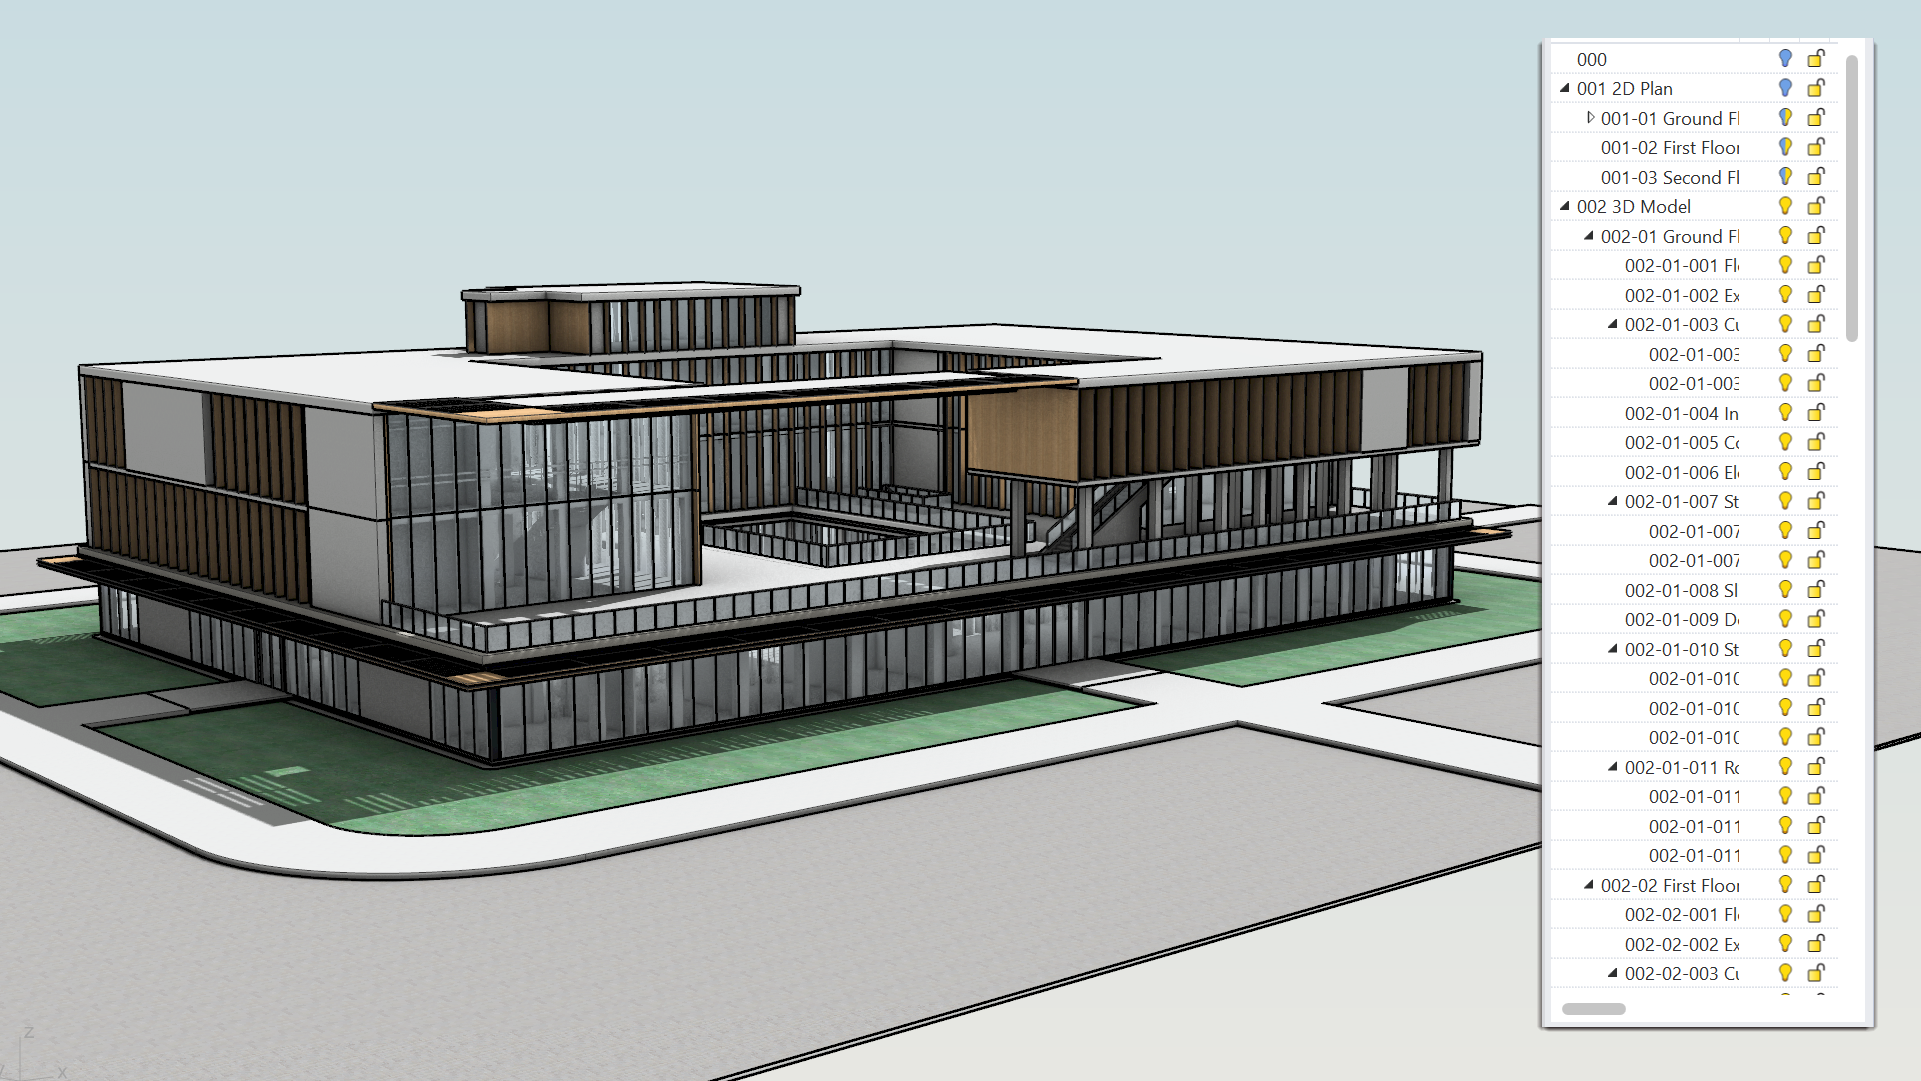
In architecture, engineering and marine, everyday life consists of projects that are large by nature. Segmenting, distributing, and organizing these are key in achieving tangible results. Rhino 9 builds on its existing tools to provide smarter solutions for managing, sharing and collaborating. Read on…
Block Edit
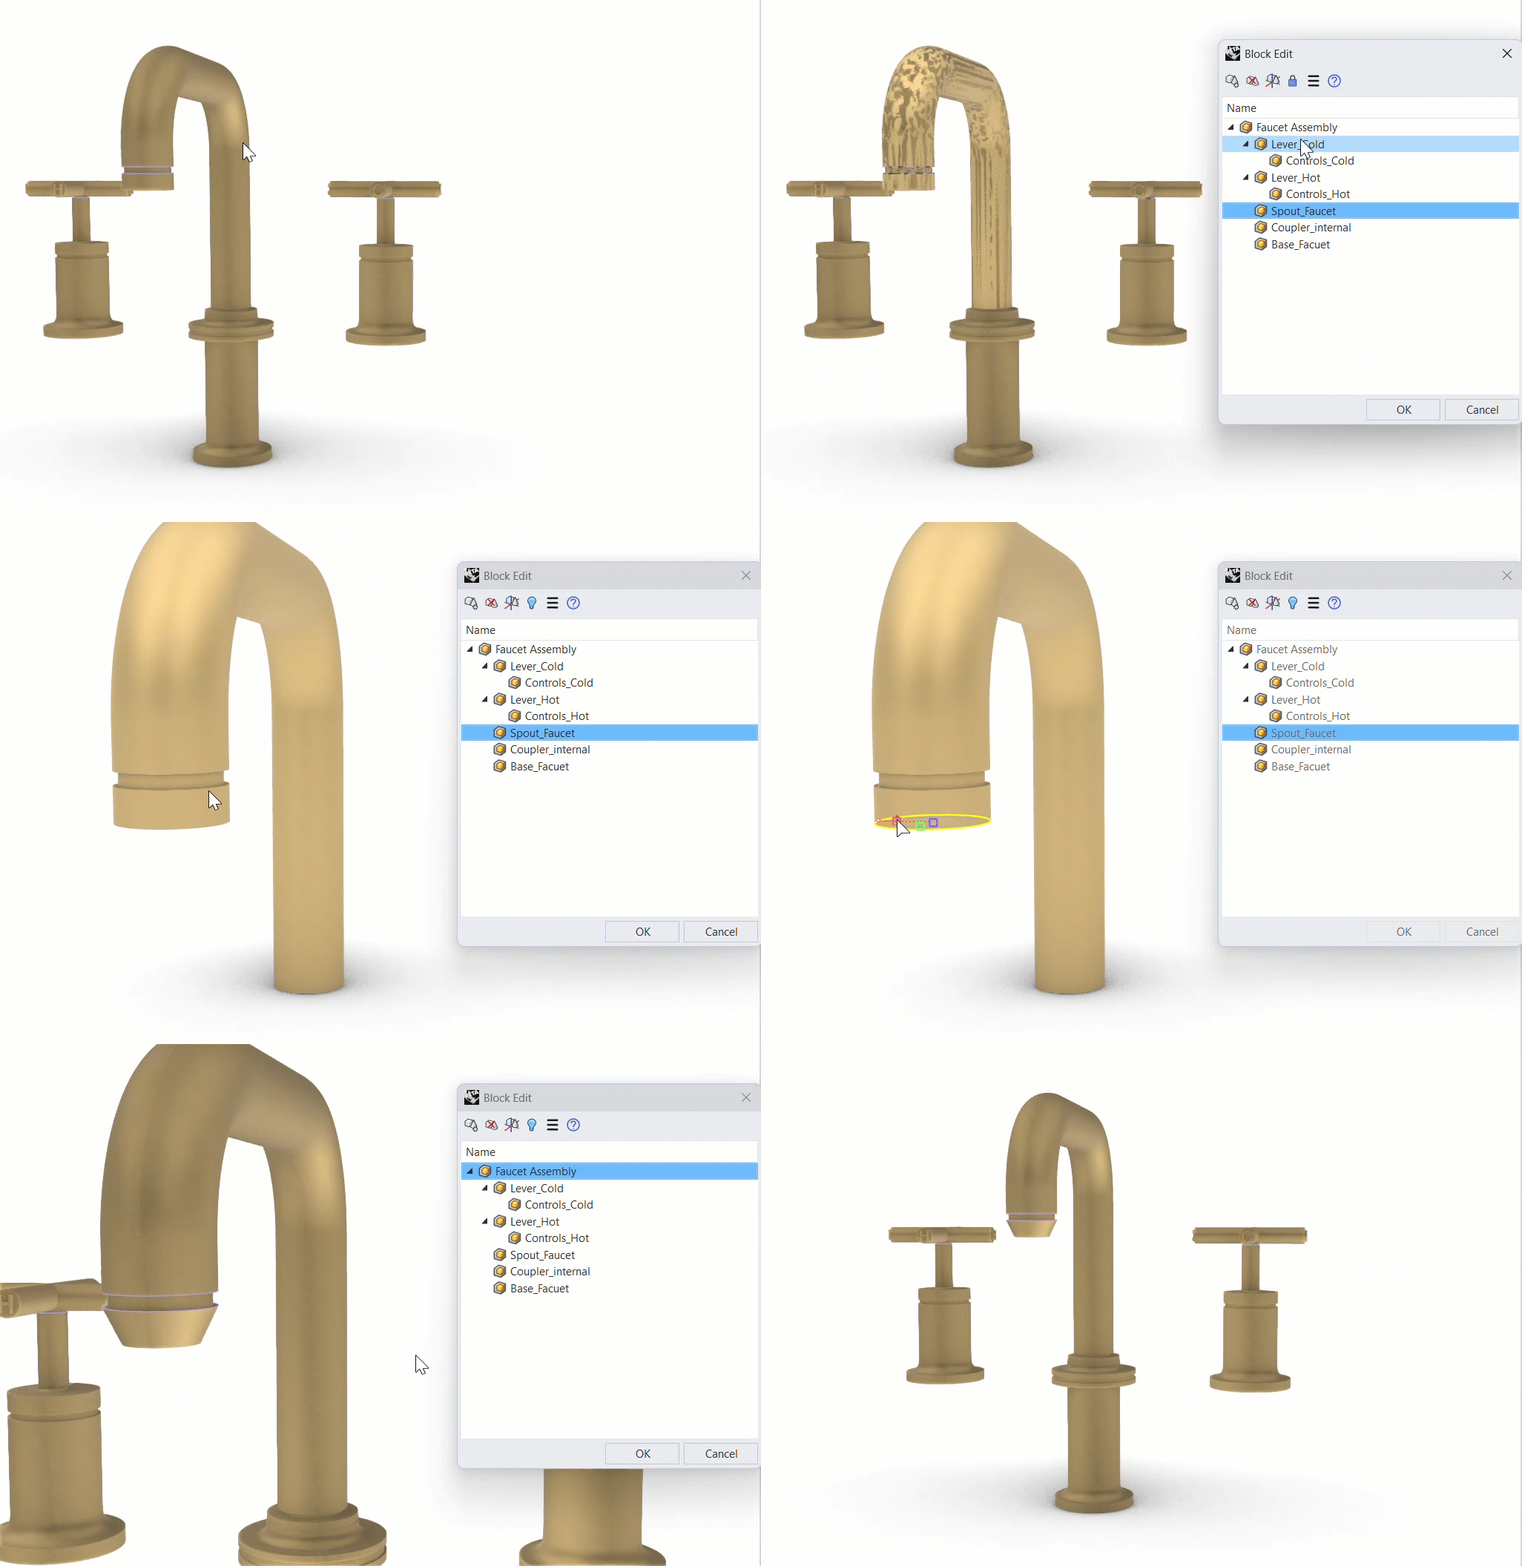
Blocks make large, repeated assemblies manageable. Now editing them is too. The refreshed BlockEdit
workflow lets you access a nested sub-block inside a complex assembly to edit it in place, then step back out just as easily, keeping shared components consistent across the whole project.
Markup
For architects and designers, Markup
is an easy way to communicate with the design team directly on the model! Whether giving feedback on the 3D model or redlining 2D drawings, Markups are a great tool for collaboration.
Worksessions: Refined
Collaborate across platforms with ease. Rhino 9 brings Worksessions to Mac for the first time, now featuring a dockable panel that keeps your multi-file projects organized and accessible. Attach multiple files at once, manage file locks in real time, and coordinate team edits without leaving the panel.
Layout Groups: Organize your drawings
Organize complex drawing sets with precision. Layout Groups eliminate tedious naming conventions by intelligently grouping sheets by status, discipline, location, or any criterion. Streamline printing, exporting, and collaboration while cutting time spent searching through dozens of layouts.
Audit3DMFile: Don’t suspect, inspect
Ever wonder why your 3dm is so big? Files can get out-of-hand when collaborating on large architectural, marine, or fabrication projects. Find your file’s “baggage” with  Audit3dmFile
’s interactive visualization:
Performance Improvements
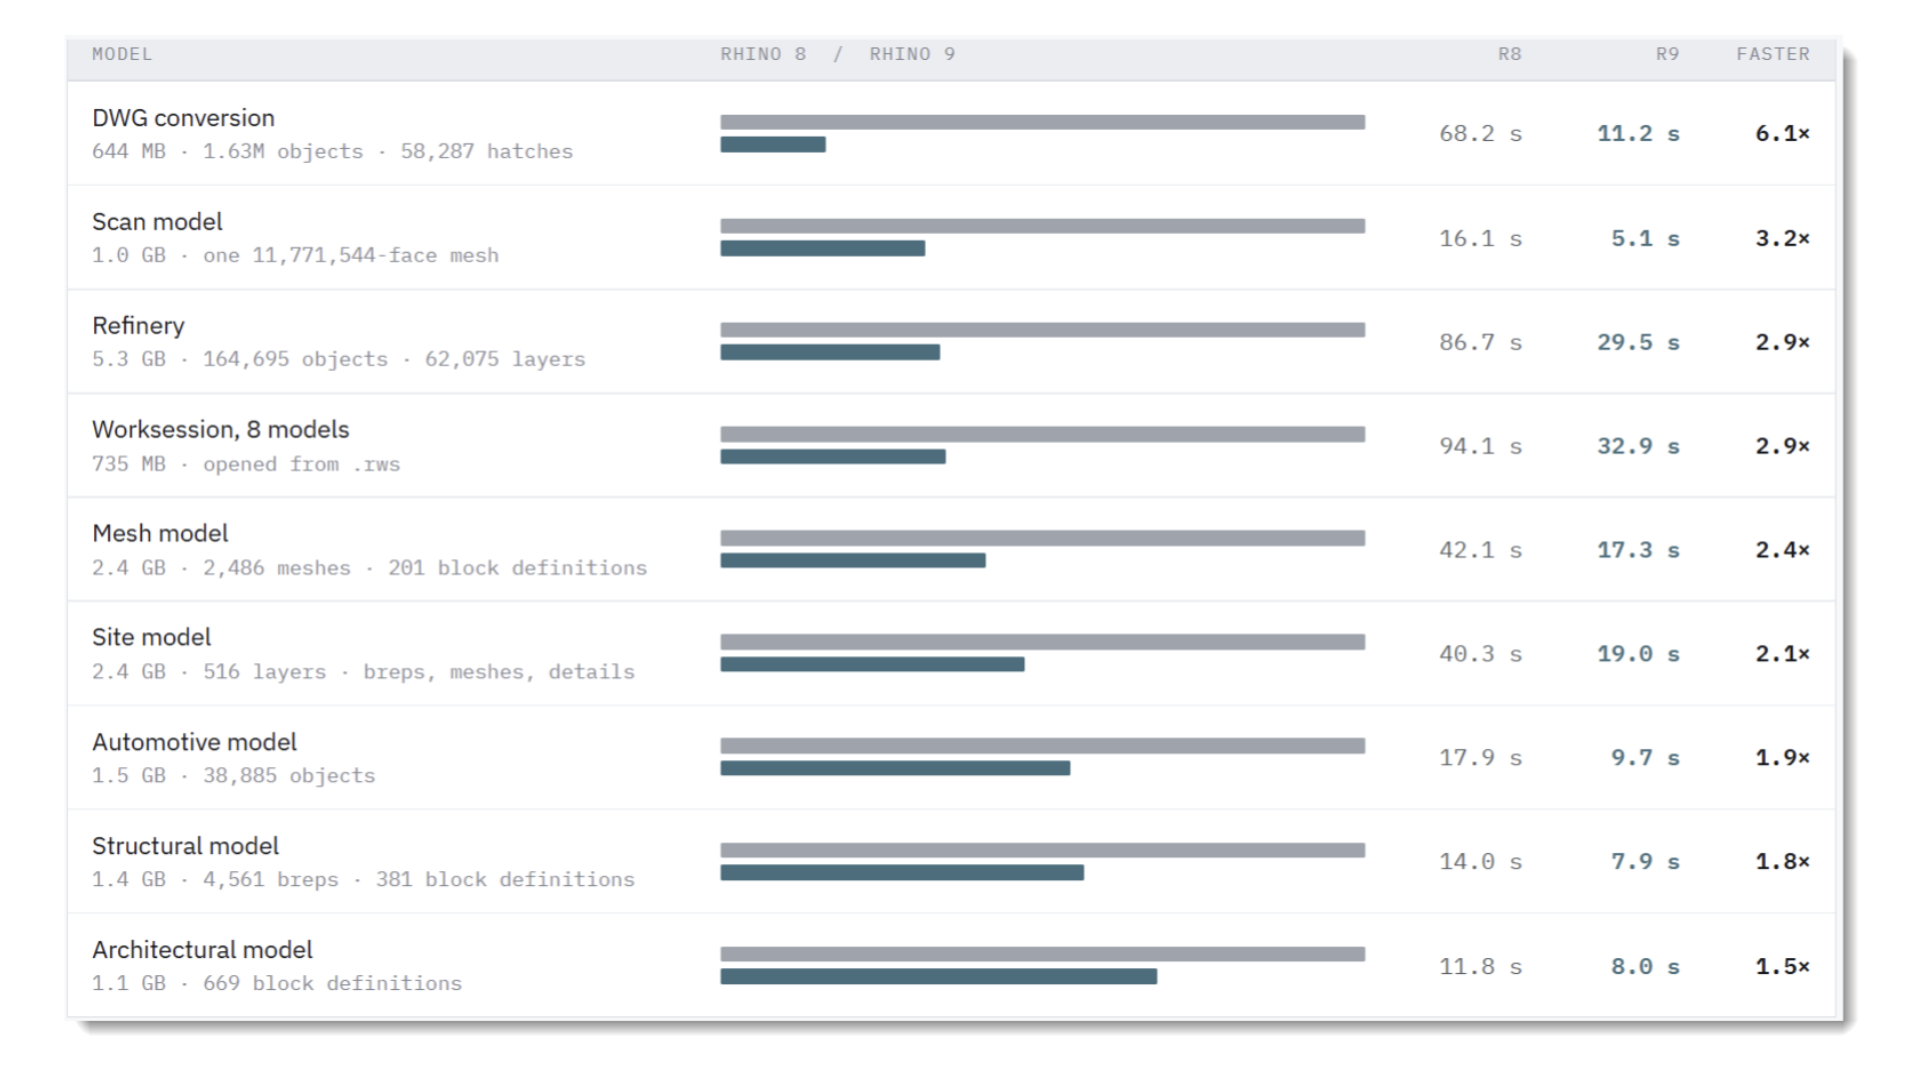
Considerable efforts have been invested in making Rhino 9 handle and respond better when treating large data set files. Improvements are visible when opening large files, selecting, switching to technical display modes and manipulating views with heavy 2D drawings.
Overlap: Cleaning up
The new Overlap
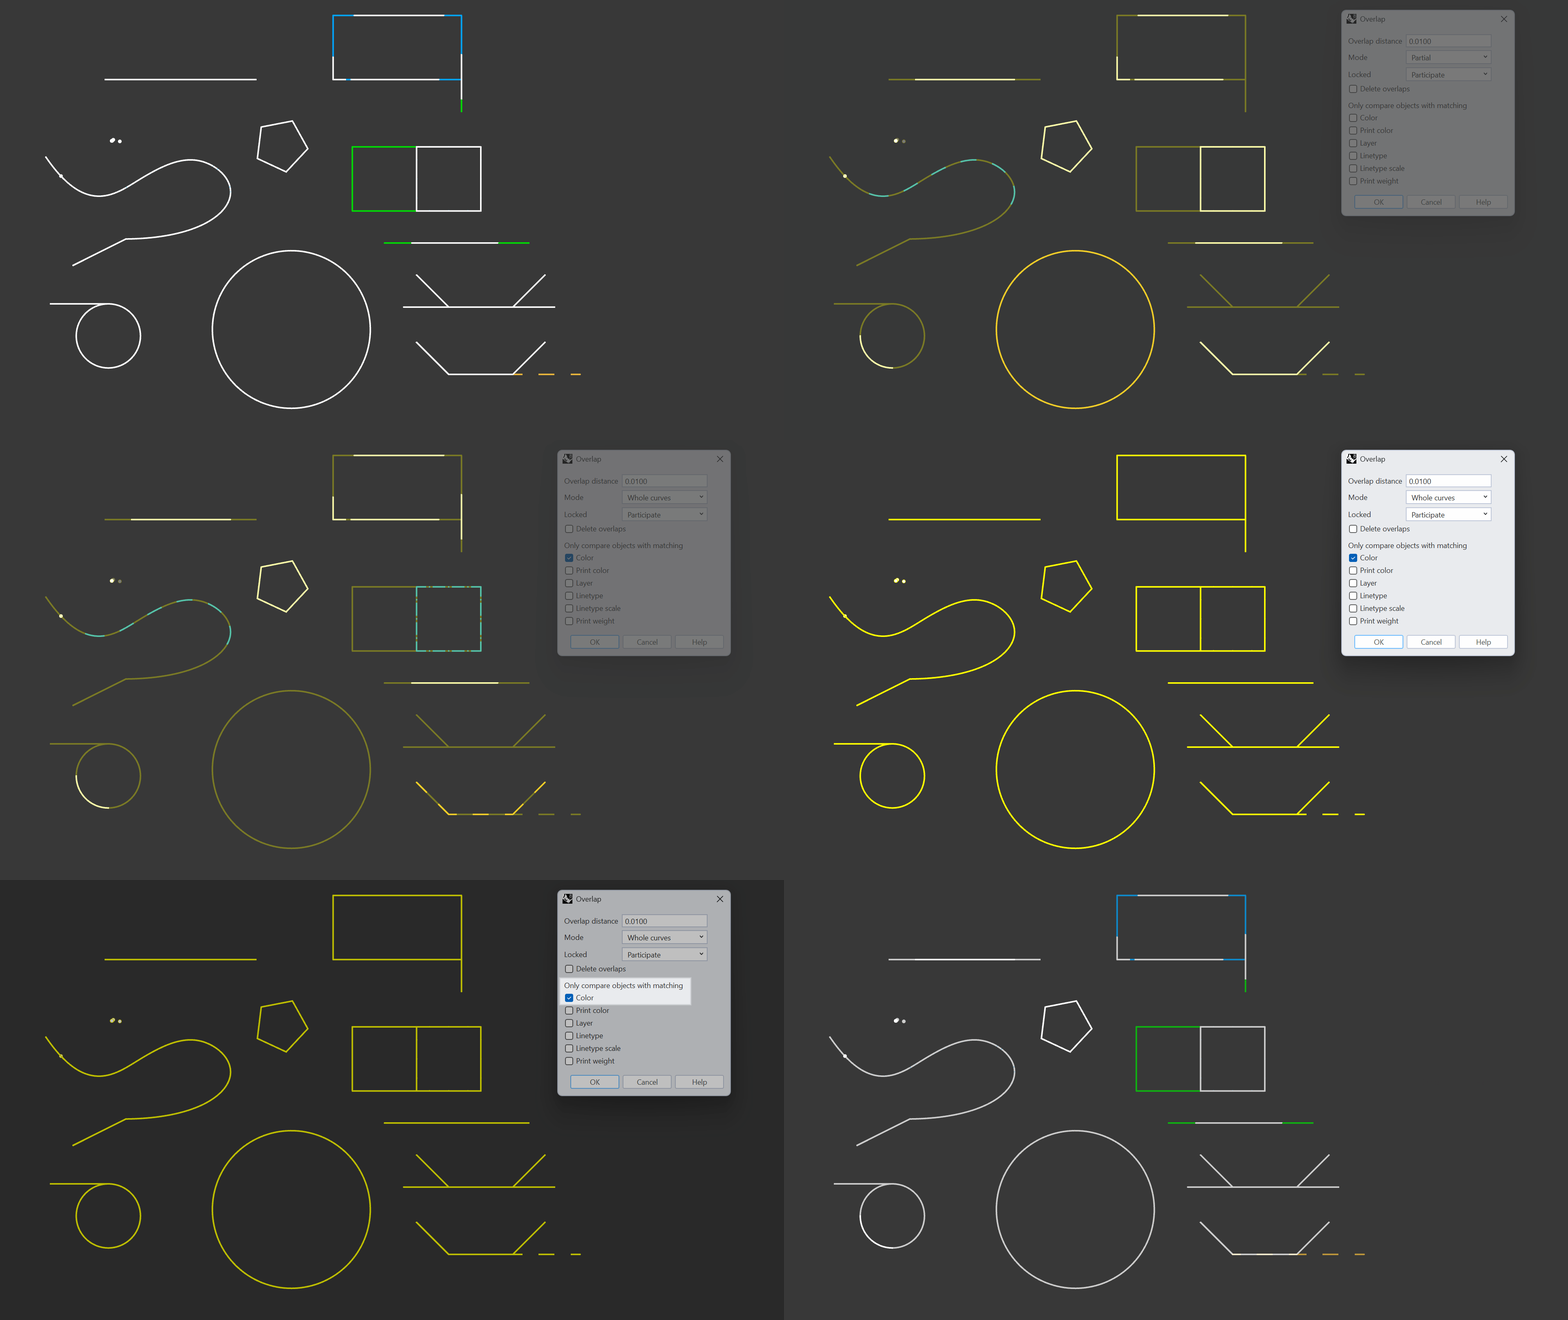
command is designed to help you clean up messy 2D drawings by finding and selecting duplicate and overlapping linework within a user-defined distance. The command detects whole and partial overlaps, as well as linework with different properties, making it easier to find similar geometry rather than exact duplicates.
Use-Cases
- Clean large/heavy files of unnecessary, almost-duplicate geometry.
- Clean 2D drawings so you can more easily annotate, add hatches, or change linetypes.
- Avoid issues with downstream operations selecting multiple or wrong geometry, which can slow your workflow.
- Improve toolpath creation (multiple passes over the same segment).
- Improve laser/plasma results (extra burn time, overcutting, inconsistent kerf).
Serengeti
Serengeti, named after the largest African Savanna, is where Rhino grows.

Overview
Serengeti, named after the largest African Savanna, is where Rhino grows.
We like to involve users in every phase of the Rhino development process. As with prior releases, we invite current users to try, test, and provide feedback on the next release while still in development so you can participate in the development beyond the upcoming release.
Since many development efforts span more than one release, we have set up the Serengeti Project to give users more direct influence on all future Rhino developments.
That means you always have access to the weekly Work-In-Progress (WIP) builds of everything we are working on, no matter when or if it will be released. Rhino WIP builds are where we develop future features, like Grasshopper 2, Flair: Non-Photorealistic Display Styles, Constraints, and more.
You will also have access to our developer discussions, developer notes, and issues tracking system.
We look forward to your input on future releases of Rhino and the Serengeti Project infrastructure.
What’s Beyond Rhino 8?
Rhino 8 owners can download and test Work-In-Progress versions of Rhino in-development (Rhino WIP access).

Access
Join the Serengeti forum to discuss and help prioritize features in development with expert users and developers.

Experiment
Test out the early beta versions of the Rhino WIP (Work-In-Progress) builds, including:
- Grasshopper 2

- Flair: Non-Photorealistic Display Styles

- Constraints

- More to come.
SectionTools Integrated
Dynamic 3D Sectioning and 2D Drawings.

SectionTools creates dynamic sections and drawings, enabling new modeling, drafting, and fabrication workflows. Now a part of Rhino, it takes advantage of the new clipping and sectioning features such as Section Styles and Selective Clipping.
The following is a description of different SectionTools workflows and how they integrate into Rhino 8.
Clipping Sections: Create, View and Edit
Rhino 8 introduces a new command to create clipping planes called ClippingSections that is geared towards drafting and sectioning workflows. It helps select sectioned objects, set sections orientation, name, label, and also save to Named Views for easy access in modeling and Layout spaces.
- SectionTools commands are located in the drafting toolbar and the menu under Drafting > Sections.

- The ClippingSections is the main section creation command. It creates clipping planes that cut through selected objects (or all objects). It has options to set the direction, depth, name prefix, label and saving to named views.
- Clipping planes properties such as name, depth, label, clipped objects, and views can be edited directly from the clipping plane property panel.
- The clipping plane widget has been updated in Rhino 8 to indicate the Up and Normal viewing directions. The widget is labeled with the clipping plane name. The center grip points of the widget are used to change the location and depth of the clipping plane. The grip points at the two ends of the clipping plane help scale the widget size.

- Sections are visible in clipped views only, and update dynamically with model changes. The sections are in display only, however, you can still snap to them. If you need to vector the geometry of your sections, you should extract in-place using ExtractClippingSections and ExtractClippingSlices commands. You can enable History to update with model changes.
- You can select the section clipping plane and copy, delete, and transform using regular Rhino commands. Copying a section that is saved to named views creates a new named view for all copies. Deleting a section also deletes the associated named view and the drawings layers of that section.
Extract Sections
Rhino supports extracting curves, hatches, surfaces, and slices of clipping planes for modeling and fabrication. Use ExtractClippingSections command to extract curves and hatches in place and ExtractClippingSlices to extract surfaces and slices in place. Both these commands support history. You can also use NestedClippingDrawing command to generate sections curves that are projected and nested on World XY-plane with tags which can be used in laser cutting workflows.
Dynamic 2D Drawings: Create, Edit and Export
SectionTools has been updated to support extracting not only the sections geometry but also the background geometry. The drawings are projections of clipping planes’ views on the XY-Plane. Use ClippingDrawings to create the drawings of a clipping plane. The geometry is organized in layers to control visibility in modeling and layout. Drawings dynamically update when editing the associated clipping plane. You can also use UpdateClippingDrawings command to update when adding and removing objects from the model or changing objects’ properties.

Use EditClippingDrawings command to edit the 2D drawing’s properties, such as grip point, label visibility, placement point, background, and projection. You can also export the 2D drawings to 3dm and dwg files using ExportClippingDrawings command.

Sectioning Workflows: From 3D Model to 2D Layout
Rhino has several new features that enhance the flow between 3D modeling space to 2D layout paper space when it comes to sectioning data extracted from clipping planes. The following present two workflows.
1) Set Details to Clipped Views Create clipping planes for section, plans and elevations, then save to named views using SaveClippingSectionViews command with Clip=Yes option. Reference the saved named view from a detail in layout. You can set the depth of the clipping plane to zero to view the section without the background geometry.
2) Extract Vector Drawings and Reference in Layout You can generate dynamic drawings of clipping planes sections, plans and elevation and their background geometry, and place on the World XY-Plane using ClippingDrawings command. You can then reference the drawing in layout from the Top view. The section geometry is organized in layers that you can turn on and off in layout. Turning off layers in model space and keeping on in layout is now possible. This helps to view the drawings in layout only.
Notes
- Files created with SectionTools in Rhino 7 should load correctly. However, section hint and layers will be updated to use the new layer organization and features in Rhino 8, so please make backups of your files before loading into Rhino 8.
- SectionTools commands in Rhino 8 will work with clipping planes created using the ClippingPlane command. For example, it is possible to use any clipping plane to extract 2D drawings and save to named views.
- Ask questions and give feedback on the Discourse Forum.

