Rhino connects to an AI assistant through the Model Context Protocol (MCP) with the native  RhinoMCP
and
RhinoMCP
and  mcpstart
commands. Once connected, you can describe the geometry you want in plain language, watch the assistant build it live in your Rhino session, and refine it by continuing the conversation instead of rewriting code by hand. In this tutorial, we’ll use that conversation to prototype a circular grid of holes, like a speaker grille, and then turn the finished script into a real, reusable
mcpstart
commands. Once connected, you can describe the geometry you want in plain language, watch the assistant build it live in your Rhino session, and refine it by continuing the conversation instead of rewriting code by hand. In this tutorial, we’ll use that conversation to prototype a circular grid of holes, like a speaker grille, and then turn the finished script into a real, reusable SpeakerGrid command with its own command-line prompts.
What You’ll Need
- Rhino 9 for Windows or Mac.
- An MCP-capable AI chat client, such as Claude Desktop, that can connect to a local MCP server.
- No Python knowledge required. The assistant writes and edits the script for you; some familiarity with Python is helpful, but not necessary, if you want to read along.
Connect Rhino to an AI Assistant
NOTE TO SELF: This whole section needs revision next week (Sep 21 2026), once the panel is native to Rhino.
- In your AI chat client’s MCP configuration, add an entry that starts the RhinoMCP
server. For Claude Desktop, this goes in its configuration file:
- Restart your AI chat client so it picks up the new server.
- Back in Rhino, run the McpStart
command to open the connection. This will open the AI panel. Your AI chat client can now see and control the active Rhino session.
NOTE TO SELF: Add an image of the RhinoMCP panel here next week (Sep 21 2026)
mcpstart
again to close the bridge, or quit the chat client, once you’re done experimenting.Prototype the Grid in Conversation
-
With the bridge running, in the AI Panel, describe the pattern you’re after instead of writing it from scratch:
Write RhinoScript-Python that draws a circular grid of small circles around a center point, arranged in concentric rings, like the holes in a speaker grille. Run it in Rhino so I can see it.
-
The assistant writes the script and calls
RhinoMCP
’s execute_rhinoscript_python_codetool, which runs the code directly in your open Rhino document. The grille pattern appears in the viewport immediately, so you can keep iterating conversationally:Space the rings further apart near the center, and make the holes a bit smaller. Each reply re-runs an updated script against the live model.
 RhinoMCP
to fix the pattern rather than patching the script by hand:
RhinoMCP
to fix the pattern rather than patching the script by hand:-
Tell the assistant what’s wrong and how you want it fixed:
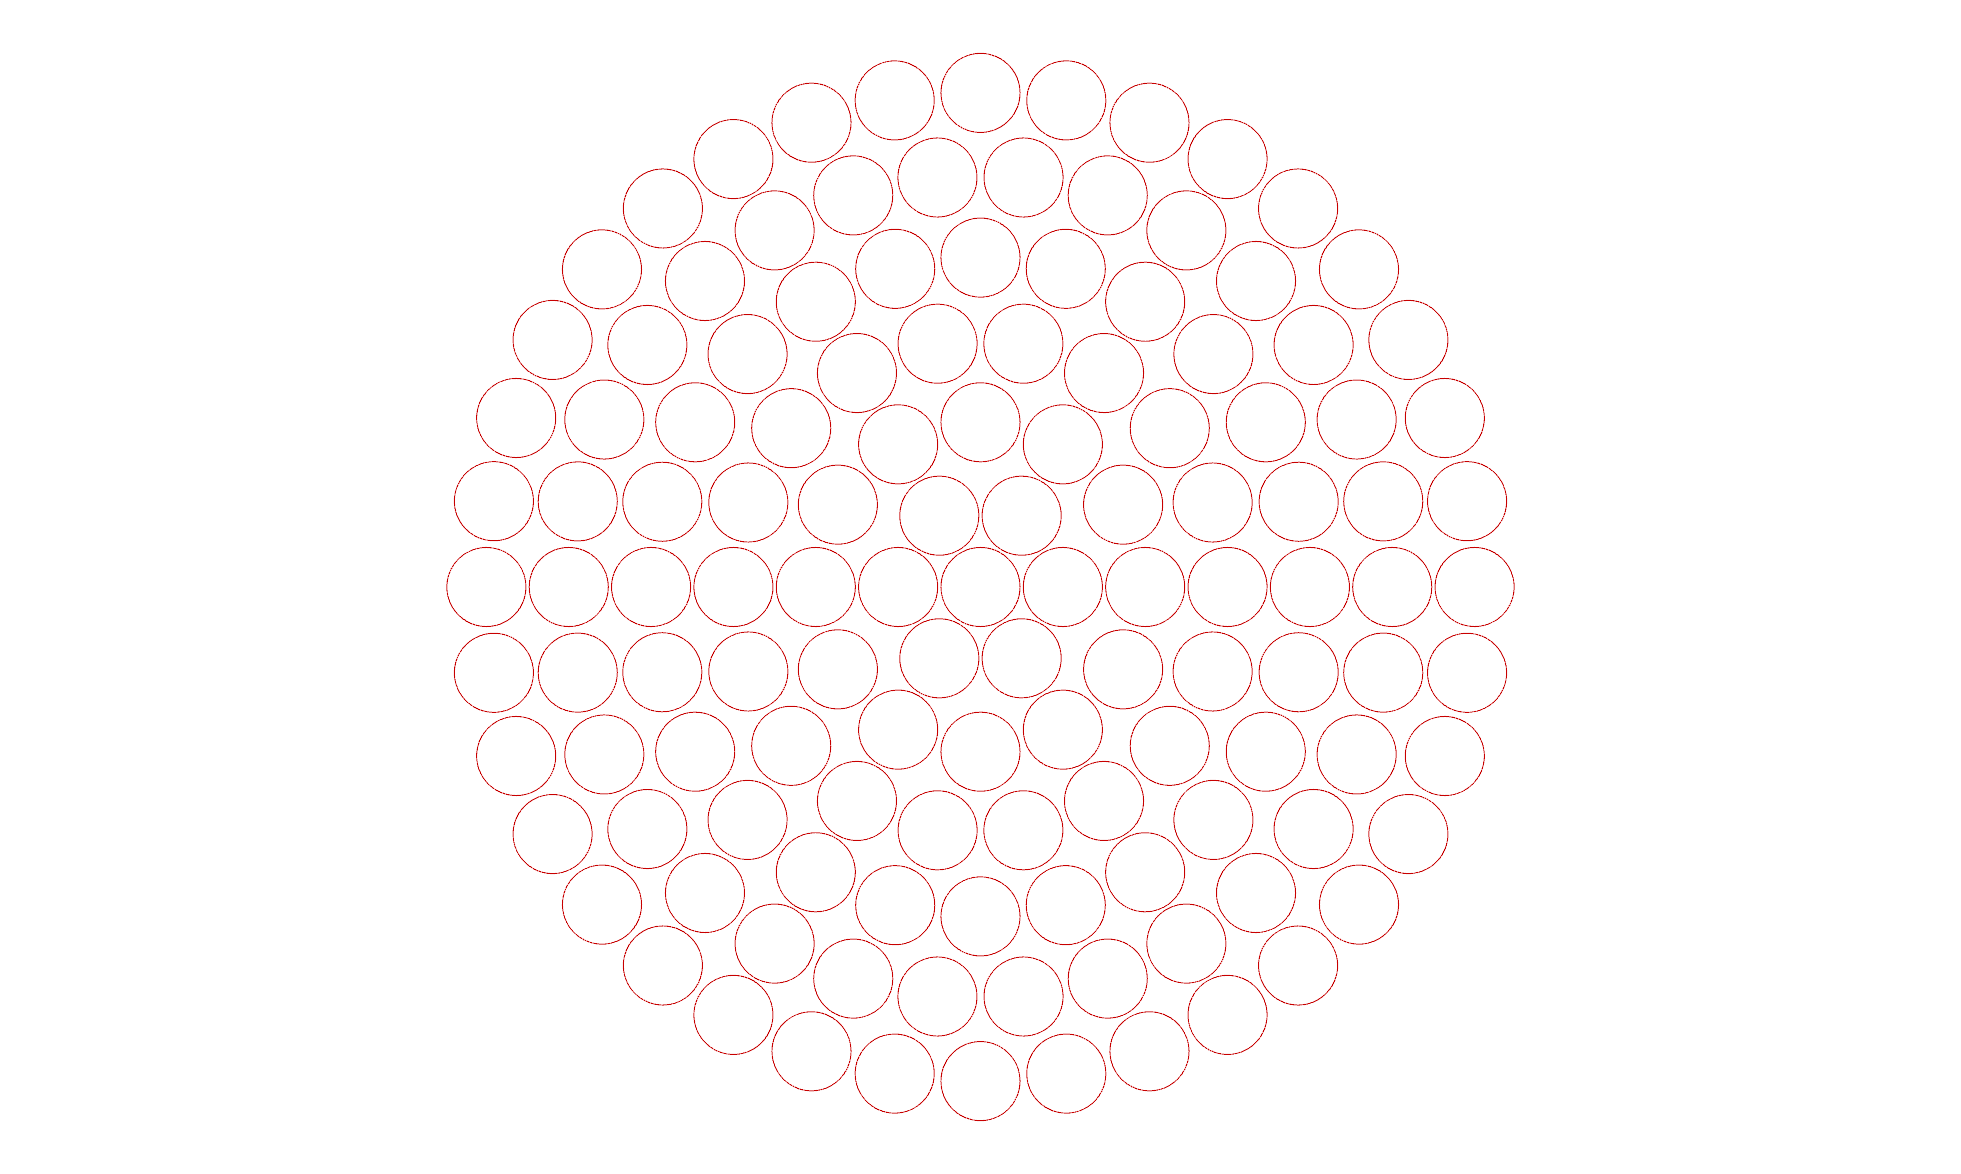
The holes look randomly scattered instead of forming clean rings. Update the script so each additional ring adds exactly 6 more circles than the ring before it, keeping them evenly spaced around the circle.
-
Let
RhinoMCP
run the updated script and check the result in the viewport. -
Run it again with the same values as before: center
0, radius50, default rings, hole radius4. Confirm the holes now line up into even radial spokes instead of a scattered pattern. -
The assistant’s modified script should now look close to this:
|
|
- Download the fixed script: speaker_grid.py
Save the Working Script
Once you’re happy with the result, save the script you downloaded above to disk somewhere permanent, for example Documents\Scripts\speaker_grid.py. You’ll point to it when turning the script into a command in the next step.
 EditPythonScript
command to read through it, adjust it, or press
to test-run it before wiring it up as a command.
EditPythonScript
command to read through it, adjust it, or press
to test-run it before wiring it up as a command.Turn the Script into a Command
A script only becomes a command you can type at the command line once it’s linked to an alias.
-
Run the
 Options
command and open the Aliases page.
Options
command and open the Aliases page. -
Click New, and set:
Alias Command macro SpeakerGrid! _-RunPythonScript "Documents\Scripts\speaker_grid.py" -
Close the Options dialog. Typing
SpeakerGridnow runs your script exactly like a built-in command, prompts and all, any time, with no AI connection required.
 ExtrudeCrv
on a panel, then
ExtrudeCrv
on a panel, then  BooleanDifference
the extruded holes out of it to get a real perforated speaker grille.
BooleanDifference
the extruded holes out of it to get a real perforated speaker grille.Add a Toolbar Icon
Typing SpeakerGrid works, but a clickable icon is faster to reach for a command you use often.
-
Go to the Window menu, click Toolbars, and right-click any gray area of a toolbar. Choose New Toolbar Button….
-
Select Empty Button, click Next, choose Image only for the button appearance, and click Finish. A blank button appears on the toolbar.
-
Press + right-click the new button to open the Button Editor.
-
Under Tooltip, enter
Speaker Grid. Under Command, enter the same macro you used for the alias:! _-RunPythonScript "Documents\Scripts\speaker_grid.py" -
Click the arrow next to one of the image squares in the top-right corner of the editor to open the built-in Image Editor. Draw an icon with the built-in tools, or click the Gear icon, then File > Import…, to bring in an SVG you’ve made instead.
-
Click OK to close the Image Editor, then OK again to close the Button Editor.
Click the new button to test it — it walks through the same prompts as typing SpeakerGrid at the command line.
Buttons you add to Rhino’s default toolbar file get wiped out on a reinstall or a Reset. Before adding more than one or two, create your own RUI file first ( Options
Appearance > Toolbars, then + > New) and build your toolbar there instead. See Customize Your Toolbars for a closer look at the Button Editor, including drawing button icons from scratch.
Where to Go from Here
- Package
speaker_grid.pyand a handful of related scripts as an installable plugin — see How to Use Scripts and Plugins for packaging and distribution options. - Remember to close the mcpstart
bridge when you’re not actively using it — there’s no reason to leave an AI assistant with live code execution access to Rhino running in the background.