Rhino WIP | Tips & Tricks
Modeling & Editing
Learn about some of the improvements when modeling & editing in Rhino WIP.
Modeling Simplified (Direct Modeling - Solid Modeling)
Here are additions related to direct modeling workflows in Rhino WIP.
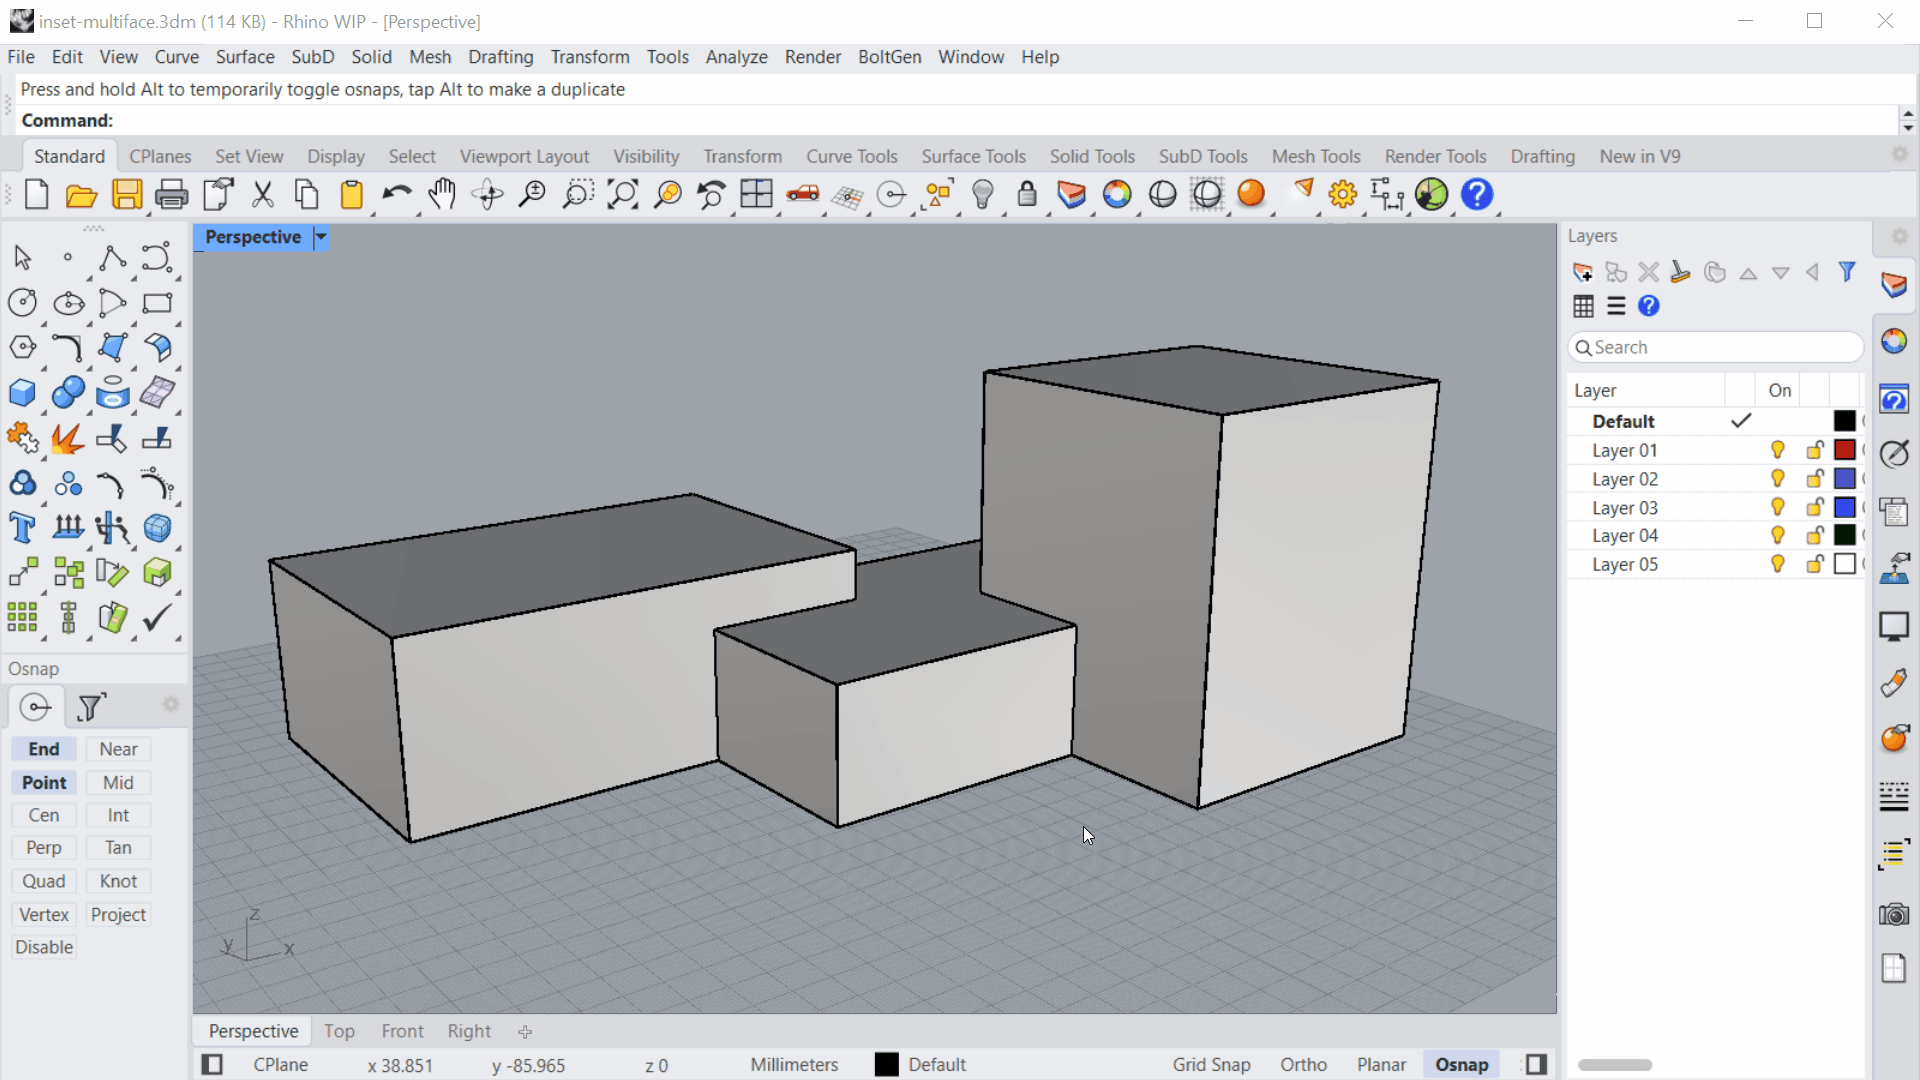
Inset Multiface
Inset now supports grouping faces. This accelerates the solid editing process and is very helpful when multiple faces of a polysurface need to be pushed-pull or extruded as a continuous element.
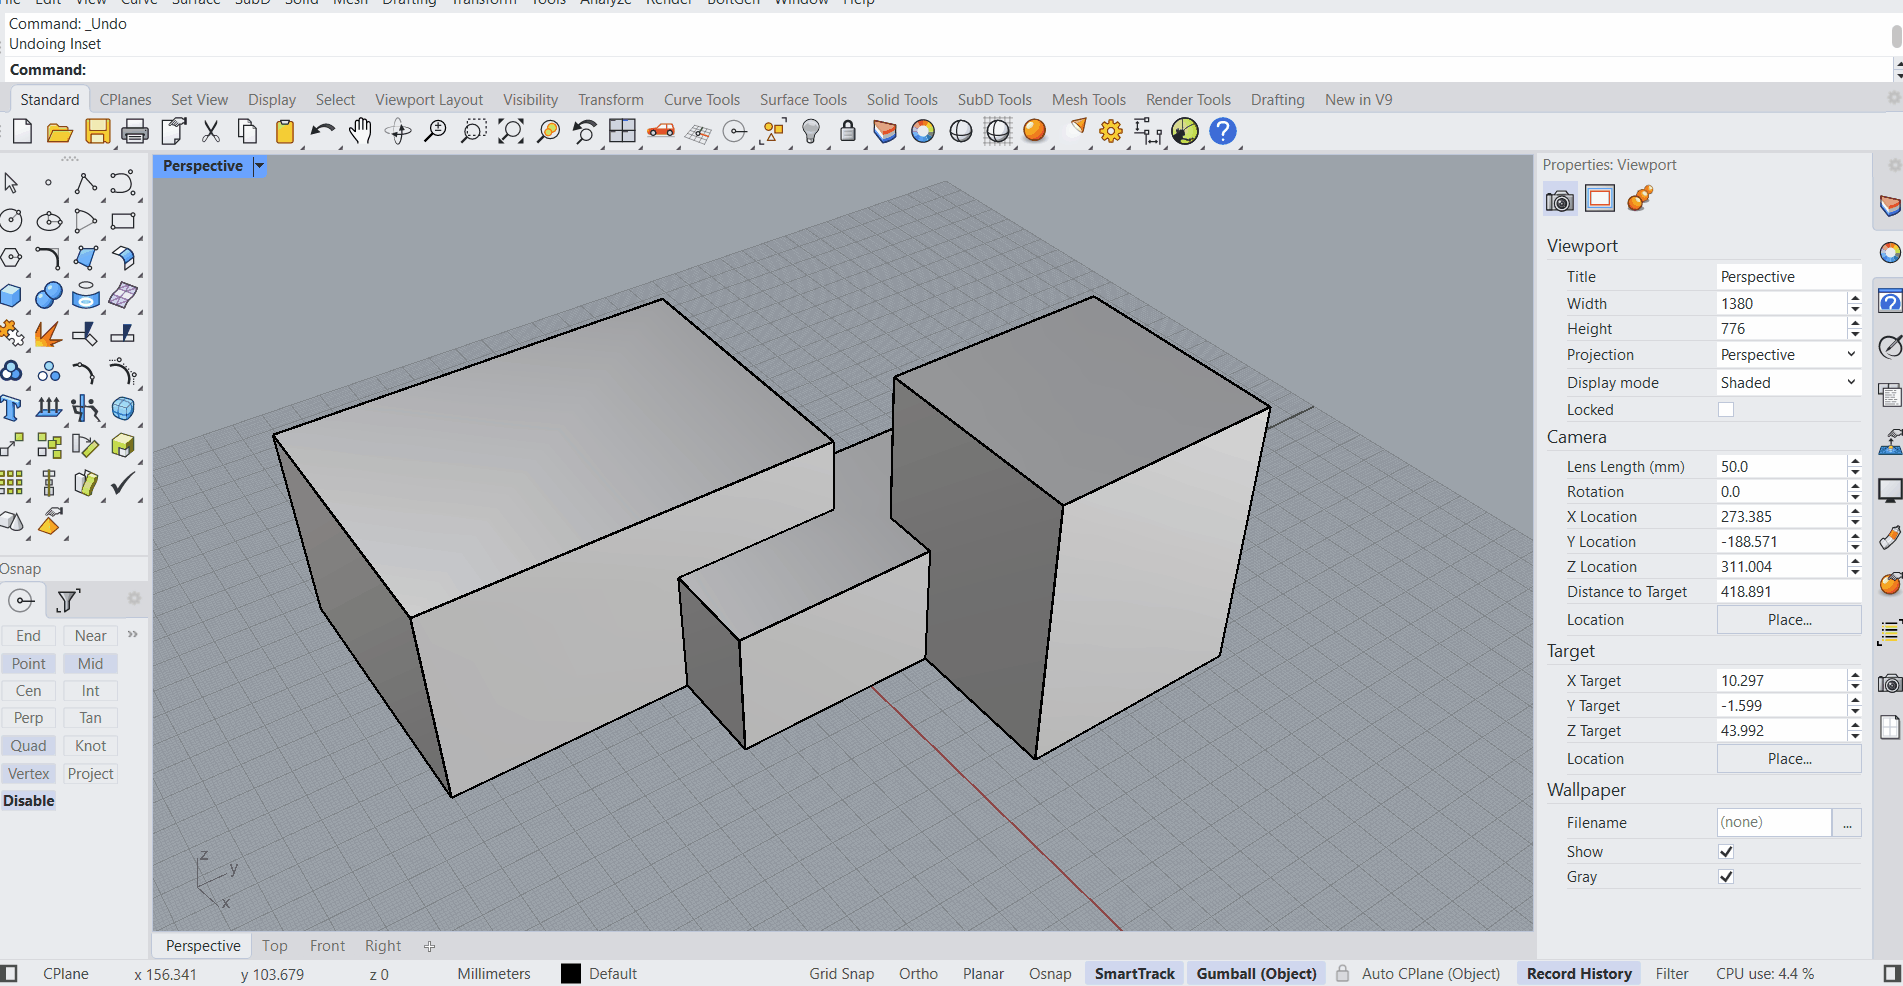
- Download inset-multiface.3dm in Rhino .
- Run the
 Inset
command.
Inset
command. - Select 3 surfaces adjacent surfaces and press .
- Select the Mode option in the
prompt
. It should read:
Mode=Group. - At the Inset Distance prompt , type 10 and press .
- You get a single loop that crosses all three faces!
PushPull Multiface
Rhino’s
![]() PushPull
command now supports selecting multiple faces in one go. This is helpful
PushPull
command now supports selecting multiple faces in one go. This is helpful
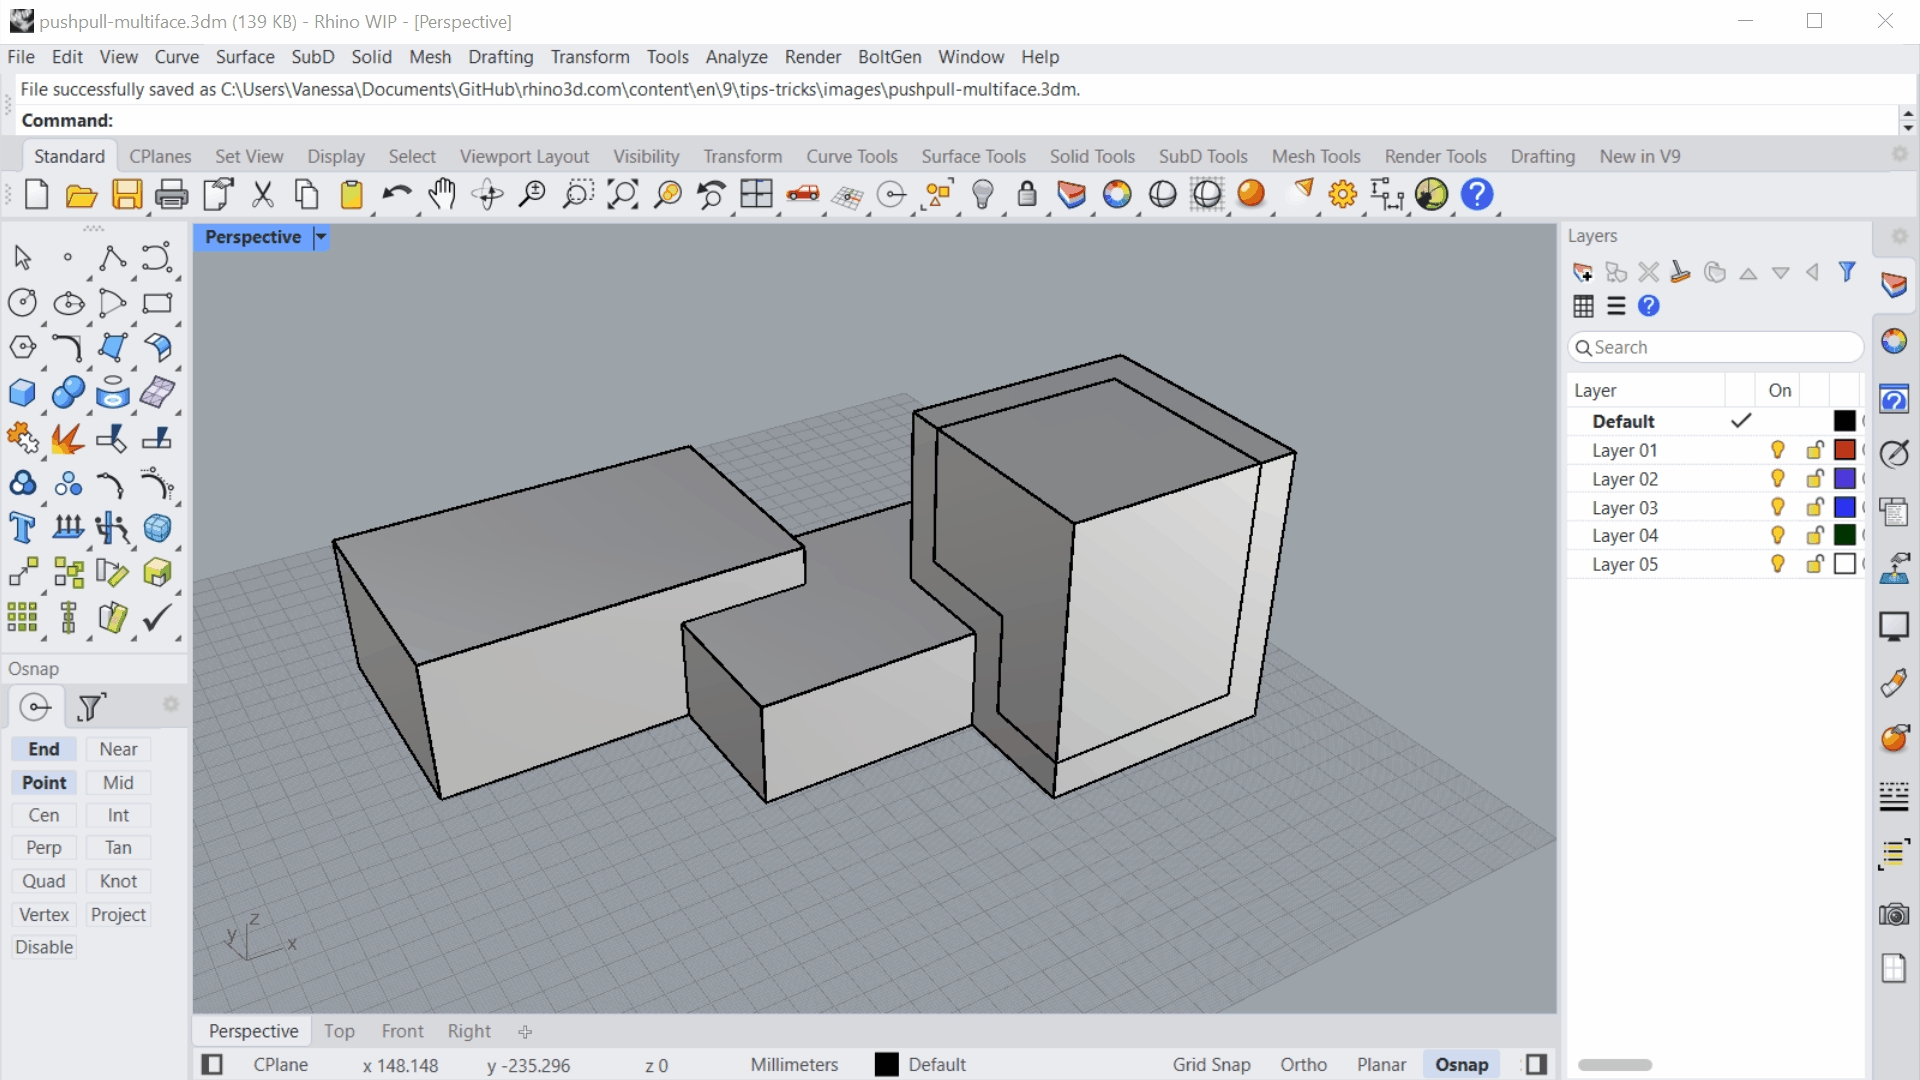
- Download pushpull-multiface.3dm in Rhino .
- Run the
 PushPull
command.
PushPull
command. - At the Select surface to PushPull prompt , select multiple surfaces and press .
- At the PushPull distance prompt, drag your mouse or enter a numerical value.
- Keep playing!
Gumball Rotate-Extend
You can now use the Gumball Rotate handle to shear a face while in rotation. This avoids deforming adjacent faces.
- Download gumball-rotate-extend.3dm in Rhino .
- Activate the Gumball .
- Sub-object select one of the vertical faces.
- Hold down + while dragging the Gumball Rotate handle.
- Your face is sheared!
Explode | TangentComponents
The
![]() Explode
command allows you to extract surfaces with a tangent connection as a single part. This is great for extracting parts that need to be shelled or given another wall thickness.
Explode
command allows you to extract surfaces with a tangent connection as a single part. This is great for extracting parts that need to be shelled or given another wall thickness.
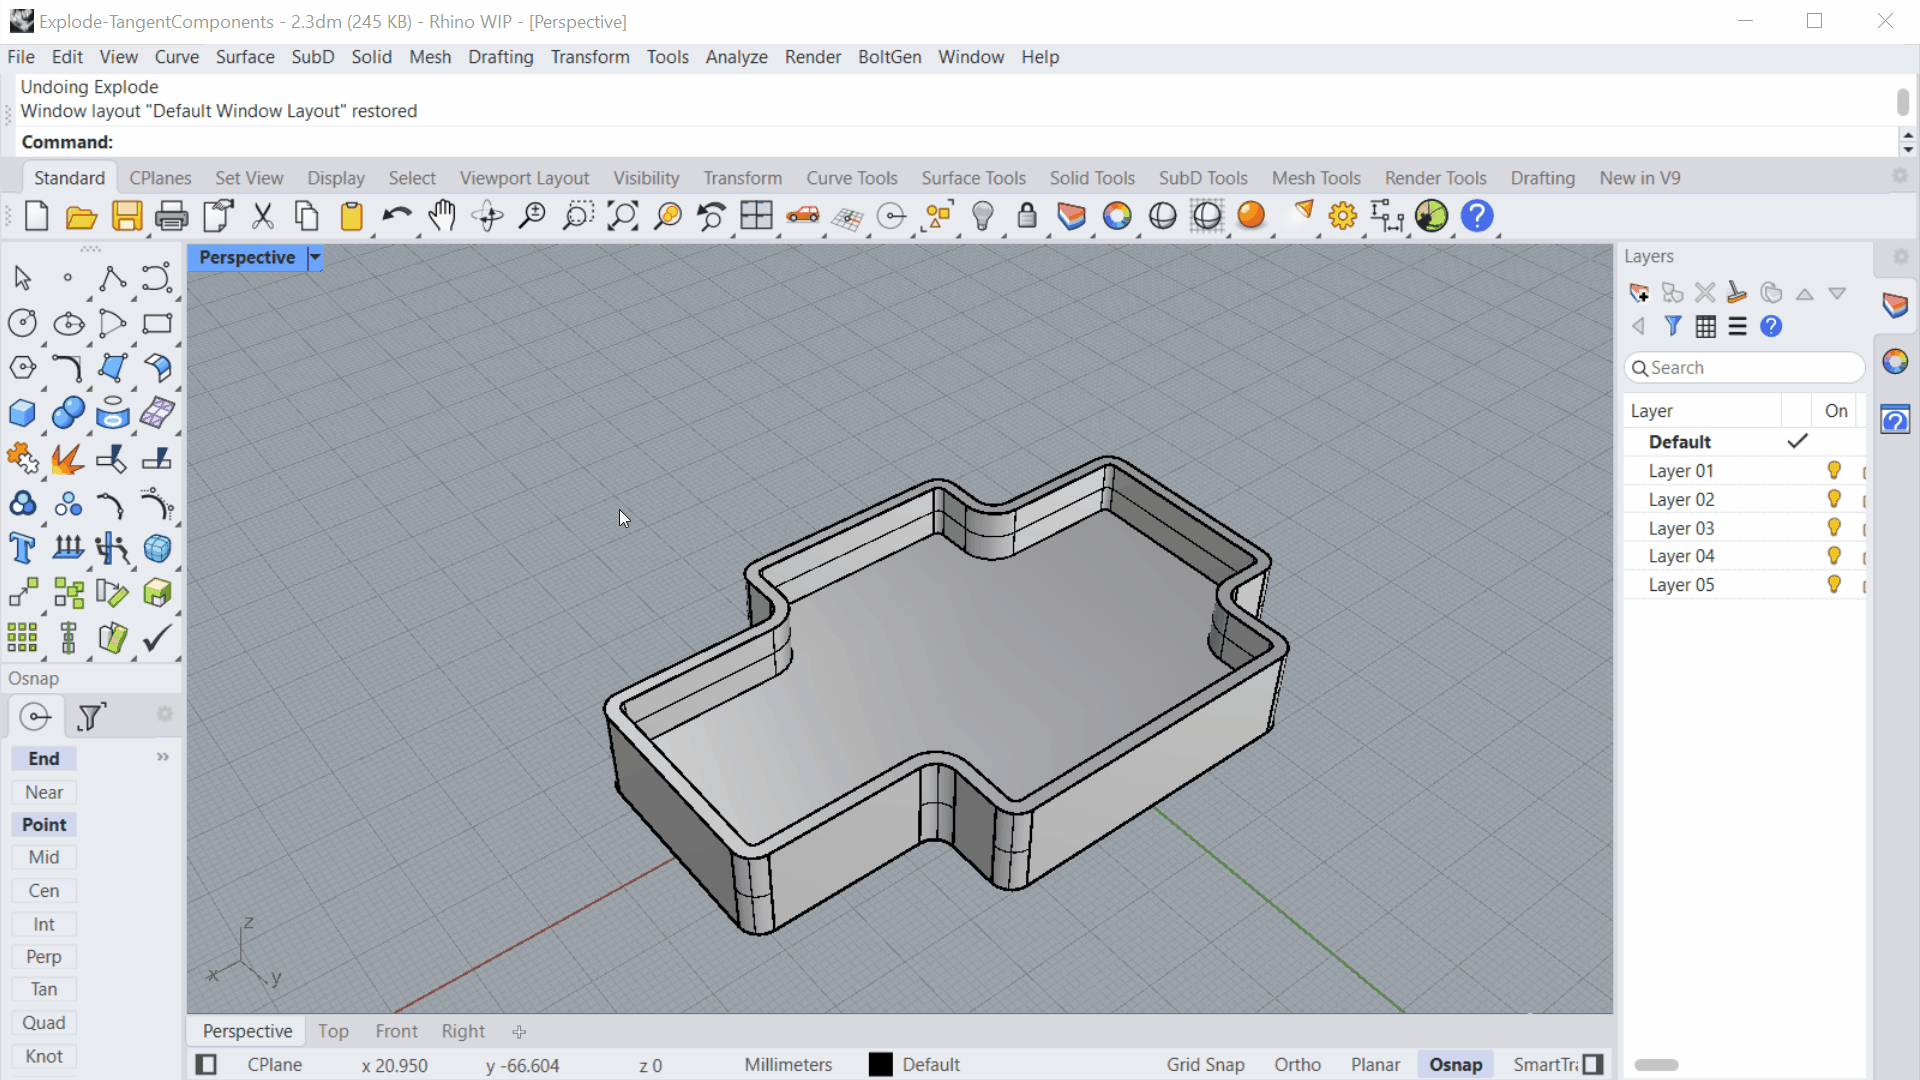
- Download gumball-rotate-extend.3dm in Rhino .
- select the polysurface.
- Run the
 Explode
command.
Explode
command. - At the Press enter to accept
prompt
, make sure:
TangentComponents=Yes. - Press twice to end the command.
- Your tangent surfaces have been extracted as a single part!
Fillets | Chamfers
Learn about the improvements to surface connecting commands, such as
![]() FilletSrf
,
FilletSrf
,
![]() FilletSrfToRail
or
FilletSrfToRail
or
![]() ChamferEdge
amongst others.
ChamferEdge
amongst others.
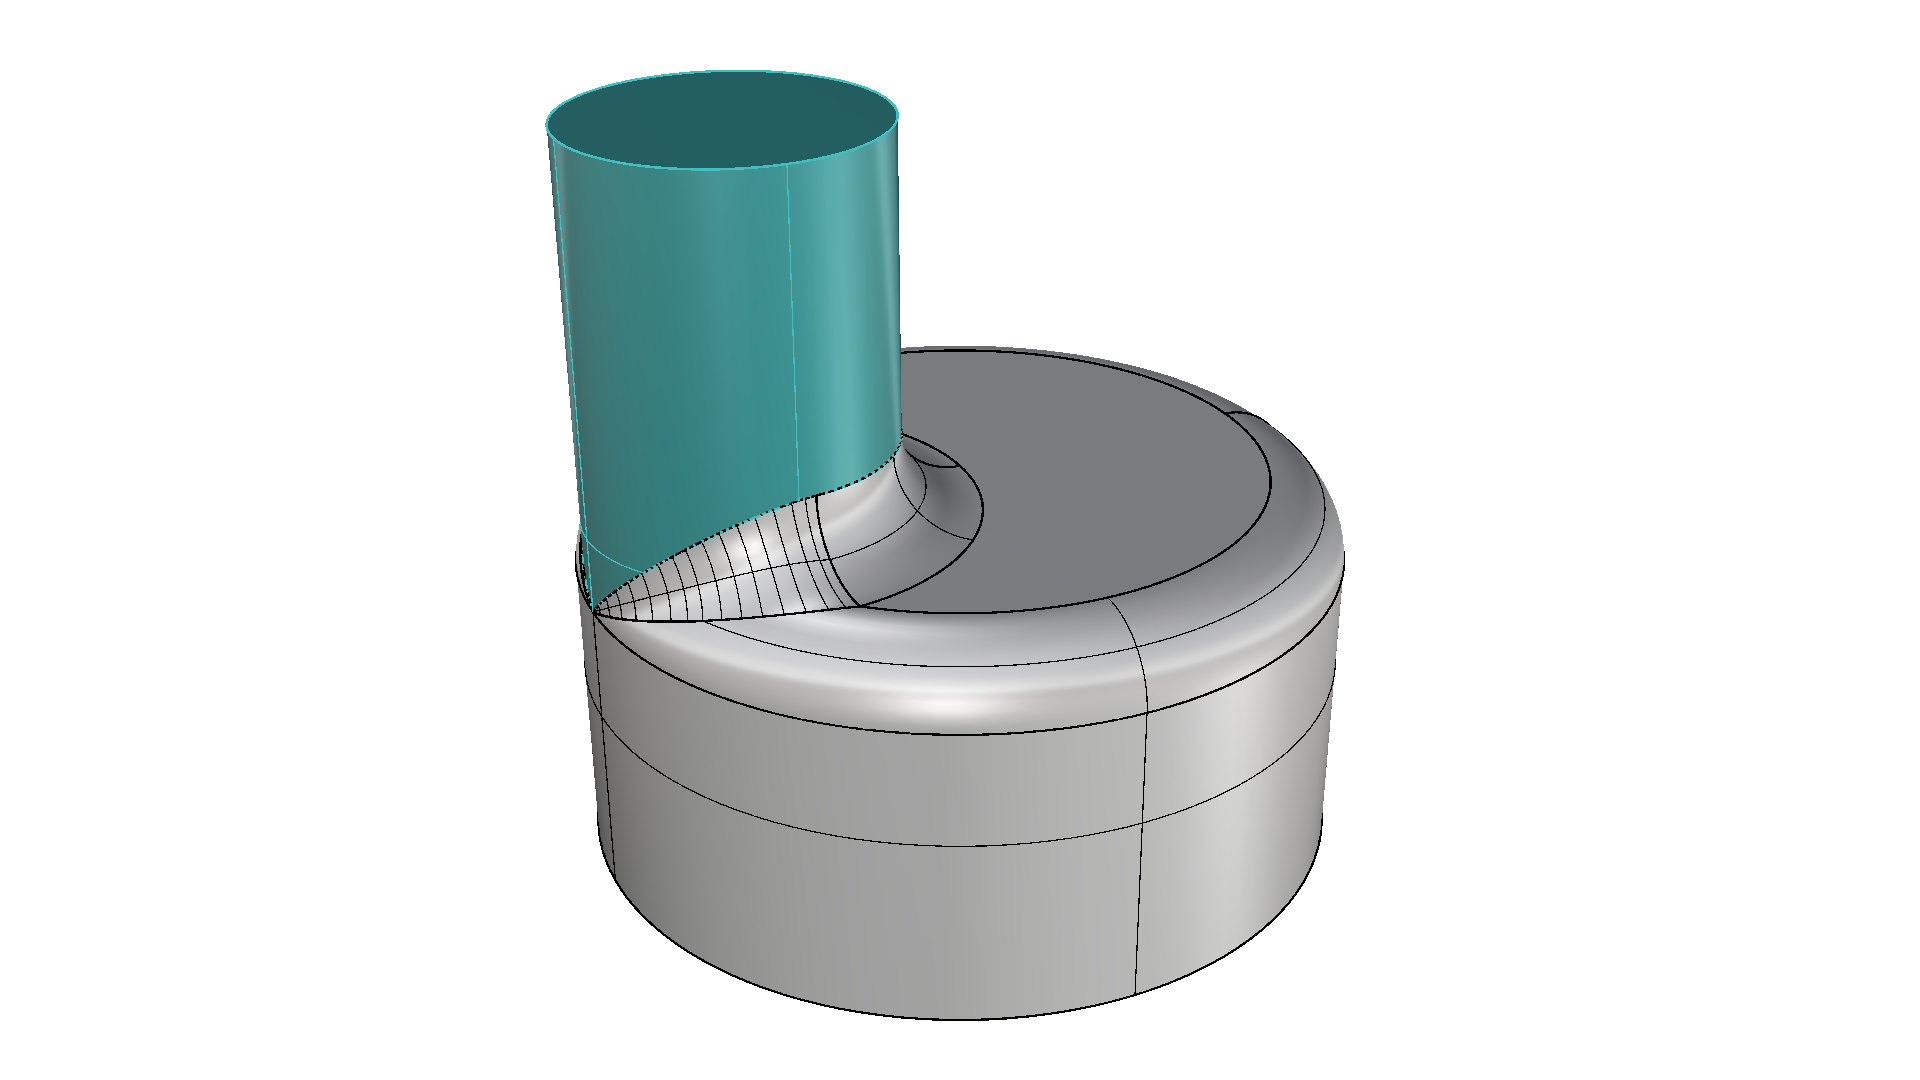
FilletSrf
FilletSrf in Rhino 8 and earlier only allows connecting one surface pair at a time, making the process of filleting a
Polysurface
very time consuming. In Rhino WIP,
![]() FilletSrf
includes an option named Continue across faces. Create a chain of tangent fillet surfaces across your product in one go!
FilletSrf
includes an option named Continue across faces. Create a chain of tangent fillet surfaces across your product in one go!
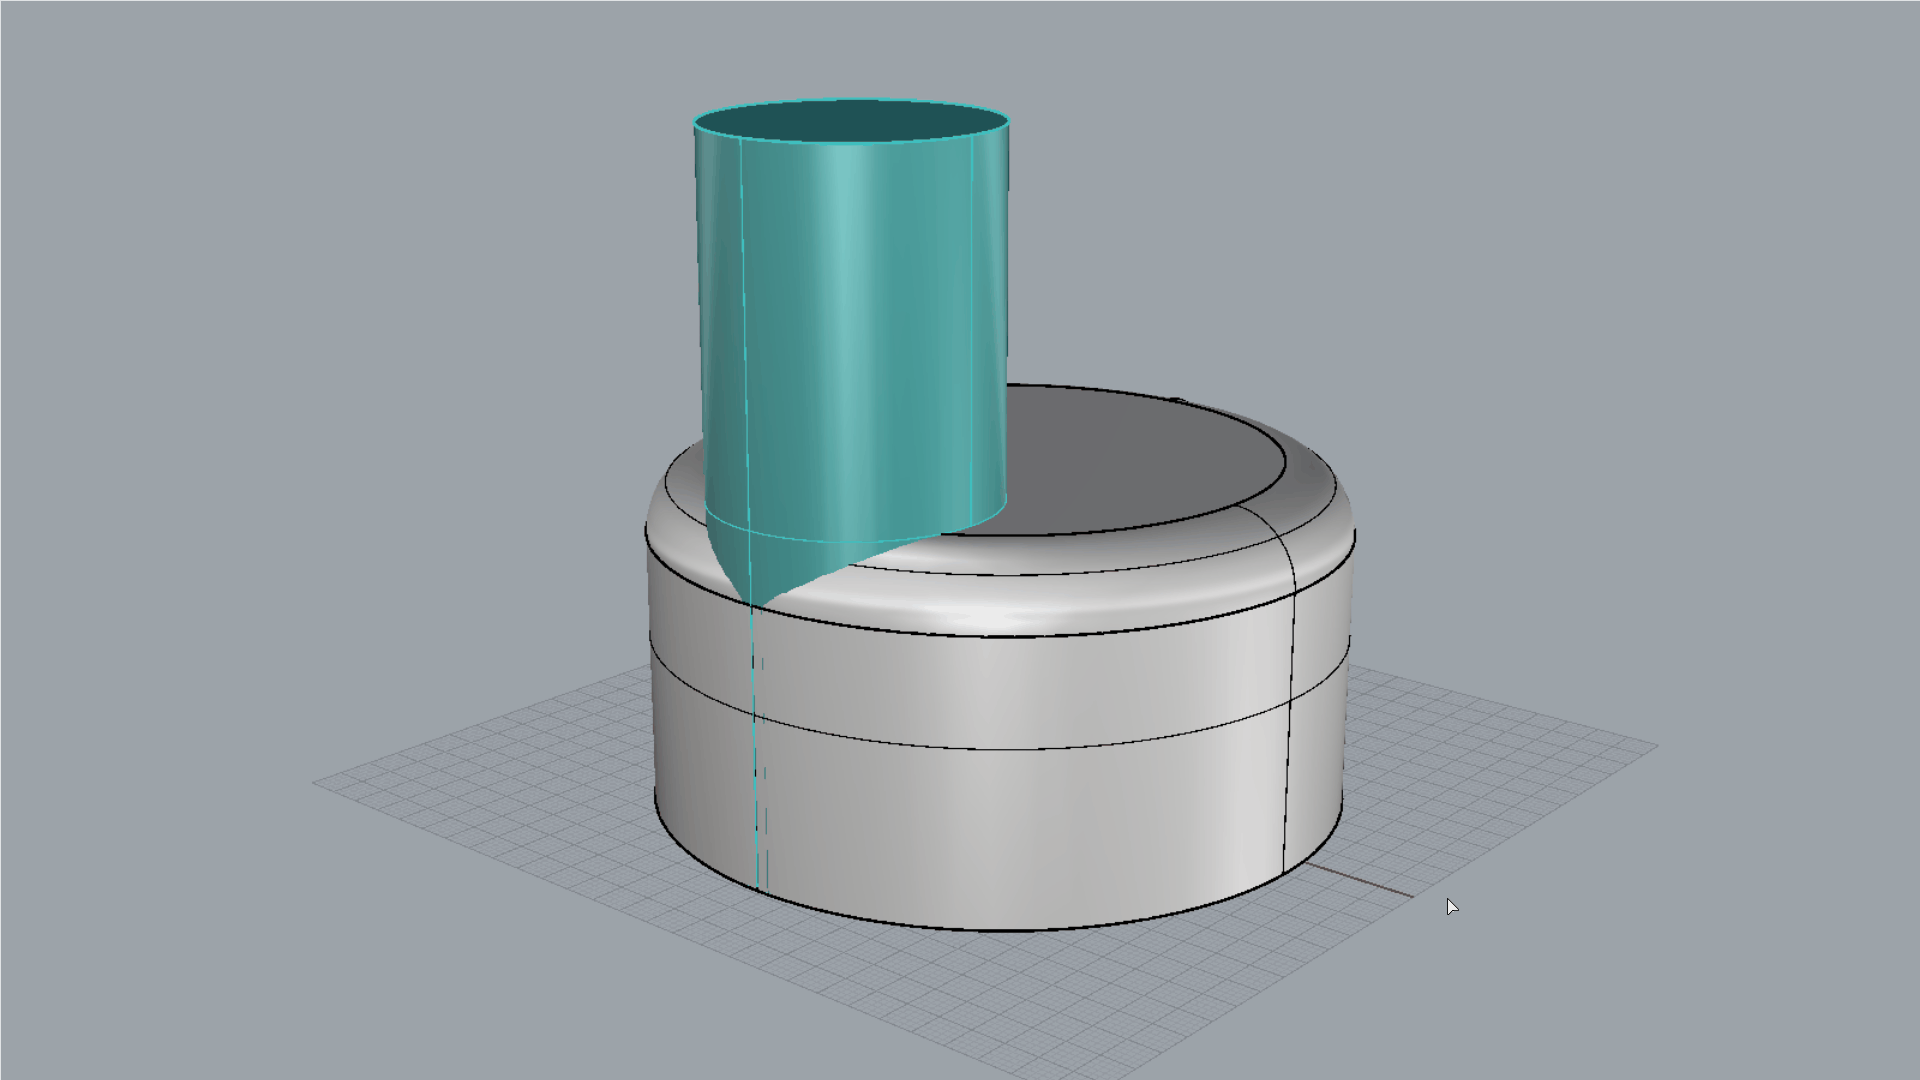
- Download filletsrf-extend.3dm in Rhino .
- Run the
 FilletSrf
command.
FilletSrf
command. - At the Select first surface to fillet prompt , select the fillet surface on the grey cylinder.
- At the Select second surface to fillet prompt , select the turquoise cylinder.
- In the FilletSrf dialog, select Trim and Continue across faces.
- Press OK to close the dialog.
- The result is filleted along all faces and trimmed!

Rhino 8
Rhino 9
SubD
Learn about the new features and enhancements to the SubD toolset in Rhino WIP.
SubDMatch
The
![]() SubDMatch
is new to the Rhino Work-In-Progress. It allows you match a SubD chain of edges to another boundary. This boundary can be a curve, a
surface
edge or another
SubD
edge chain. You can also make the SubD tangent to the target object, if it’s a surface or SubD. This is useful when matching a SubD to other objects or shapes that have manufacturing constraints, such as a certain radius.
SubDMatch
is new to the Rhino Work-In-Progress. It allows you match a SubD chain of edges to another boundary. This boundary can be a curve, a
surface
edge or another
SubD
edge chain. You can also make the SubD tangent to the target object, if it’s a surface or SubD. This is useful when matching a SubD to other objects or shapes that have manufacturing constraints, such as a certain radius.
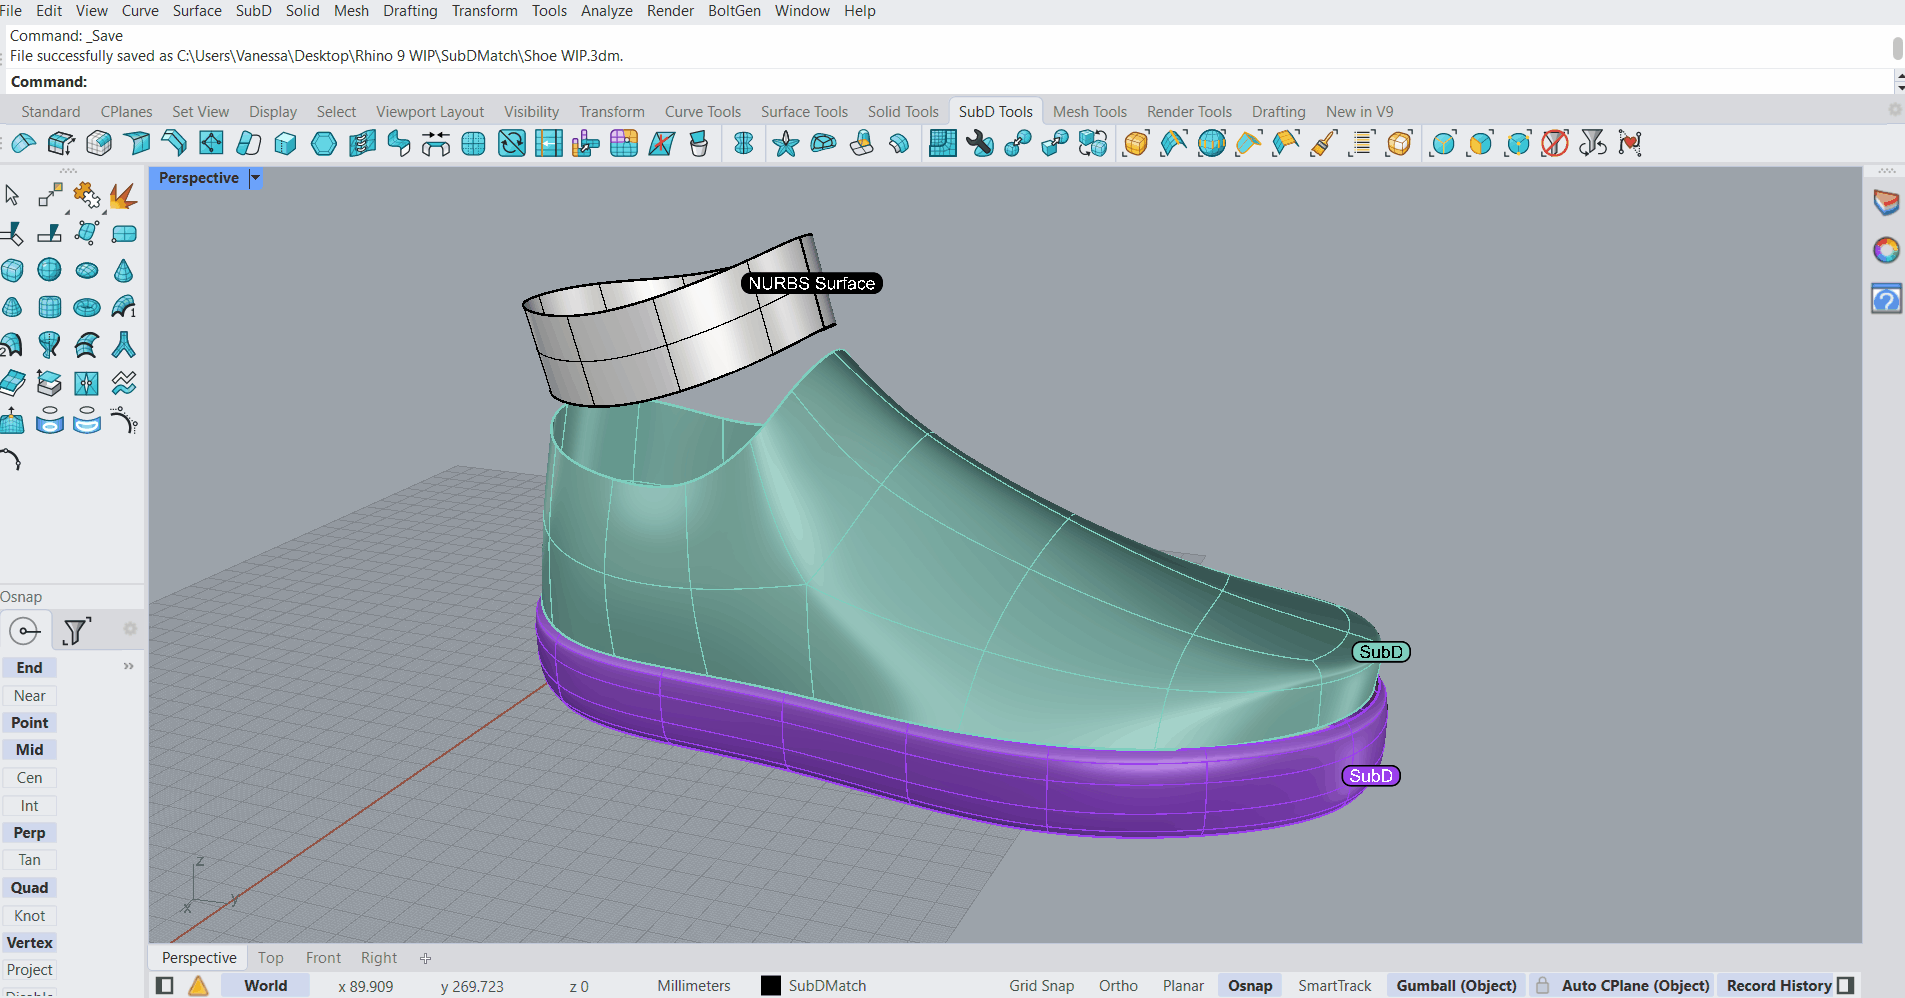
- Download subdmatch.3dm in Rhino .
- Run the
 SubDMatch
command.
SubDMatch
command. - At the Select a chain of SubD boundary edges prompt , double-click on the edge representing the topline.
- Press .
- At the Select a chain of boundary curves to match prompt , double-click on the bottom surface edge.
- Press .
- At the SubD edge match parameters
prompt
, make sure:
MatchTangents=YesandBulge=0.2. - Try it on your own! Match the sole openings or play with the Bulge value!
Drafting
Learn about the many new tools added to improve creating technical drawings in Rhino WIP.
Layouts
Non-Rectangular Details
HatchPattern: Create
The
![]() HatchPattern
command allows you to create your own hatch patterns. These get saved in the 3dm file and can be reused in other projects. This is handy to build a custom library to represent materials or patterns specific to a project.
HatchPattern
command allows you to create your own hatch patterns. These get saved in the 3dm file and can be reused in other projects. This is handy to build a custom library to represent materials or patterns specific to a project.
- Download hatch-create.3dm in Rhino .
- Run the
 TweenCurves
and press
.
TweenCurves
and press
. - At the Select start and end curves prompt , select the two wavy curves.
- At the Press Enter to accept options prompt , type 10 and twice.
- Run the
 Trim
command.
Trim
command. - At the Select cutting objects prompt , select the square and press .
- At the Select object to trim…
prompt
, select the
Fenceoption. - Click and drag a fence around the square to trim the exceeding curves.
- Run the
 HatchPattern
command.
HatchPattern
command. - At the Choose hatch pattern option
prompt
, select the
Addoption. - At the Pattern tile rectangle prompt , snap to the End osnap of the square.
- At the Other corner or length prompt , snap to the opposite End of the square.
- At the Select curves to define pattern prompt , , window select the trimmed curves.
- At the Hatch pattern name prompt , type waves.
- Press to end the command.
- Run the
 Hatch
command to add your pattern to any closed boundary!
Hatch
command to add your pattern to any closed boundary!
Workflows
Rhino WIP includes various tools to streamline certain modeling techniques.
IsolateToViewports
The
![]() IsolateToViewports
command makes selected objects only appear in specific viewports, while they are hidden in others. This can be helpful when sketching or presenting different design iterations in viewports side-by-side.
IsolateToViewports
command makes selected objects only appear in specific viewports, while they are hidden in others. This can be helpful when sketching or presenting different design iterations in viewports side-by-side.
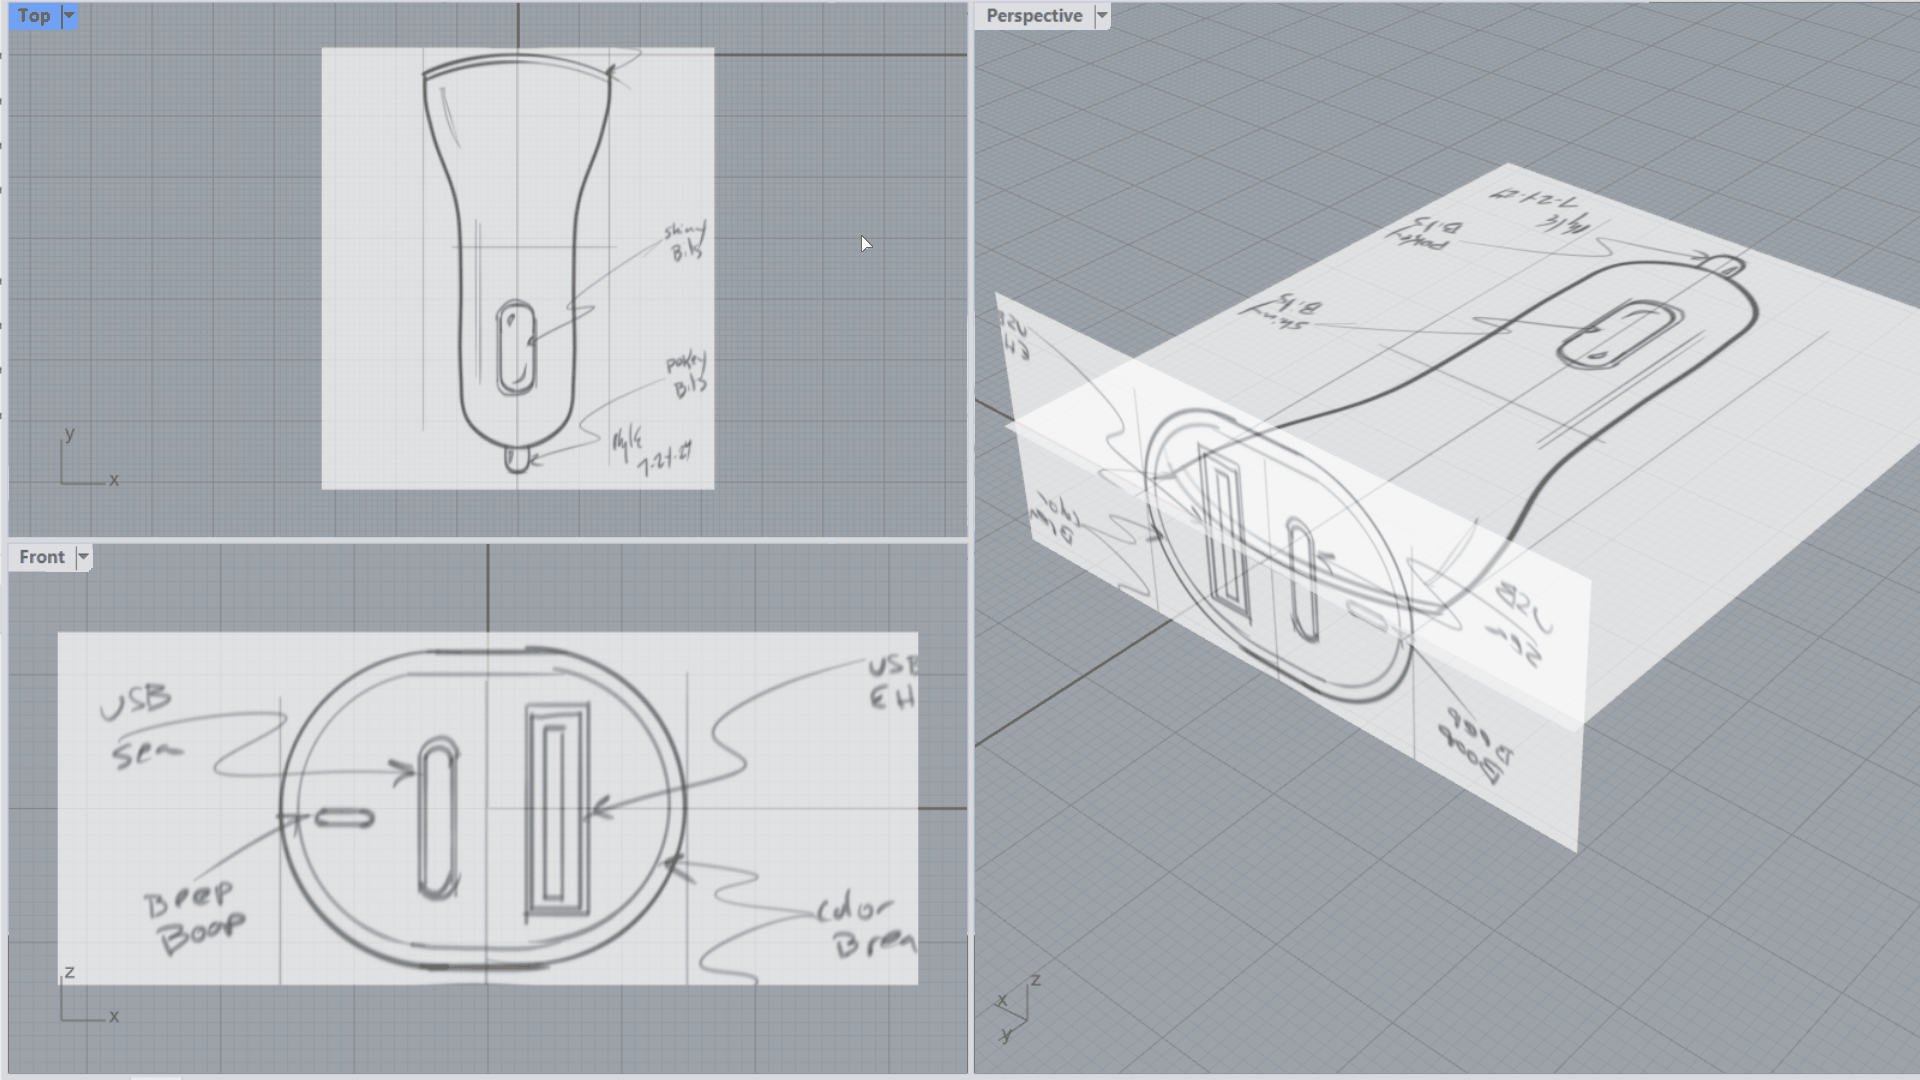
- Download sketch.3dm in Rhino .
- Run the
 IsolateToViewports
command and press
.
IsolateToViewports
command and press
. - At the Select objects to make visible in some viewports prompt , select the images in the and viewport. Press .
- At the Click in each viewport the objects should be visible in prompt , left-click in the Top and Front viewport.
- Press or right-click to end the command.
- Run the
 Curve
command.
Curve
command. - Start tracing away! You can visualize and edit the resulting curve in the viewport without the images getting in the way.
