This tutorial focusses on camera positioning and framing. We’re aiming for renderings that communicate a product design, whether that is to present your design to your boss, client or end customer. Framing is important to guide the attention of your audience to the details you want to focus on, and to set a certain atmosphere for the product you want to communicate.
This tutorial assumes you know the basics of rendering, lighting and materials.
Download the file to start: Rendering Framing
I created a simple scene, that consists of the product we are presenting (a table), the rendering environment (a curved backdrop and lights) and some accessories (a toy car model and some marbles). Although this guide is render engine agnostic, we are using Rhino’s built-in renderer (Cycles) for this tutorial so that everyone can follow along.
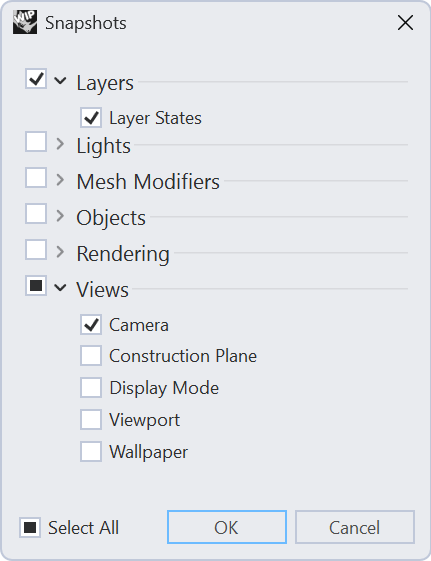
Snapshots
Snapshots is similar to NamedViews, but can store many more settings than just the camera.
While it is possible to save the position and orienation of objects into a snapshot, I’m keeping it simple, and create 3 copies of the rendering scene environment, so that I can keep moving objects around for each rendering as I see fit, without having to update the snapshot.
For this project, I’ve planned to deliver 3 renderings, to communicate the product:
- A rendering that shows the complete product
- A detail rendering of the leg design
- A shot that focusses on the product ‘in use’
Camera Settings
Lens length
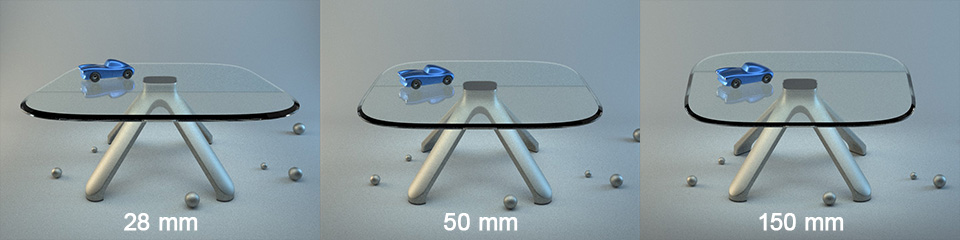
Rhino’s default camera focal length is 50mm. This is not an arbitrary focal length: it matches closest to the human eye, which makes it an ideal starting length for product shots. For architectural scenes you will typically use much shorter lens lengths, e.g. 28mm, and for close-up shots its common to user larger focal lengths. There are no fixed rules to what lens length you should use, it all depends on the effect you are after.
Shorter focal lengths generate a more aggressive perspective, whereas longer lens length deminish this effect, as is clearly illustrated in the image below.
Accurate Camera Positioning
Positioning the camera using the right mouse button is convenient but sometimes you want to have accurate control over your camera position. The position and target of the camera can be found in the Properties panel, where you can type in the exact coordinates for the position and target. Another way is to position the camera and/or target with the Gumball. With the camera view active, press the F6 button, or run the command
![]() Camera
.
This turns on the camera widget. The camera has points for the camera position, target, rotation and one extra point that can be used to drag the camera and target simultaniously.
Camera
.
This turns on the camera widget. The camera has points for the camera position, target, rotation and one extra point that can be used to drag the camera and target simultaniously.
Safe Frame
Safe frame settings are part of the viewport properties. Without any objects selected, the settings can be found in the properties panel:
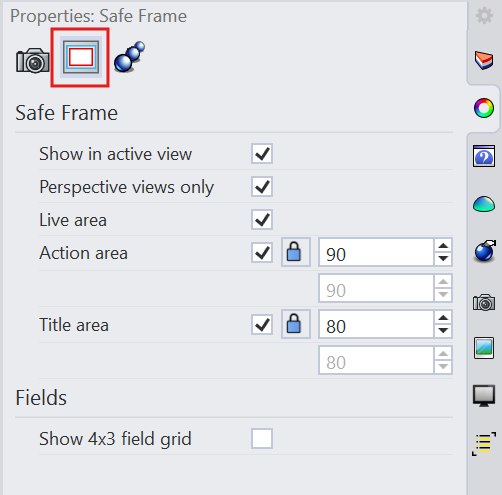
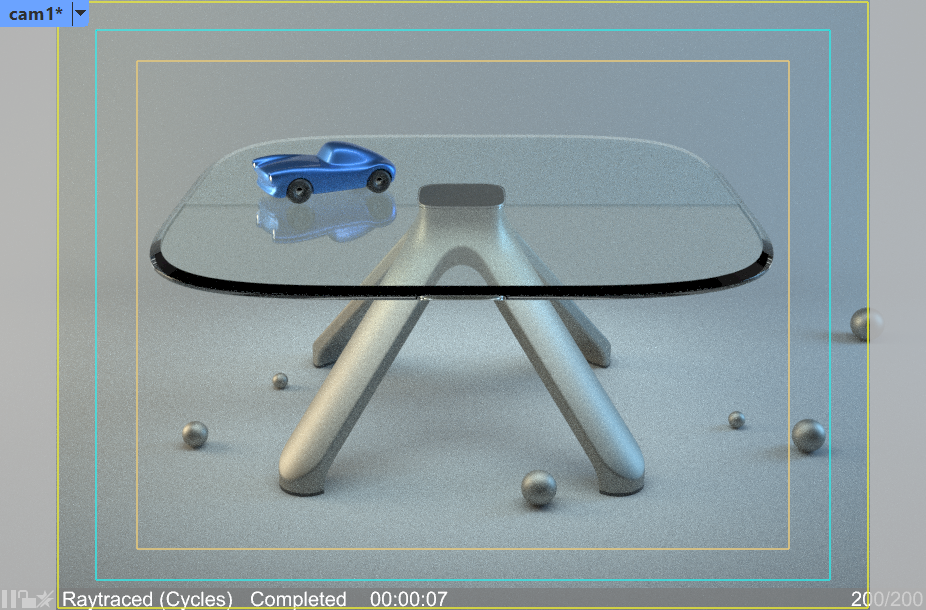
Safe frame helps you to see what part of the viewport will be rendered. The most important here is the Live area. Once activated, that part is marked with a yellow border and the part outside of this area will be grayed out:
Depth of Field
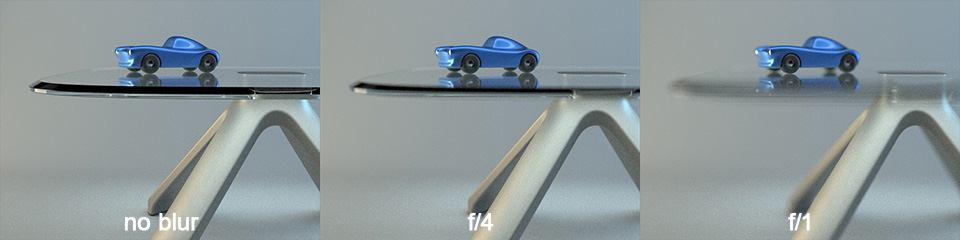
Depth of field is a natural phenomenon in real cameras that is dependent on the lens opening (aperture). Larger the apertures result in less depth of field and more focal blur. Focal blur can be used as a tool to help you put focus on those parts of the scene you want the user to pay attention to. At the same time, it adds to the sense of depth in the image and creates a different mood than an image that is fully in focus. The effect should be used with care and not be exaggerated. Too much focal blur creates a very shallow depth of field and makes the scene look very tiny. You’ll often find shallow depth of field in macro photography.
Framing
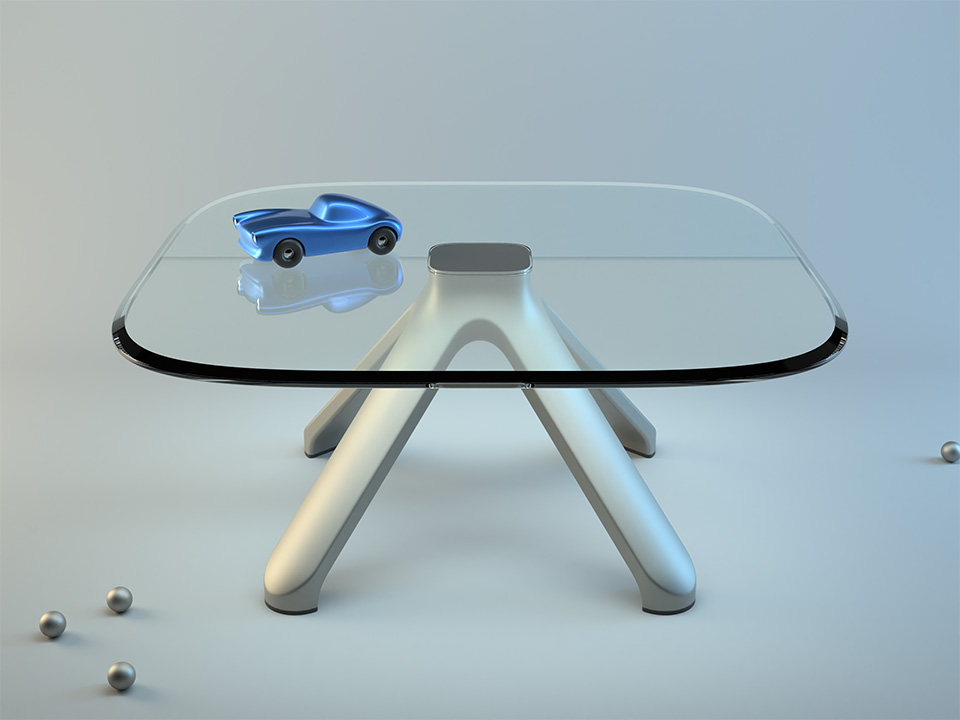
Full product shot
When framing a product, the first variable is how much of the product will be in frame. For the first product shot, I want the full product in frame. There is a balance between object and scene. Getting too close to the frame borders feels cramped, and the opposite makes the product feel lost.
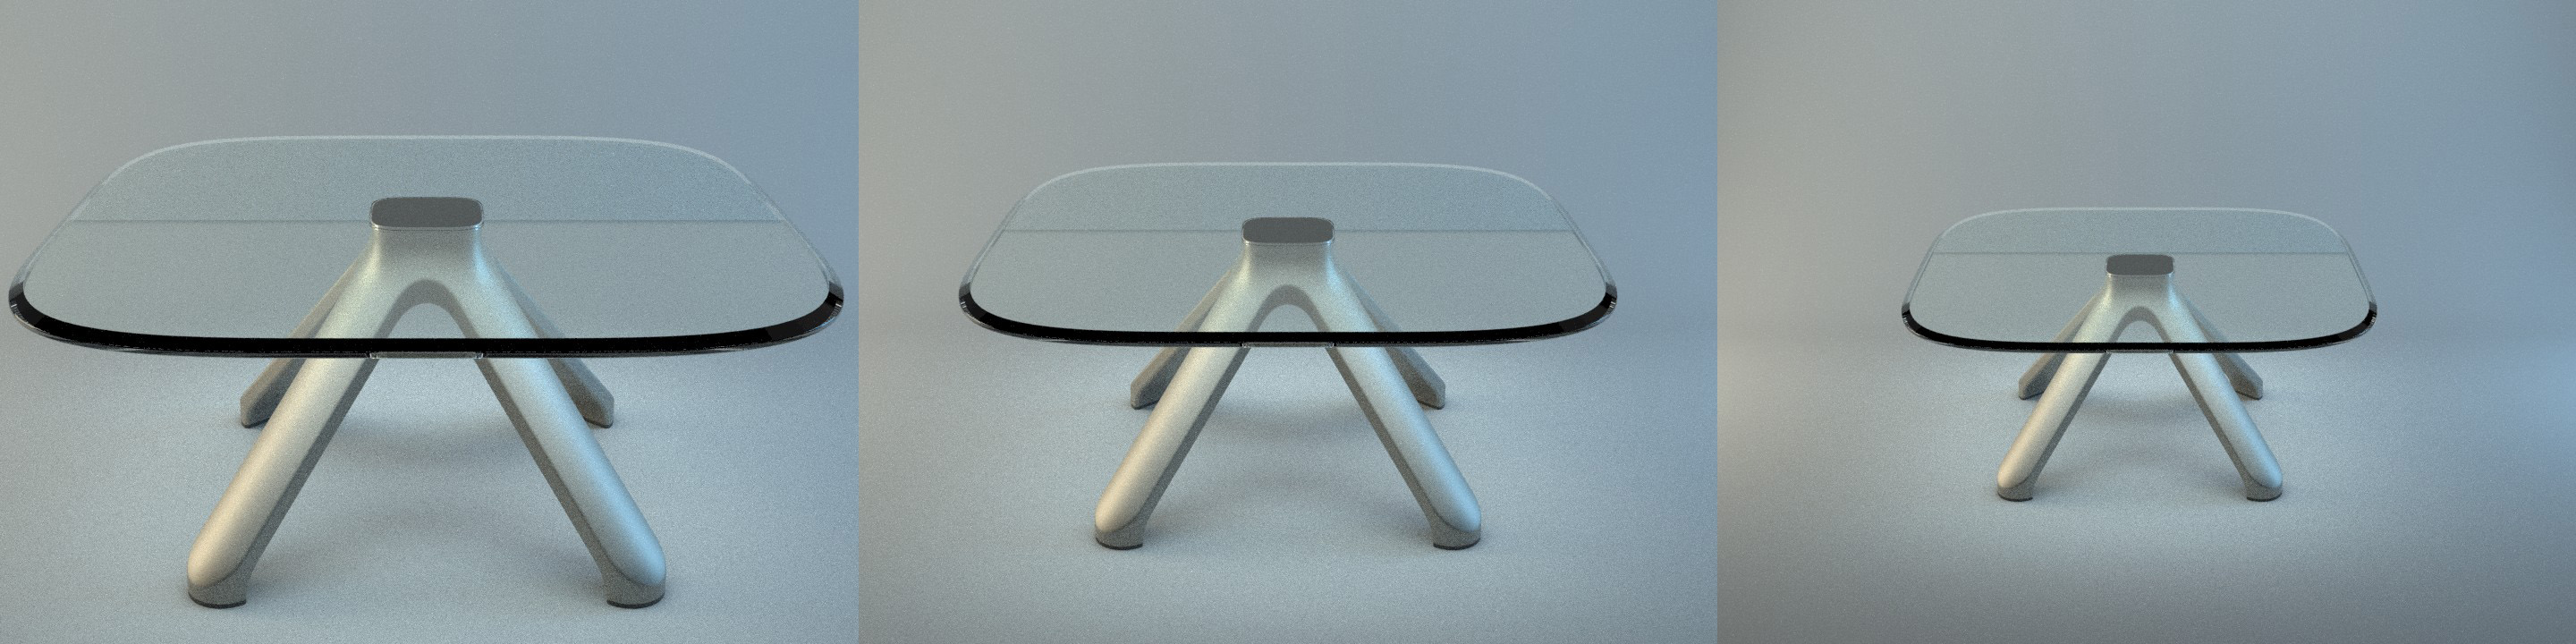
We will add objects that give the product context. This is arbitrary, I chose objects that make the scene more playful. The objects need to help create a scene without asking too much attention. Here you see three options. The colorful marbles, while more realistic, call for more attention than I wanted, and the right most scene is a bit too crowded. Using the material of the table for the marbles makes the scene playful, yet keeps the focus on the product.
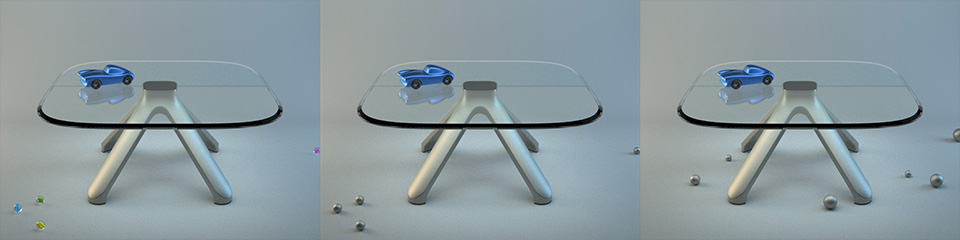
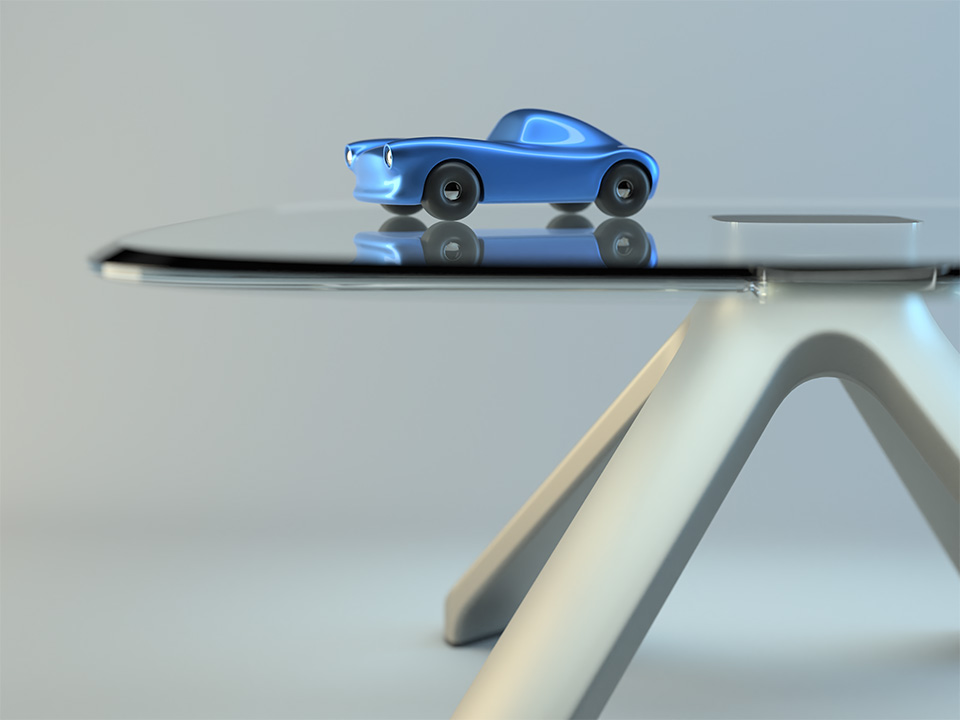
Detail shot 1
For the first detail shot, I want to focus on the design of the table leg. Therefore, I frame the rendering such that the table top is partly out of view. The camera is lowered which helps bringing the attention to the table leg. With this shot the viewer gets a good sense of both the front and back surface shapes of the design. The car has been moved from the table top to the ground. The car and one of the marbles extend the scene beyond the part that is visible.
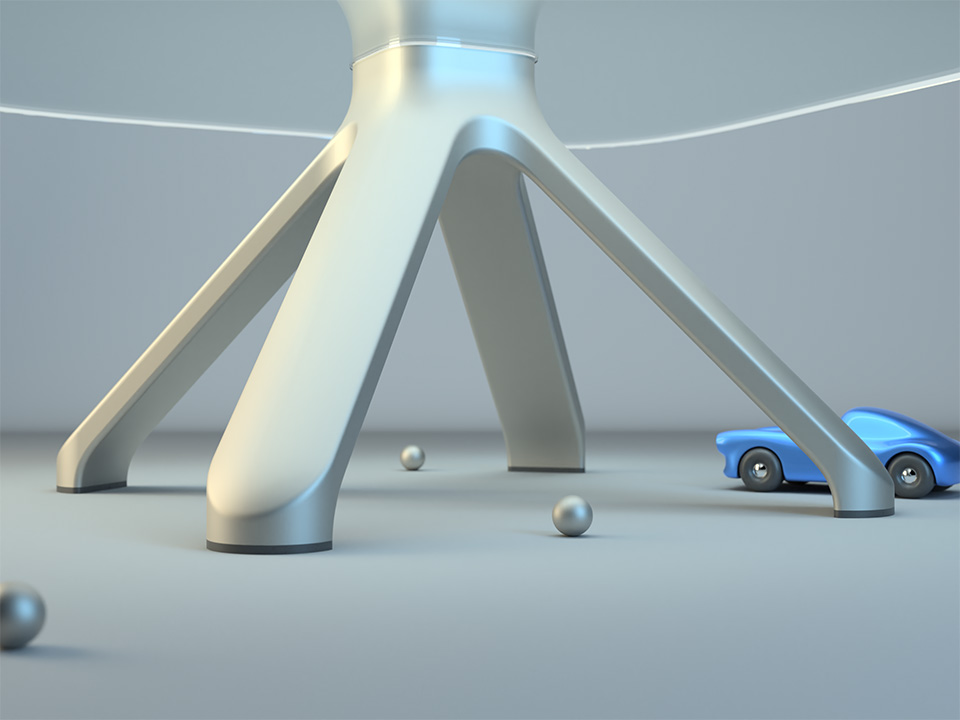
Detail shot 2
For the second detail I am aiming for what I would call a ‘magazine style’ shot. Using a more shallow depth of field, and focussing on the accessory (the car) in this case, moves the focus from the product, to the product in use. The product is not fully in view. This isn’t necessary since the main focus is to set an atmosphere for the product.
