1. Tutorial: Creating a Key

|
In this tutorial you will
You learn about about |
In this tutorial, learn how to create your first object in Rhino by placing a sketch or image in the background to help us trace polylines and circles that will define they key’s shape. We will combine these curves into one and use it to extrude it into a 3D object. We will then use some of the solid creation and editing tools to detail the object. A simple exrercise to start acquiring good modeling habits while creating a 3D object.
1.1 Tutorial Legend (note to self: add videos and links to the following topics)
If you’re completely new to Rhino, we recommend following these tutorials first to get you up to speed with some of the essential Rhino behaviors. You can always start the tutorial and come back to them at a later stage if needed:
- Jump Start with Rhino
- The Interface
- Navigation
- Selection
- Object Snaps
- The Properties panel
- Running Commands
- Command Prompt
- Accesing the Help guide
- All commands and UI elements in this tutorial will be linked to a video or to a Help topic.
- Rhino is a command based program. When we ask you to run or execute a command, it can be done through the menus, the Command Line or or the icons. Once a command is run, please read and follow the prompts in the Command area. Rhino will always tell you what to do next.
Now that you’ve gone through these, you’re be ready to start the key creation journey!
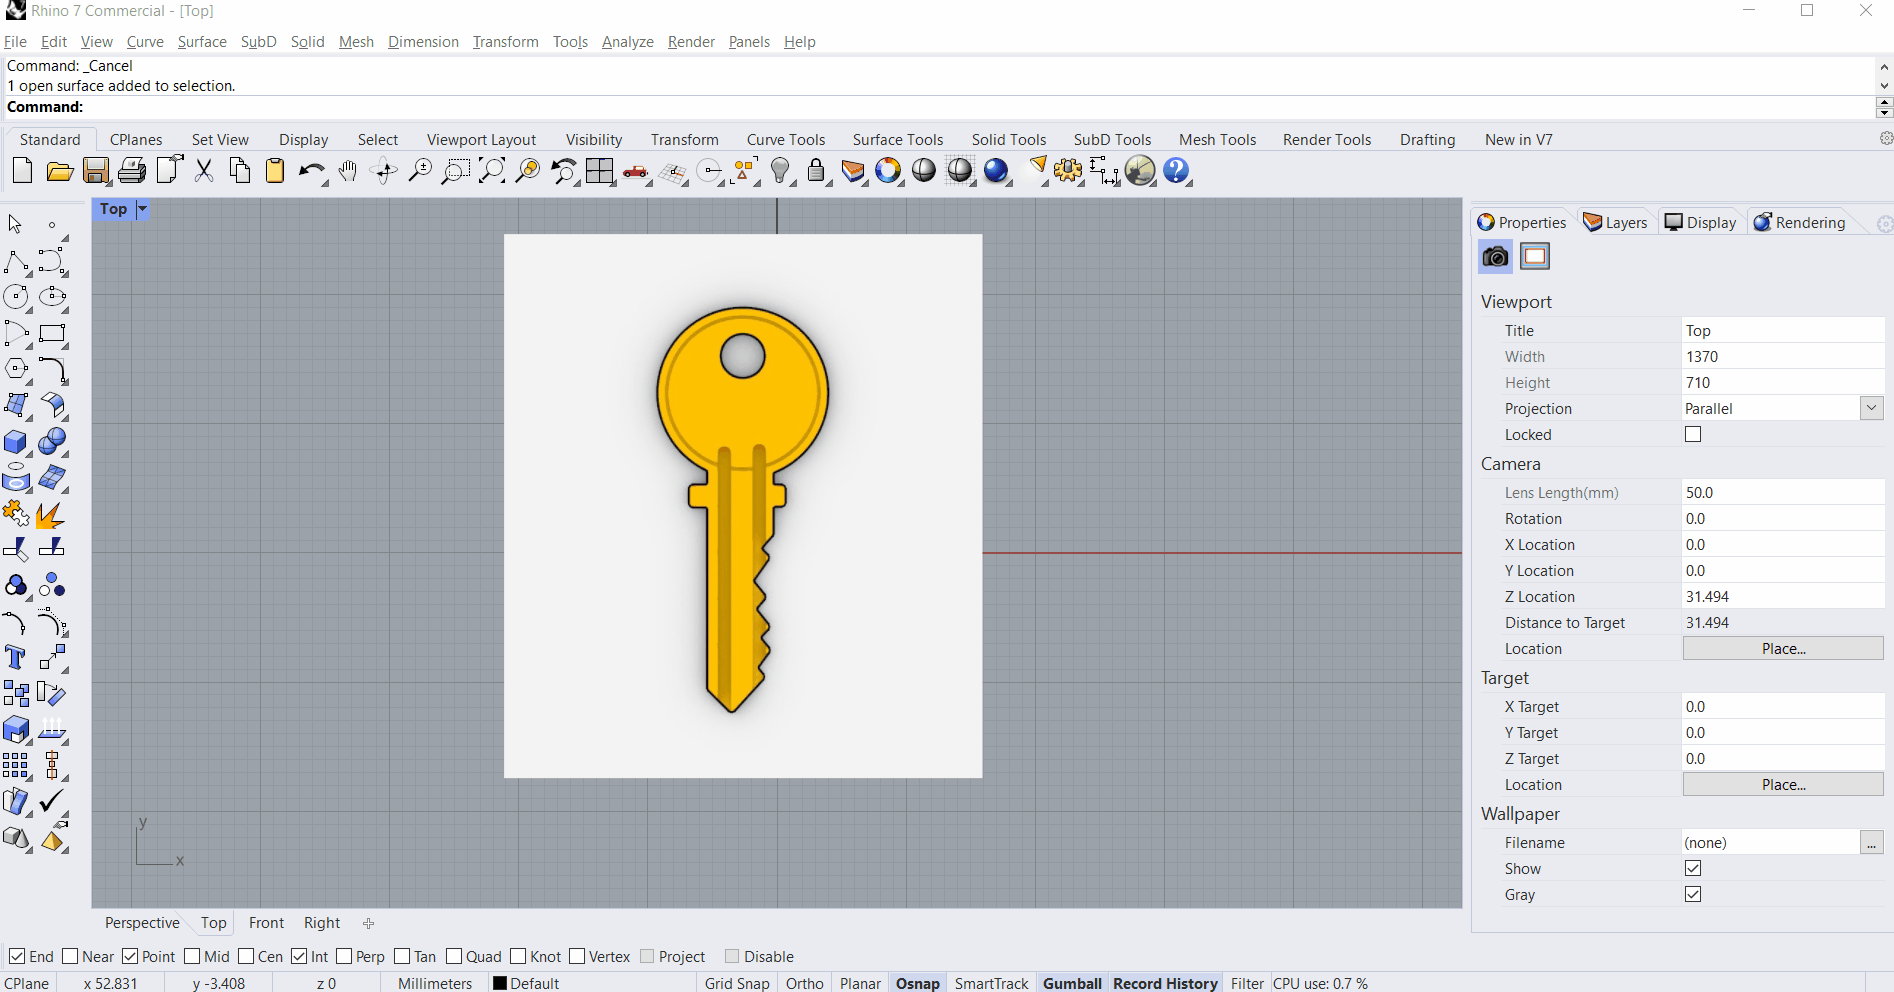
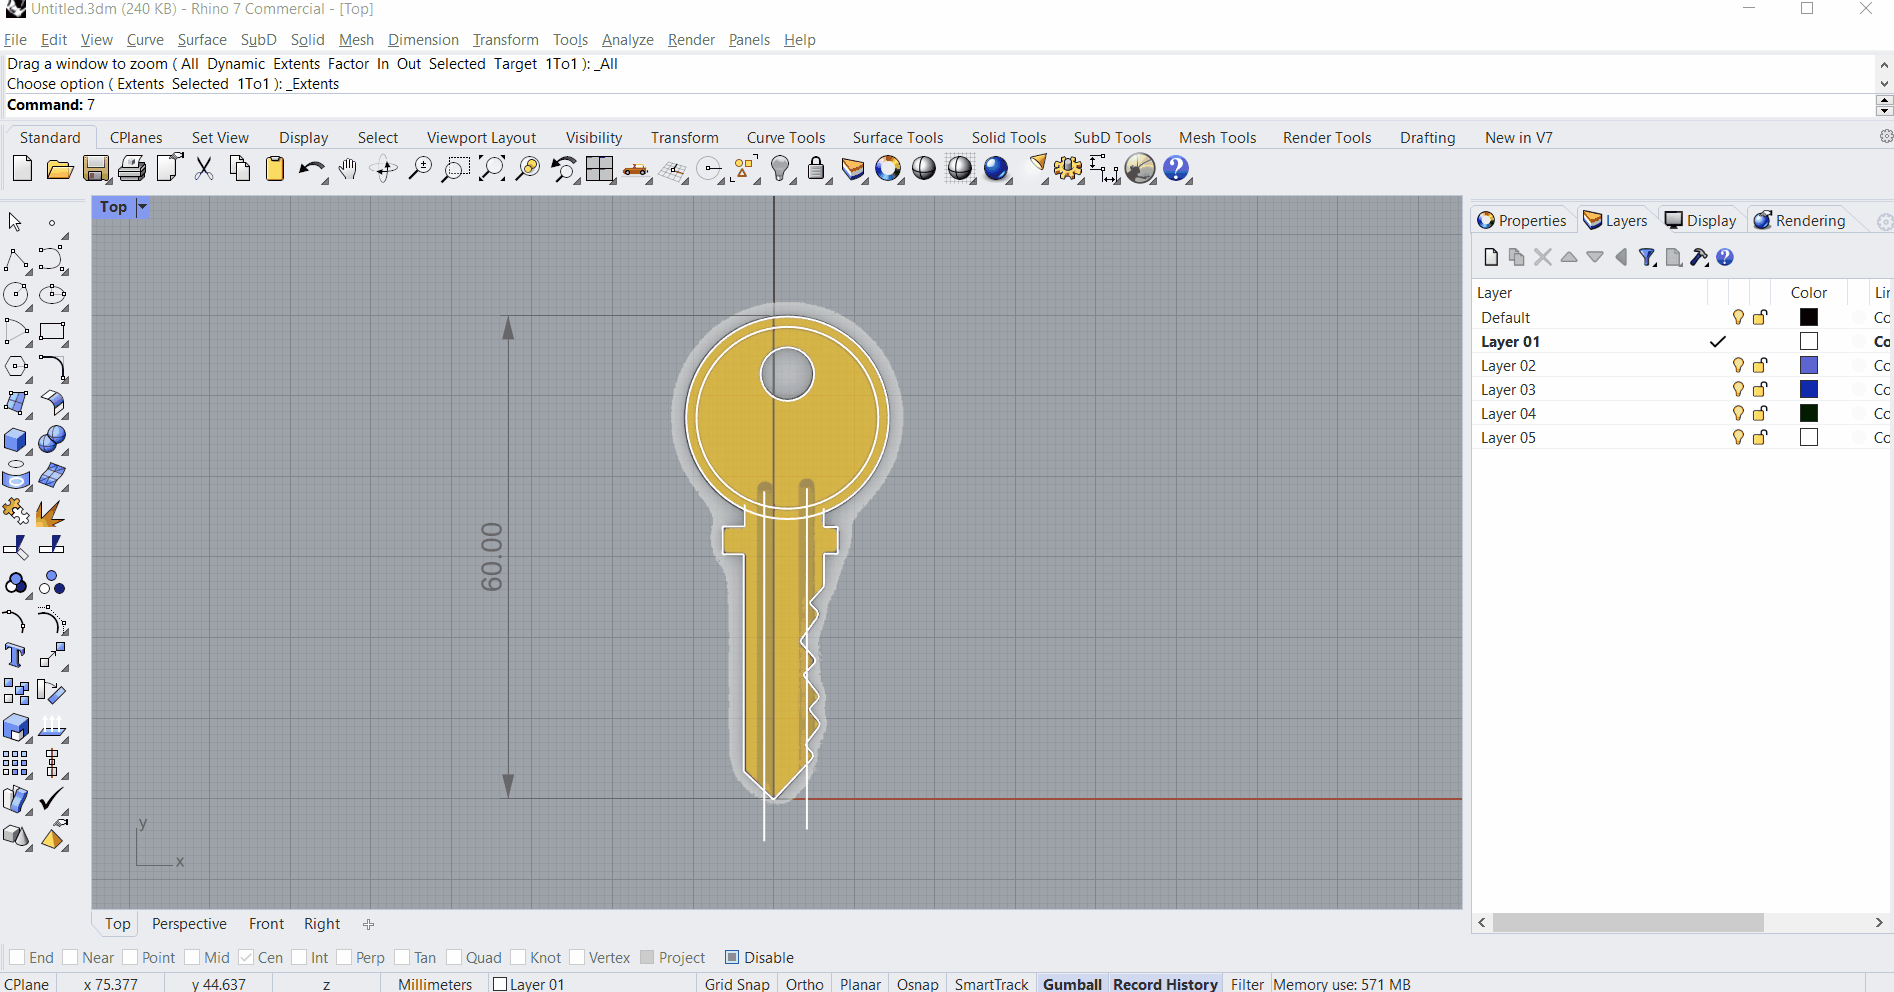
1.2 Placing a Reference Image
In this first step we will learn how to place an image in the view.
- In the File menu, click on New… and select a Small Objects - Millimeters.3dm from the Templates folder. This file template is the most adapted to model a small object such as a key.
- Maximize the Top viewport by double-clicking on its title.
- Run the Picture command and browse for the image (note to self: add a link so users can download the key pic).
- In the viewport, click two points diagonally to place the picture.
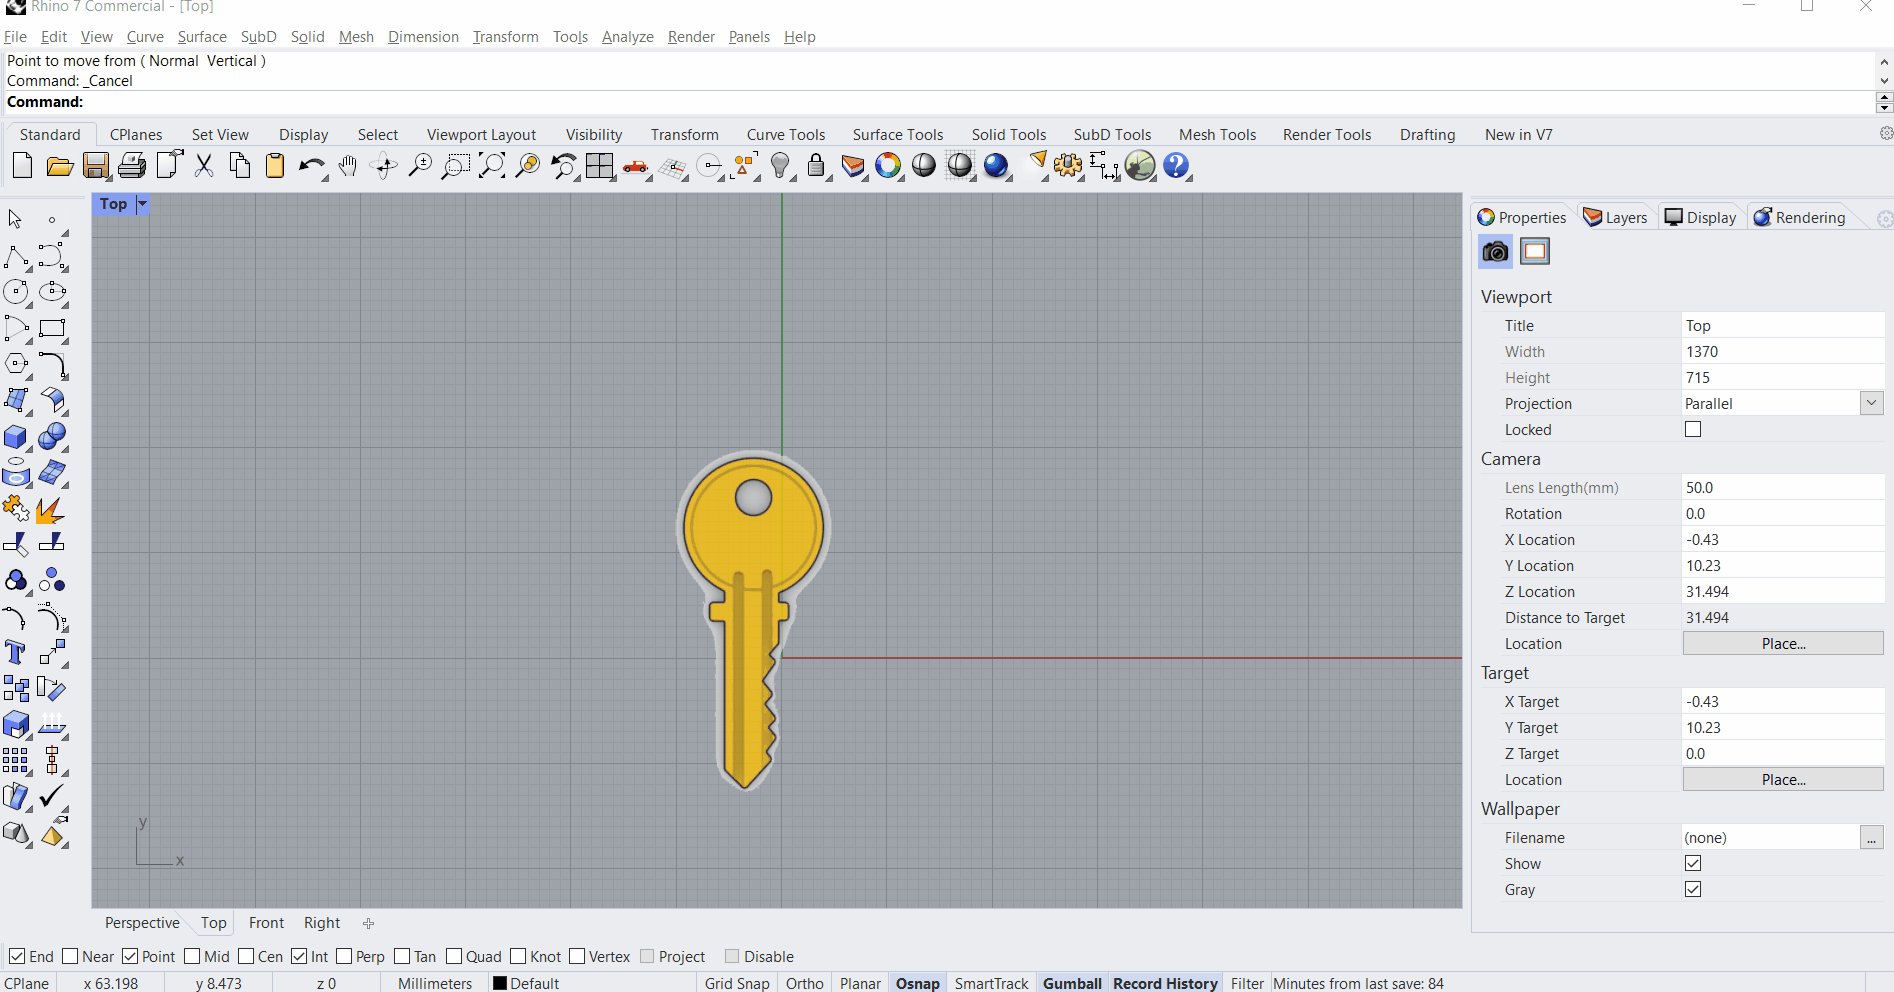
1.3 Editing the Image
In this step, we will learn how to remove the background color and set a global transpareny level to the image. This will help us visualize the curves as we trace them.
- Select the image you just placed.
- Go to the Materials page on the Object Properties panel.
- Under Transparency, check Color Mask.
- Click in the color box to open it.
- Drag the Eyedropper icon until you sample the white background color of the image.
- Click on OK to close the Color Box.
- With the Picture still selected, go to the Object Properties panel and play with the Tolerance value, starting at 5%, until you get rid of the surrounding pixels left for the background of the image.
- Under the Color Mask setting, move the Object transparency slider to around 50%.
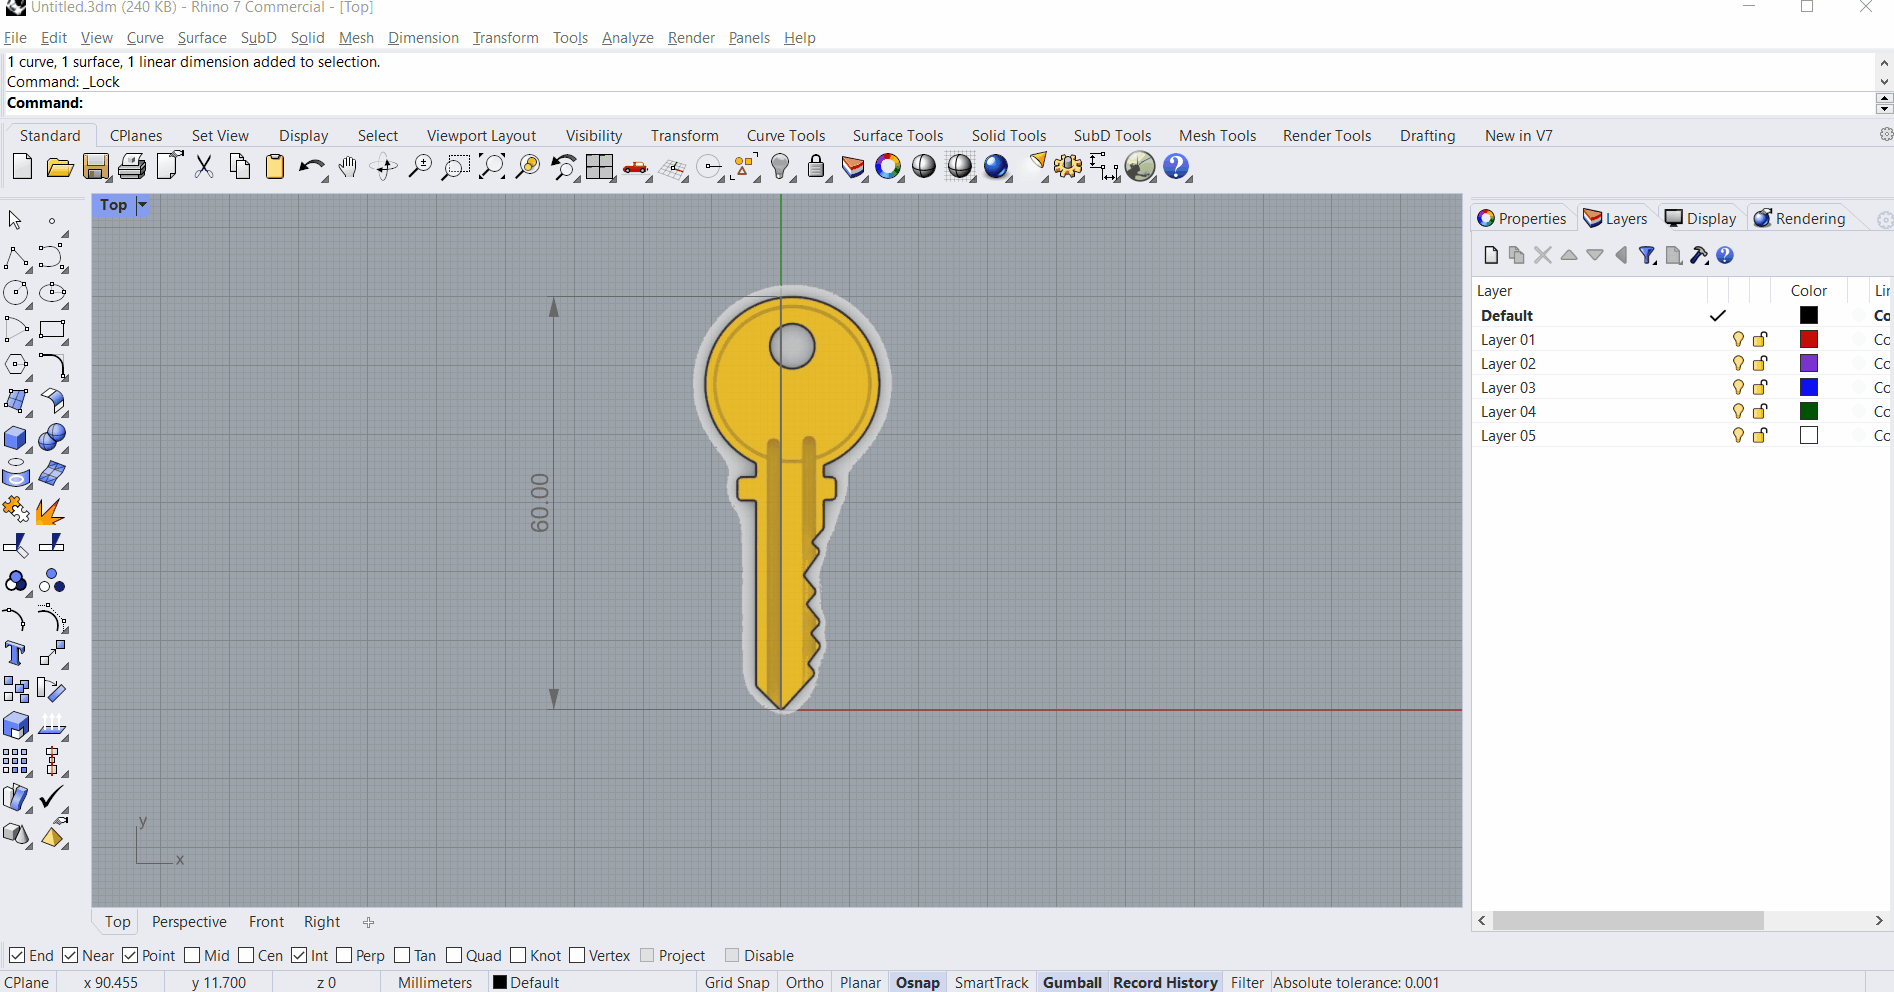
1.4 Scaling the Image to Size
We will proceed to centering the image on the Grid and scaling it to 60mm, which is a standard size for a physical key.
- Select the image and run the Move command.
- Click on a point at the bottom tip of the key.
- Type 0 to move the image from that tip to the middle of the Grid.
- Run the Polyline command.
- Type 0 to place the start of the polyline at the center of the Grid.
- Type 60 and press Enter to make it 60mm in length.
- Hold down the Shift key to activate Ortho. This will force the cursor to move only in the X or Y direction of the Grid. Click a point in the Y direction and press Enter to end the command.
- Select the image and run the Scale command.
- Type 0 as the Base Point.
- Hold down Shift to activate Ortho and pick the First reference point at the top of the head of the key.
- Make sure the End Osnap is checked.
- Click at the top End of the polyline, for the Second reference point. The total length of the key now measures 60mm.
- With the image still selected, click on the Lock icon. This keeps the image visible and prevents you from inadvertently moving it.
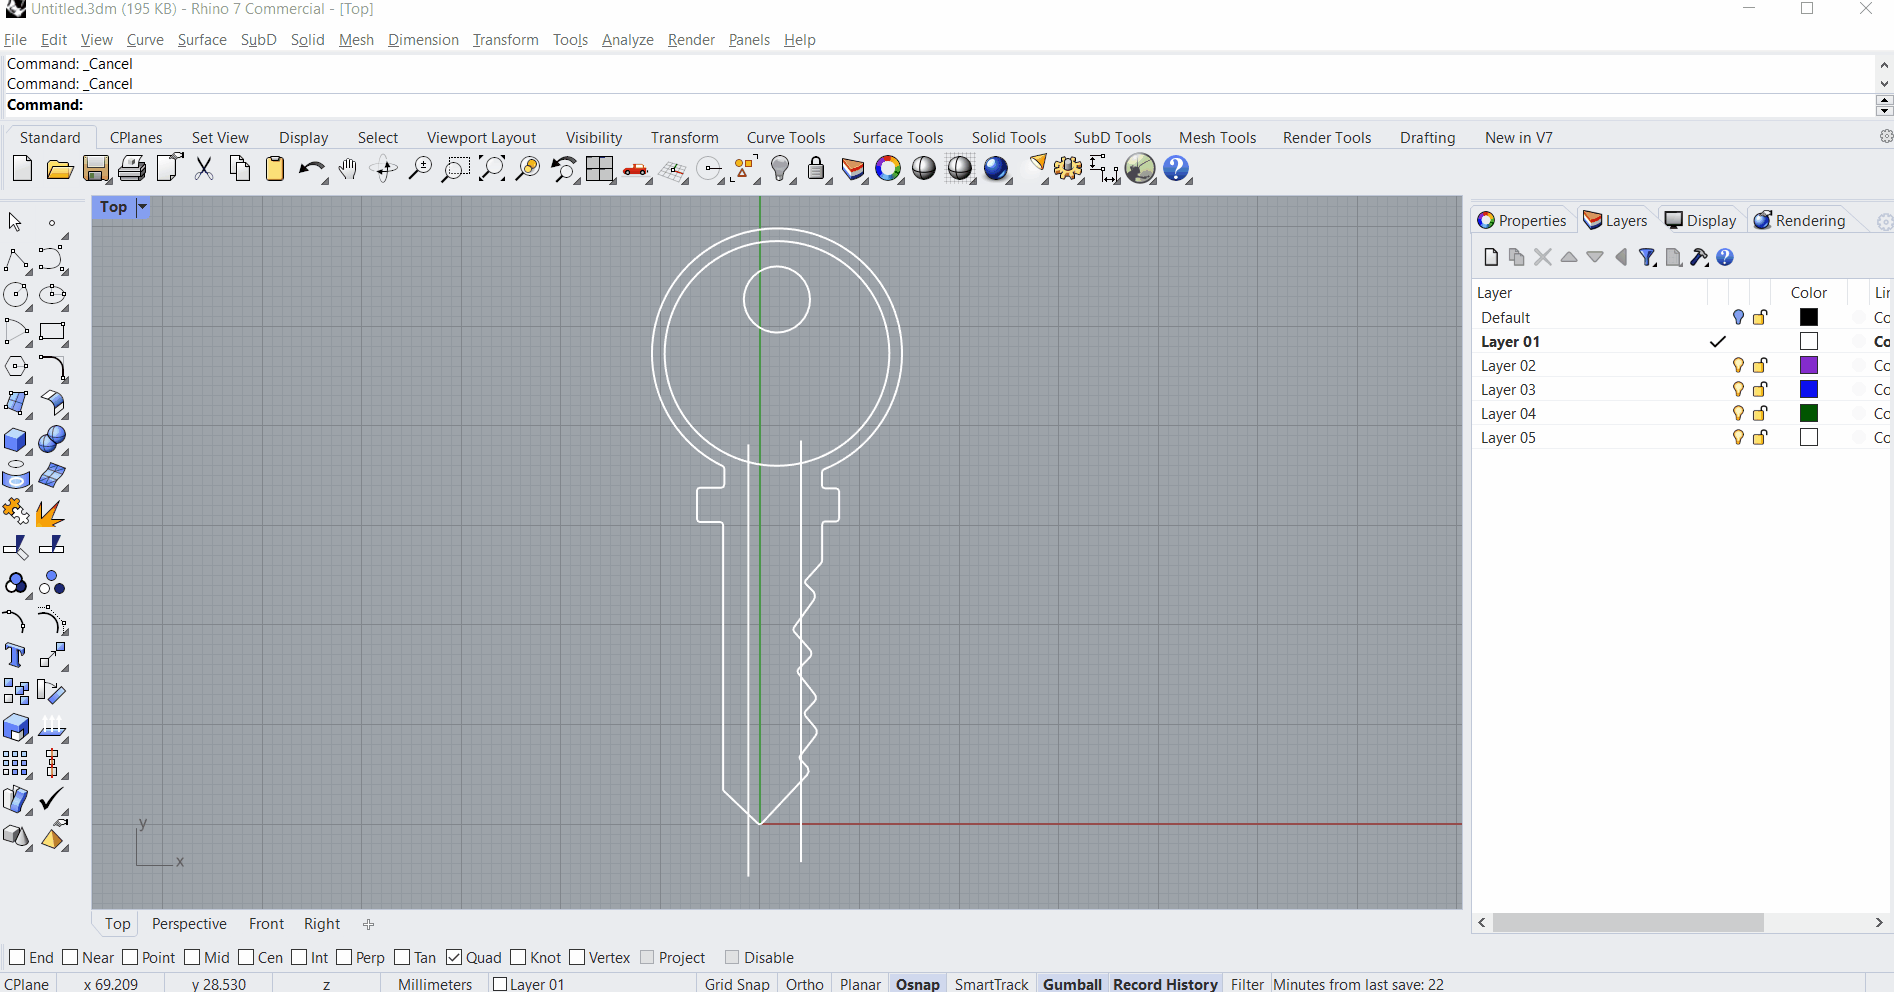
1.5 Tracing the 2D Curves
In this section, we will start creating the curves that will define the outer shape of the key.
- In the Layers panel panel, double click on Layer 01 to make it the current layer.
- Run the Circle command and click on the 2Point option at the Command Prompt.
- In the view, click two points at the top and bottom to place the curve that will define the head of the key.
- Make sure Cen Osnap is active.
- Run the Circle command again.
- At the Center of circle prompt, hover over the perimeter of the head circle until the Cen Osnap tag appears, then click to validate
- At the Radius prompt, click a second point on the image, to represent the circle of the indent.
- Create a third Circle to represent the eyelet of the head.
Now let’s create the profile defining the blade, the teeth and the indents of the key.

- Run the Polyline command.
- Place the first point inside the outer circle, aligned with the straight left segment of the blade. Continue placing points.
TIP: Toggle the use of Ortho by pressing down the Shift key as you trace the line. Ortho will keep the alignment straight. - Once you reach the teeth area, notice you can click on the Mode Command Line option to switch to an arc. This will allow you to trace the profile toggling from straight lines to arcs.
- Place the last point of the polyline inside the circle representing the head. Press Enter.
- Run the Line command to create two straight lines representing the indents on the blade.
TIP: Once a command is completed, right-click to run the command again. You can also right-click in the Command Line to access the list of recently used commands.
1.6 Editing the 2D Curves
We will proceed by modifying the curves to obtain a single boundary for the outer shape of the key. This is the last step in getting the curves ready to convert them into solids.
- Run the CurveBoolean command.
- Click on the DeleteInput Command Prompt option. Click on All.
- Select the circle representing the head and the polyline representing the blade. Press Enter.
- At the Click inside regions to keep prompt, click in the viewport, anywhere outside the key. Press Enter. The curves have been combined into a single boundary.
- Run the FilletCorners.
- Select the key’s boundary curve and press Enter. This will round up all the hard edges left in the curve.
Are curves are ready!
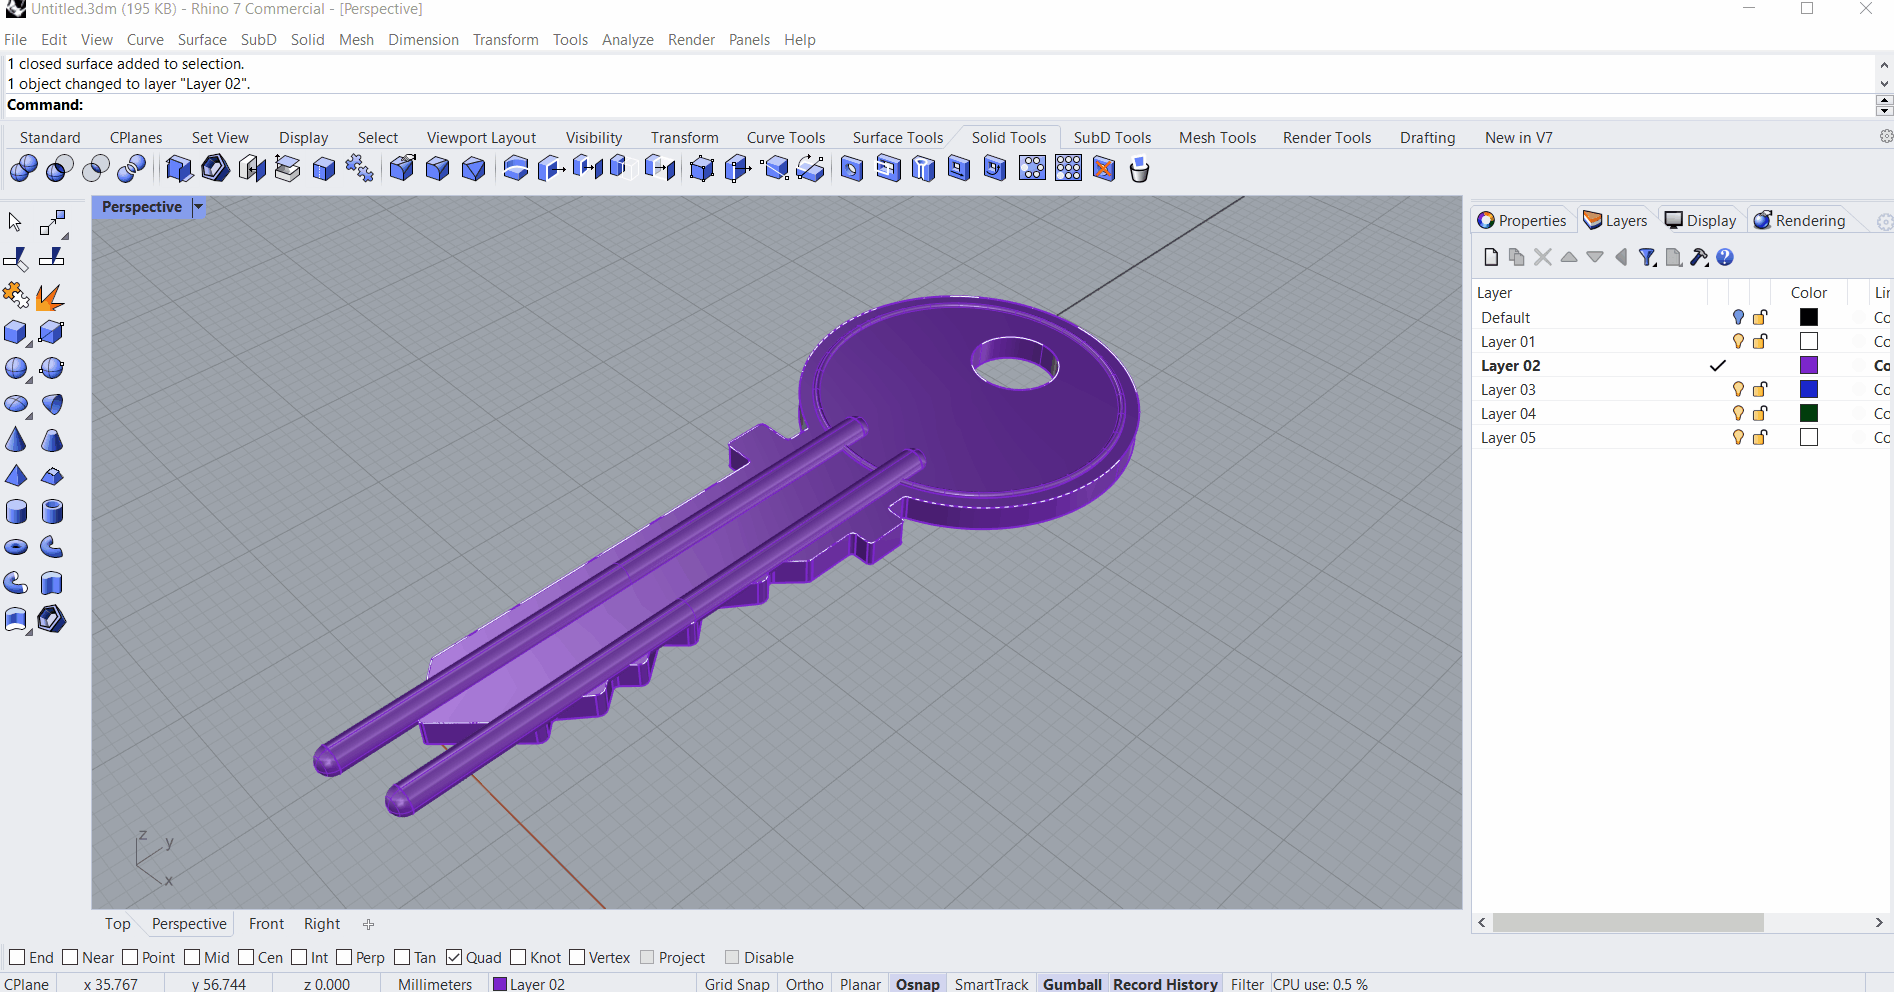
1.7 Creating the Solids or Polysurfaces
We will now create the 3D geometry. The outer boundary curve will become our main solid. The internal curves will be used to create the solids representing the indents on the key.
- Change to Layer 02.
- Change for the Perspective view.
- Select the outer boundary curve as well as the circle for the eyelet.
- Run the ExtrudeCrv command from the Solids menu or Solids toolbar tab.
- At the Extrusion distance prompt, type 2 and press Enter.
TIP: Before pressing Enter to complete the extrusion, make sure the mouse is placed under the curves. The mouse location will determine the extrusion direction.We want to keep the indent curves on top of our solid. - Select the two lines representing the blade indents.
- Run the Pipe command. Make sure the Caps command prompt option is set to Round.
- At the Pipe radius prompt, type 1 and press Enter.
- Repeat the Pipe for the circle representing the indent for the head. Set the radius to 0.25 units. Press Enter twice to end the command.
Our solids are all created!
1.8 Modifying the Solids
We will use the solids to modify their volumes, using common solid operations called Booleans. We will subtract the pipe volumes from our main key volume.
- Change to Layer 03
- Select all the solids, sometimes called Polysurfaces in Rhino (see Object Types).
- Right-click on Layer O3 and select Copy Objects to Layer.
- Turn off all other layers (note to self: maybe link to a video about layers?).
- Run the BooleanDifference command.
- At the Select surfaces or polysurfaces to subtract from, select the main key solid.
- At the Select surfaces or polysurfaces to subtract with, select the three solids representing the indents.
- Make sure the DeleteInput Command Prompt option is set to Yes. Press Enter.
Our key is created!
Learn how to quickly obtain photorealistic renders of your key! (note to self: make tutorial!!)
Download files here (note to self: add download link).
Need help? Contact us!
