Using the Gumball to move move objects
Dragging follows the construction plane of the current viewport.
Move objects
-
If Gumball is on bold in the Status Bar, gumball is on.
-
Click to turn gumball off.
-
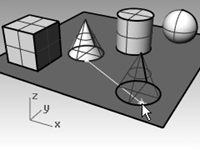
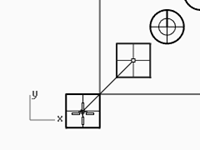
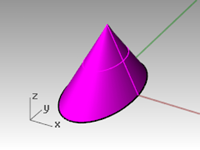
Click the cone and drag it.
-
Drag the objects around. You can drag in any viewport.
In this model, the Grid Snap setting is one-half of a grid line. Using this snap, you should be able to line objects up with each other.
The selected cone changes to the selection color.
-
Drag the cone in the Perspective viewport until it lines up with the cylinder.
It will be inside the cylinder.
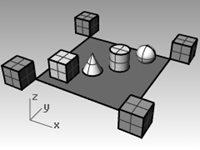
The cone moves on the base represented by the grid. This base is a construction plane. Each viewport has its own construction plane. When you start Rhino, the **Perspective **viewport has the same construction plane as the Top viewport. You will learn more about using construction planes later. -
From Edit menu, click Undo.
-
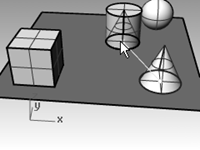
Drag the cone in the Perspective viewport until it lines up with the cylinder. Next tap the Alt key.
You will see a plus + on the screen. Pick a location and the cone is copied to base surface.
-
From Edit menu, click Undo.
-
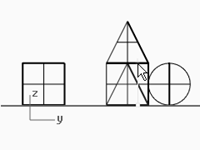
In the Front viewport, drag a cone to the top of the cylinder.
Watch what happens in the Perspective viewport.
Watch the other viewports to place your objects.
-
Click in the Perspective viewport.
-
Change the viewport to a Rendered display.

Copy objects
To create more objects, copy the shapes.
Open the model
- On the File menu, click Open.
- Do not save the changes.
- In the Open dialog box, select Start.3dm.
Copy objects
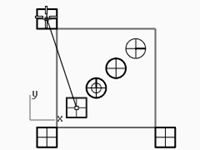
- Click the box to select it.
- On the Transform menu, click Copy.
- Click somewhere in the Top viewport.
It usually helps to click a spot that relates to the object like the middle or near a corner.
- Click where you want the first copy.
Zoom in closer if you like. - Click other places to make more copies of the box.
- When you have enough copies, press Enter.
Editing with gumball
Gumball displays a widget on a selected object, which is used to facilitate the direct editing. The gumball provides move, scale, and rotate transformations around the gumball origin.
- Click the **Gumball **pane on the Status Bar.

Gumball actions
- Drag gumball arrows to Move the object.
- Drag scale handles (squares) to Scale the object in one direction.
- Drag arcs to rotate the object.
- Tap the Alt key after starting to drag to toggle copy mode.
- Click a control handle to enter a numeric value.
- Hold the Shift key during Scale to force 3-D scale.
|
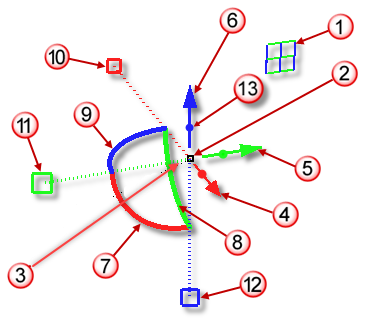
Gumball Controls
 Axis plane indicator
 Free move origin
 Menu location
Move arrows
 Move X
 Move Y
 Move Z
Rotation arcs
 Rotate X
 Rotate Y
 Rotate Z
Scale handles
 Scale X
 Scale Y
 Scale Z
 Extrude Z
|
|
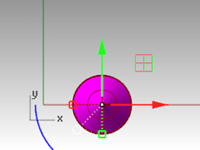
Move geometry with the gumball
-
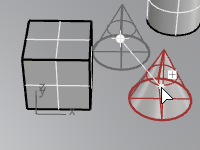
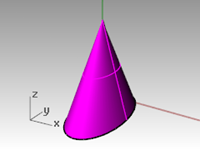
In the Top viewport, select the cone.
-
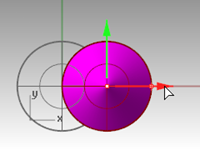
Drag the red arrow to move the object in the positive x or negative x-direction.
-
Drag the green arrow to move the object in the positive y or negative y-direction.
-
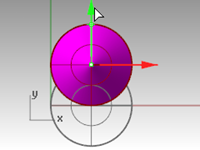
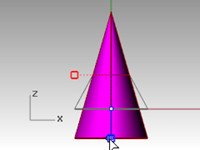
In the Front viewport, select the cone.
-
Drag the **blue arrow **to move the object in the positive z or negative z-direction.
-
Undo enough times to get back to the original model.
-
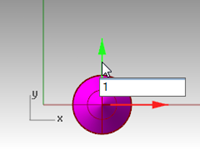
In the Top viewport, select the cone.
-
Click x Move Arrow (red) to enter numeric value of 1.
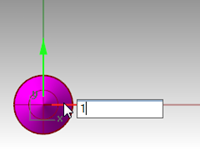
The cone moves a distance of 1 units to the right.
-
Repeat for y Move Arrow and z Move Arrow.

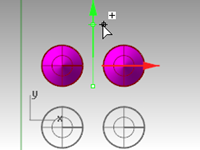
Copy objects with gumball
In this exercise you will drag objects with the gumball and tap the Alt key after starting to drag to toggle copy mode.
- In the Top viewport, select the cone.
- Drag the red arrow to move the object in the positive x or negative x direction.
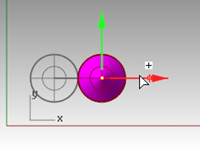
- While still dragging, tap the Alt key.
A plus + appears to the right of the red arrow.
When you release the mouse button, a copy of the object is created.
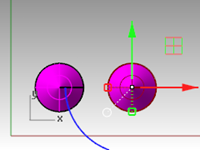
- In the Top viewport, select the two cones.
- Drag the green arrow to move the objects in the positive y direction.
- While still dragging, tap the Alt key.
A plus appear to the right of the green arrow.
When you release the mouse button, a copy of the object is created. - Undo enough times to get back to the original model.
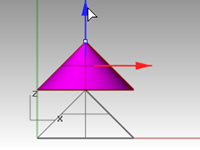
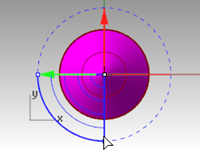
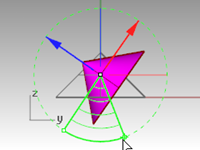
Rotate objects with gumball
Drag arcs to rotate the object.
- In the Top viewport, select the cone.
- Click and drag along blue arc to rotate cone.
- In the Right viewport, click and drag along green arc to rotate cone.
- Undo enough times to get back to the original model.
Scaling with Gumball
- Drag scale handles (squares) to Scale the object in one direction.
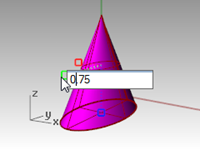
- Click a scale control handles (squares) to enter numeric value.
- Hold the Shift key during Scale to force 3-D scale.
Scale objects with gumball
- In the Front viewport, select the cone.
- Drag the red scale handle (square) to scale the object.
Release the mouse button to complete the scale.
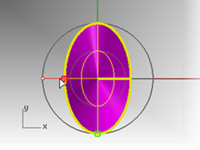
- In the Front viewport, select the cone.
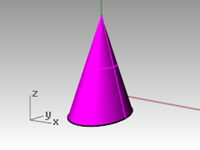
- Drag the blue scale handle (square) down to scale the object larger in height.
Release the mouse button to complete the scale.
- Try clicking a scale control handle (square) and enter numeric value or scale factor like .75.
- In the Front viewport, select the cone.
- While holding down the Shift key, drag the red scale handle (square) to scale the object uniformly in the x, y, and z direction. Let go to complete the scale.

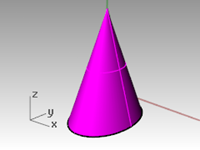
- Undo enough times to get back to the original model.
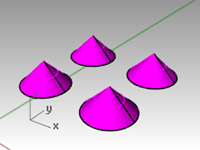
Try on your own
- Make copies of more objects and move them around.
See if you can build something.

Change the view of your model
When you add detail to your models, you will need to see different parts of your model with different magnifications. You can use the view commands, the mouse, and the keyboard to change the view in a viewport.
Each view corresponds to the view through a camera lens. The invisible target of the camera is located in the middle of the viewport.
