Display Modes
Display modes control how 3D objects are visualized on your device, allowing you to examine different aspects of your models. This chapter will guide you through the various display modes available in iRhino and explain how each can help you better understand your designs.
Built-in Display Modes
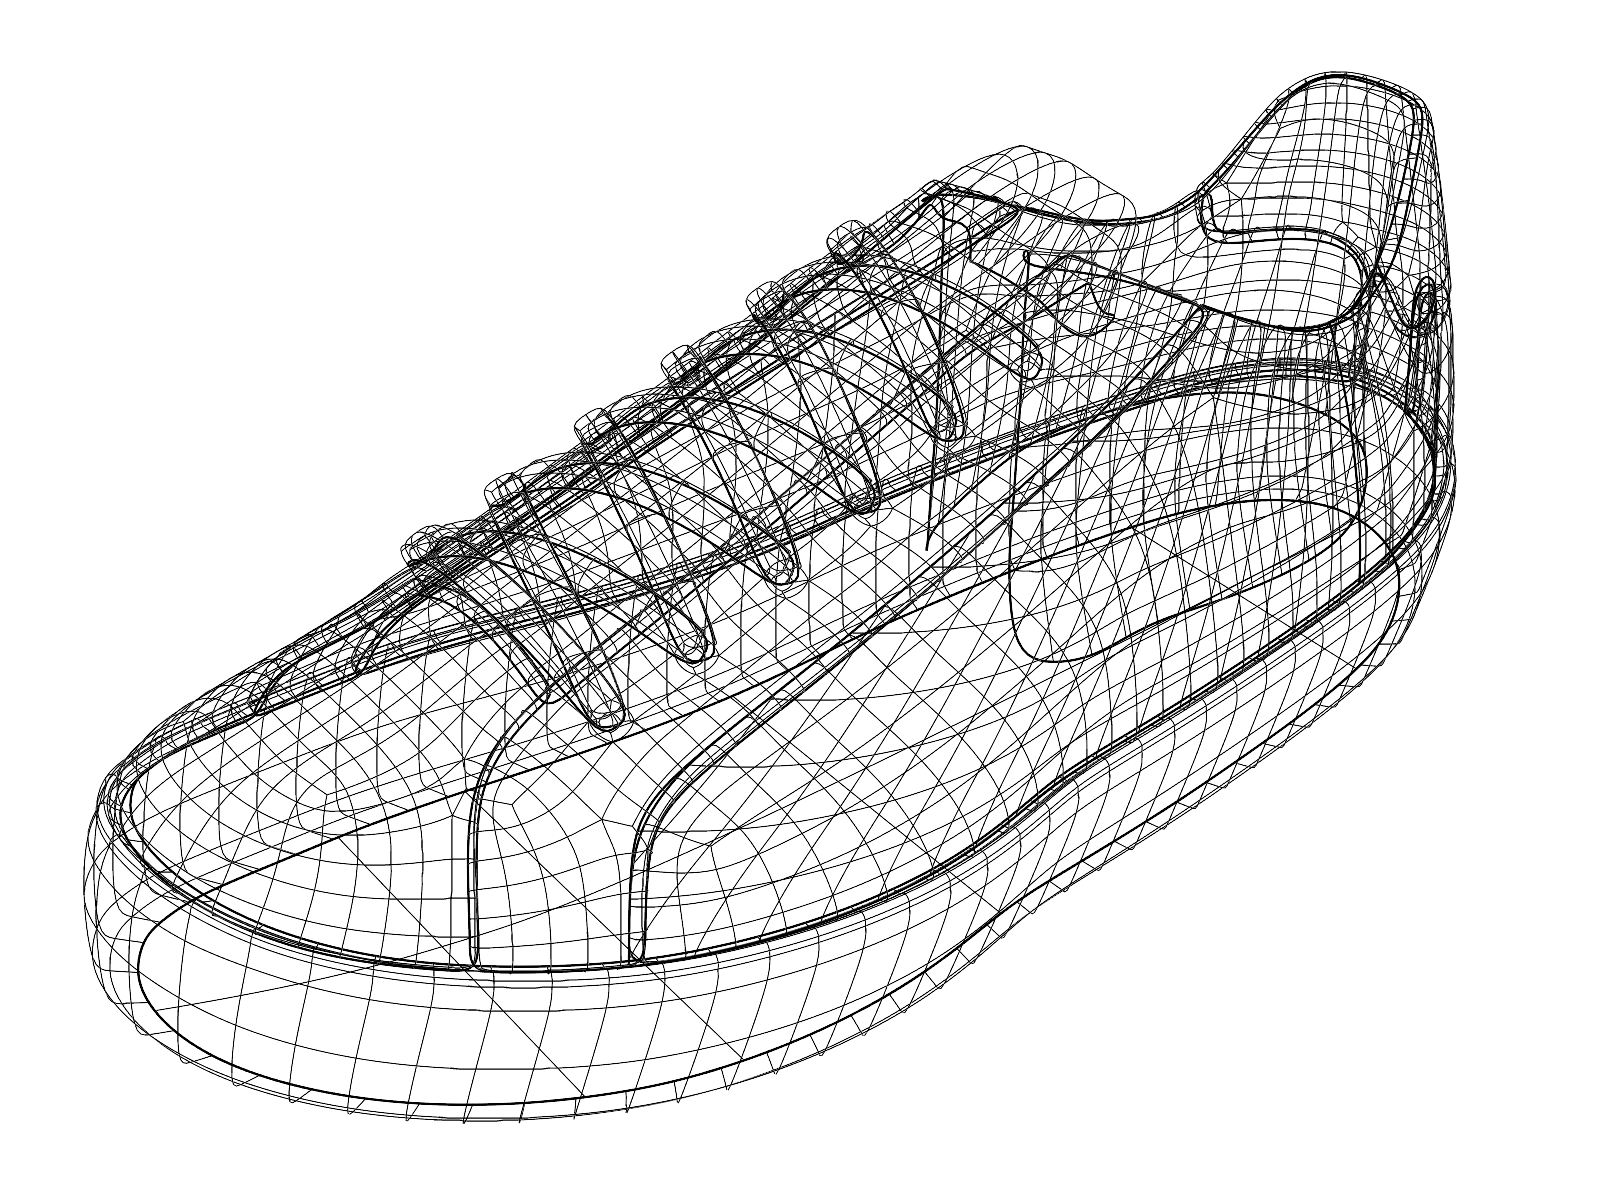
Wireframe
The Wireframe mode shows only the edges and wires of 3D geometry. Without shading of surfaces, it can reveal the underlying structure of 3D objects. It usually has the best display performance for view manipulation.
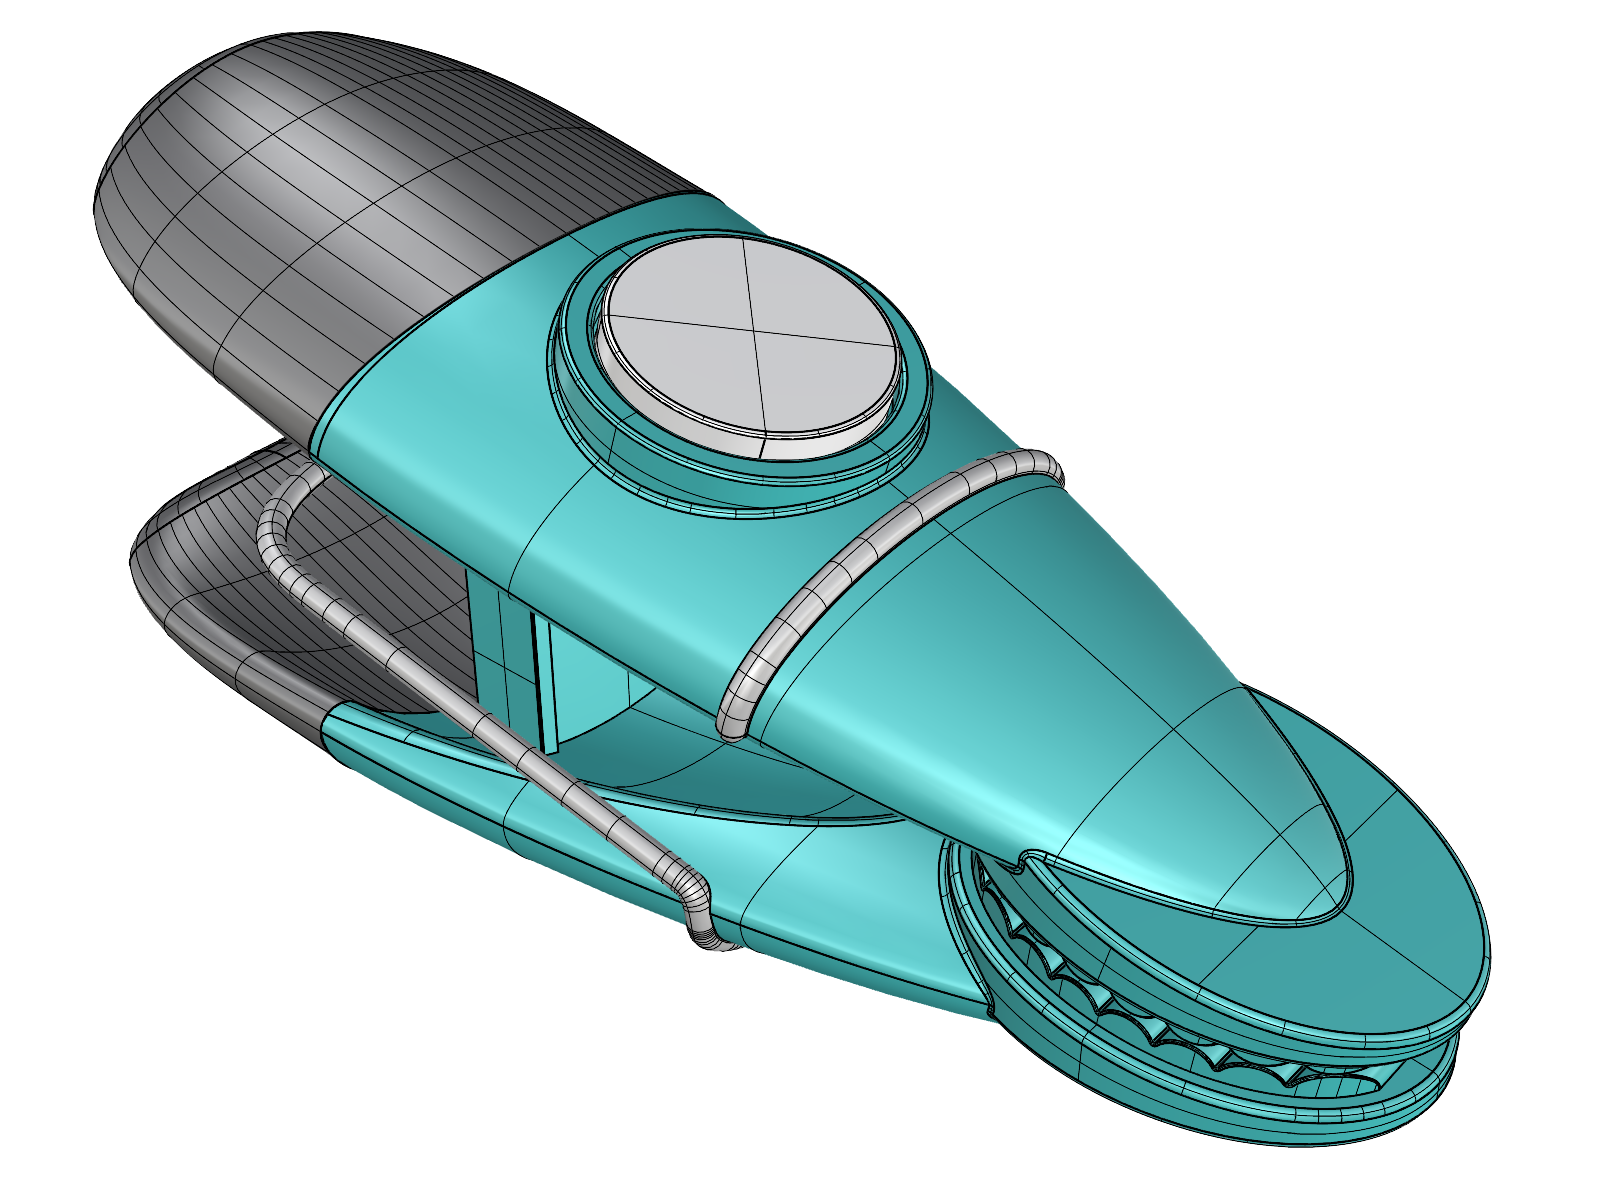
Shaded
The Shaded mode shows 3D geometry with opaque surfaces and basic colors. Shading techniques are used to help you see the shape of the surfaces. This mode helps evaluating models without distractions from materials and textures.
Rendered
The Rendered mode takes visualization a step further by showing materials and textures on your model. Lights can cast simple shadows, but there is no calculation for reflection and refraction in comparison to final rendering. This mode can be a quick preview of what the final rendering of your model will look like. It is especially useful for presenting ideas.

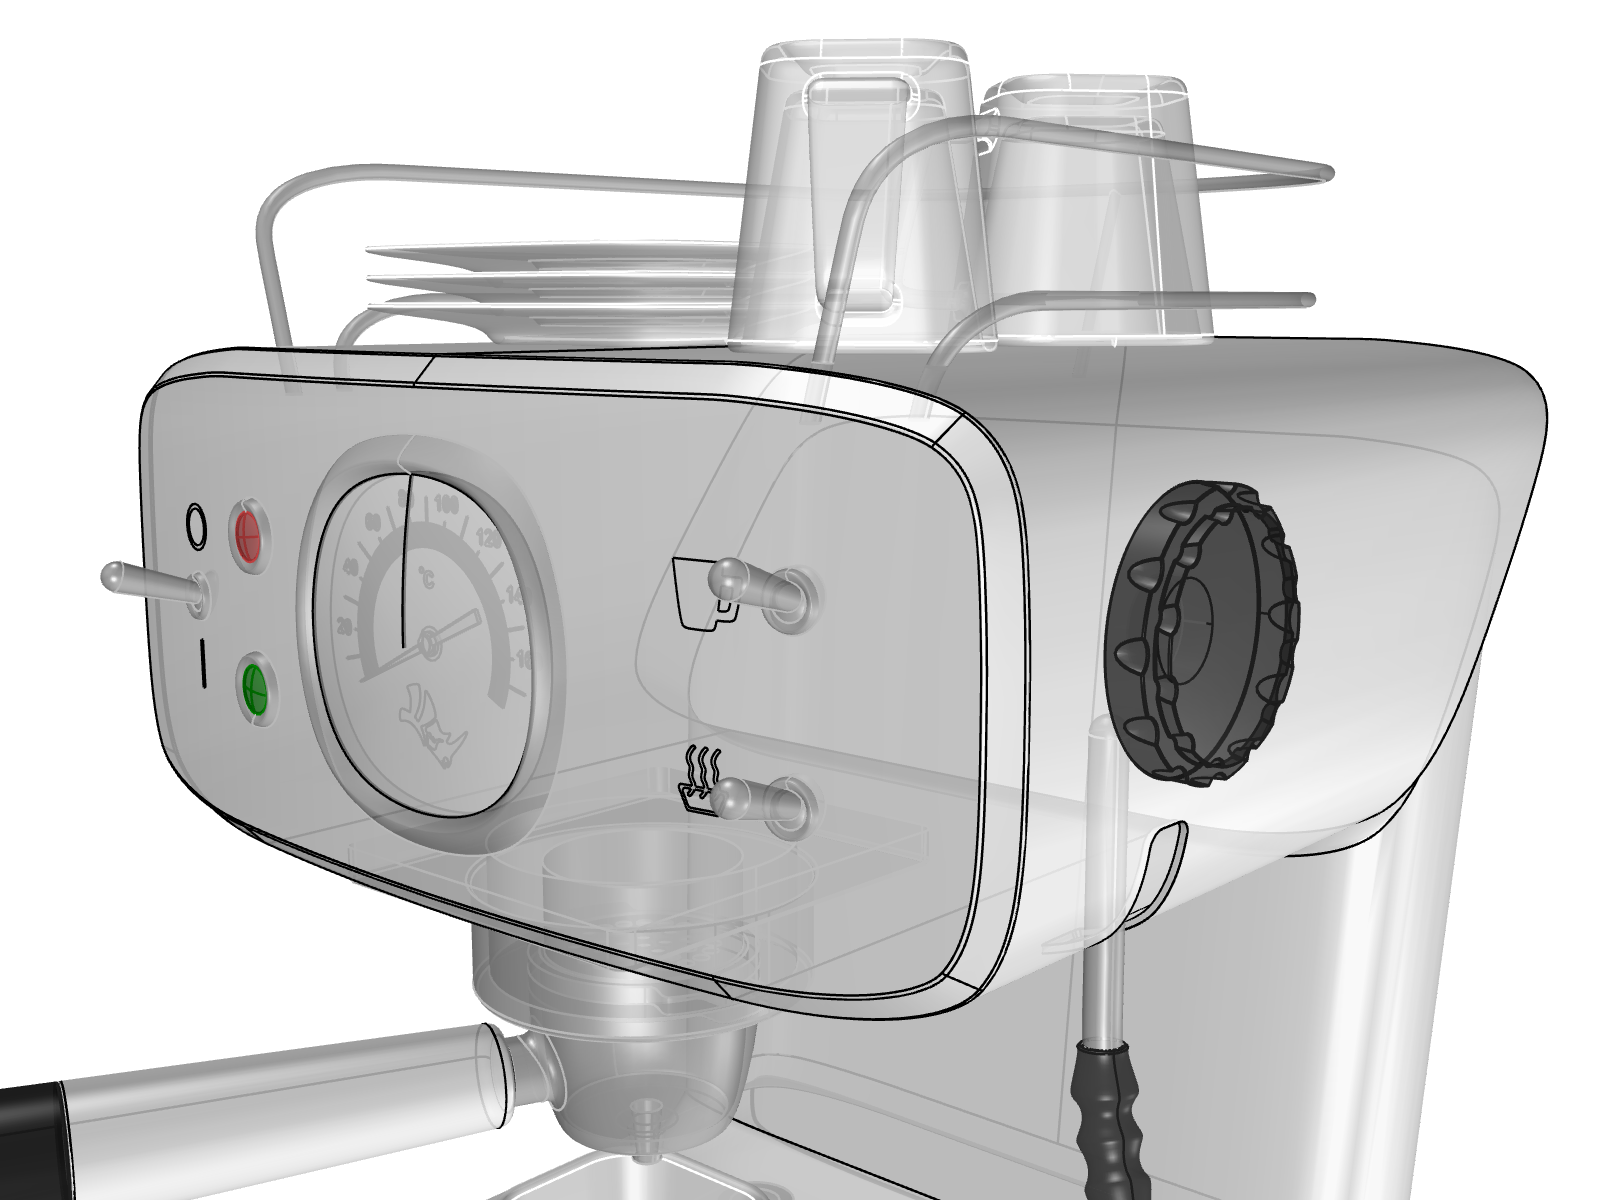
Ghosted
The Ghosted mode displays 3D objects with a semi-transparent appearance and basic colors, allowing you to see through objects. This mode is perfect for examining internal details while maintaining a sense of the model’s outer shape. It is especially helpful when working on assemblies or checking how internal components can fit inside.
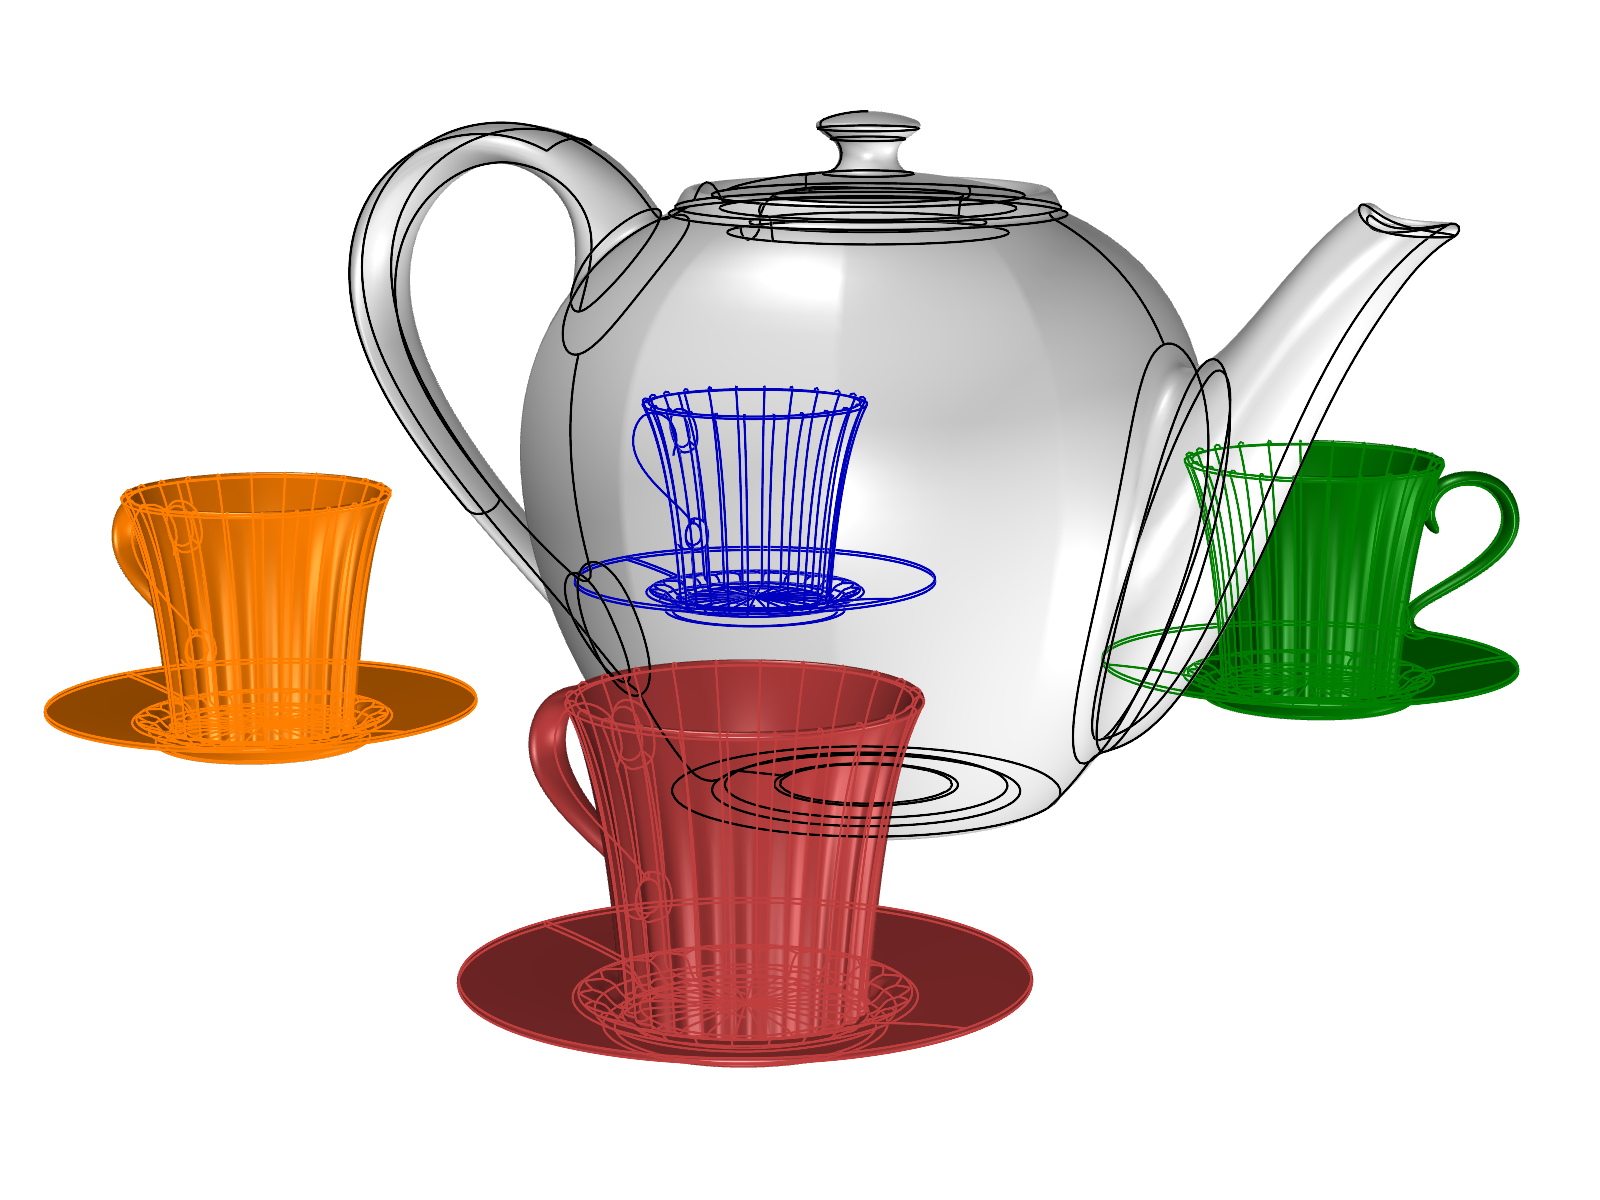
X-Ray
The X-Ray mode is a blend of Wireframe and Shaded modes. 3D objects display as opaque shapes while allowing the edges and wires of objects behind to remain visible, creating an “X-Ray” kind of illusion. In the X-Ray mode, you can distinguish the front and back relationships between objects, but it lacks the depth perception provided by the Ghosted mode.
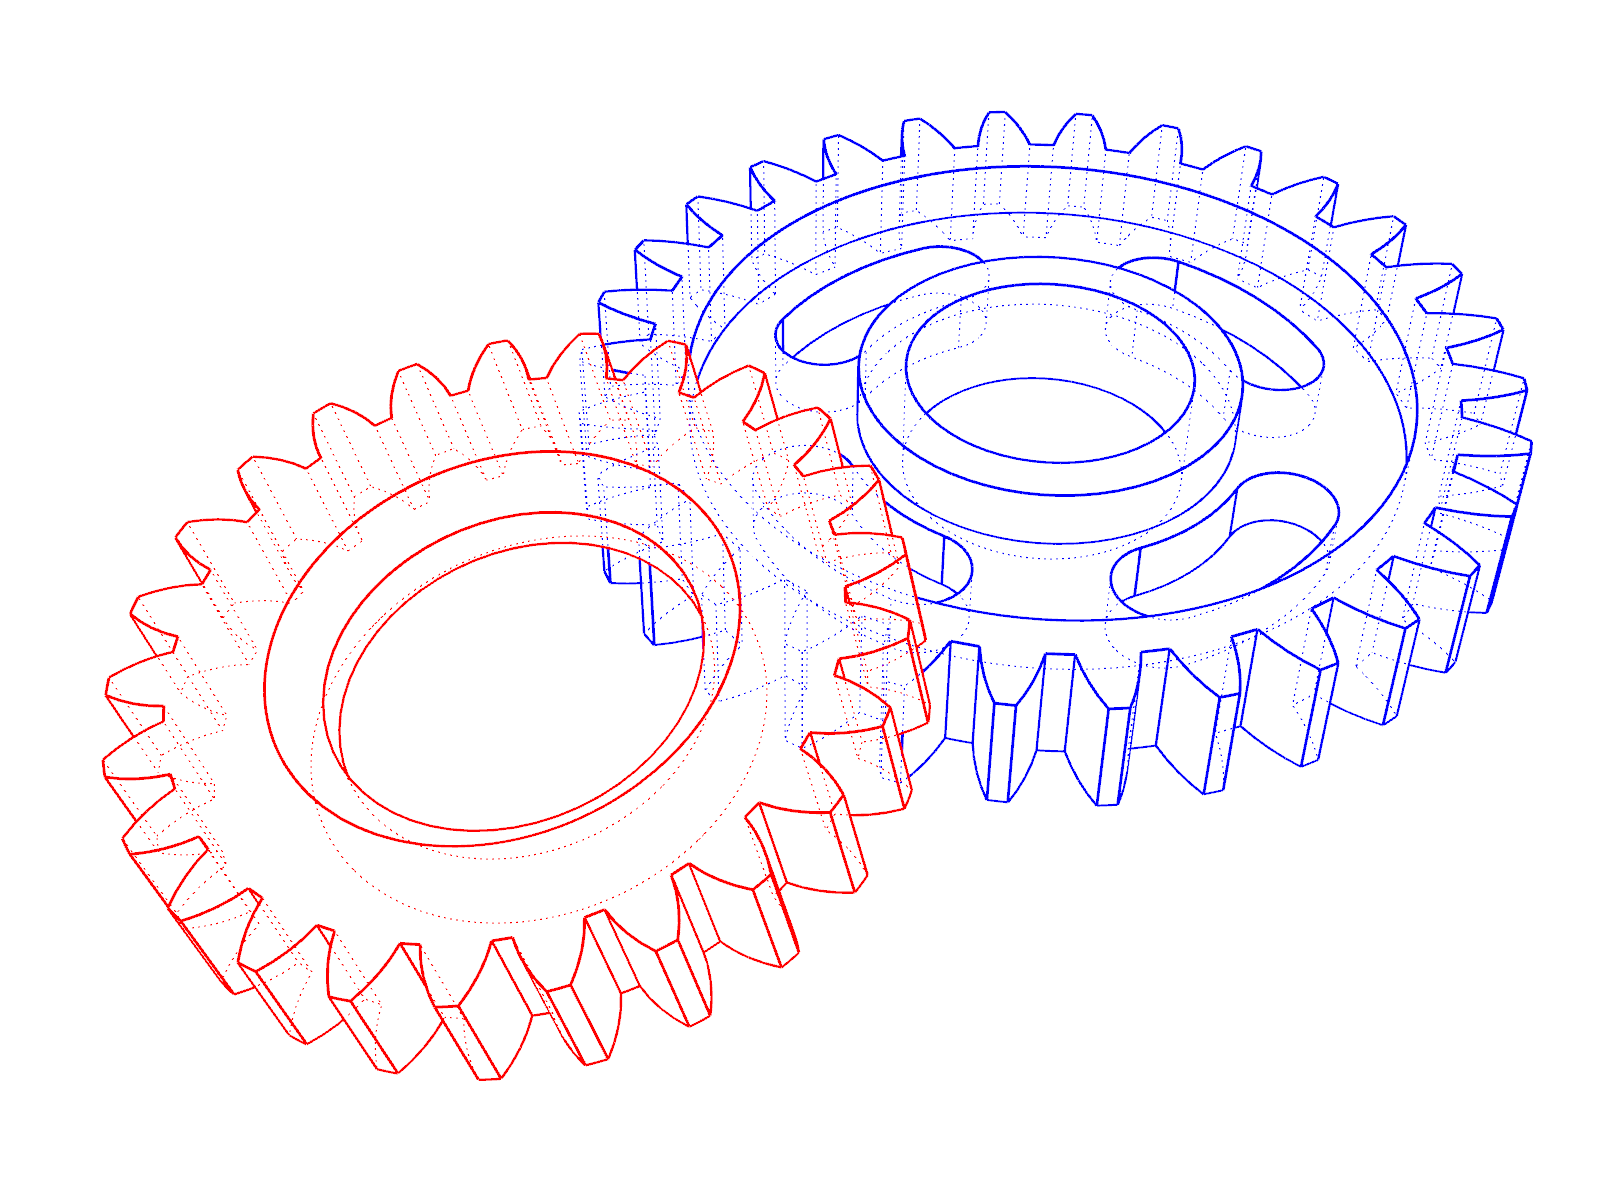
Technical
The Technical mode simulates technical drawing of 3D objects. Occluded silhouettes, intersections, creases and borders are drawn with dotted lines and they update in real-time as you manipulate the view.
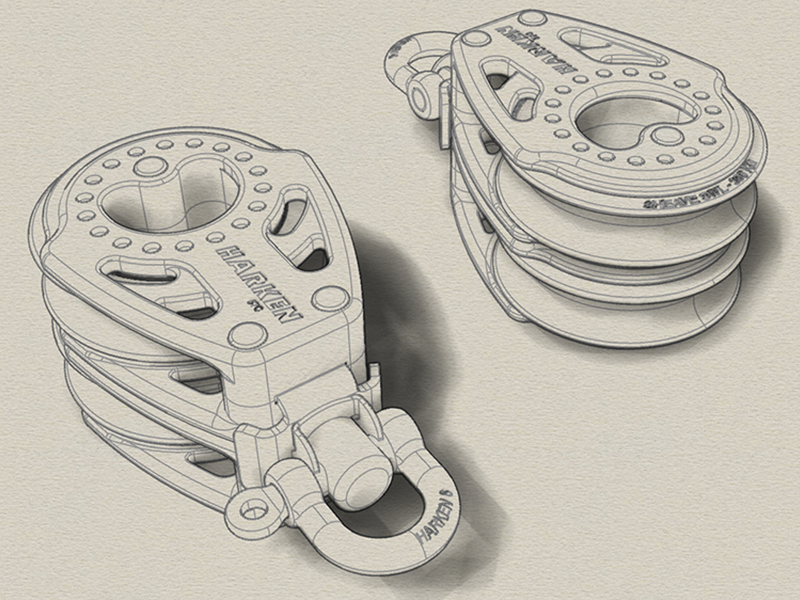
Artistic
The Artistic mode gives your model a look of pencil sketch-like appearance on the background of a yellow paper texture. Lights affect shading of surfaces and cast simple shadows.
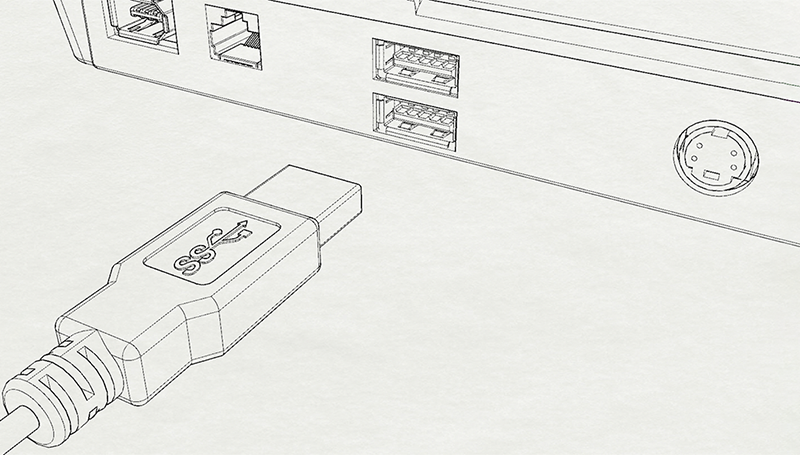
Pen
The Pen mode creates a clean black pen drawing-like view of the model on a white paper texture. Materials, textures, lighting, and shadows are all eliminated. Drawing only edges and contours gives a clean and simple appearance similar to technical sketches.
Monochrome
The Monochrome mode draws 3D models as grayscale images with silhouettes and edges emphasized and eliminates colors and materials from the objects. Objects are shaded with soft tones and lights in the scene can cast shadows.

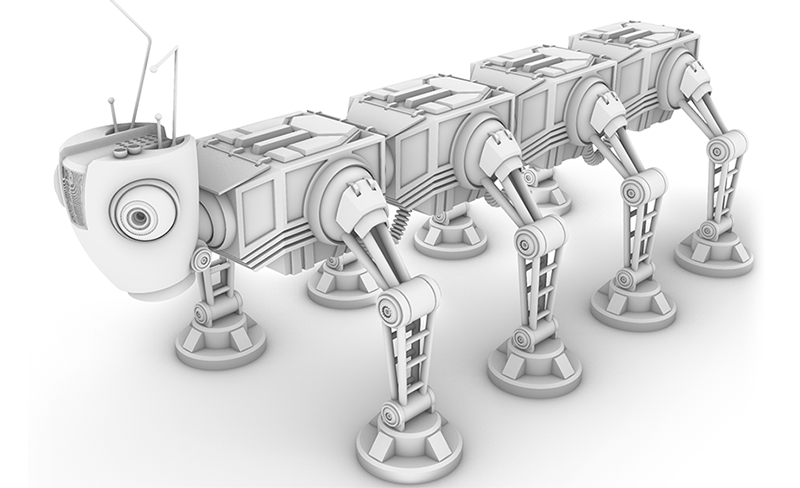
Arctic
The Arctic mode provides a white presentation of your model with soft shadows and minimal details, similar to an architectural concept model made from white paper. To focus only on the 3D form rather than the rest. Colors, textures and materials of objects and lights in the scene are all excluded.
Customize Display Mode
iRhino is designed for viewing and sharing models on mobile devices. Display modes in iRhino are less customizable than the desktop versions of Rhino, but it allows you to import display mode settings from the desktop versions.
To customize a display mode
- Tap the Viewport title to open the “viewport menu”.
- Select the display mode that you want to customize.
- Tap Main Menu
 > Settings > Display where you can control appearances of:
Background - Set the background colors of the viewport and the layout page.
Visibility - Toggle the display elements of the viewport and objects on and off.
Objects - Set the thickness of curves, isocurves, and different types of edges.
To import a display mode
- In Rhino for Mac, go to App settings > Display modes.
- Select the display mode that you want to export.
- Click the Gear button below and select Export *** display mode.
- Save the file to a cloud storage, e.g., iCloud Drive, where your iRhino can access.
- In iRhino, tap Main Menu
> Settings > Display.
- Tap the Import.ini button to select the *.ini file from the cloud storage.
