Start with Rhino by modeling this candle set. We will introduce the main tools to build one of the candle holders and leave you up to the challenge of making the rest of the series!
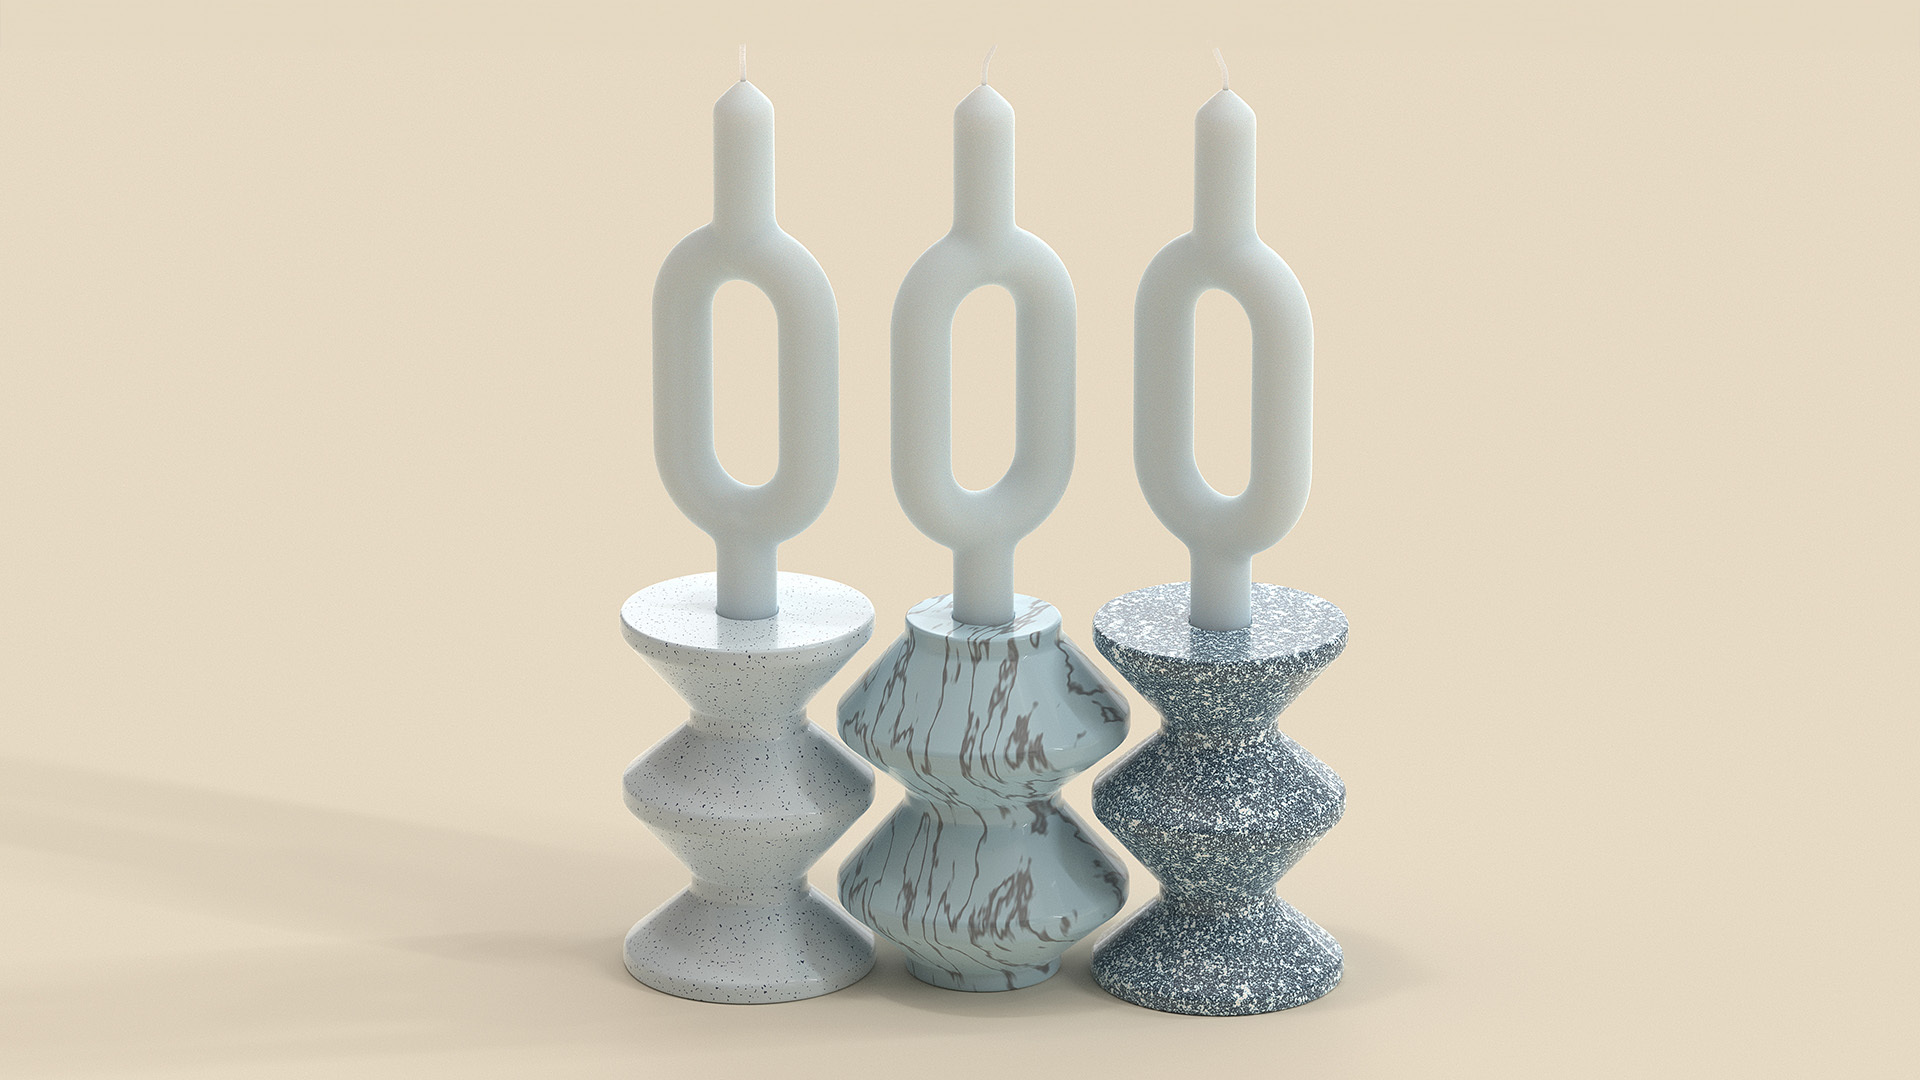
In this tutorial, we will learn how to build a simple object in Rhino that has its own character and shape. We will learn how to create profile curves using
![]() Polyline
or the
Polyline
or the
![]() Curve
command. Use it to build a 3D object using the
Curve
command. Use it to build a 3D object using the
![]() Revolve
command and detailing it with a few solid editing commands such as
Revolve
command and detailing it with a few solid editing commands such as
![]() FilletEdge
.
FilletEdge
.
If you’re completely new to Rhino, you might want to watch our Jump Start series(20 minutes). This will get you up and running with the very basics of Rhino, such as UI, navigation, object selection and more.
Before We Start
If you don’t have Rhino, download the 90 day evaluation Download Rhino 8 Evaluation for Windows or Mac..
- Download the 3DM file from here TO DO!!
- Let’s make sure we have set Rhino’s User Interface to a similar setup:
- Go to the Window menu
- Click on the submenu Window Layout
- Select Default Window Layout.
Go down by the Status Bar and make sure everything is disabled except for Grid Snap, Ortho and OSnap, which should be enabled. On the left, by the Osnap Control , make sure Near and Cen are unchecked and End is checked. This is just to make our lives easier as we model.
Lastly, in the
Command Prompt
, type the
![]() OrthoAngle
command and set it to 45. Press
to end the command.
OrthoAngle
command and set it to 45. Press
to end the command.
Creating the Profile Curves
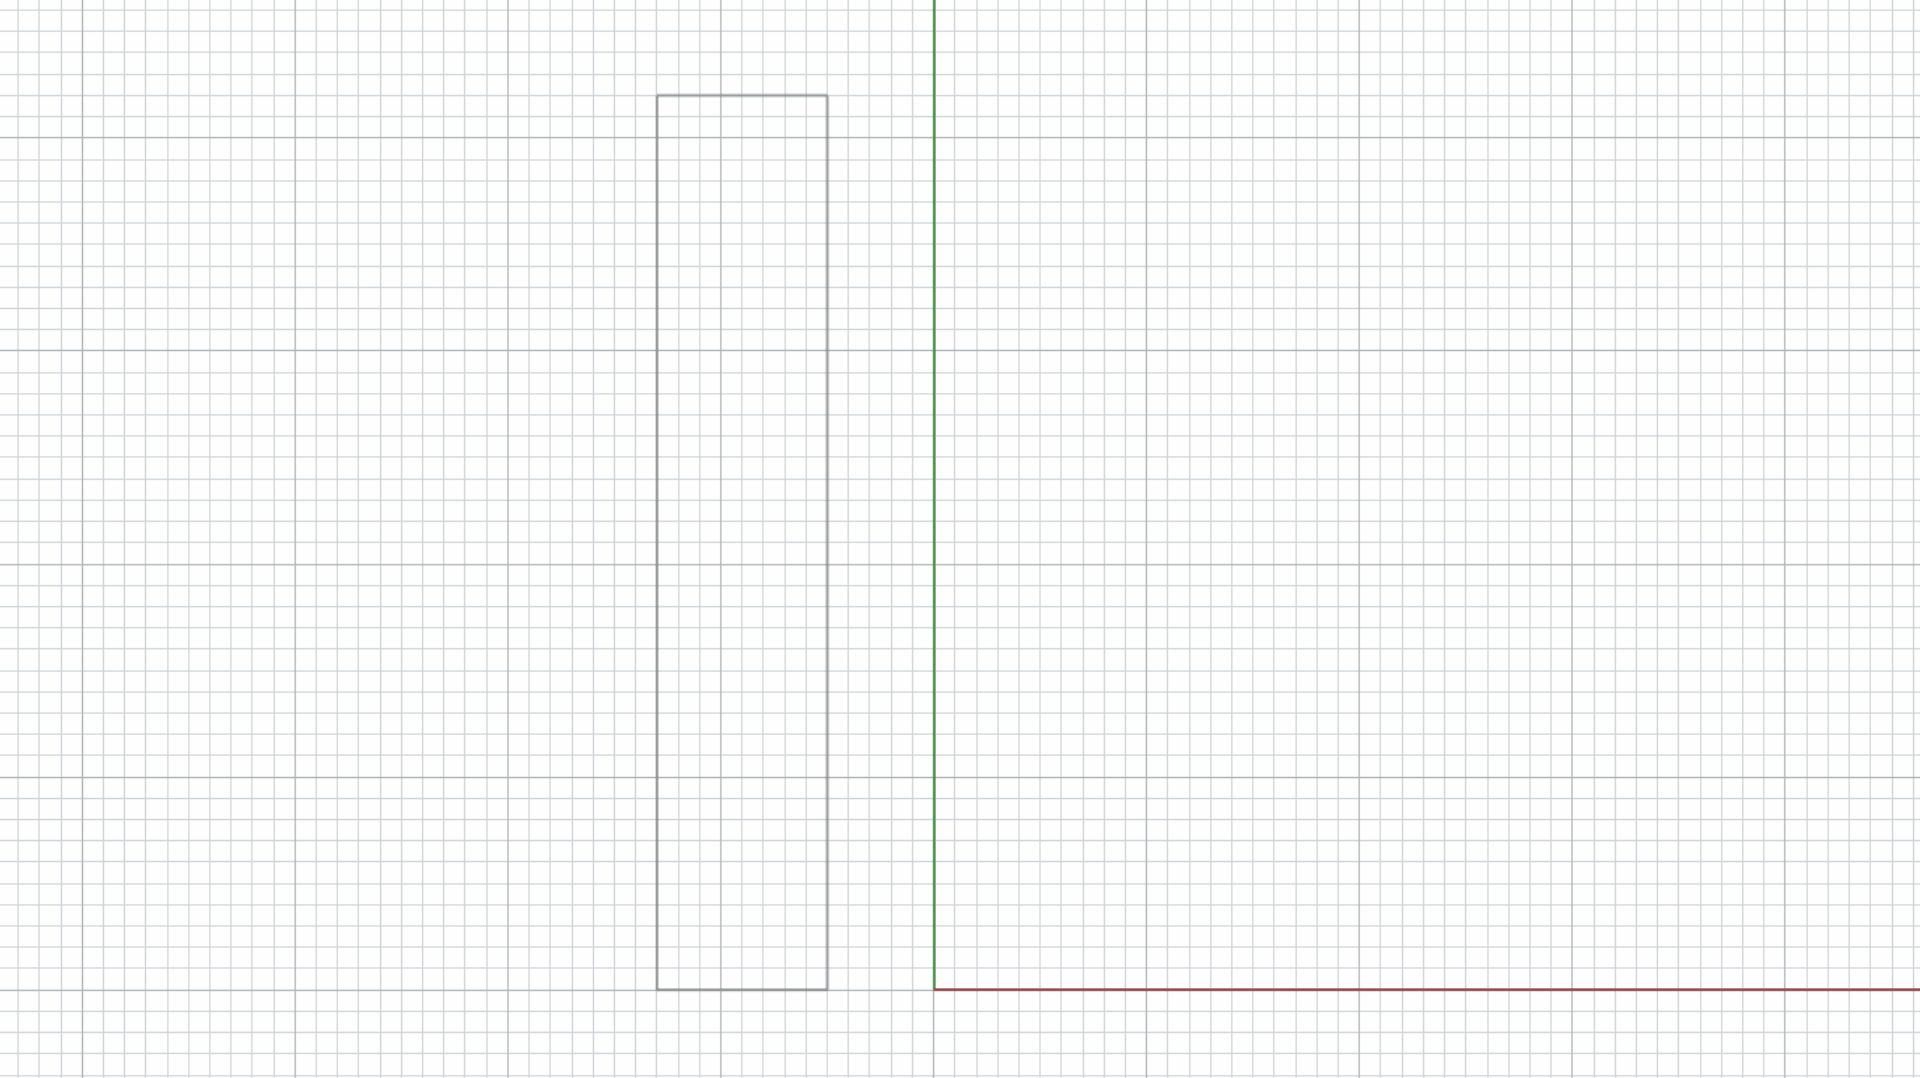
In this section, we will create the 2D profile curve. The shape of this curve will define the overall shape of our 3D object. We will use the Polyline command, which allows us to make a series of straight lines joined together to represent a polygonal shape.
-
Maximize the viewport. You’ll see a rectangle that represents the boundary of our object. We will fit the profile curve within this boundary.
-
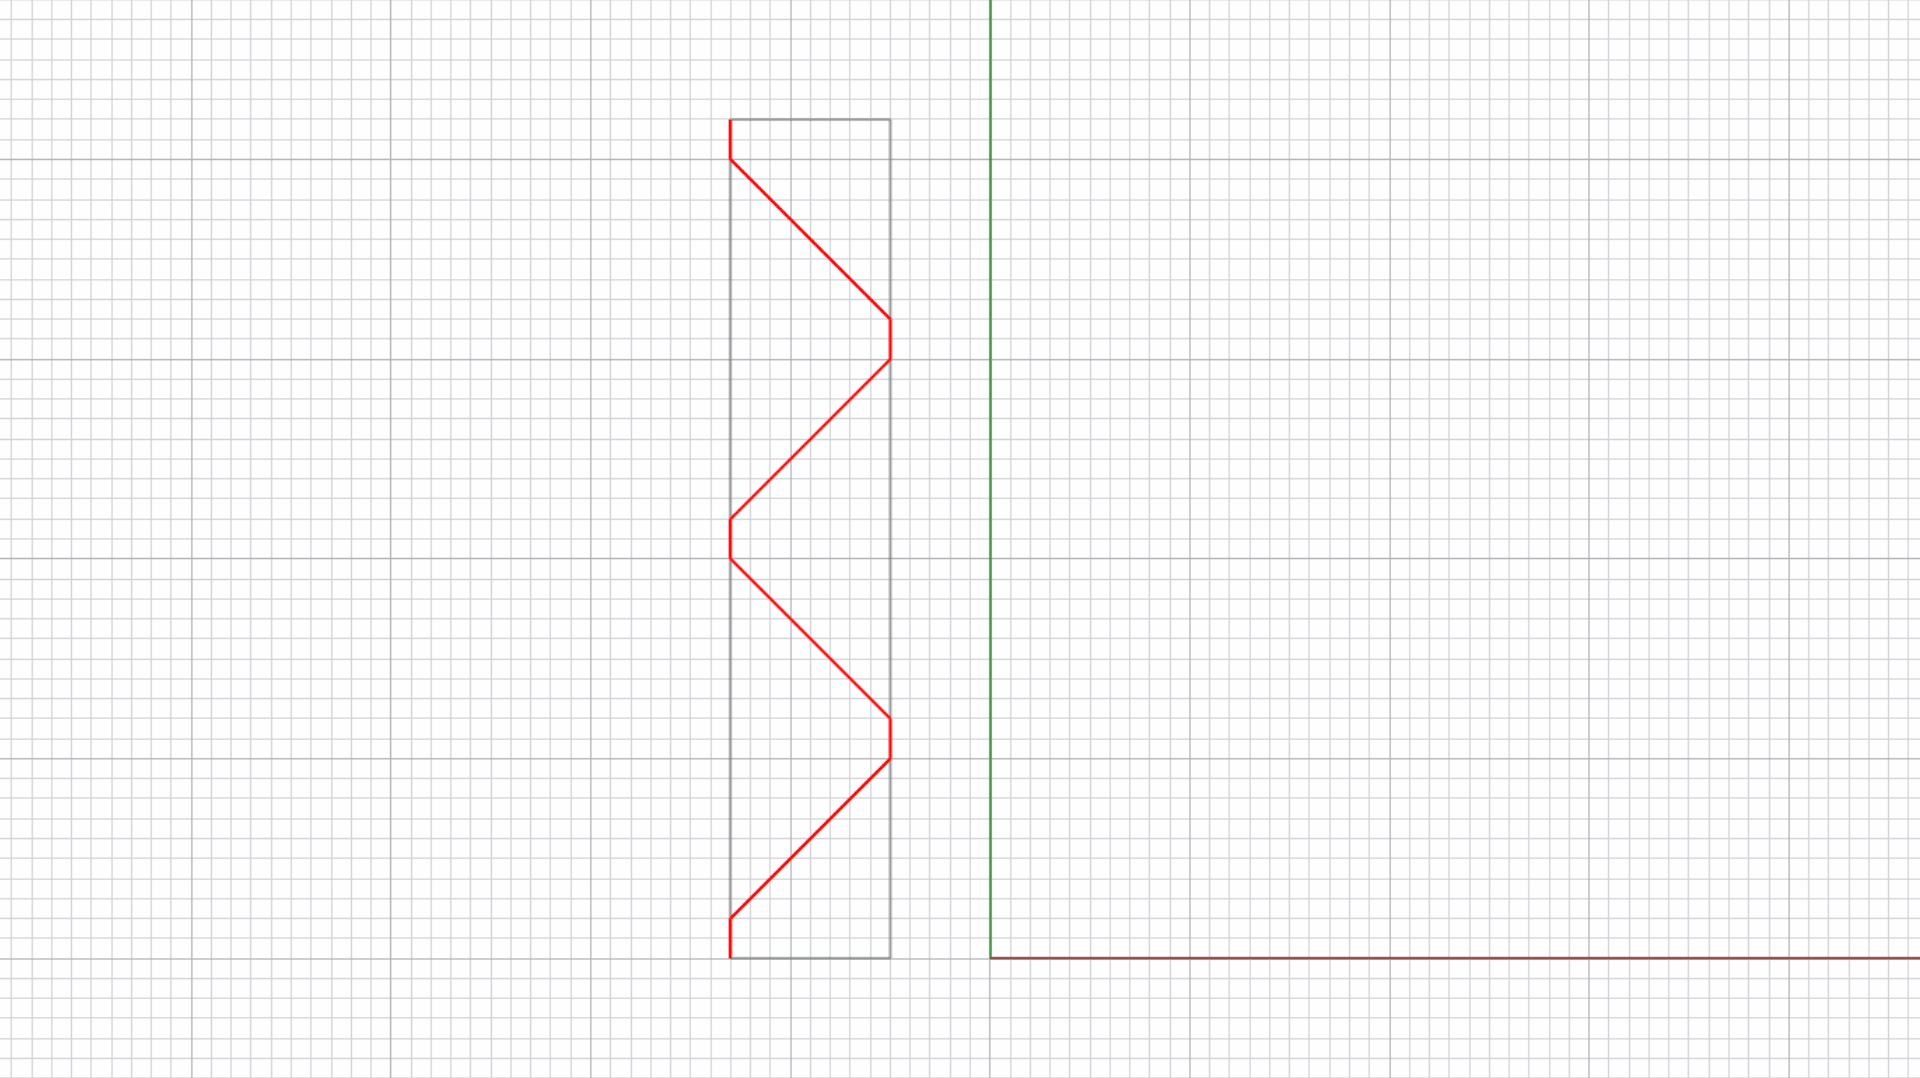
Run the
 Polyline
command. Place the Start of the polyline on the top left corner of the rectangle. Place the second point 2 units below by snapping to the Grid
Polyline
command. Place the Start of the polyline on the top left corner of the rectangle. Place the second point 2 units below by snapping to the Grid -
Continue constructing the profile curve in a zig-zag shape. Until you land at the bottom left corner of the rectangle. press to end the command.
Note: as you move the cursor around the viewport, you’ll notice how it halts on the Grid line intersections. This is because we’ve activated Grid Snap on the Status Bar . We also activated Ortho and set it to 45º degrees. It forces the cursor to move at this angle around the first point picked.
Creating the 3D Objects
In this section we will focus on building the main bodies or solids. We will use a command that allows to revolve a curve around an axis. It’s a sinmple operation that provides a lot of control over circular shaped objects.
-
In the
 Layer
panel, make the revolve layer current.
Layer
panel, make the revolve layer current. -
Select the zig-zag profile curve and run the
 Revolve
command.
Revolve
command. -
For Start of the axis type 0 and press . Then click a second point along the Y axis (green line) to finish defining the revolve axis.
-
At the Command Prompt and click on the Full Circle option. The curve has traced the object to a full 360º degrees.
-
Switch back to the viewport. You can do this by Minimizing / Maximizing the corresponding viewports.
