Customize your Rhino UI for working on Visualization and share it
In this tutorial, learn about the logic behind the new icon redesign, learn how to create hotkeys in Rhino, customize your toolbars and other UI elements. Then save your Window Layout and share with your colleagues, in a lab or to your other computers.
- Understand the New Icons
- Create Instant Aliases
- Choose Your Command Line Style
- Customize Your Toolbars
- Create A Custom Toolbar Icon
- Panels
- Transfer Your Settings
- Save and Share Window Layouts
Understand the New Icons
Rhino has an enormous number of tools, which makes it extremely powerful but hard to learn. Up to Rhino 8, every icon shared the same base color, used a different logic to show input versus output geometry, and packed in a lot of visual detail. That made it difficult to tell one tool from another at a glance. In Rhino 9, icons have been redesigned around a consistent color and clarity system, and we’ll walk through the logic so it clicks the first time you see it.
-
Open Rhino 9 and switch to any toolbar tab, for example the Solid Tools or Surface Tools tab.
-
Notice the color families used across the icons:
- Grape | Mesh
- Blue | NURBS
- Cyan | SubD
- Lime | Transform, Edit
- Orange | Rendering
- Yellow | Selection, File
These colors come from the Open Color palette, optimized for UI design.
-
Look closely at a few multi-part icons: only the piece of the icon affected by the tool is colored, while the rest stays gray. This makes the icon’s specific function easier to read at a glance.
-
Compare an icon that takes geometry as input against one that outputs new geometry. Notice how input and output are now visually distinguished rather than looking identical.
-
Find the simplified icons for Print, Options, the Sun, and Set View. These were redrawn for better legibility.
-
If you also use Grasshopper 2, compare its icon set side-by-side with Rhino’s. You’ll notice the two are now much closer in style, making it easier to move between the two applications.
Create Instant Aliases (Hot Keys)
An Alias is a keyboard shortcut configured to run a Rhino command or macro. Up through Rhino 8, running an alias meant typing it and then pressing Enter, an extra step that adds up over a long modeling session. Rhino 9 introduces Instant Aliases, which run the moment you finish typing the letters, no Enter required.
Let’s add a few aliases to help you move around in the viewport faster.
-
Open Options and go to the Aliases page.
-
Turn on Instant for
ZEto runZoom Extents.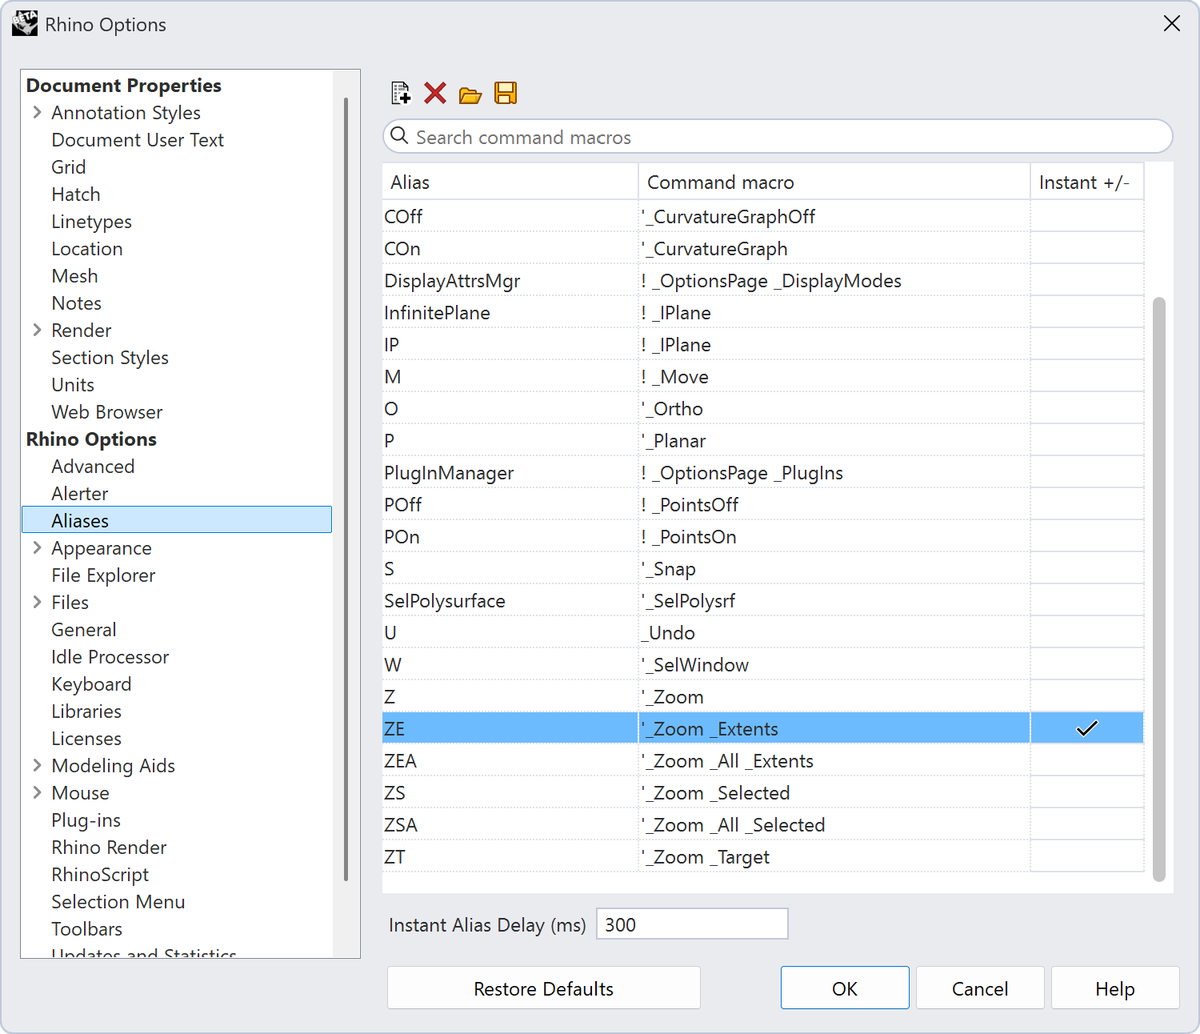
-
Add a new one, for Maximizing and Minimizing the viewport, by pressing the New button in the upper left corner. Type the shortcut to be Max and the Command macro should say ! _MaxViewport. Remember to check the Instant checkbox next to it.
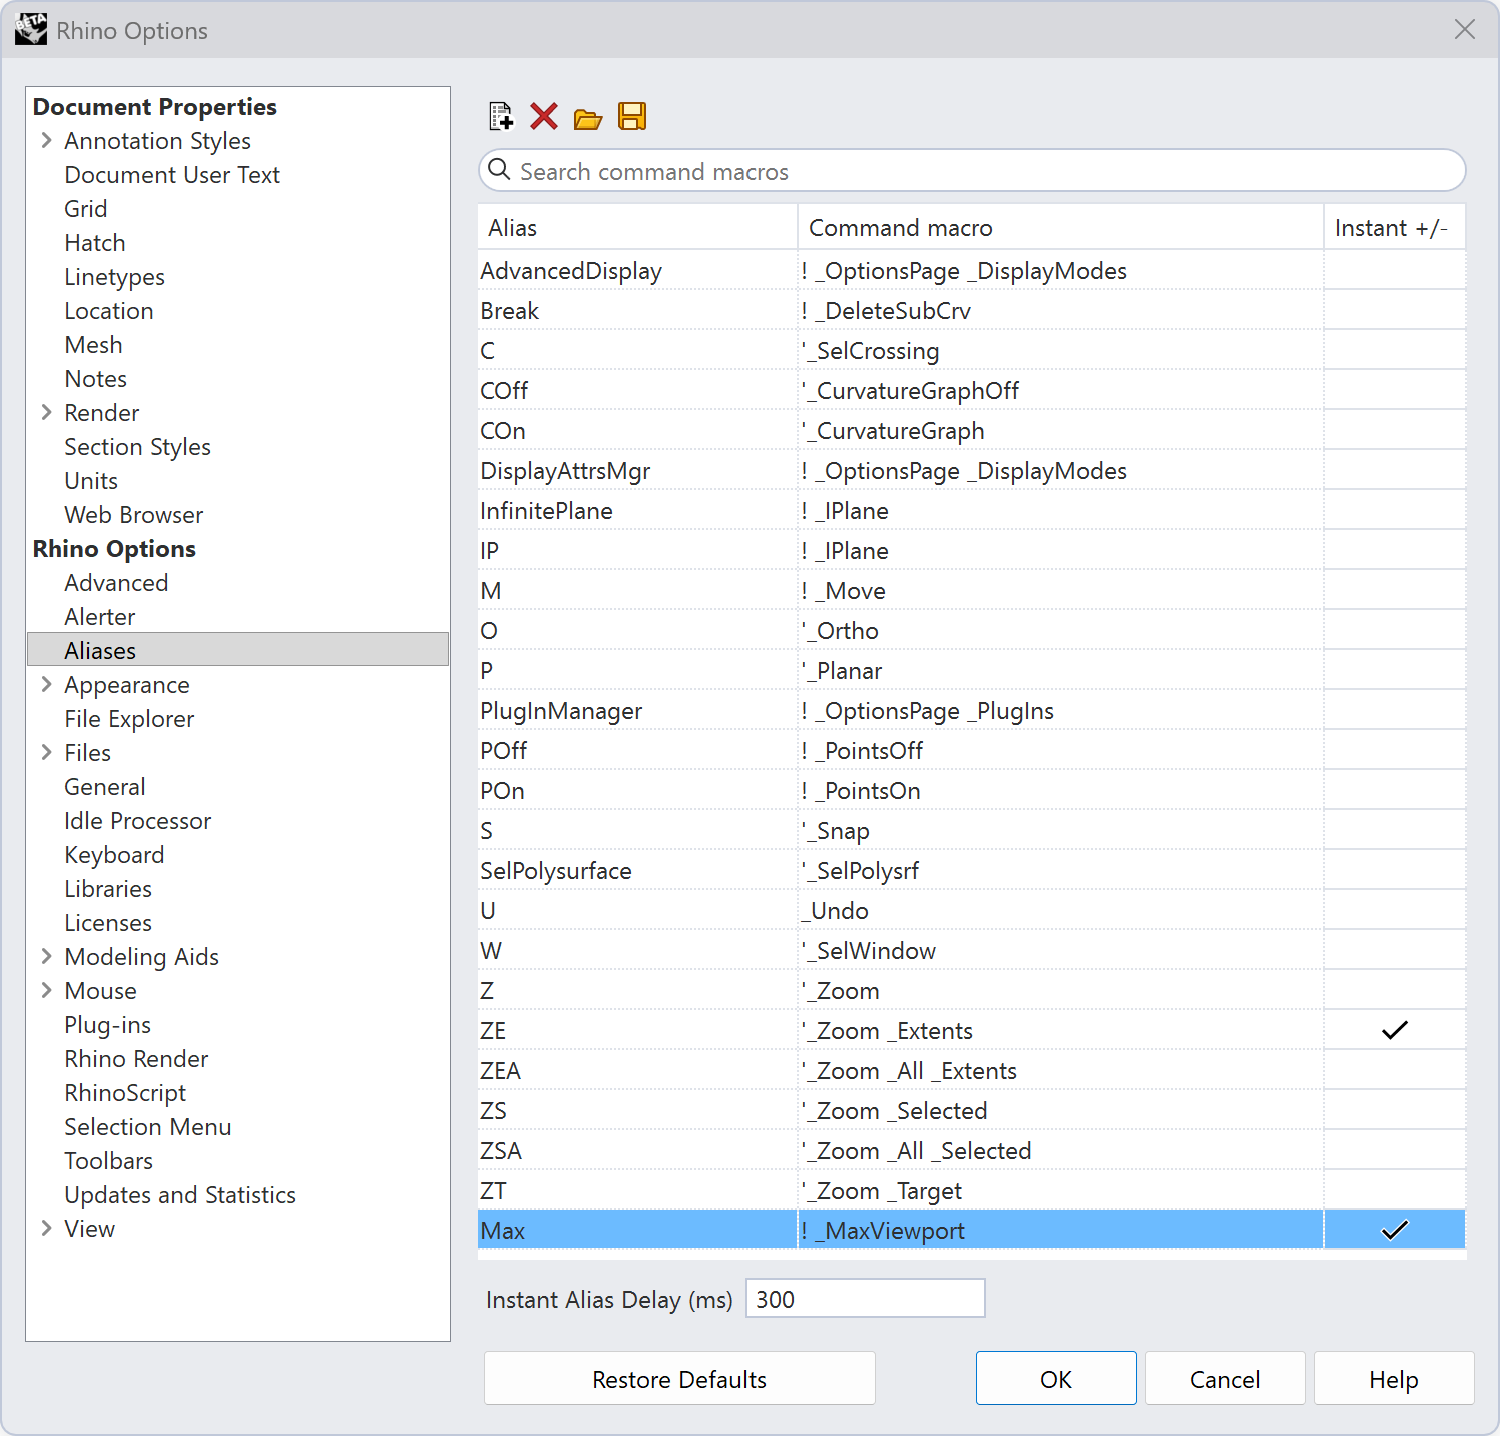
-
Close Options by pressing OK, click in the viewport, and type
max. Notice the command runs immediately, without pressing Enter, and your viewport maximizes and restores when you run the alias. -
Try typing a longer alias that starts with the same letters as one of your Instant Aliases, such as
zeaforZebra. Sincezeis instant, it will fire before you can finish typing. Hold Shift while typing to bypass instant aliases when you need the longer one.
Choose Your Command Line Style
The command line has always been central to how Rhino works, but Windows and Mac have historically offered very different experiences: Windows leaned on a persistent, text-heavy history, while Mac favored a graphical sidebar with popups for options. Rhino 9 unifies this and every command line style is now available on both platforms.
Let’s change the command line to use a simpler style, like a search bar.
-
Run the CommandMode command.
-
Choose the Location to be Separate Panel and the Style to be Buttons, and press Enter.
-
Now the command line is in a separate container that can be moved around. Move it on top of the viewport to be floating, then press Enter to end the command.
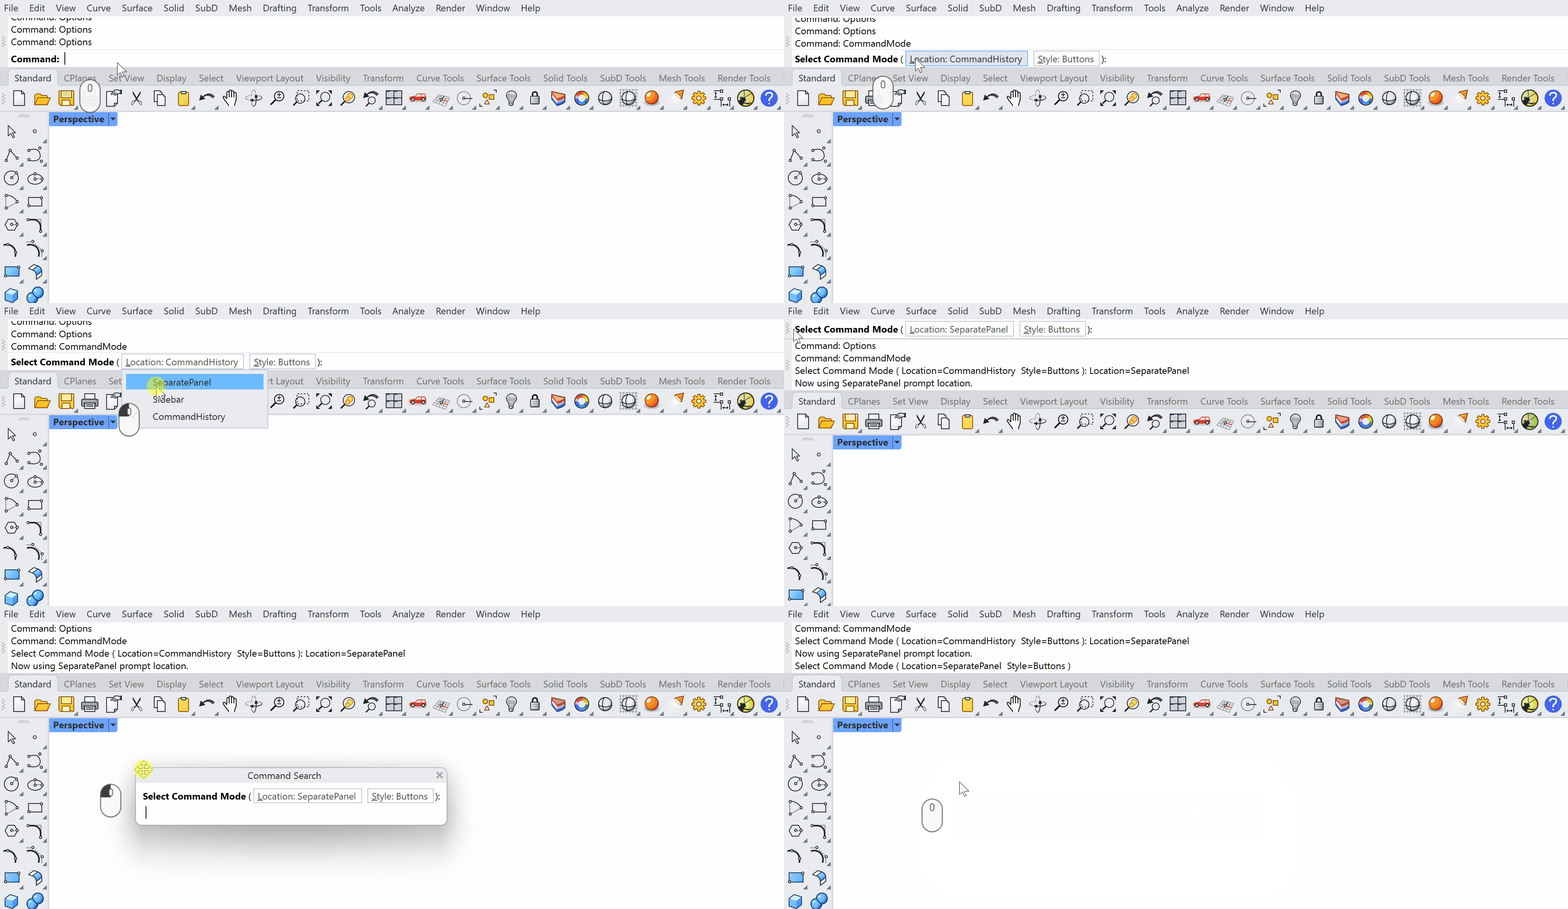
-
Now the command line is gone from the UI, but if you start typing, the command line will show up.
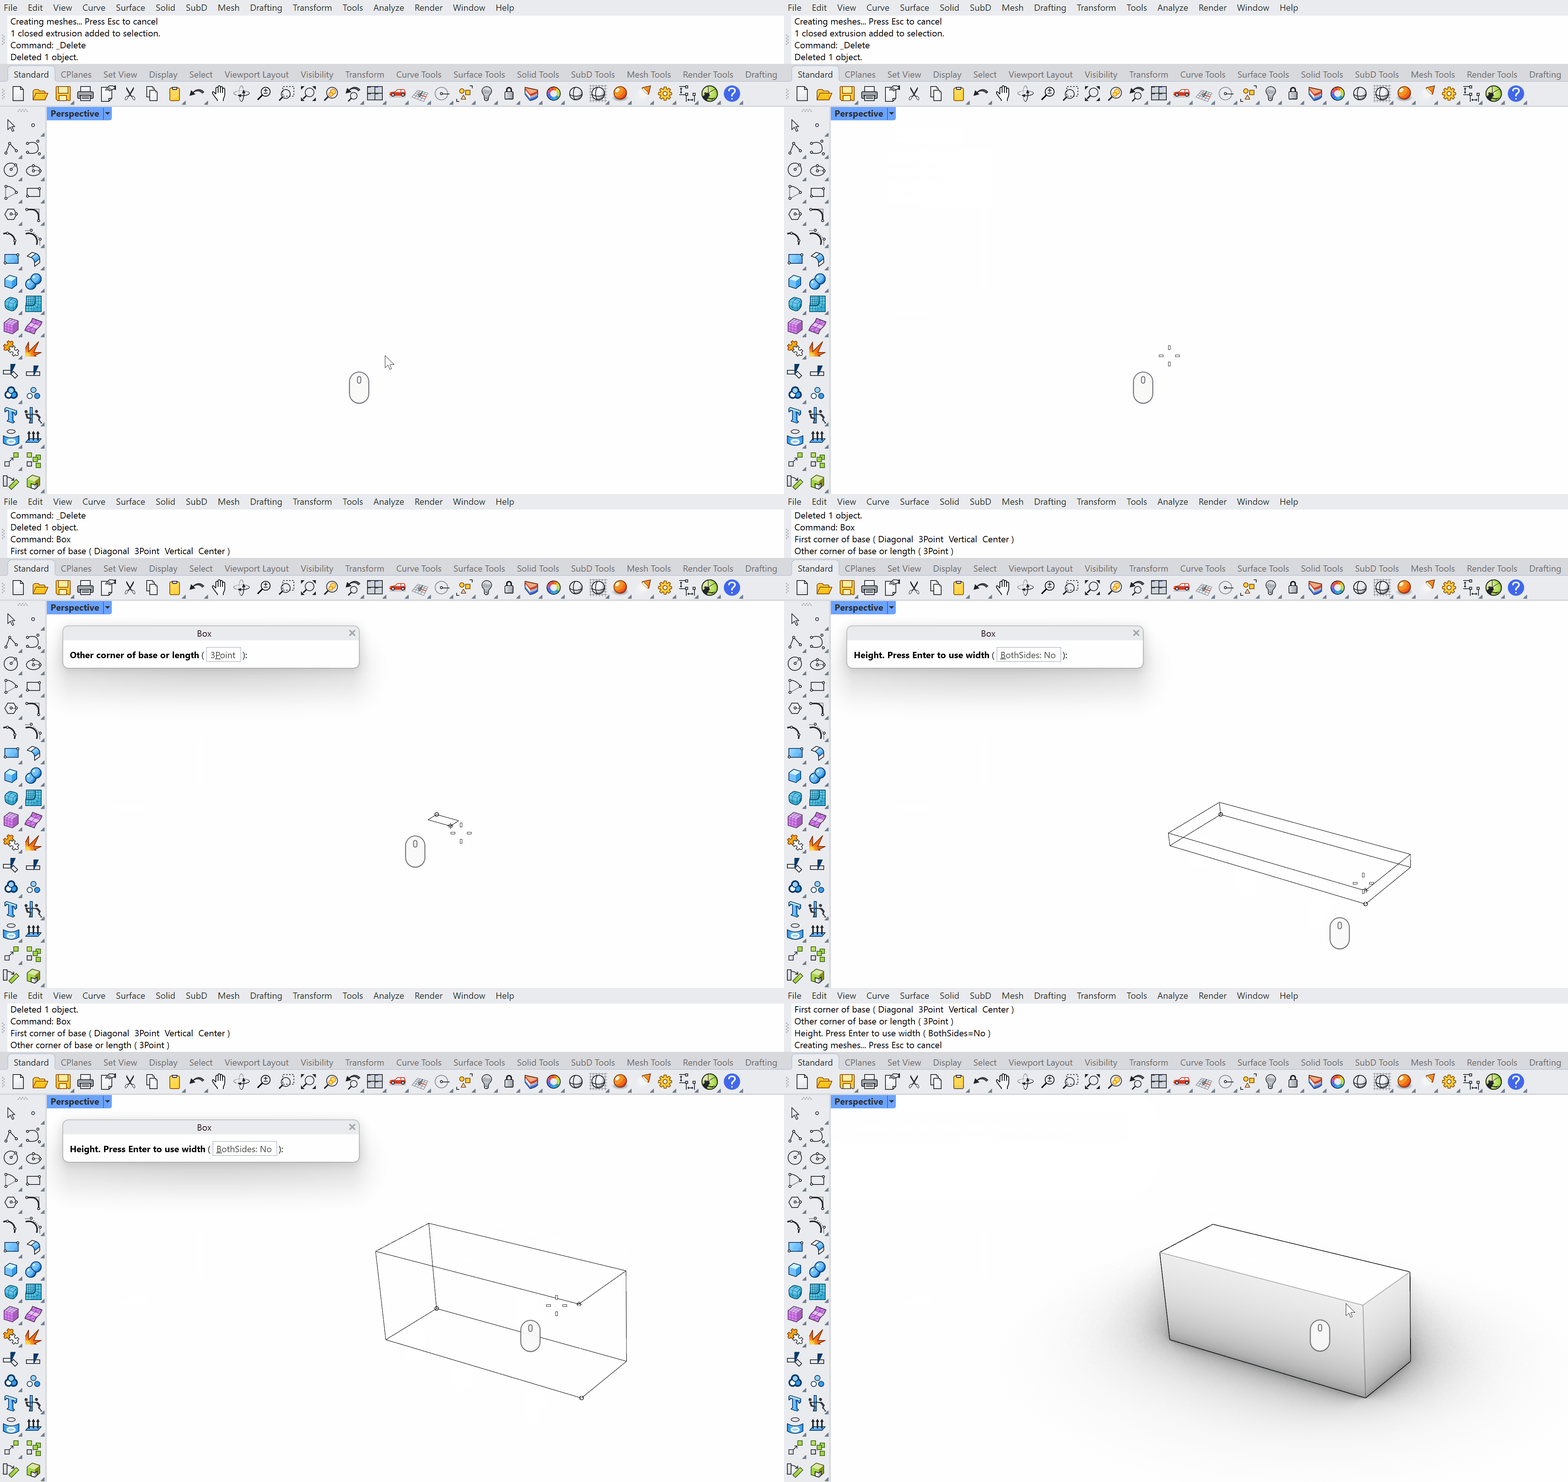
Customize Your Toolbars
Toolbars are the clickable icon groups that surround the Rhino interface. They’re the primary way most people interact with commands beyond typing. In Rhino 9, the toolbar system has been substantially reworked: the old “diff” file mechanism is gone, a proper default.rui is back, and nearly all toolbar editing now lives in a single dialog.
Let’s create a Toolbar called My Viz Tools.
-
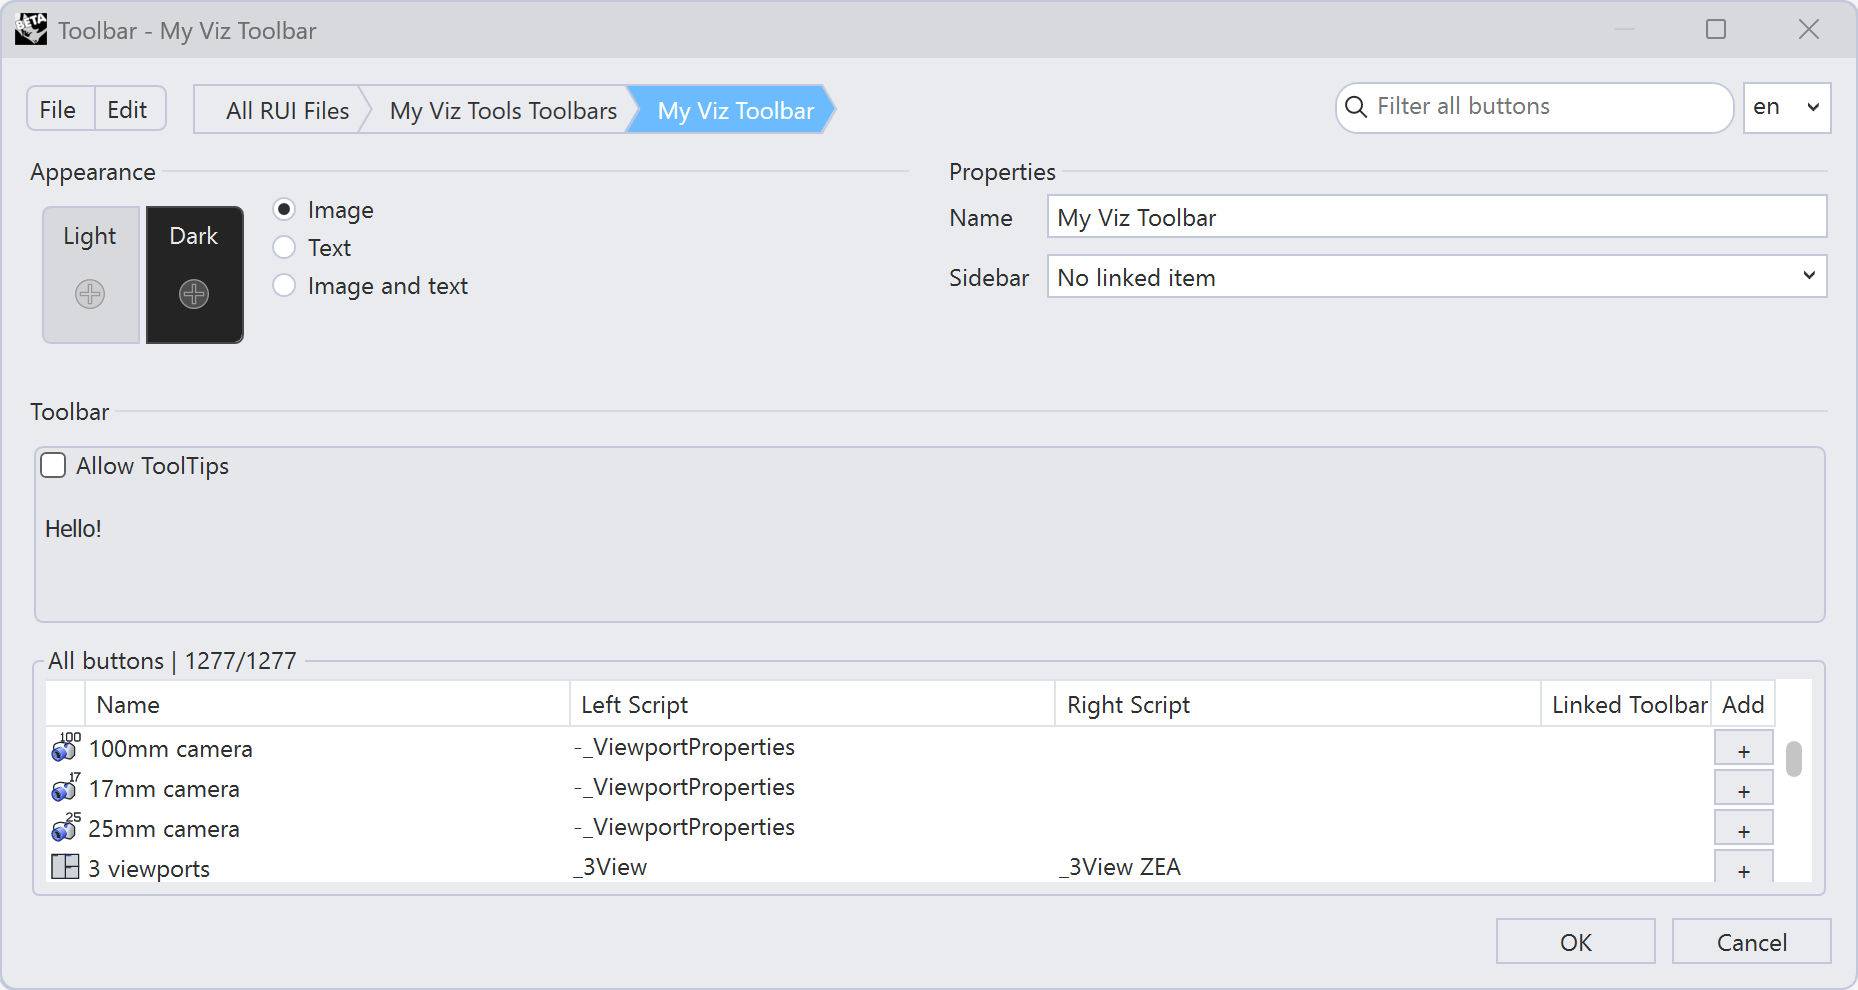
Run the Toolbar command to open the consolidated Toolbar dialog.
-
Create a new custom toolbar by going to File → New RUI file. When creating a new RUI file, you start by giving the file a name, My Viz Tools, and select the folder you want to save it in.
-
To edit the toolbar, select My Viz Tools Toolbar in the list and press Edit → Edit Toolbar, right-click the toolbar and choose Edit Toolbar, or press the Toolbars button on the
.ruifile.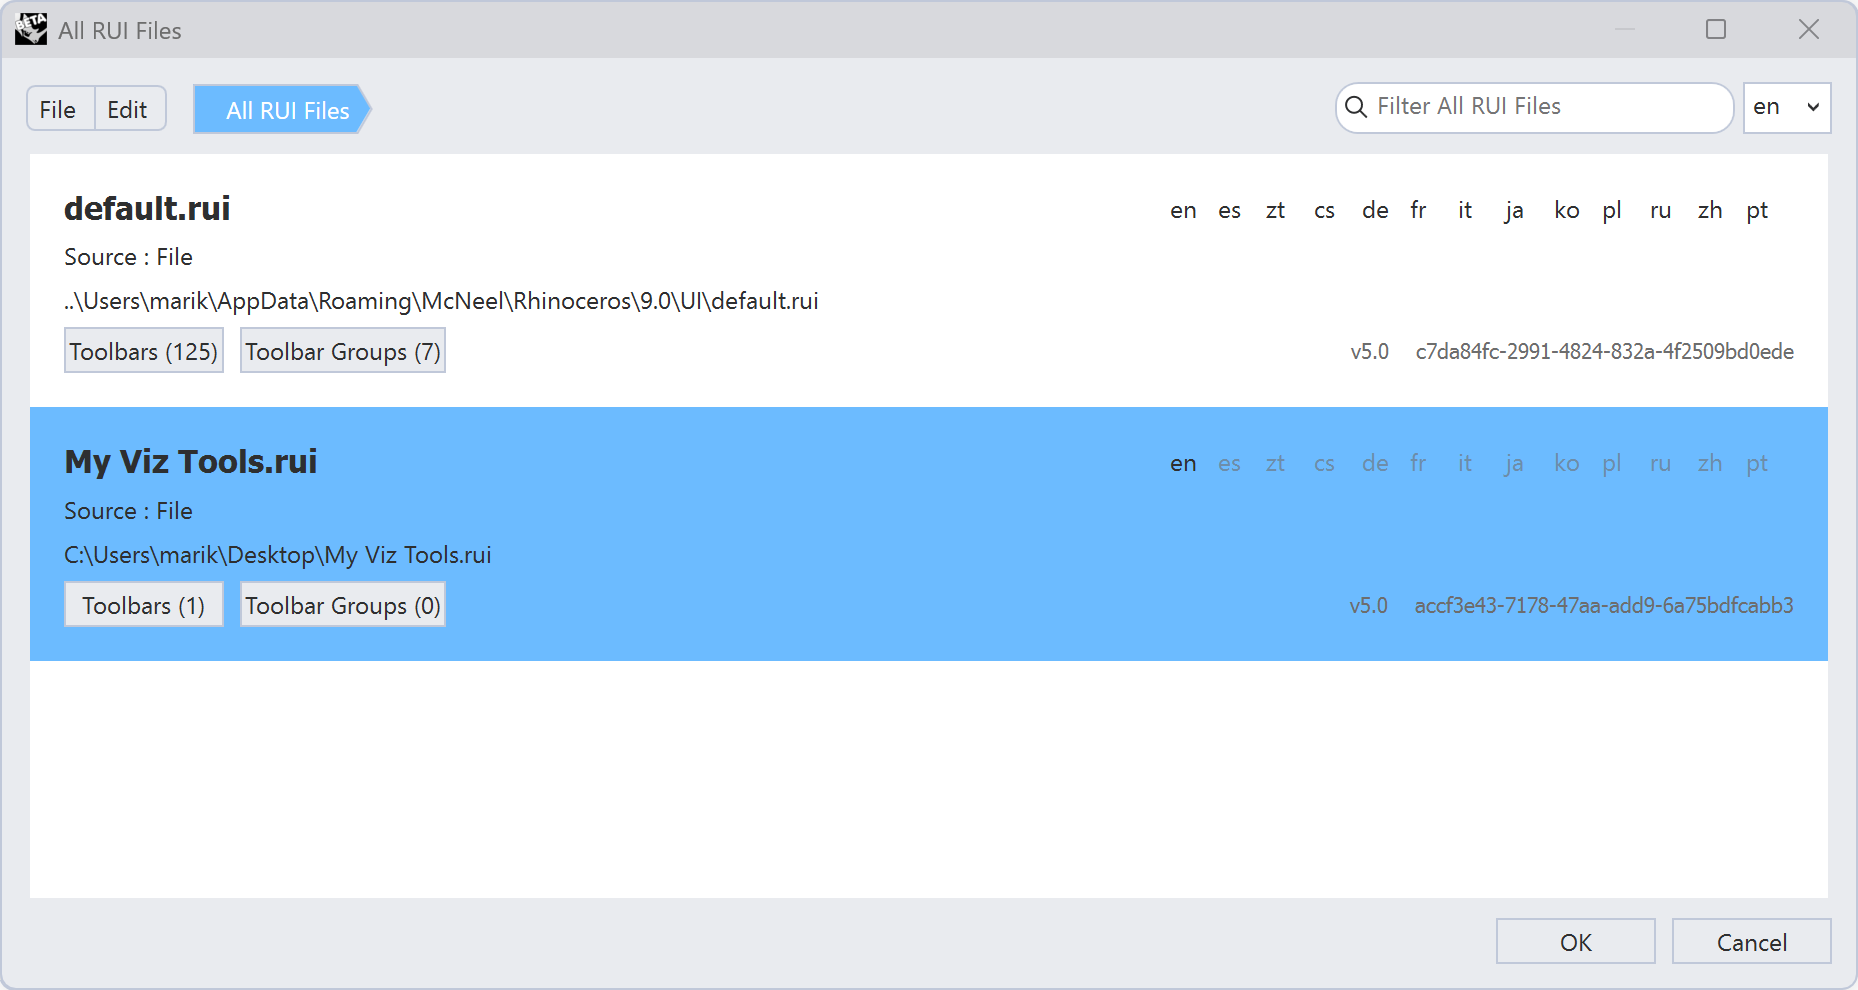
-
To Edit the My Viz Tools Toolbar, you can double click on it, or right-click and choose Edit Selected to make changes to it.
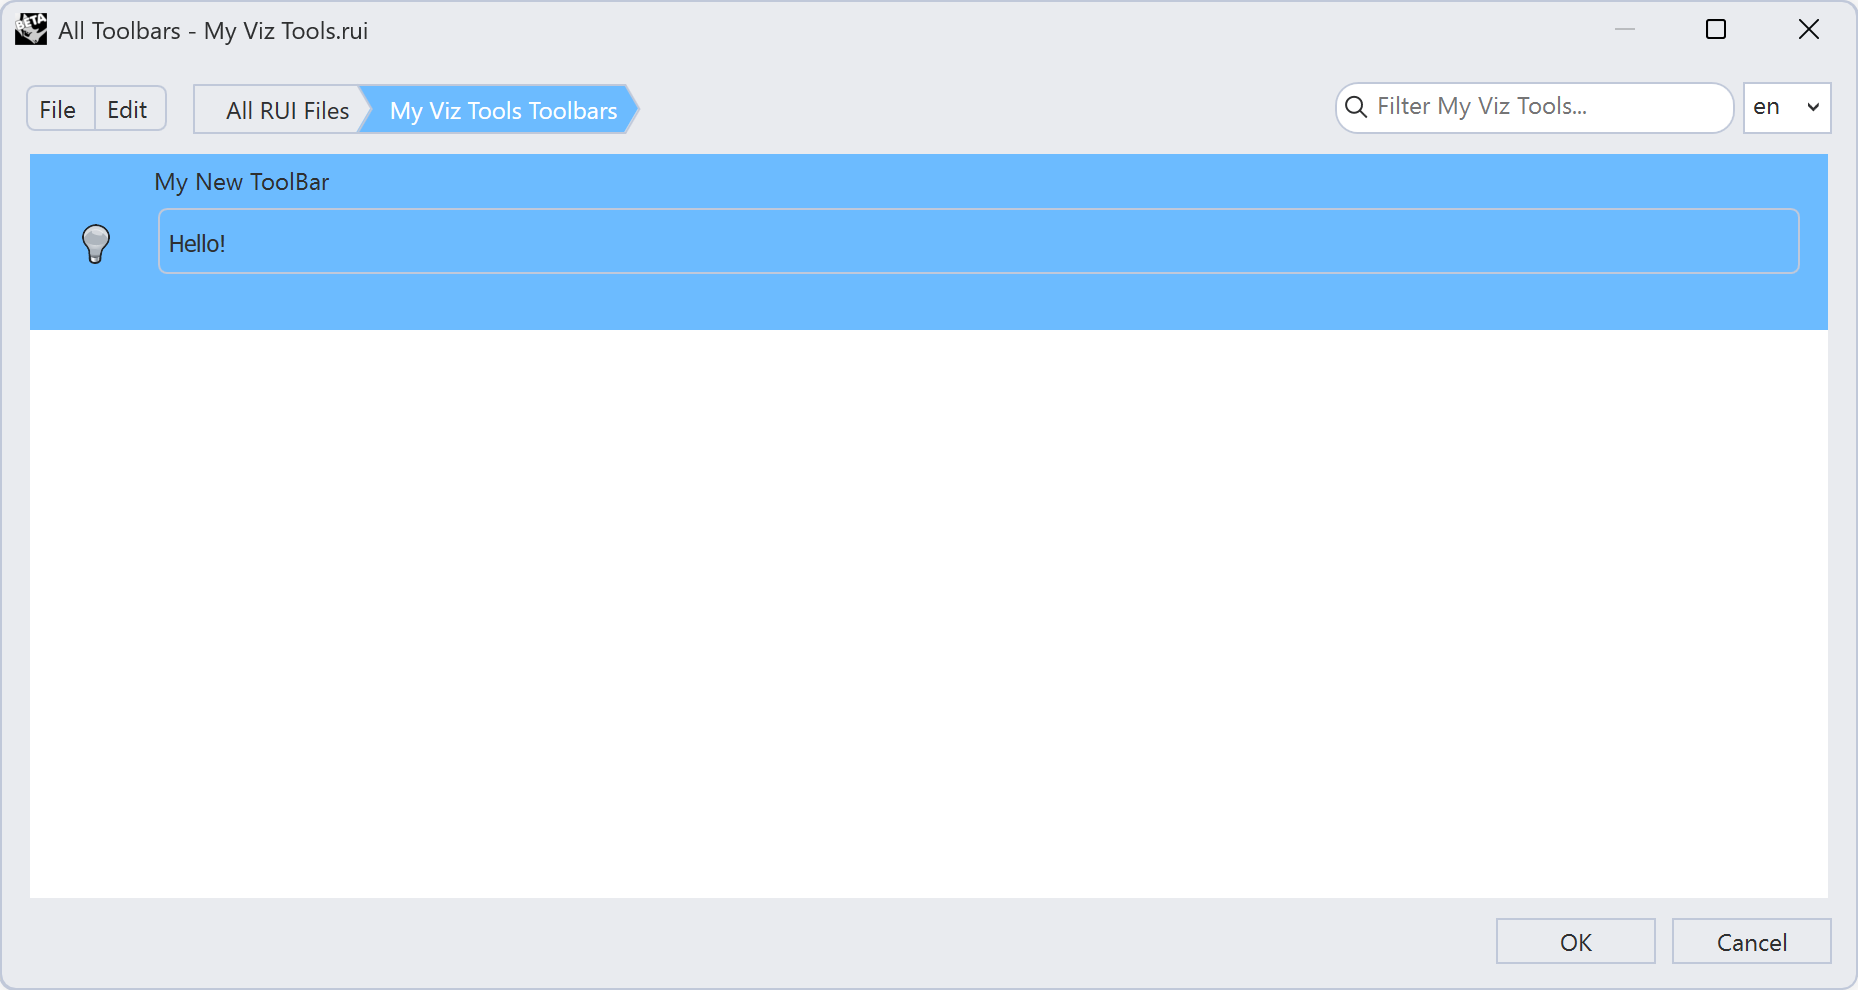
-
Change the name of your Toolbar under Properties to My Viz Tools.
-
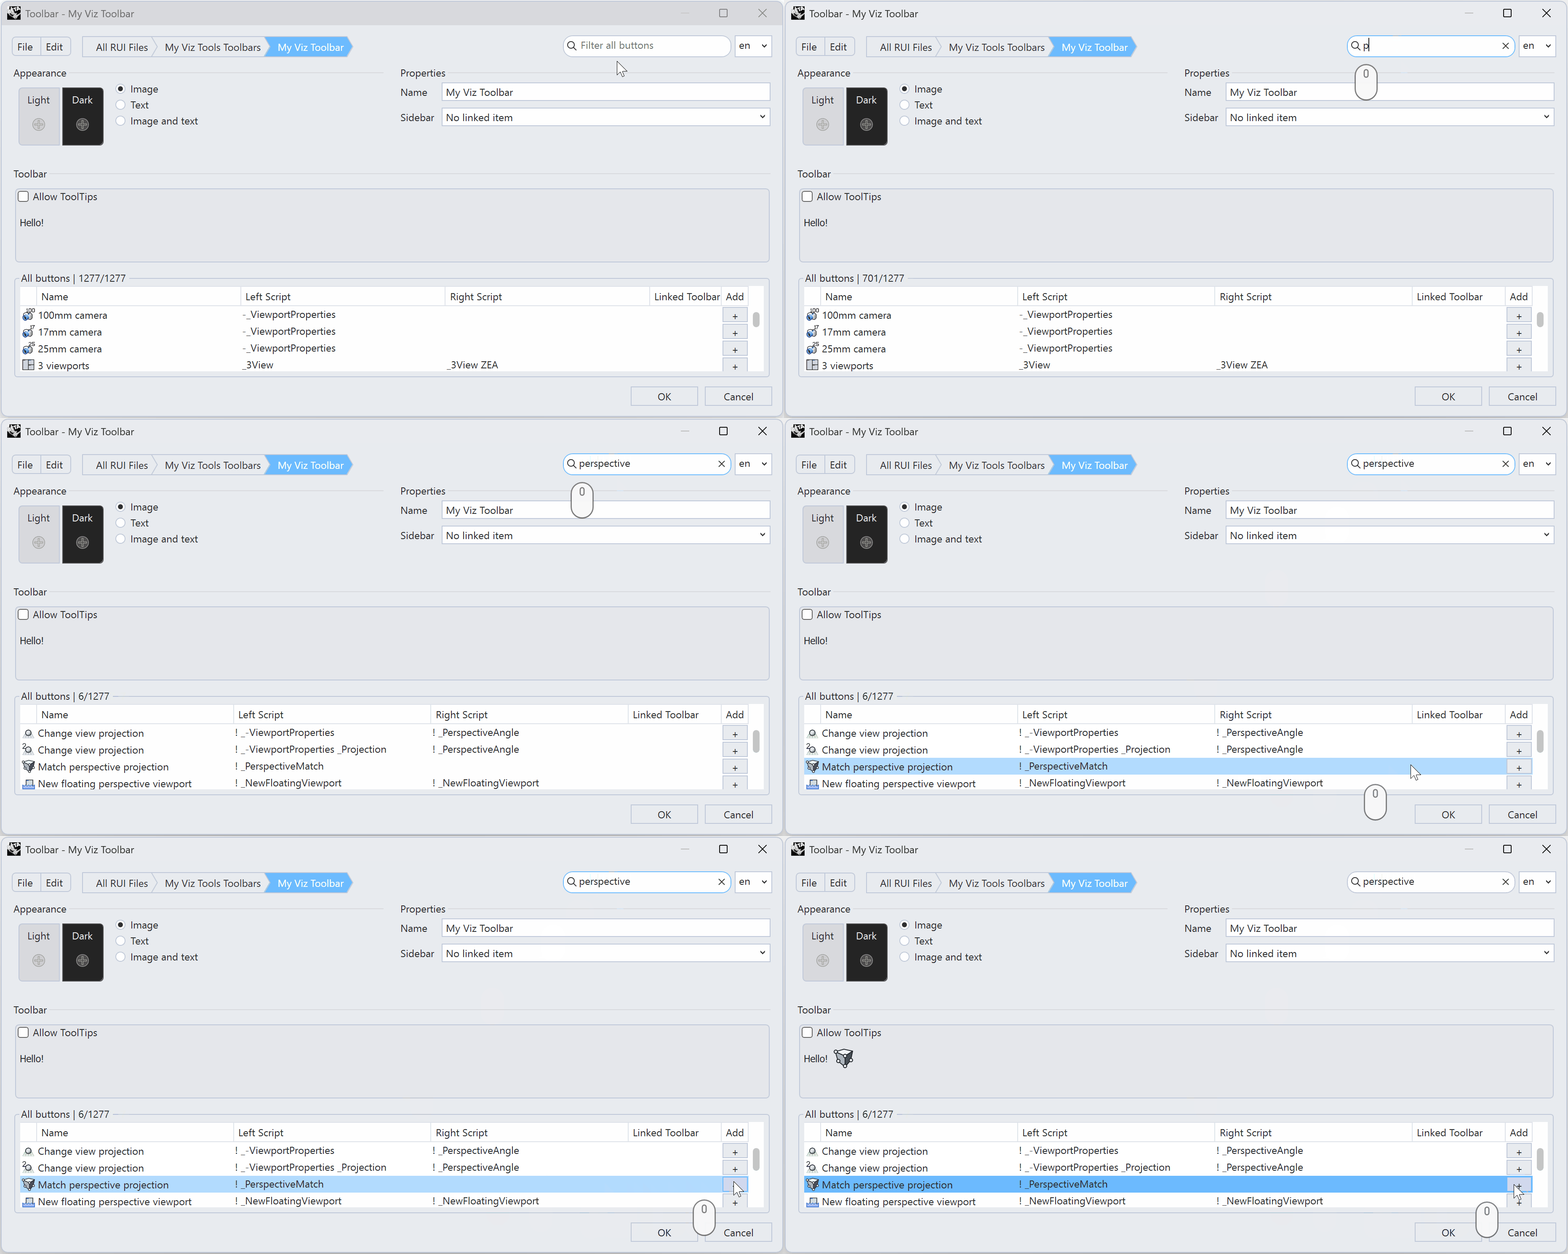
You can search for specific buttons in the search bar in the upper right corner, and when you find the one you’re looking for, press the + sign under Add to add it to your toolbar. Start by searching for PerspectiveMatch and adding it.
-
Next add the following buttons the same way:
- Turntable
- NamedView
- ViewportCaptureToFile
- MoveTargetToObjects
- Concept viewport
-
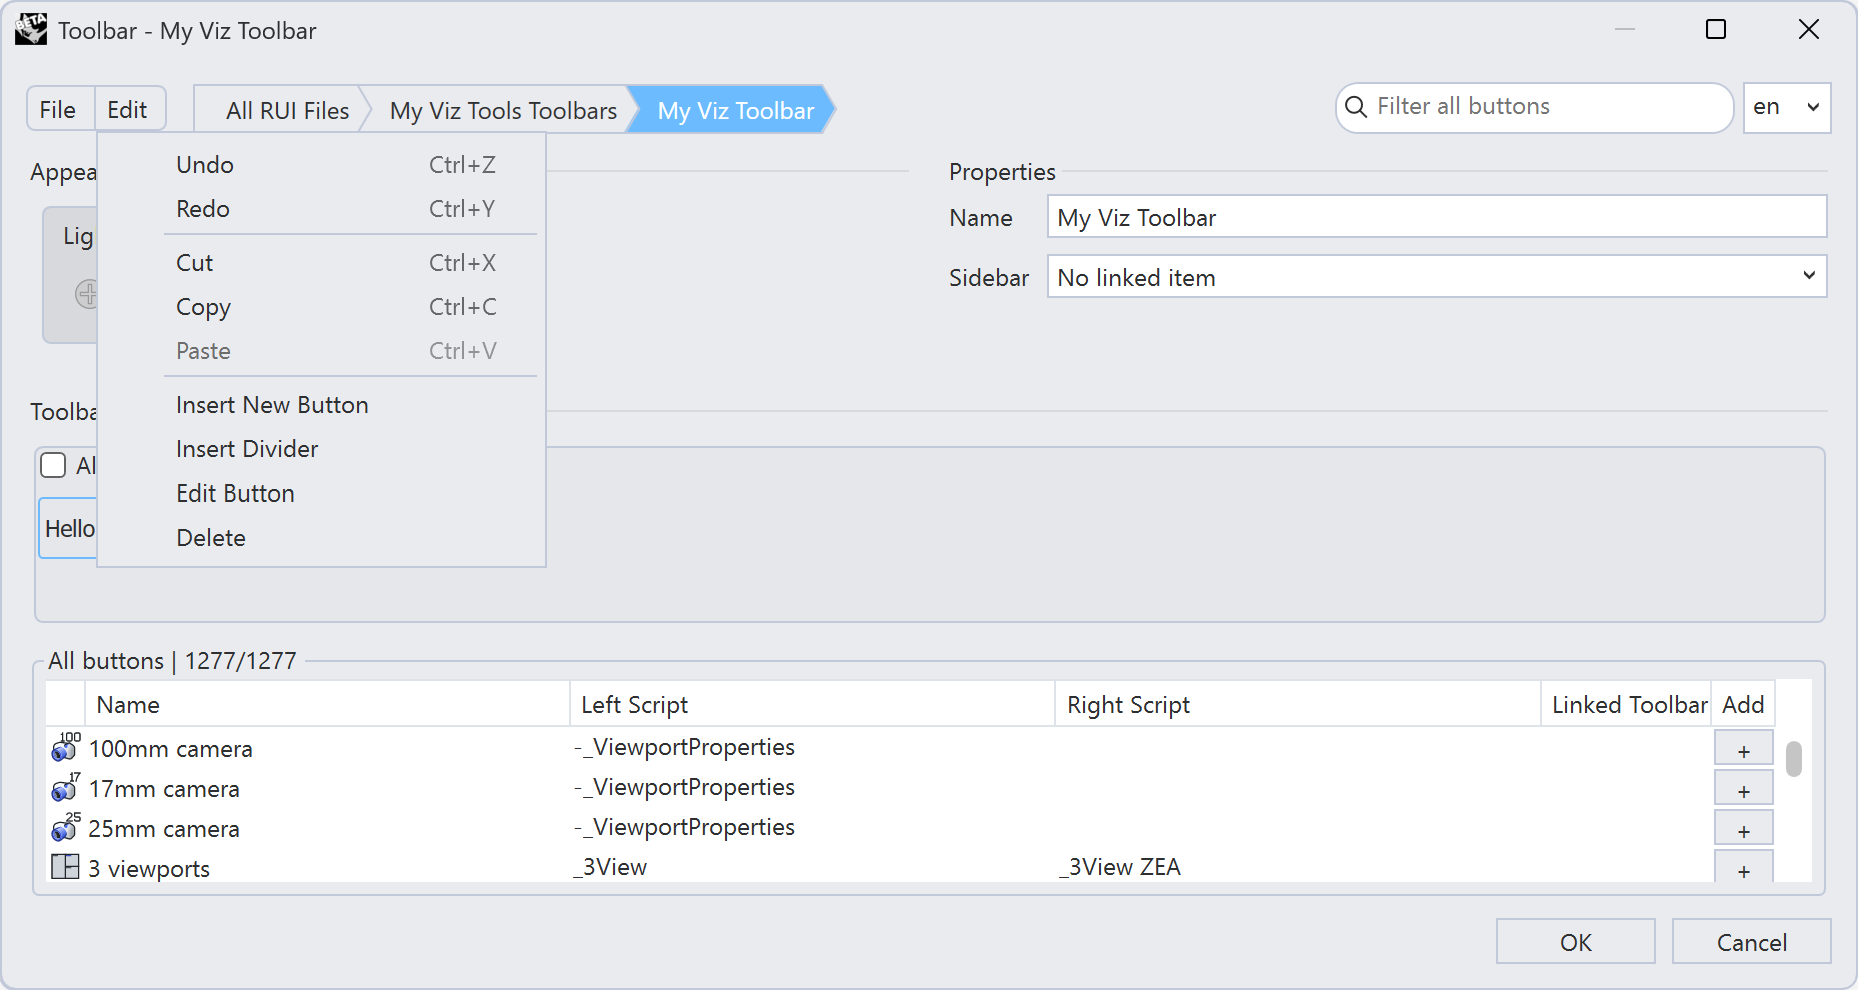
From the Edit menu, you can undo/redo, copy/cut/paste or delete toolbar items to rearrange things without starting over. Select the default Hello! button and from the Edit menu choose to Delete it.
-
When you’re done editing your toolbar, press OK to save your changes.
-
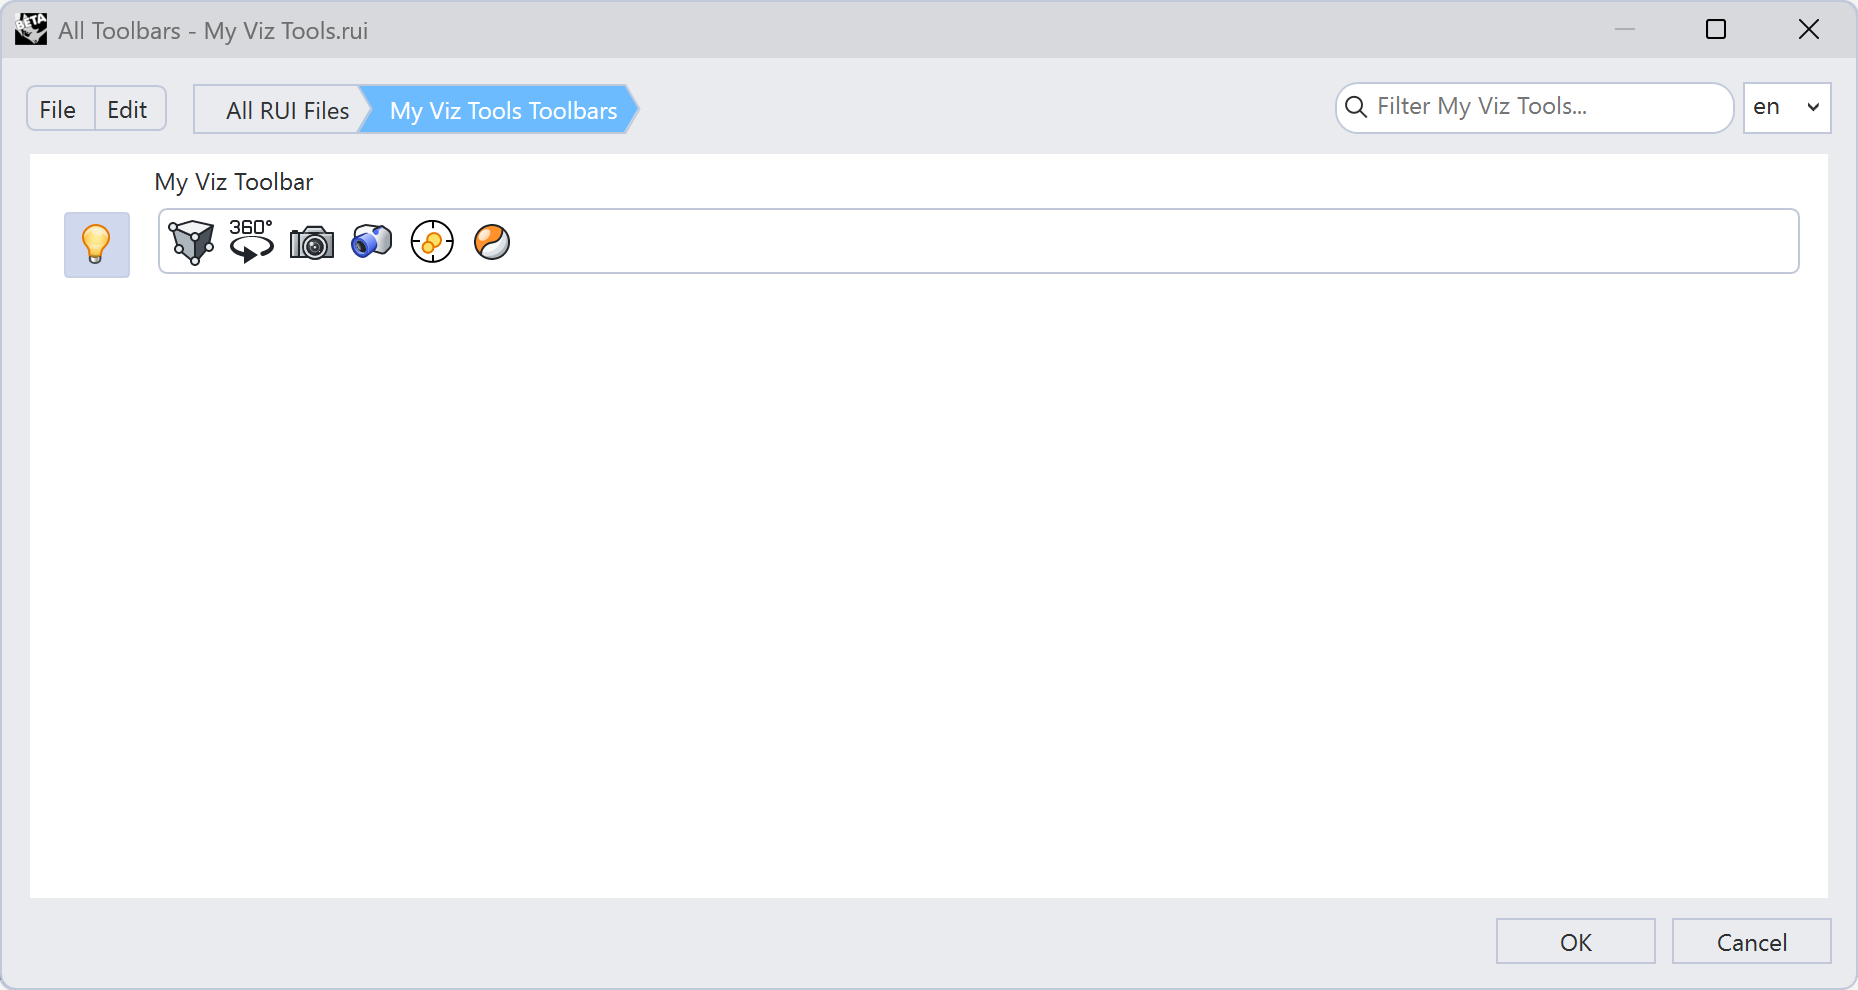
In order for the new Toolbar to show up as floating in Rhino, you have to click the lightbulb icon in front of the Toolbar name in the list of toolbars.
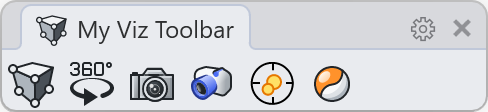
Create a Toolbar Icon
There are times that the standard commands and buttons do not do exactly what you want. For example, we want to use ZoomExtents to zoom to the objects, but we do not want the command to consider the light objects. In this exercise, we will make a new toolbar with a button that will Zoom Extents while ignoring any light objects in the model.
-
To add a new toolbar button to your Toolbar, you can do it two ways:
- In the Toolbar Editor, you can press the Edit menu and choose Insert New Button. Once the new button is added, you can select it and choose Edit → Edit Button.
- If you have your My Viz Tools Toolbar open in Rhino, you can right-click on it and choose New Button….
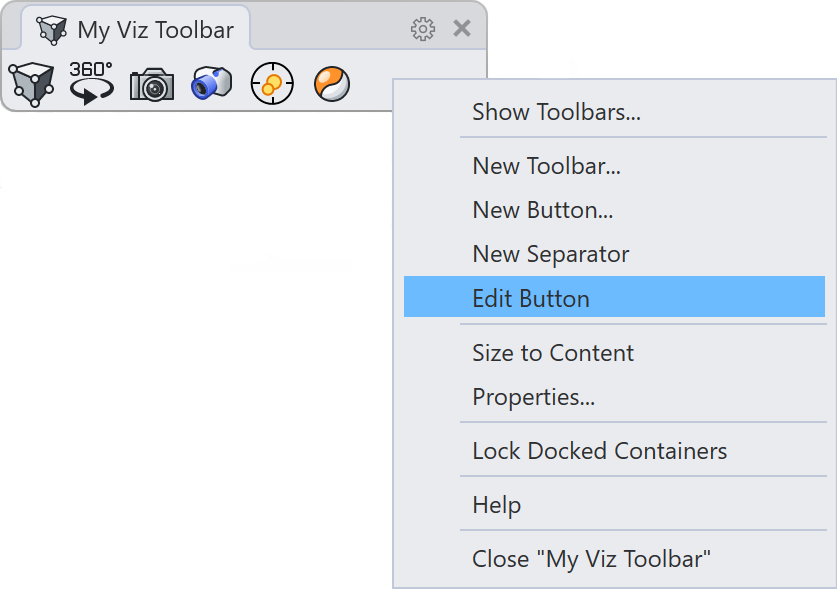
-
Add the name Zoom No Lights to the button. It will automatically fill in the Name in all places.
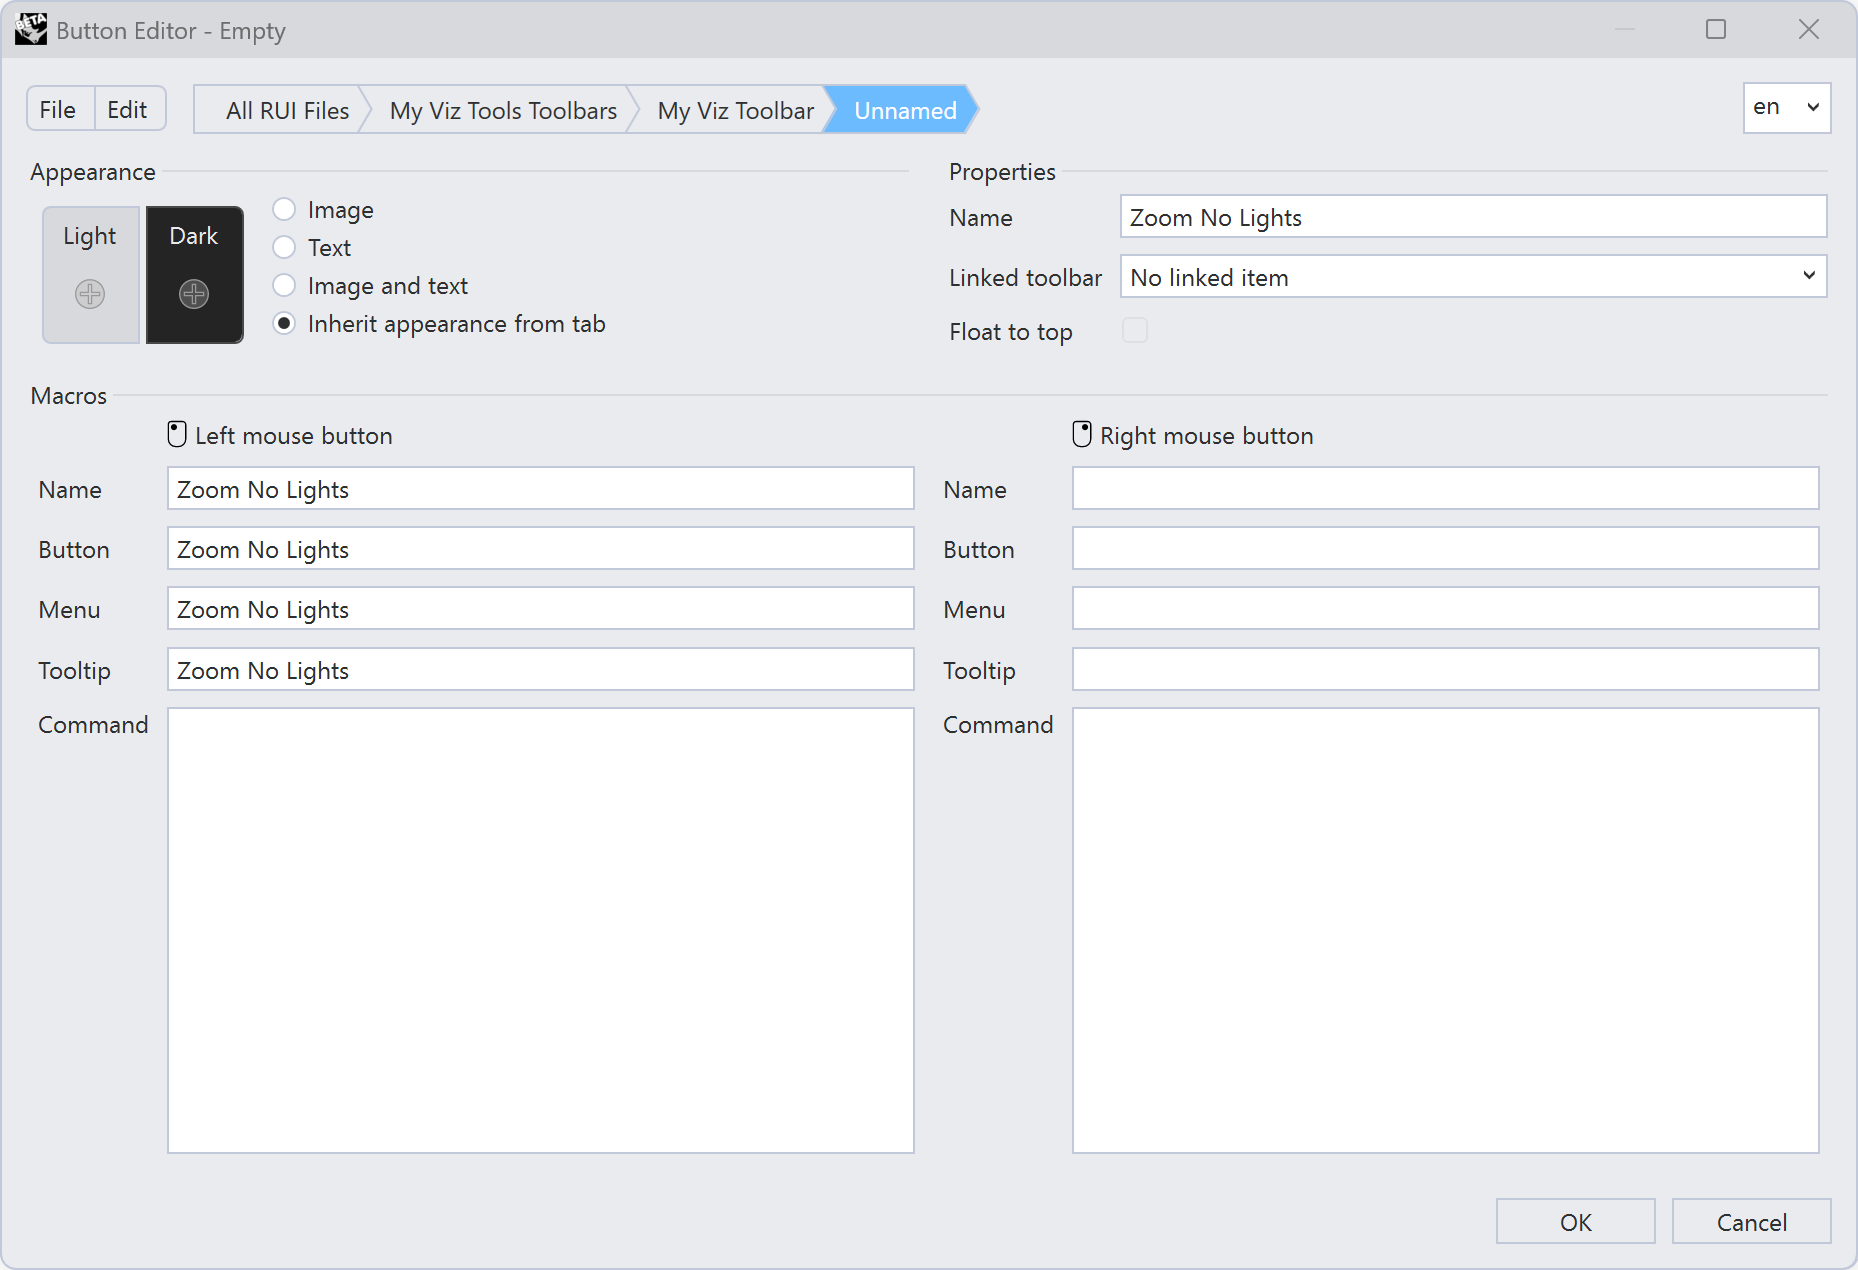
-
Write the command you want the button to execute into the Command section. In the example we use ! _SelNone _SelLight _Invert _Zoom _Selected _SelNone. The Tooltip will automatically fill in with the command name. If you want to change it, in this case, change it to Zoom Extents Except Lights.
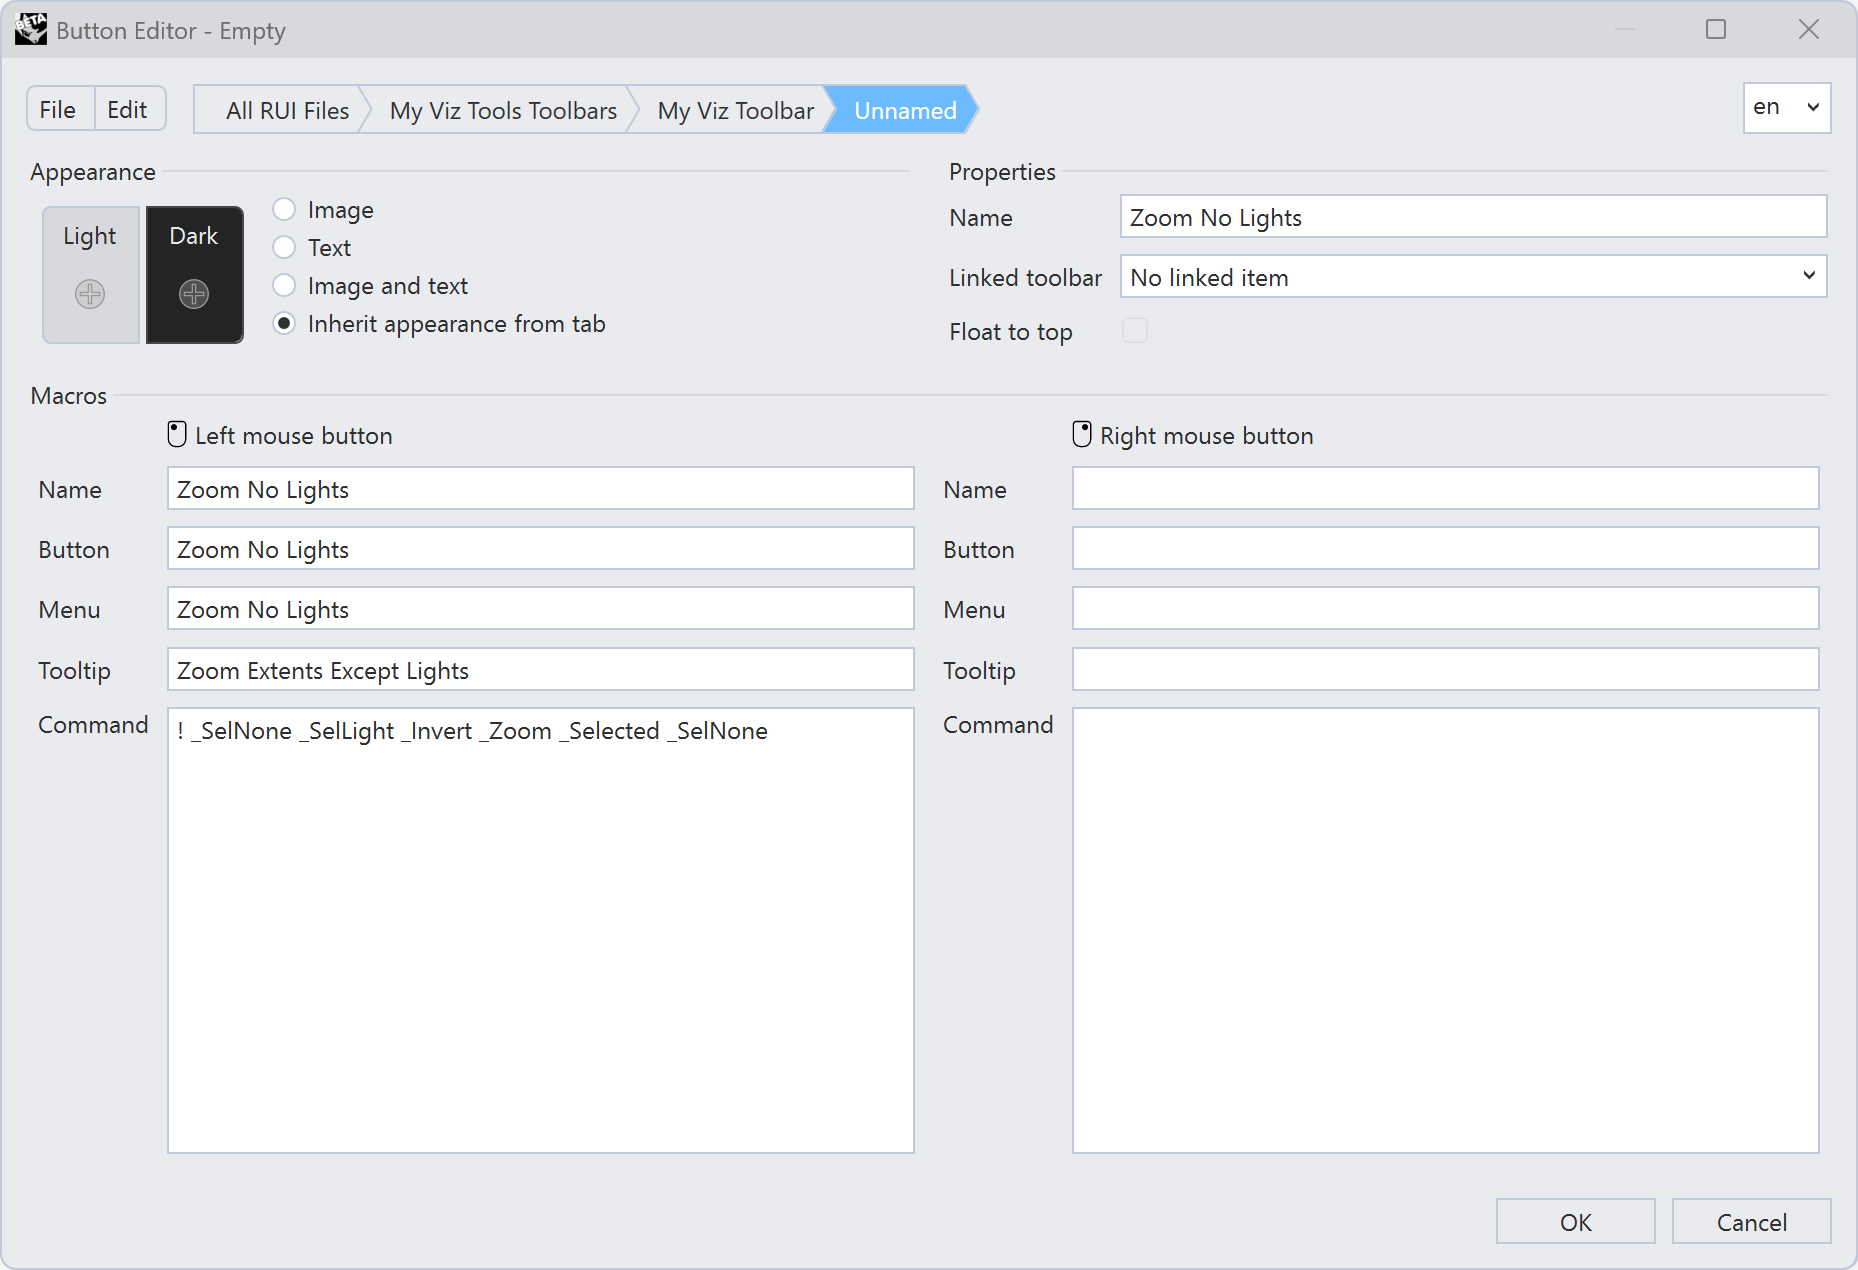
-
Add a custom icon to the button by pressing the + sign under Appearance. Choose the + sign under Light as a start.
-
In the SVG Editor, you can draw your own icon by using the drawing tools in the SVG Editor itself, or you can import an SVG file to be used in the button. Download zoom-no-lights.svg to use the icon from this example. You can also import an image by pressing the Open button. Press OK to save your changes.
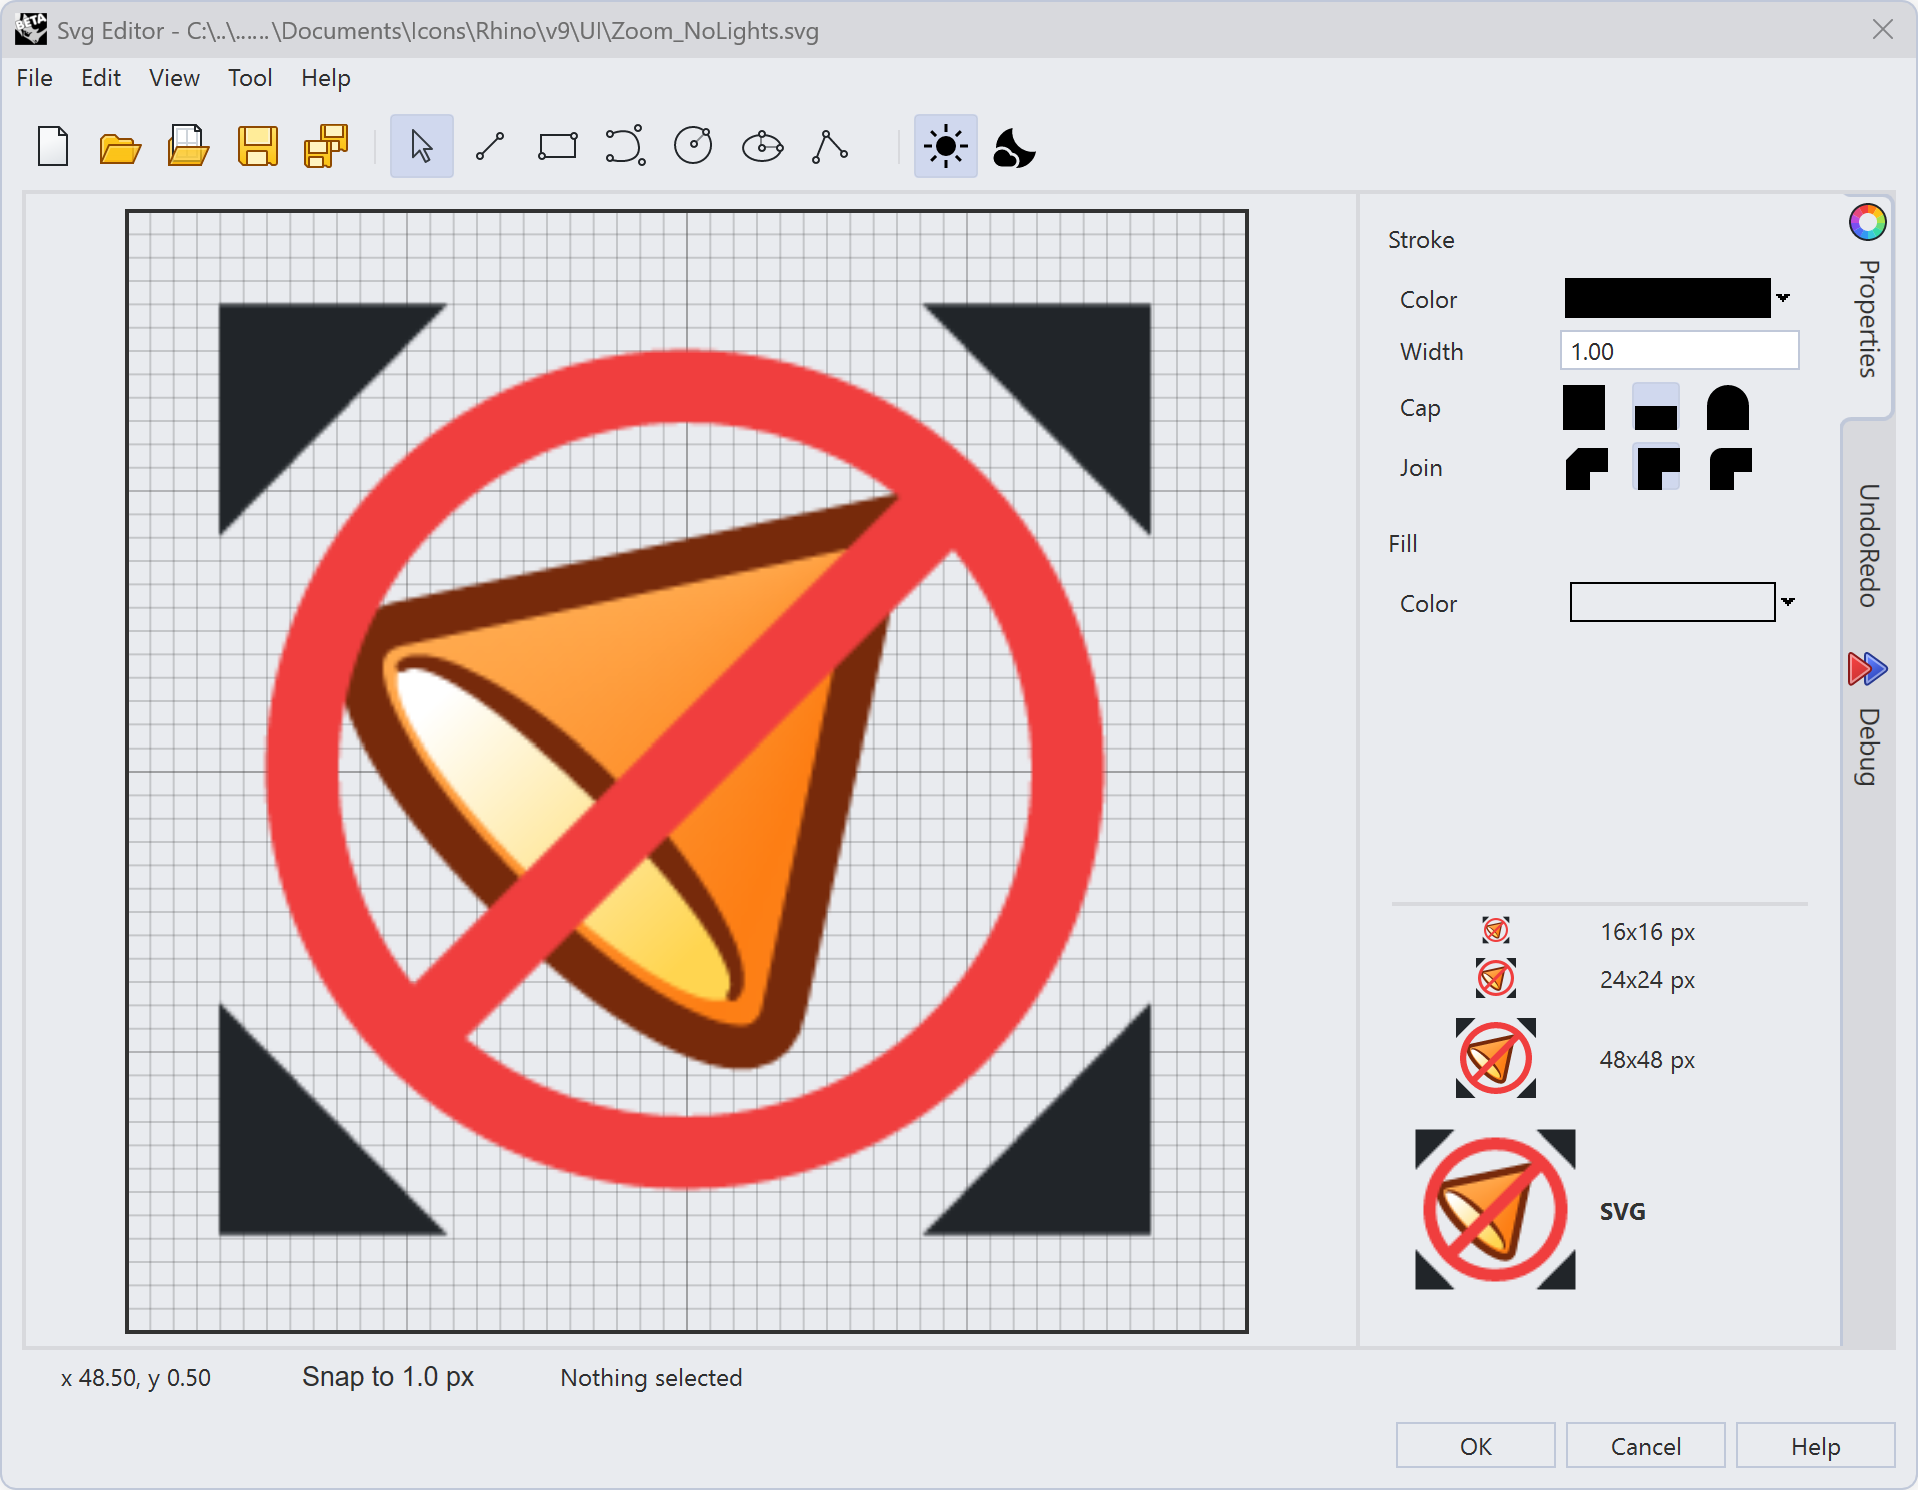
-
To add a dark mode icon to your button, press the + sign under Appearance → Dark. Download zoom-no-lights_darkmode.svg for the dark mode version of the SVG file used.
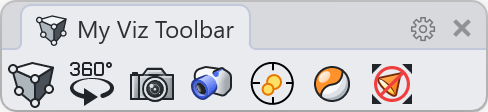
Panels
Panels give you quick access to controls like Layers, Properties, and Materials without leaving your modeling view. For our Visualization UI we want to add the Lights, Materials, and Snapshots panels.
-
You can add a panel by clicking on the + tab or right-click a tab. Check the Lights, Materials, and Snapshots panels from the list. Uncheck the Display and Layouts panels, if they are on by default.
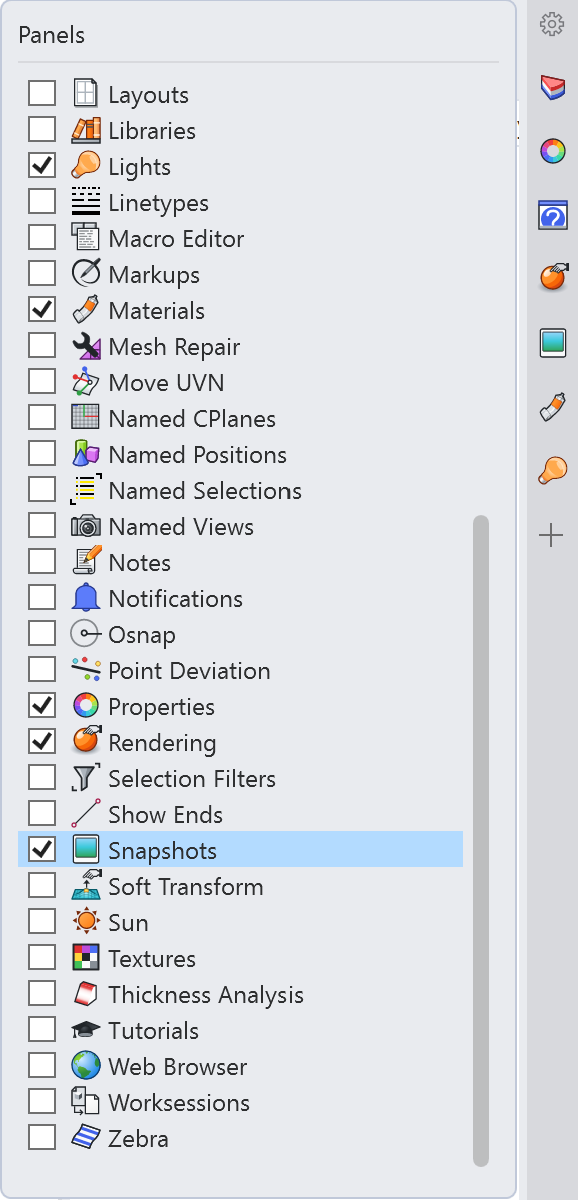
-
Reorder the tabs, so that all the rendered related ones are next to each other. Do this by dragging the tab to a new position.
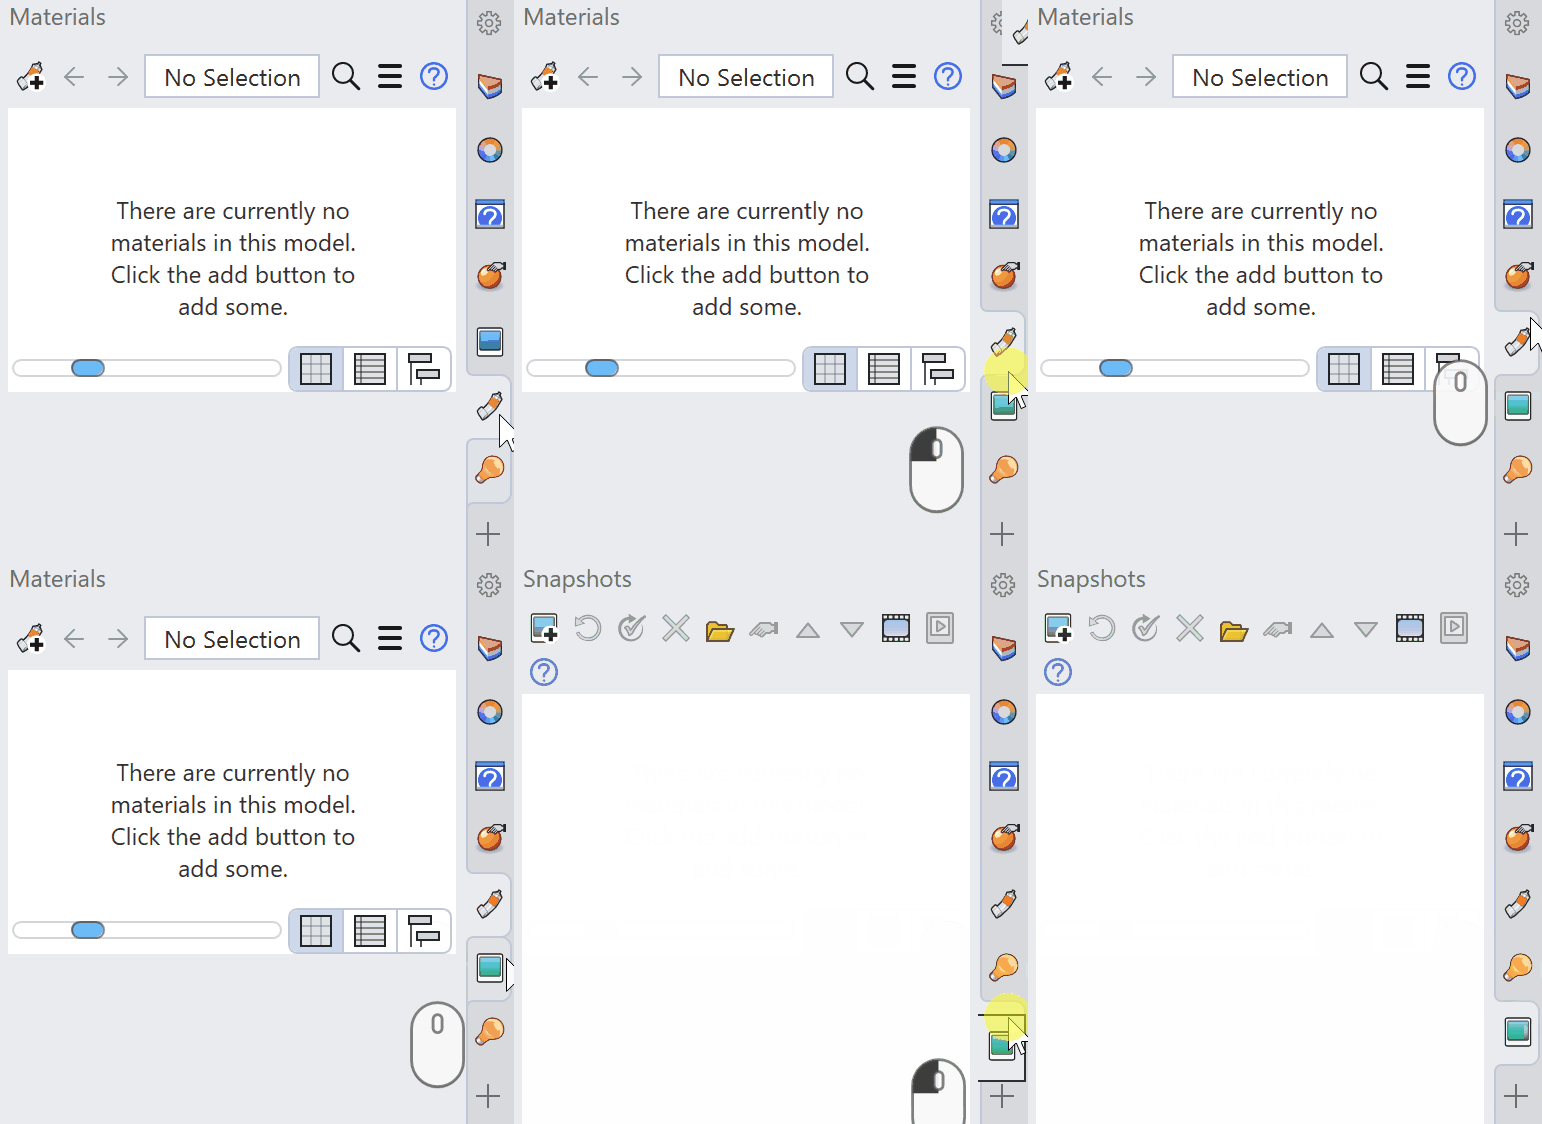
-
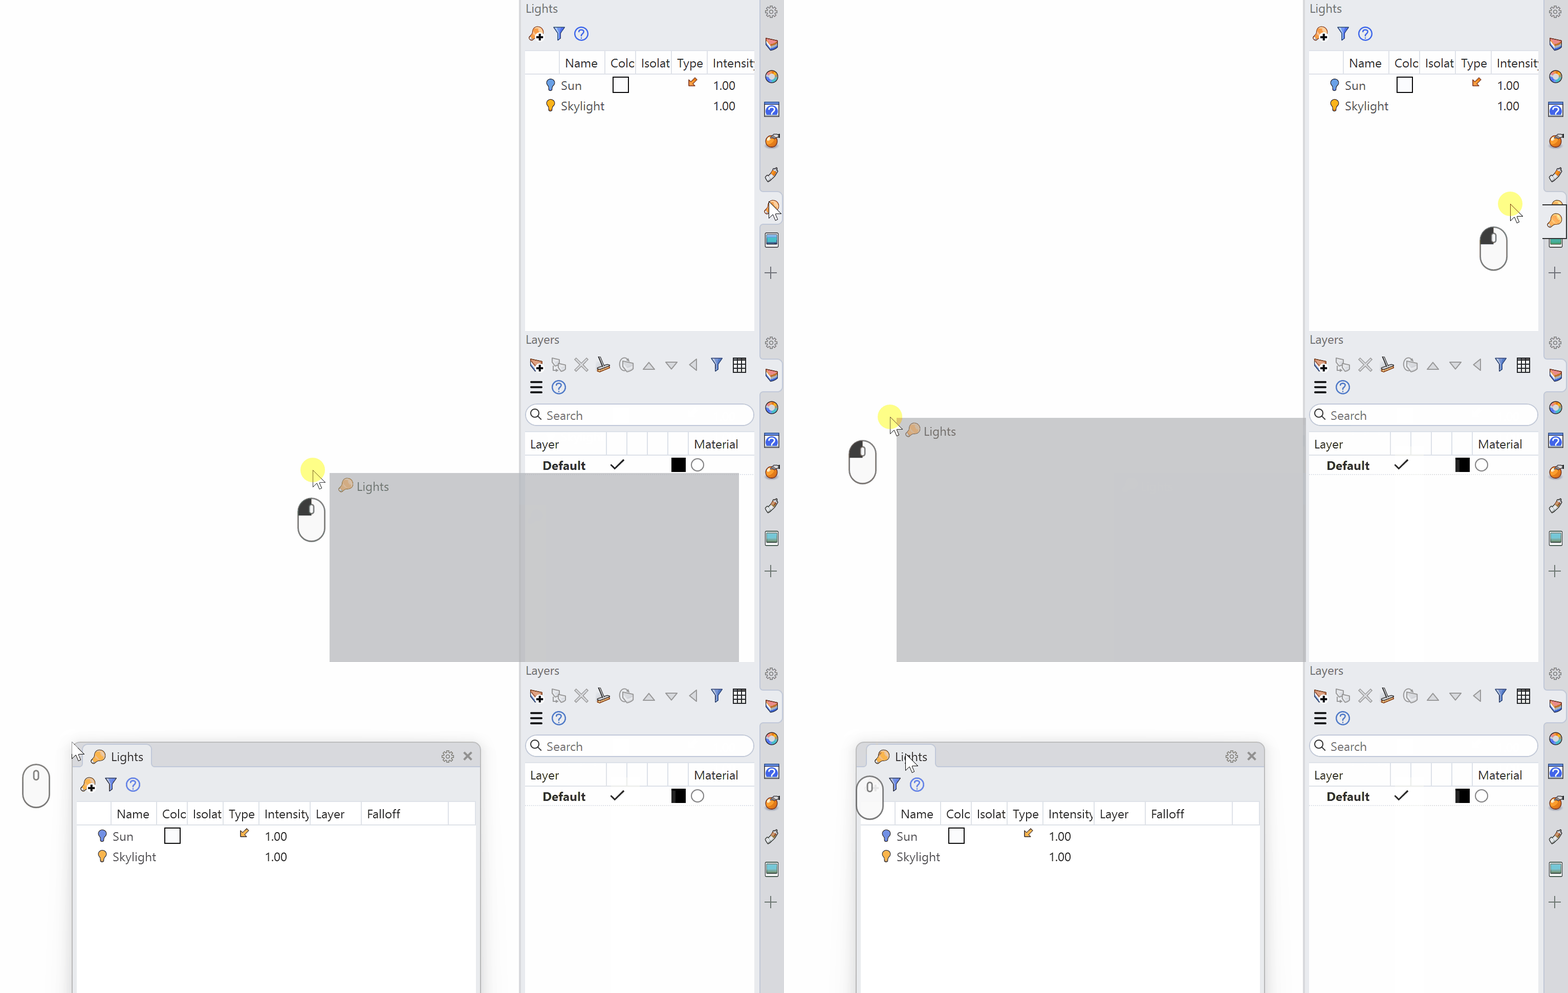
Let’s move some of the panels to save space. Drag the Lights Panel from the tab out of its container to pop it into its own floating panel window.
-
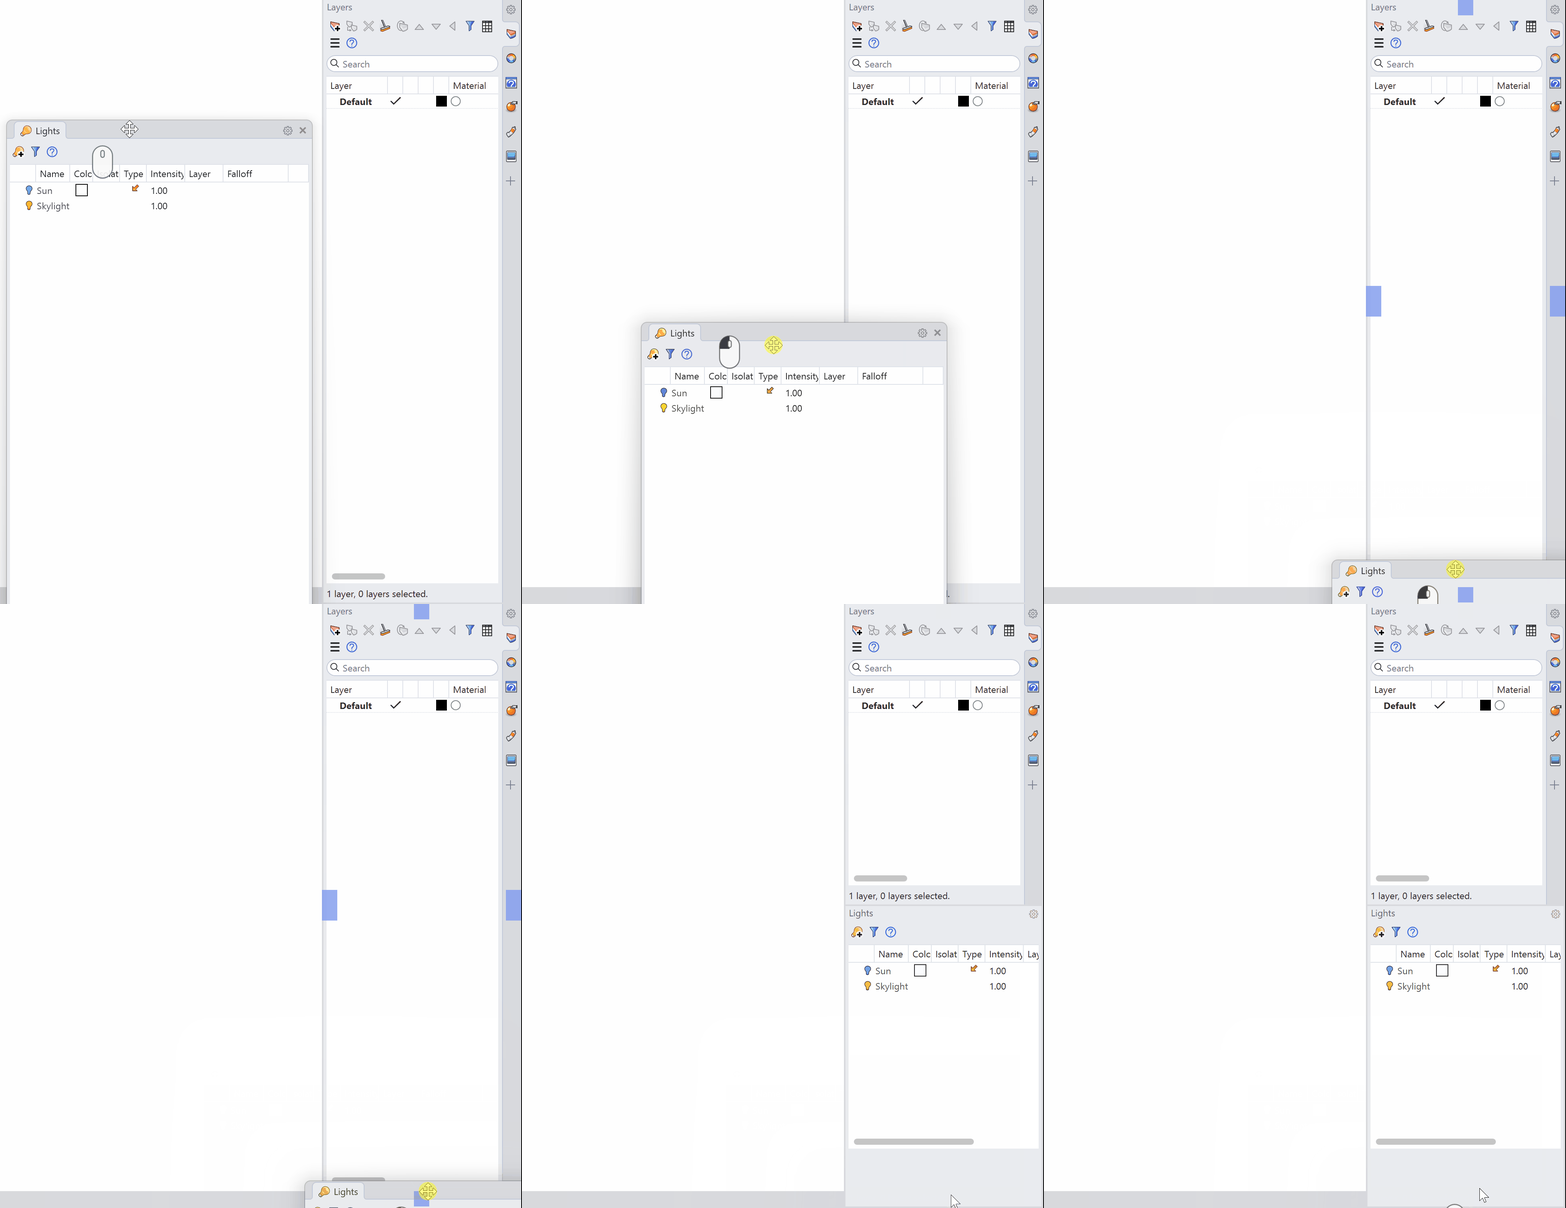
Now dock the Lights Panel below your other ones by dragging it. Please note that you need to click on the container, not the tab, in order to get it docked. You can see when the cursor changes to four arrows; that’s when you’re in the right spot.
-
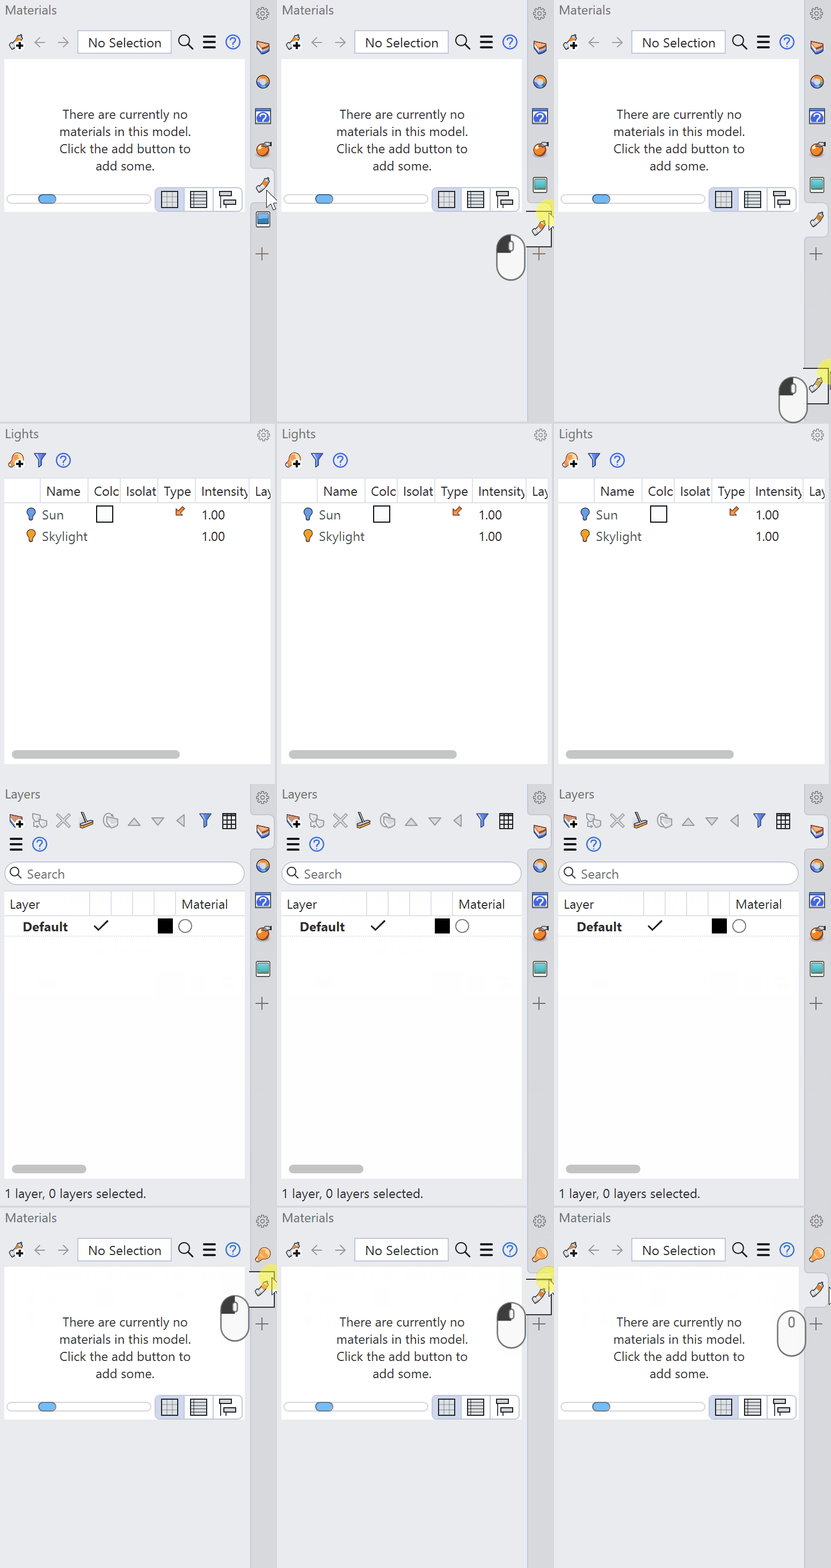
Click the tab for the Materials Panel and drag it down to the Lights Panel.
-
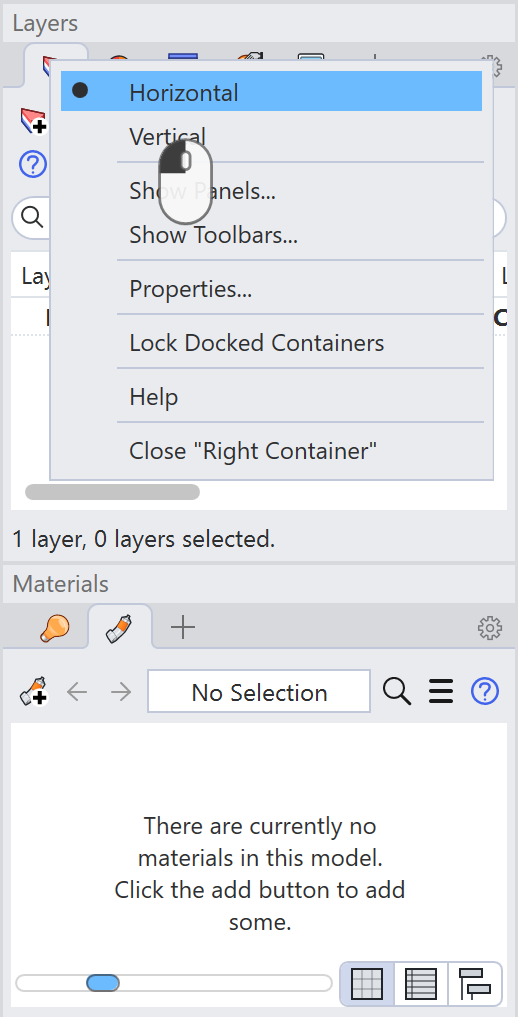
Click on the panel menu button to switch tabs to Horizontal.
Transfer Your Settings
Next let’s move all of your Rhino settings to another computer. Rhino 9 bundles everything into one file type: .rhs.
- On this computer, run OptionsExport in Rhino. OptionsExport creates a
.rhsfile containing your Window Layouts, Keyboard Shortcuts, Aliases, Plug-ins, Schemes, Default and Custom RUIs, Advanced Settings, Window Positions, and Rhino Options. Save the file as My-viz-ui.rhs and move the file over to the other computer. - On the other computer, use OptionsImport and select the My-viz-ui.rhs file. This merges the incoming settings with what’s already there.
.rhs file to .zip and you can open it like any archive to inspect what’s inside.Save and Share Window Layouts
If you just want to share your Toolbar and Panel setup from your Viz UI with another computer, rather than all of your settings like Transfer Settings does, Window Layouts will do that for you.
-
Go to the Window menu → Window Layouts → Save Window Layout… and name it My Viz UI.
-
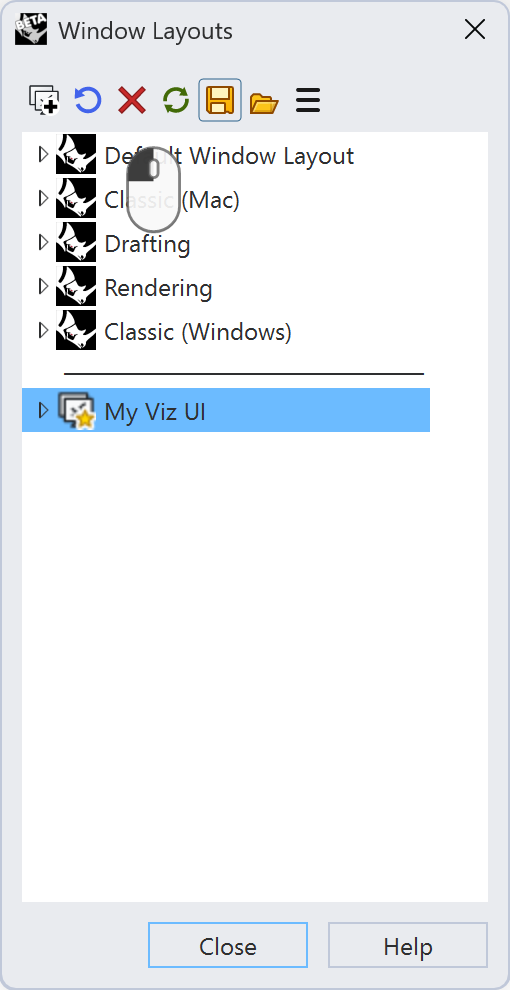
Go to Window → Window Layouts → Manage Window Layouts… to see your saved layouts. Select My Viz UI and press the Export button. Save the file as My Viz UI.rhw.
-
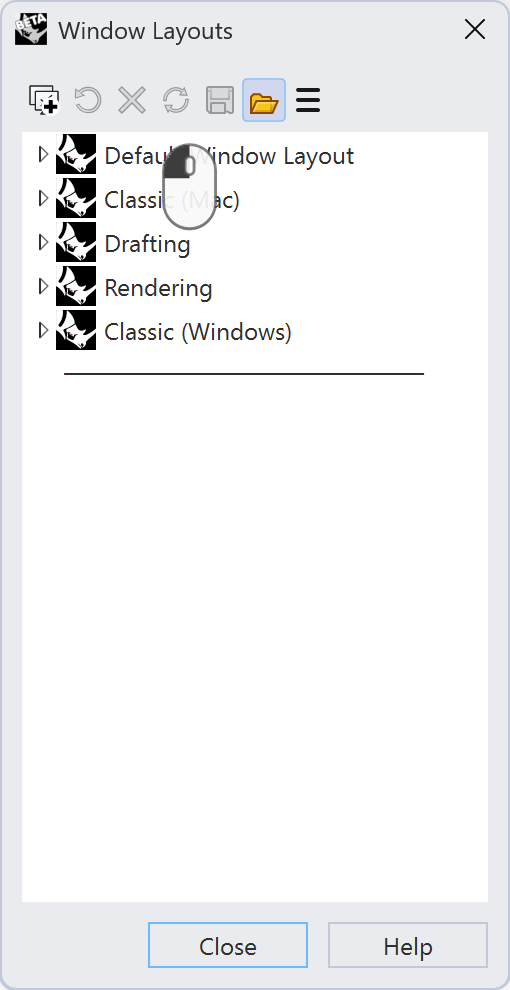
Move the file My Viz UI.rhw to the other computer. On that computer, go to Window → Window Layouts → Manage Window Layouts…, then press the Import button to open My Viz UI.rhw.
-
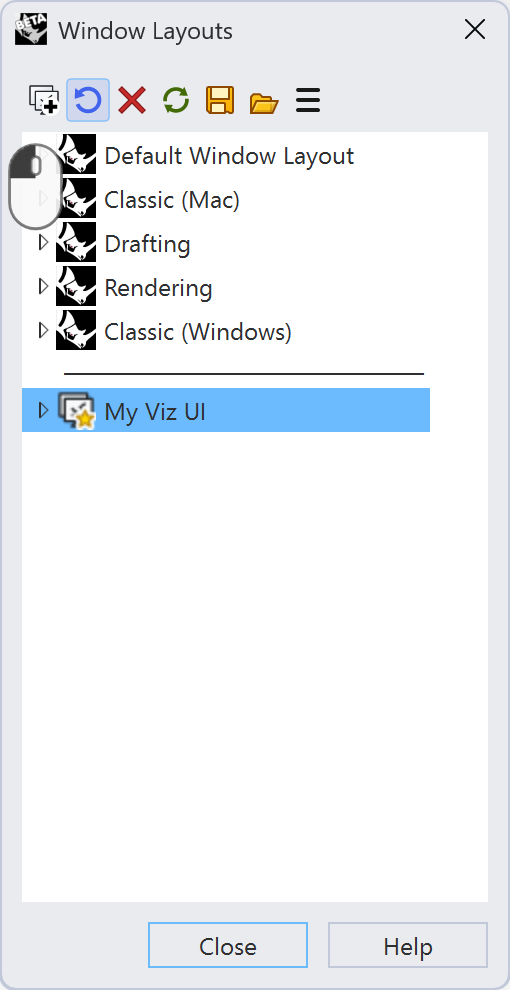
To update Rhino to use My Viz UI, select My Viz UI from the list and press the Restore button.
Rhino Commands
- CommandMode
- Toolbar
- OptionsExport
- OptionsImport
- OptionsMigrate
- WindowLayout
- SaveWindowLayout
- Reset