Background
In this tutorial, we will learn how to modify the the Rhino User Interface. We will discuss how to change the basic setup all the way to organizing a different layout or even creating your own tools.
Built-in Themes
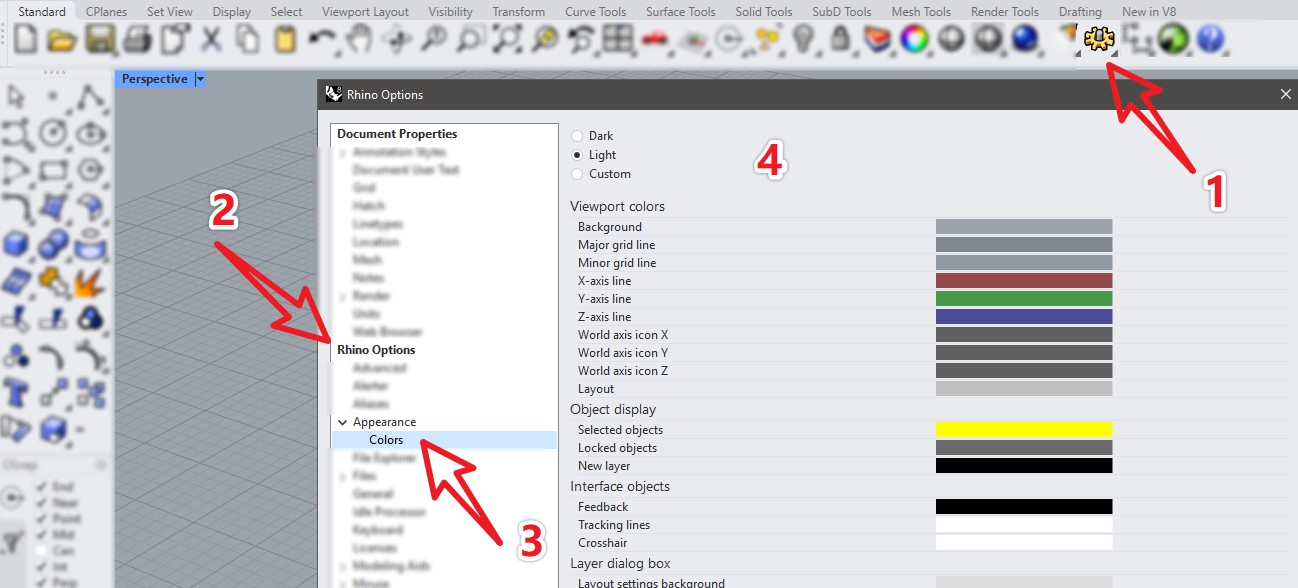
Rhino 8 provides three different theme styles. By default, the it will be consistent with the Windows theme color. However, you can switch in the
![]() Options
> Rhino Options > Appearance > Colors page:
Options
> Rhino Options > Appearance > Colors page:
- Light
- Dark
- Custom
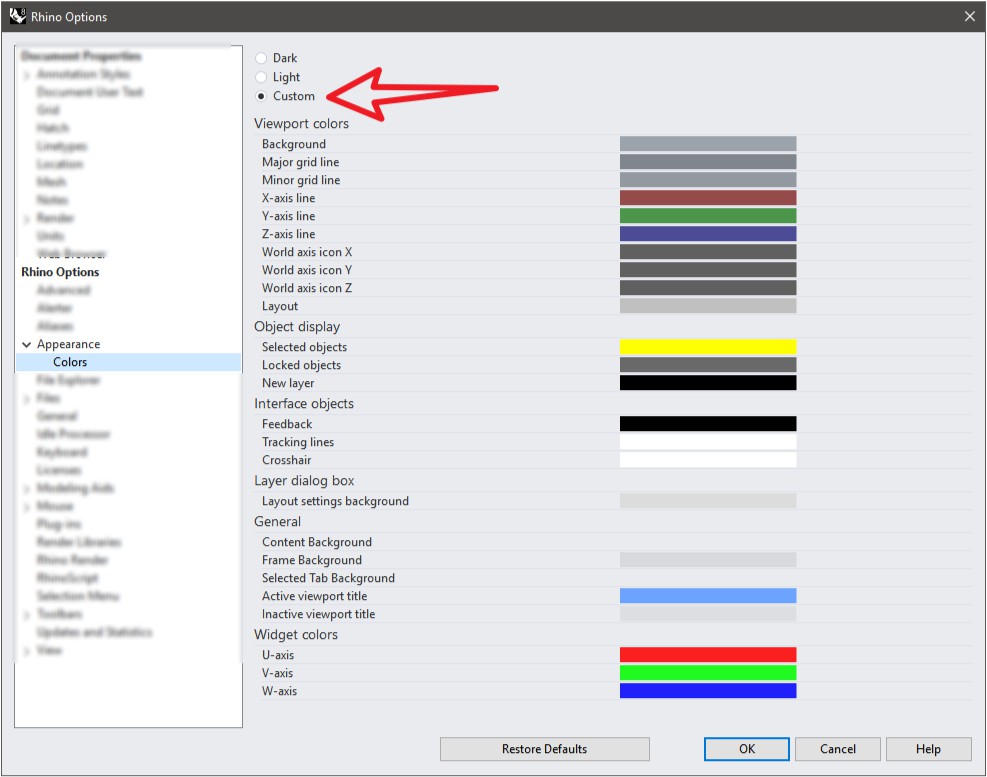
Custom
You can choose the Custom option to have more freedom on how to personalize the UI. You can choose Custom option for more settings , e.g. Viewport colors, Objects display, Interface objects, Layer dialog box, General color and Widget colors.
New Window Layout
UI customization is more flexible in Rhino 8. Now you can use
![]() WindowLayout
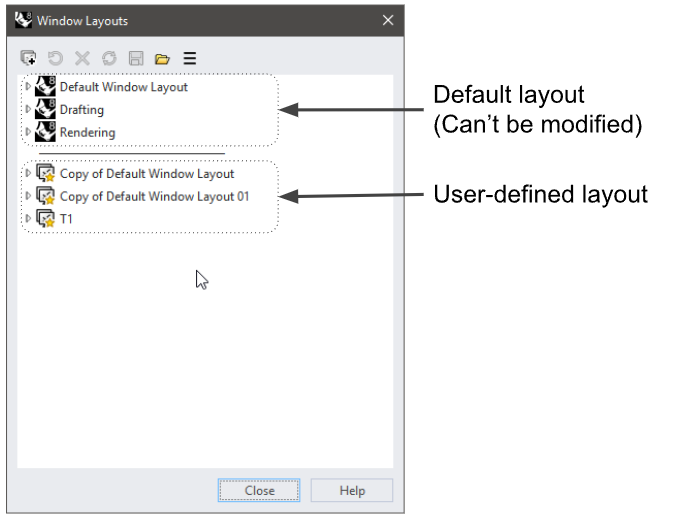
to adjust specified task interfaces, save or restore the interface, and more. Layout configuration can also be exported and imported for convenient backup of configuration files and synchronization between multiple divides.
WindowLayout
to adjust specified task interfaces, save or restore the interface, and more. Layout configuration can also be exported and imported for convenient backup of configuration files and synchronization between multiple divides.
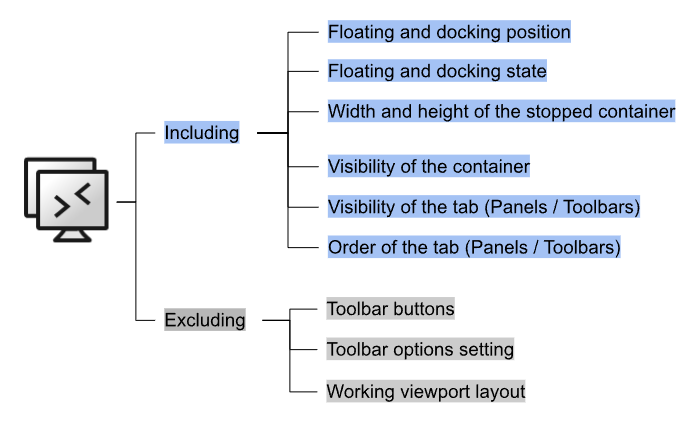
The new layout addresses the pain point that the Rhino interface layout was often disrupted in the past. Rhino 8 can remember the windows position and size to ensure that Toolbars and Panels remain in the position where you originally placed them.
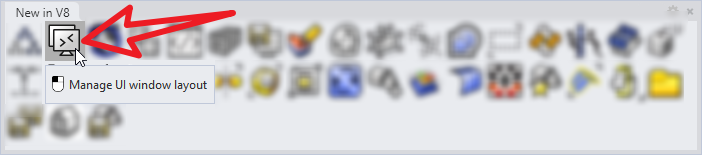
You can find this tool under the menu Windows > Windows Layouts > Manage Windows Layouts…, or click the button
![]() WindowLayout
in the toolbar of New in V8, you also can run the command WindowsLayout in the command line to call it. You can quickly switch the layout in different application scenarios by double-clicking on the layout name.
WindowLayout
in the toolbar of New in V8, you also can run the command WindowsLayout in the command line to call it. You can quickly switch the layout in different application scenarios by double-clicking on the layout name.
More details please clik
![]() WindowLayout
to see a detailed description of the help document.
WindowLayout
to see a detailed description of the help document.
