Customizing your toolset in Rhino with existing commands or with personalized macros is an important part of having an efficient workflow. In this this tutorial you will learn how to:
- Create a toolbar.
- Add a button from the existing commands.
- Create a button from scratch.
- Create an image for the button.
- Add a macro or a function to execute.
Creating a Toolbar
-
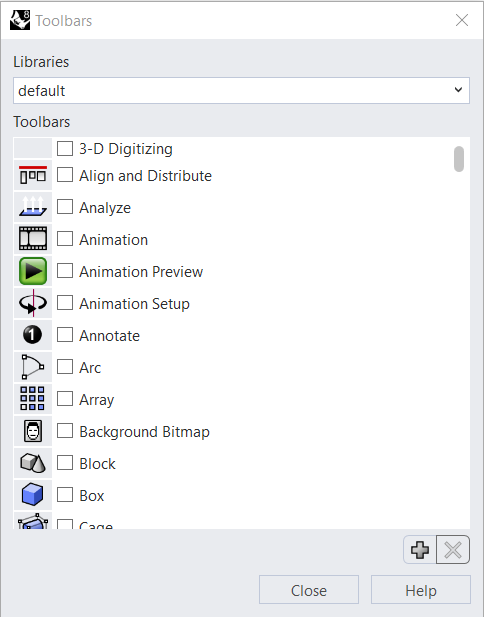
Go to the Window menu and click on Toolbars. This will bring up the following dialog box. Click on the + sign at the bottom to open up the Create Toolbar dialog.
-
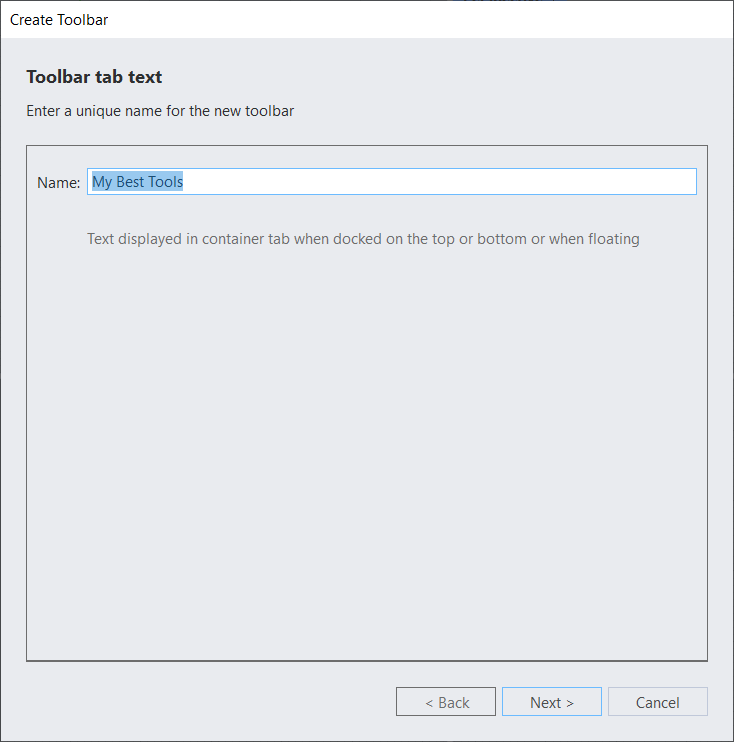
You can then name your toolbar. Click Next.
-
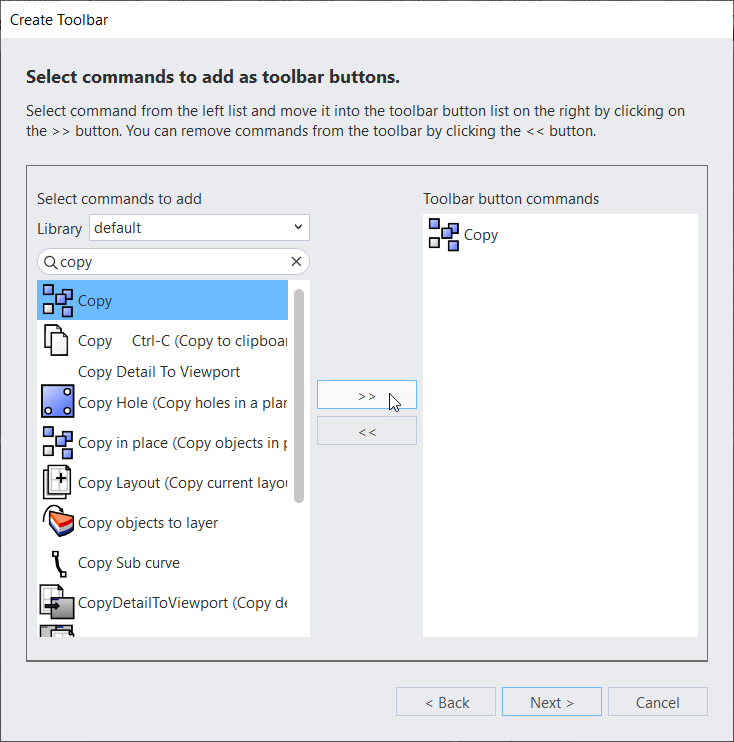
This will bring up the part of the Create Toolbar dialog with the macro libraries. The default macro library contains the all the commands that ship with Rhino. The toolbar we’re creating will be added to Rhino’s default macro library.
In the search box, type copy. Once the icon shows up, select it and click on the double-arrow icon to bring it to the right area. You can continue adding existing commands to your toolbar. Anything that is added to the right hand side, will be added to your toolbar.
Click Next and at the next prompt, make sure you select Image only for the Toolbar button appearance. Click on Finish. Voilà: your first toolbar is created!
Creating a Button from Scratch
Now that we have a toolbar with at least one button, we will learn how to create a new empty button, add a command or macro and an image.
Start by rught-clicking anywhere on the gray area of your toolbar and select New Toolbar Button….
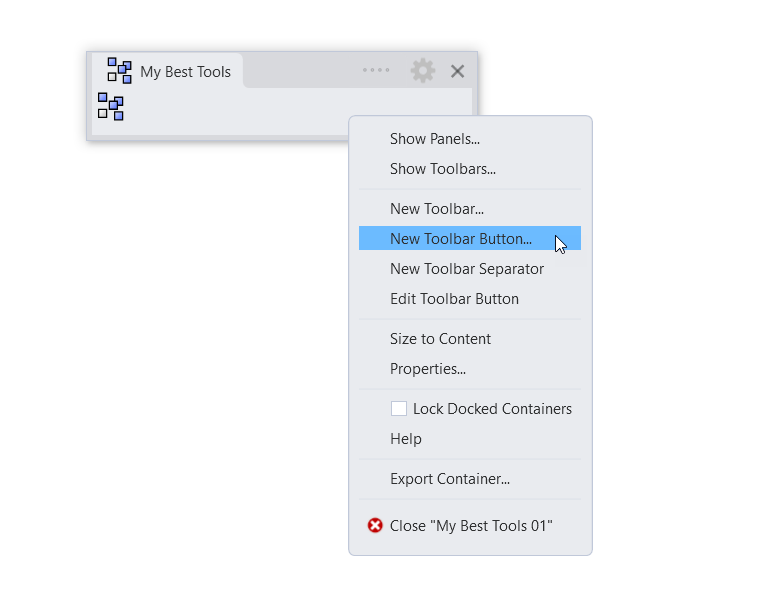
At the next dialog, select Empty Button, click Next >. Under Appearance, select Image only and click Finish. If you now hover over your toolbar, right beside the Copy button we added previously, you’ll notice there’s a second button. It doesn’t show nor execute anything yet. To change this, press + right-click. You should now see the Button Editor.
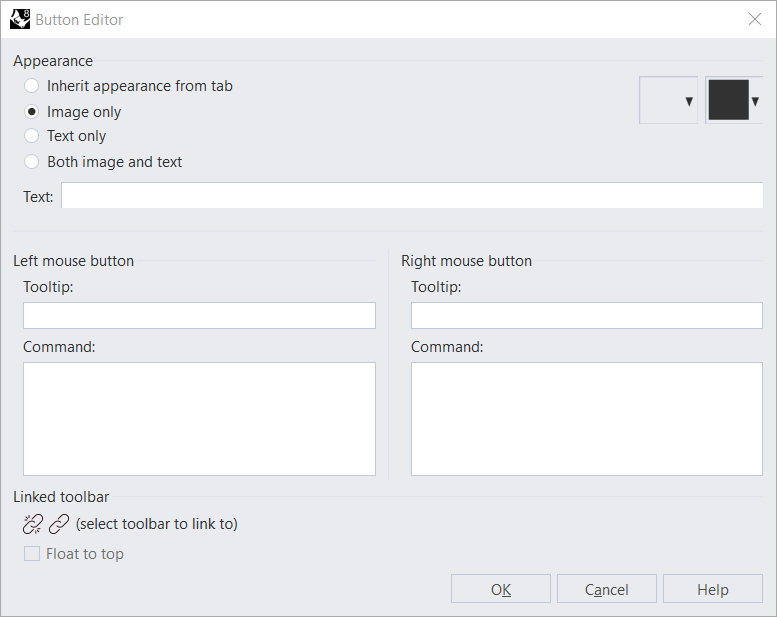
The fields we need to modify are:
- Left-mouse Tooltip and Command area.
- Editing the image (top right corner).
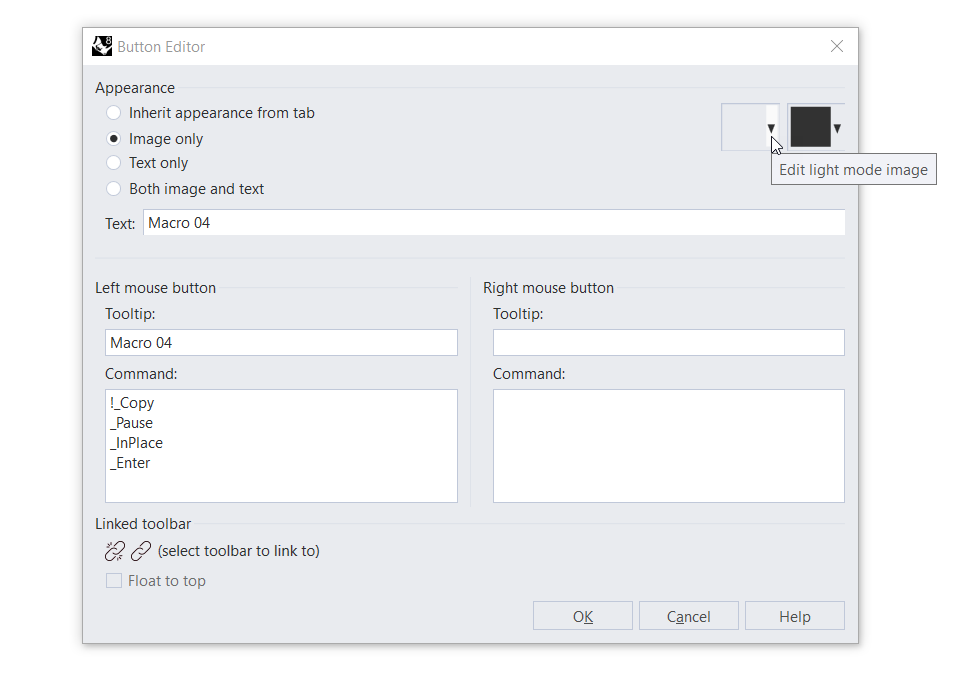
For this button, we will add a macro that will allow us to duplicate geometry. So, under Tooltip, add: Duplicate. And under Command, add the following text:
!_Copy _Pause _InPlace _Enter
Editing the Button Image
Let’s look at editing the image. While still in the Button Editor, click on the arrow, by one of the squares on the top right of the editor.
The built-in Image Editor will pop open. We can do one of two things:
- Use the the built-in editor to draw the icon.
- Import a SVG file, if we’ve created one.
For this first option, get creative with the tools on the right-hand side of the editor!
For the second option, you can go to click on the Gear icon, select File, then Import…. Browse for your SVG file.
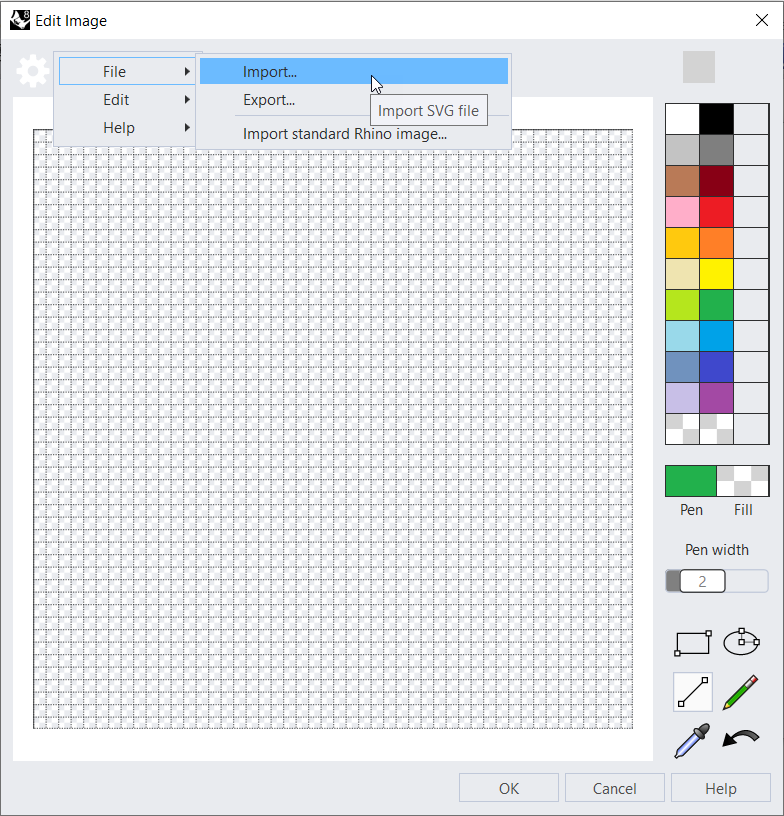
You can download and test with this example SVG file: duplicate.svg
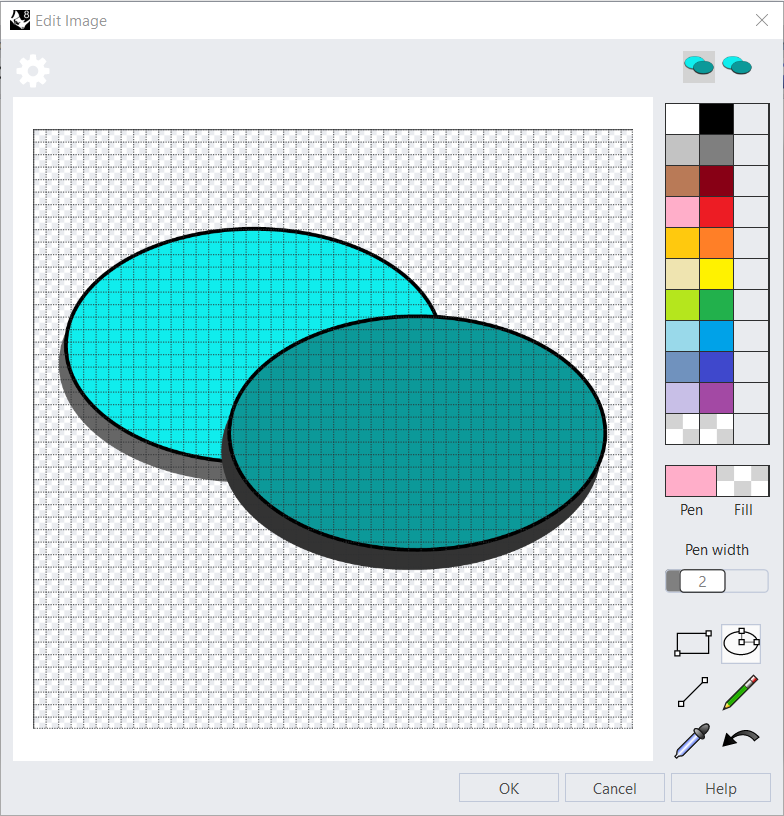
Now simply click OK twice to close both the image editor and the button editor. You’re ready to test your new icon! Simply create an object, select it and click on your new Duplicate tool.
