In most models, some parts get used repeatedly. For example, windows, doors, or appliances. For these objects, use blocks. A block is a set of objects associated together with a name.

Blocks allow you to:
- Save time updating instances by changing the definition.
- Decrease your file’s size on disk.
- Increase your model’s display speed.
- Count the number of instances.
- Nest blocks within other blocks.
- Include custom data that are updated for each instance.
- Use a Block Library for better consistency with your team.
Better Blocks
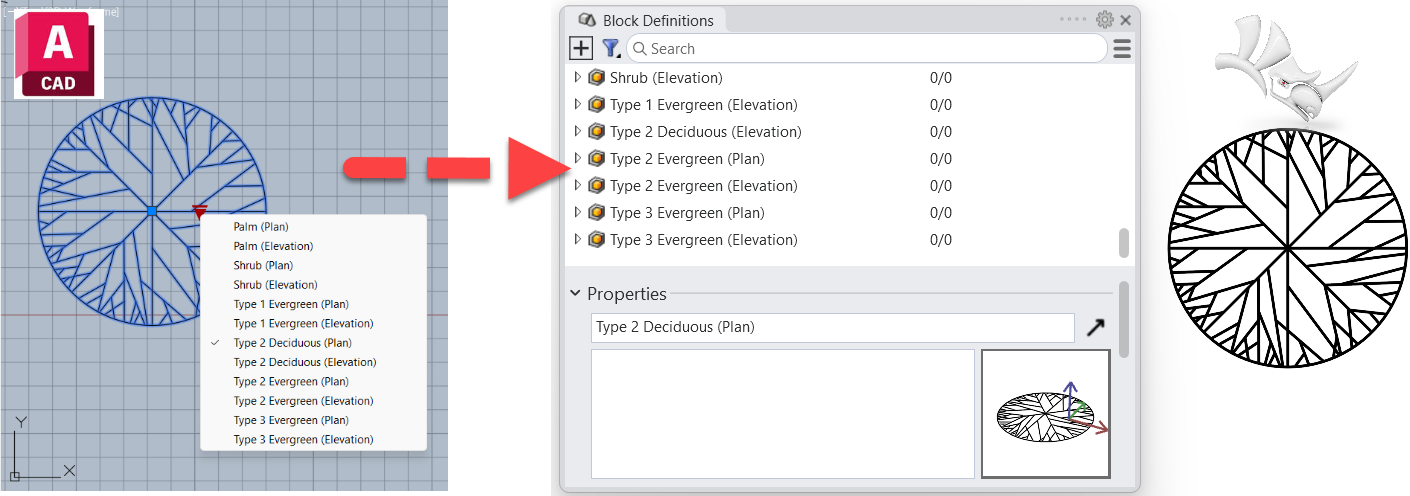
The Block Manager is now more flexible and powerful. Edit multiple definitions at the same time. Filter blocks to find the one you want, and more:
Fast Definitions
Block Properties Streamlined
Find and Select Block Components

Filter and Count
Grasshopper Block Management
Grasshopper now has components for creating block definitions and instances. Bake blocks with object attributes in tact: Grasshopper maintains and applies the attributes. Import blocks from other files, and more.

Import AutoCAD Dynamic Blocks
Try It
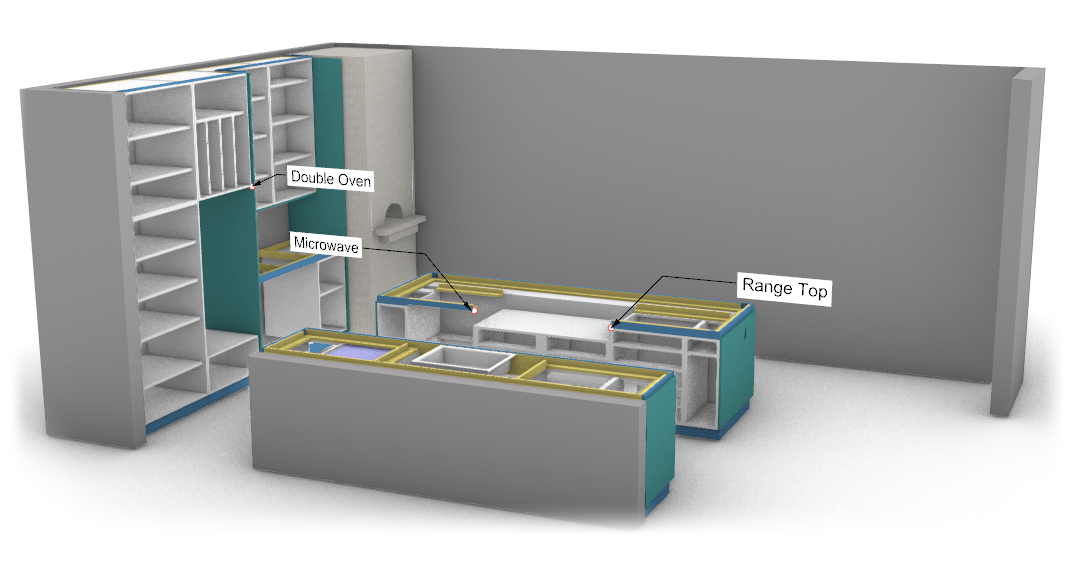
Download the model of a partial 3D plan of a kitchen. You will need to add the microwave, range top and double ovens.
- Download Rhino 8 Evaluation for Windows or Mac.
- Download and open the Blocks-Demo.3dm model.
- Type the Layer command to open the Layers panel in the right sidebar.
- In the Layers panel, verify that the Ovens & Range layer is current. The check mark should appear in the Current column of the Layers panel.
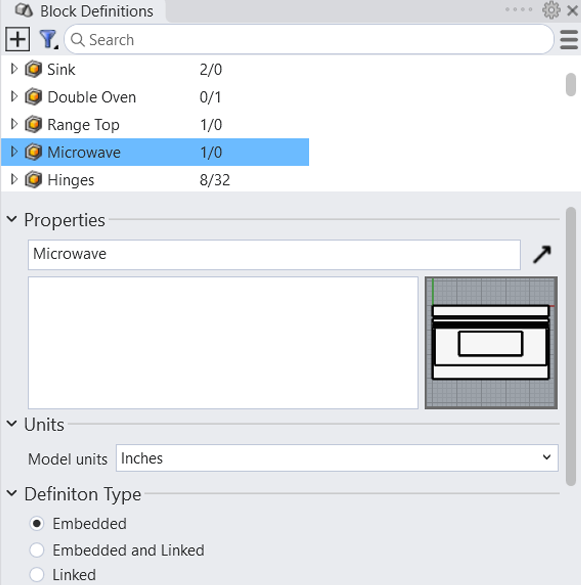
- Type the BlockManager command. This will open the Block Definitions panel in the right sidebar.
- Type the Osnap command.
- On the command line, pick Point=On, and pick the Off setting for all other osnaps. This can also be done in the Osnap panel.
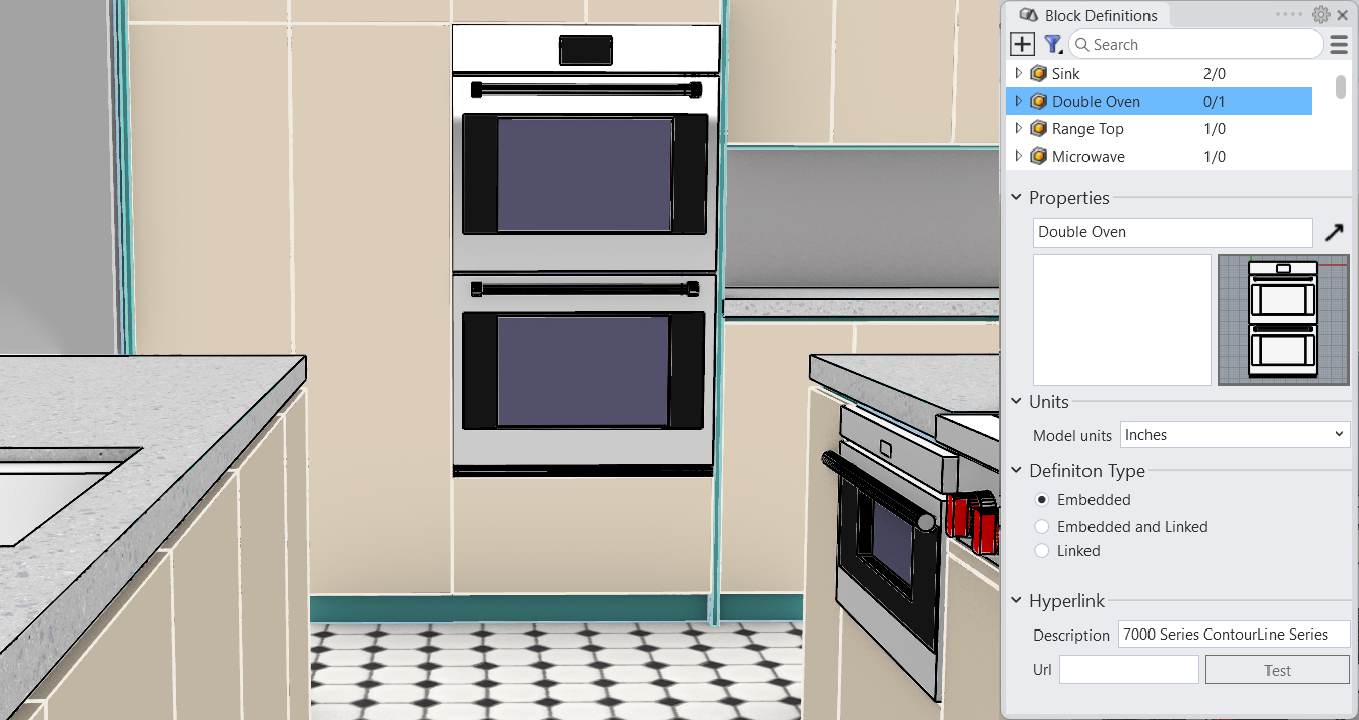
- In the Blocks Definitions panel on the right sidebar, right-click on Double Oven block.
- On the right-click menu, pick the “Insert” option.
- At the “Insertion point” prompt, pick the block insertion point where indicated by the leader.
- At the Scale factor <1>, prompt, type 1 or Enter to accept the 1 in brackets.
- At the Rotation angle <0>, prompt, type 0 or Enter to accept the 0 in brackets.
- Repeat this process for the Microwave and Range Top blocks.
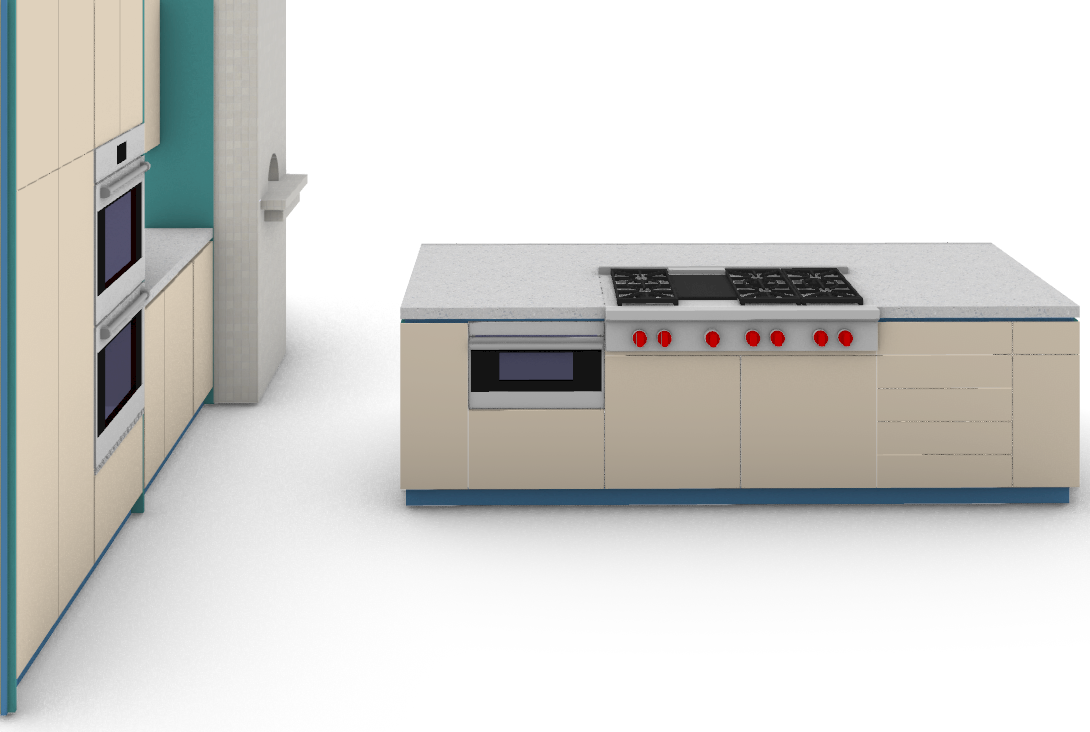
Locate these blocks at their respective insertion locations as indicated by the leaders. - Turn on the countertop geometry by going to the Layers panel and picking the gray light bulb icon in the On column of the layer Turn On When Done.
- Turn off points and leaders used to locate the block by going to the Layers panel and picking the yellow light bulb icon in the On column of the layer Turn Off When Done.
Now your 3D kitchen model is complete.
Ask questions and give feedback on the Discourse Forum.
