The
![]() Gumball
is a visual widget that shows on the screen when you are selecting objects. It’s an intuitive way of using
Gumball
is a visual widget that shows on the screen when you are selecting objects. It’s an intuitive way of using
![]() Move
,
Move
,
![]() Copy
,
Copy
,
![]() Rotate
and
Rotate
and
![]() Scale
without the need to run the commands. The
Scale
without the need to run the commands. The
![]() Gumball
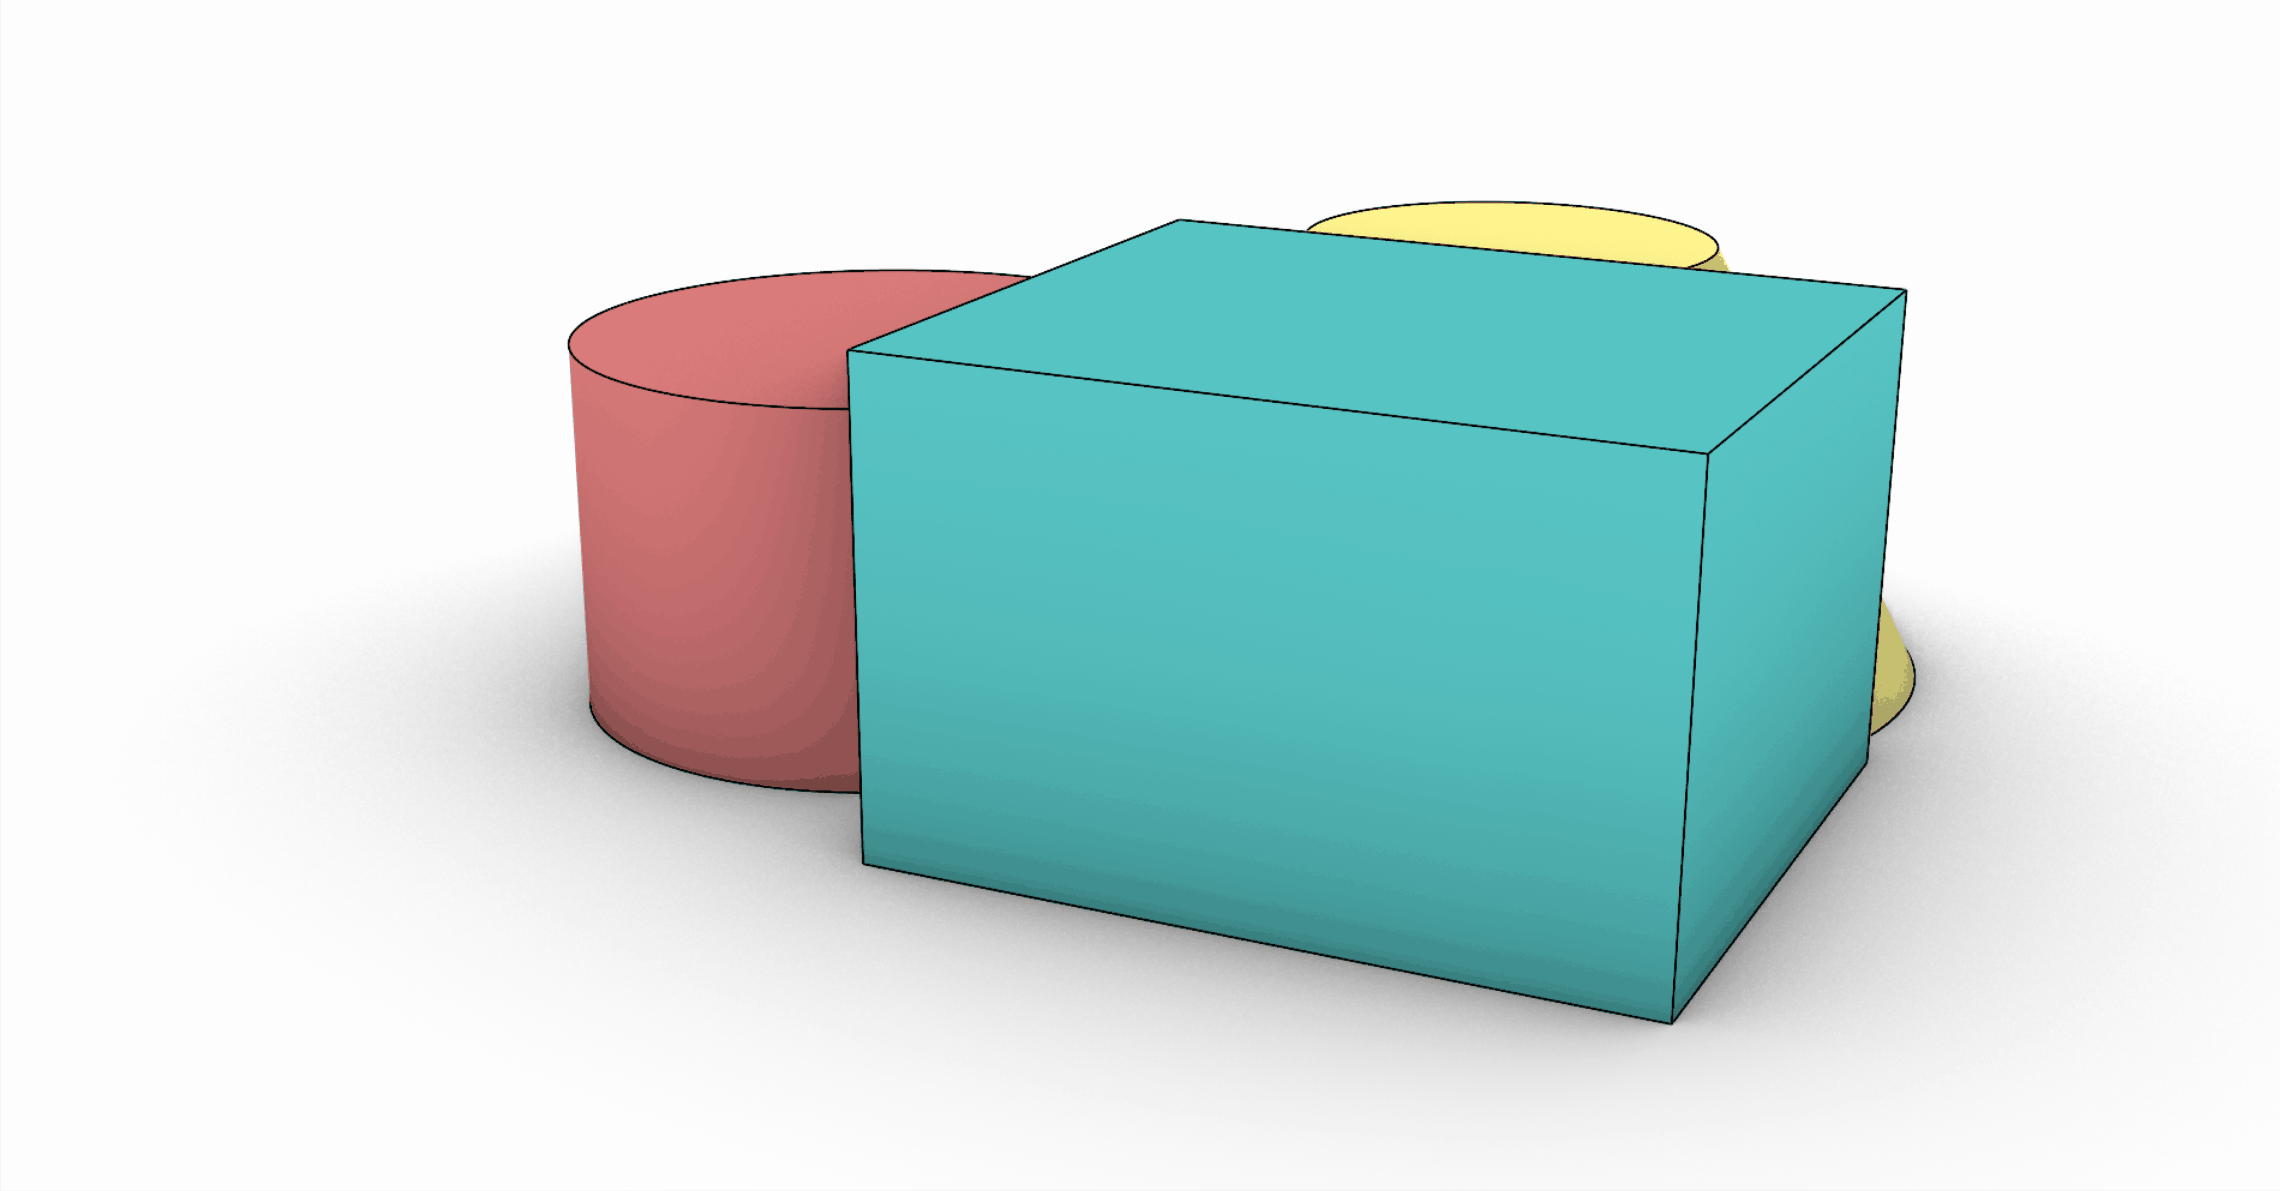
also allows for more advanced editing options such as copying, cutting, embossing, extruding, extending. You can learn to use these in our advanced tutorial for Creating a Coffee Table.
Gumball
also allows for more advanced editing options such as copying, cutting, embossing, extruding, extending. You can learn to use these in our advanced tutorial for Creating a Coffee Table.
0. Getting Started
There’s a lot the Gumball can do! It takes time and practice to manipulate it in the right way. Once you get the hang of it, it’s a powerful tool that streamlines the modeling/editing process. Let’s get acquainted with a few concepts around the Gumball that will make your life easier.
1. Activating the Gumball
The Gumball is off by default. You can activate it by clicking the Gumball pane in the Status Bar at the bottom of the interface.
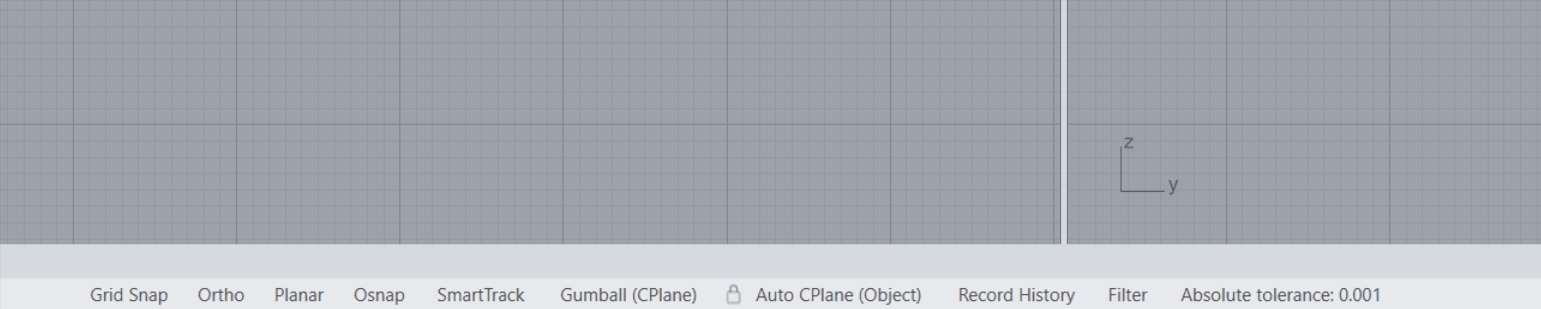
Once activated, Gumball will become visible when selecting one or multiple objects.
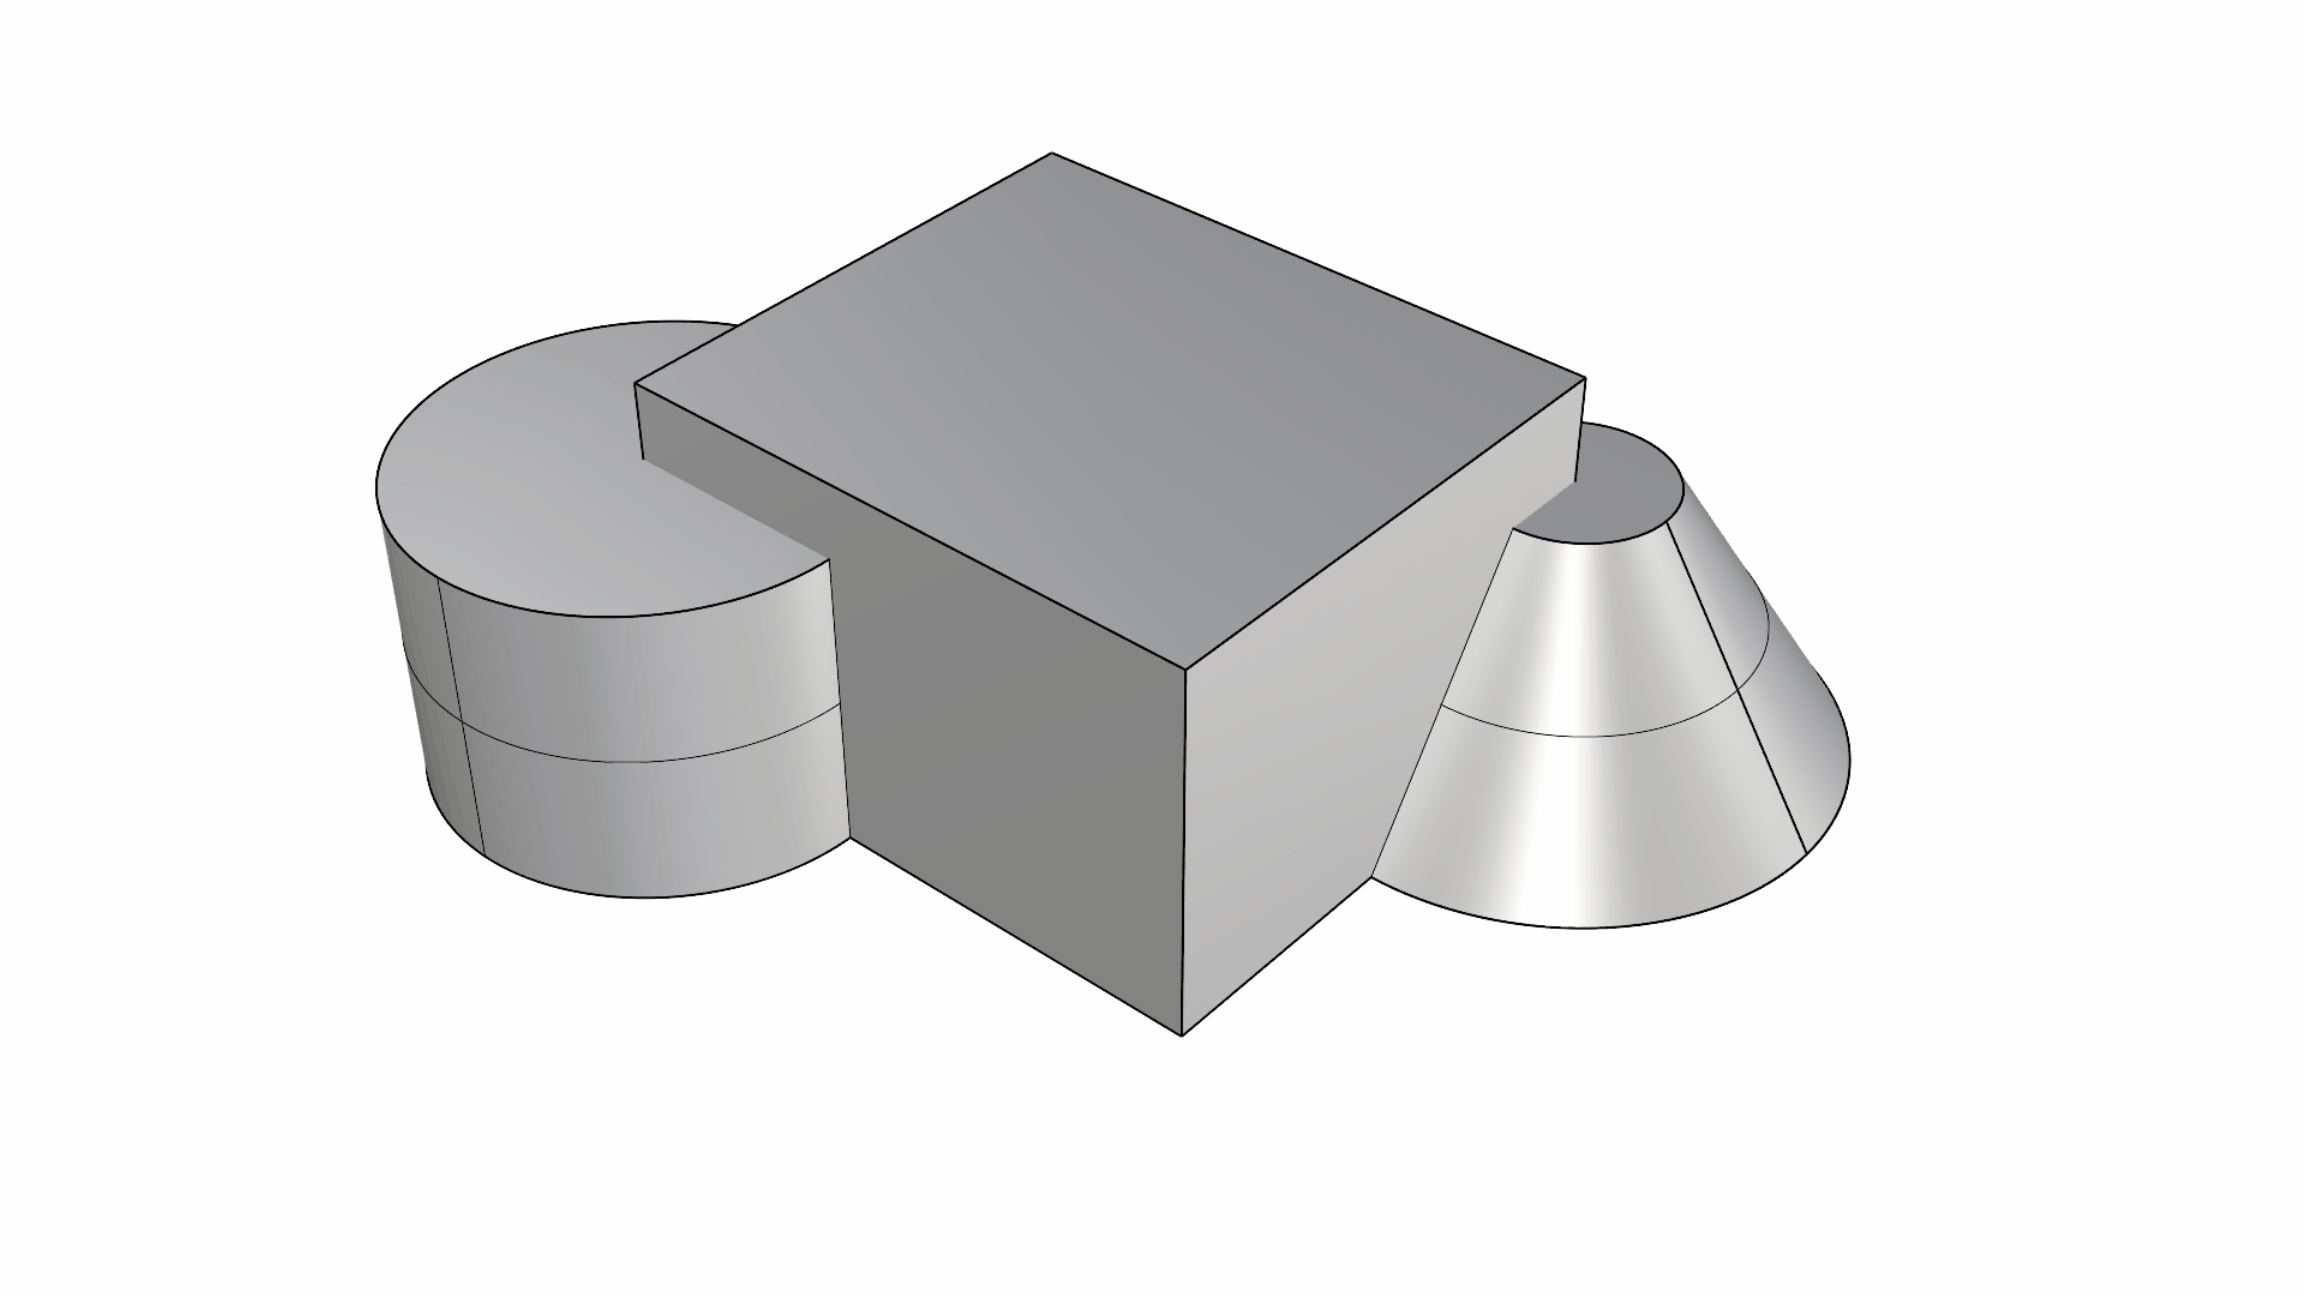
Keep in mind there’s only one Gumball. This means that if you select multiple objects, you’ll see only one Gumball widget for all the objects selected.
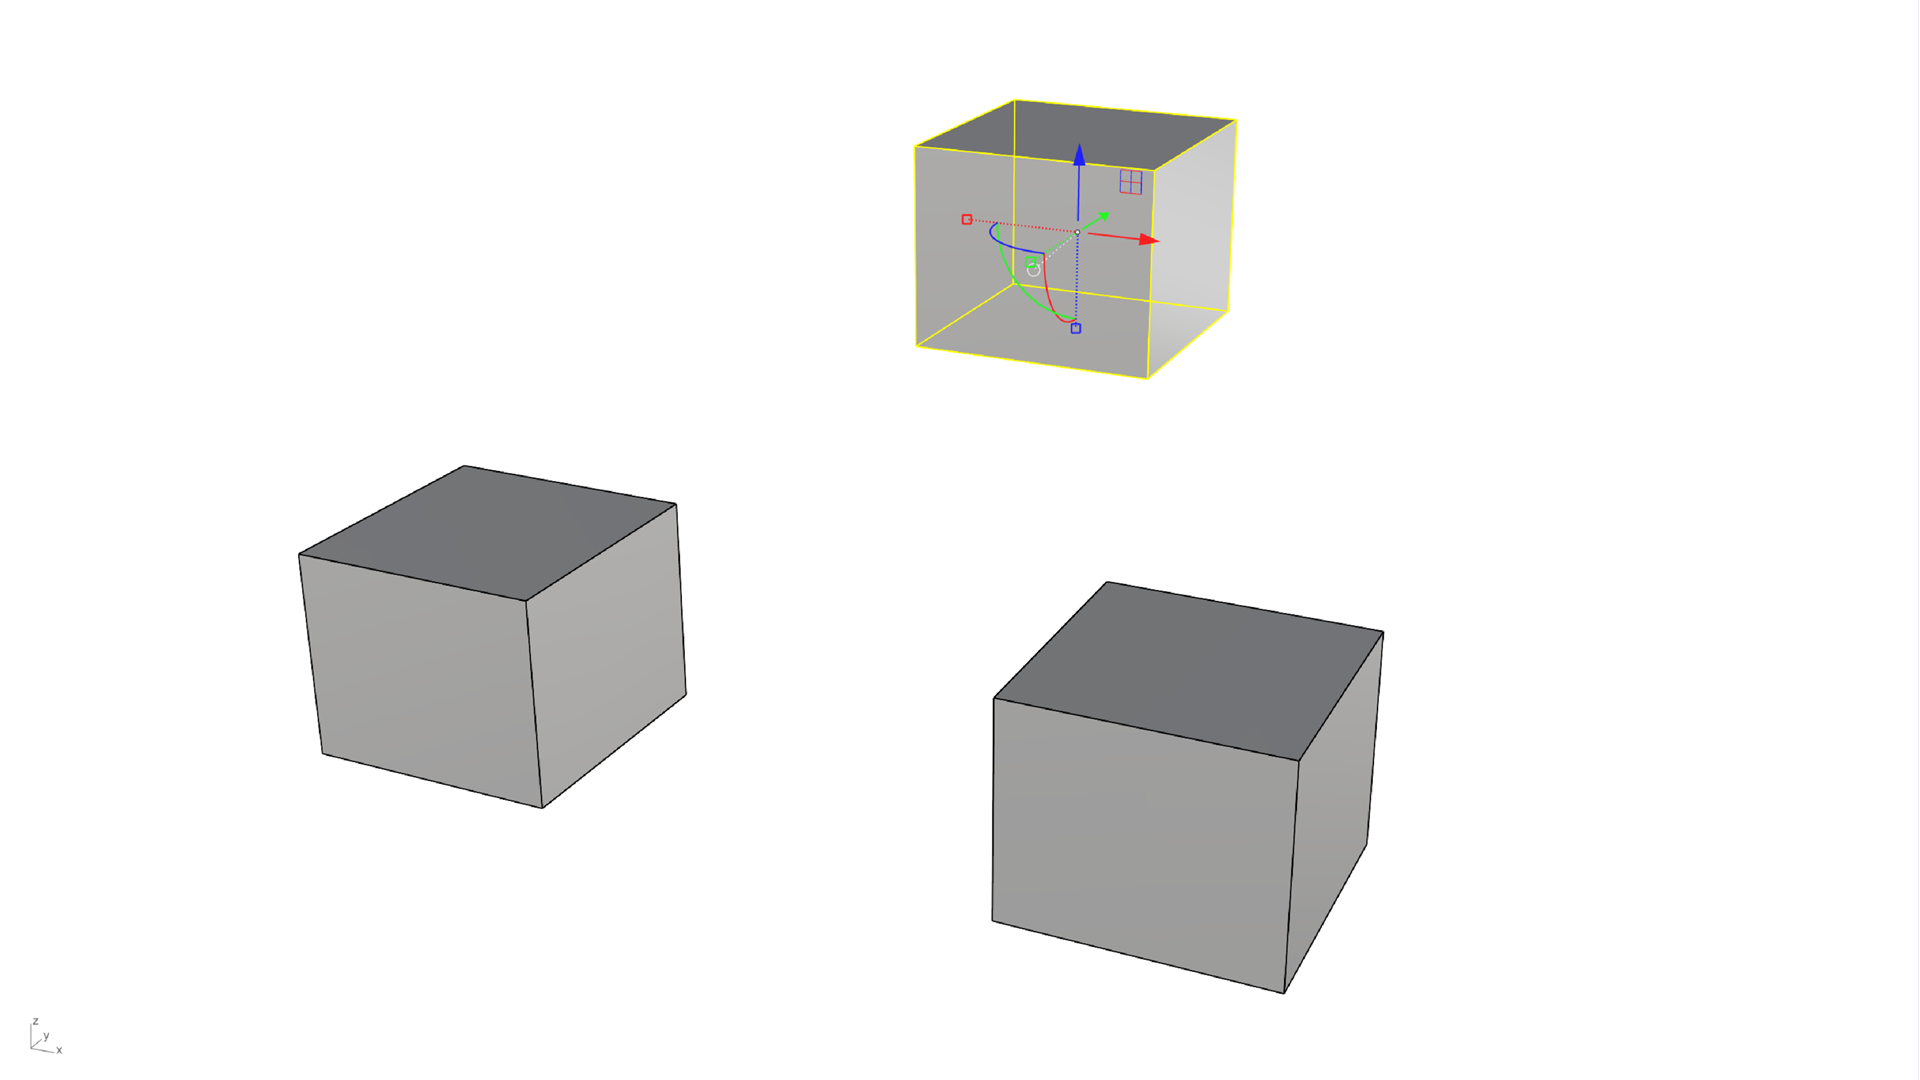
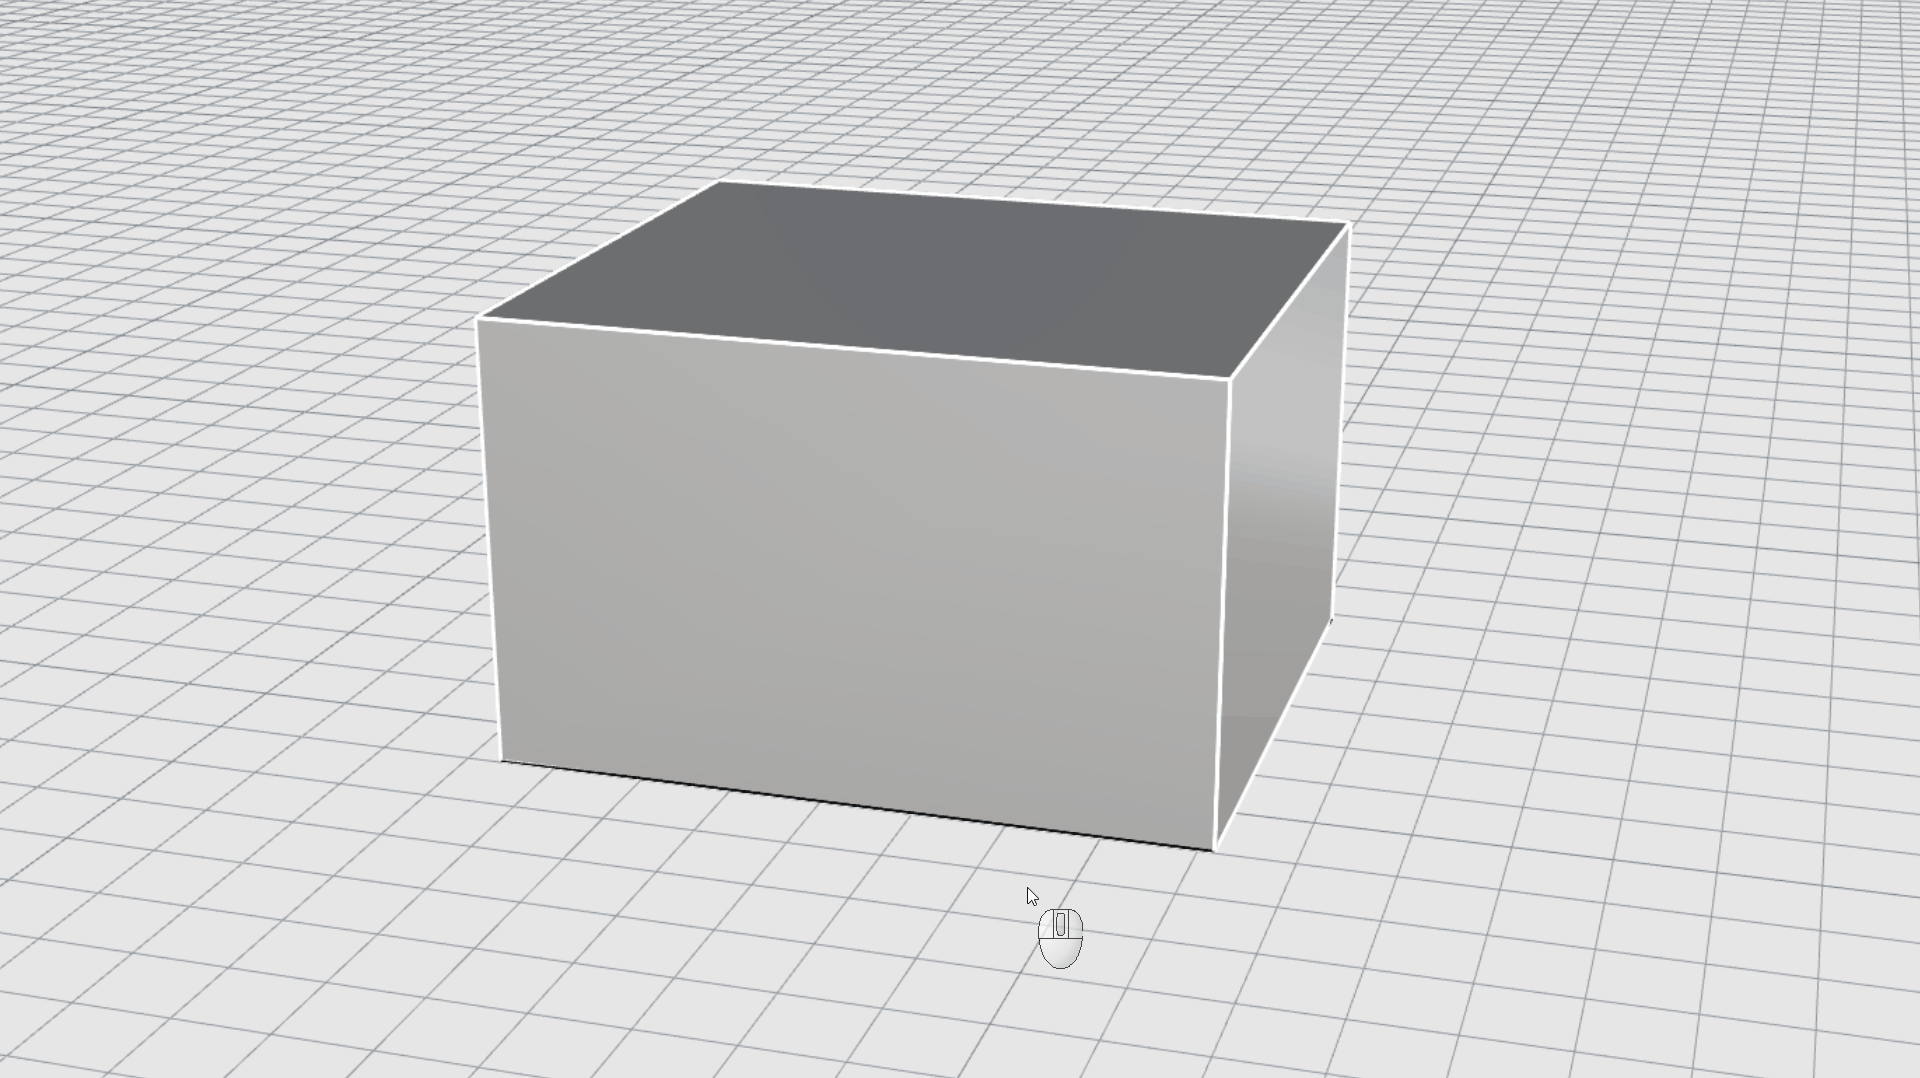
One Object Selected
Multiple Objects Selected
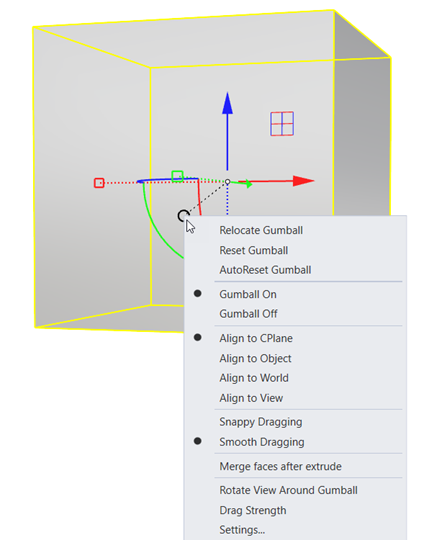
2. Settings
You can configure different aspects of the Gumball through its Settings. There are three methods for accessing it:
-
Through the
 GumballSettings
command.
GumballSettings
command. -
By right-clicking on the Gumball pane in the Status Bar.
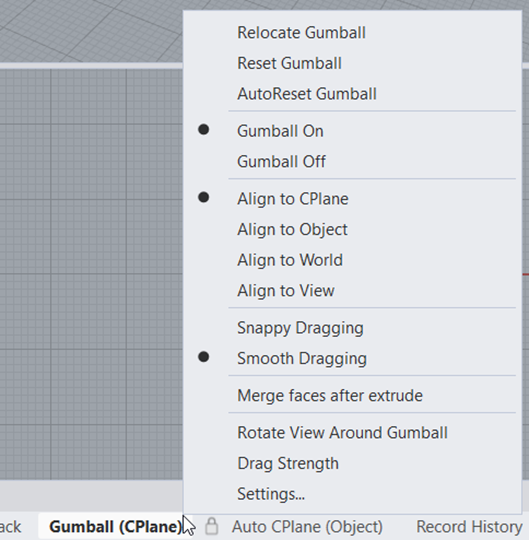
- By left-clicking on the Gumball’s Menu ball (Bunny tail).
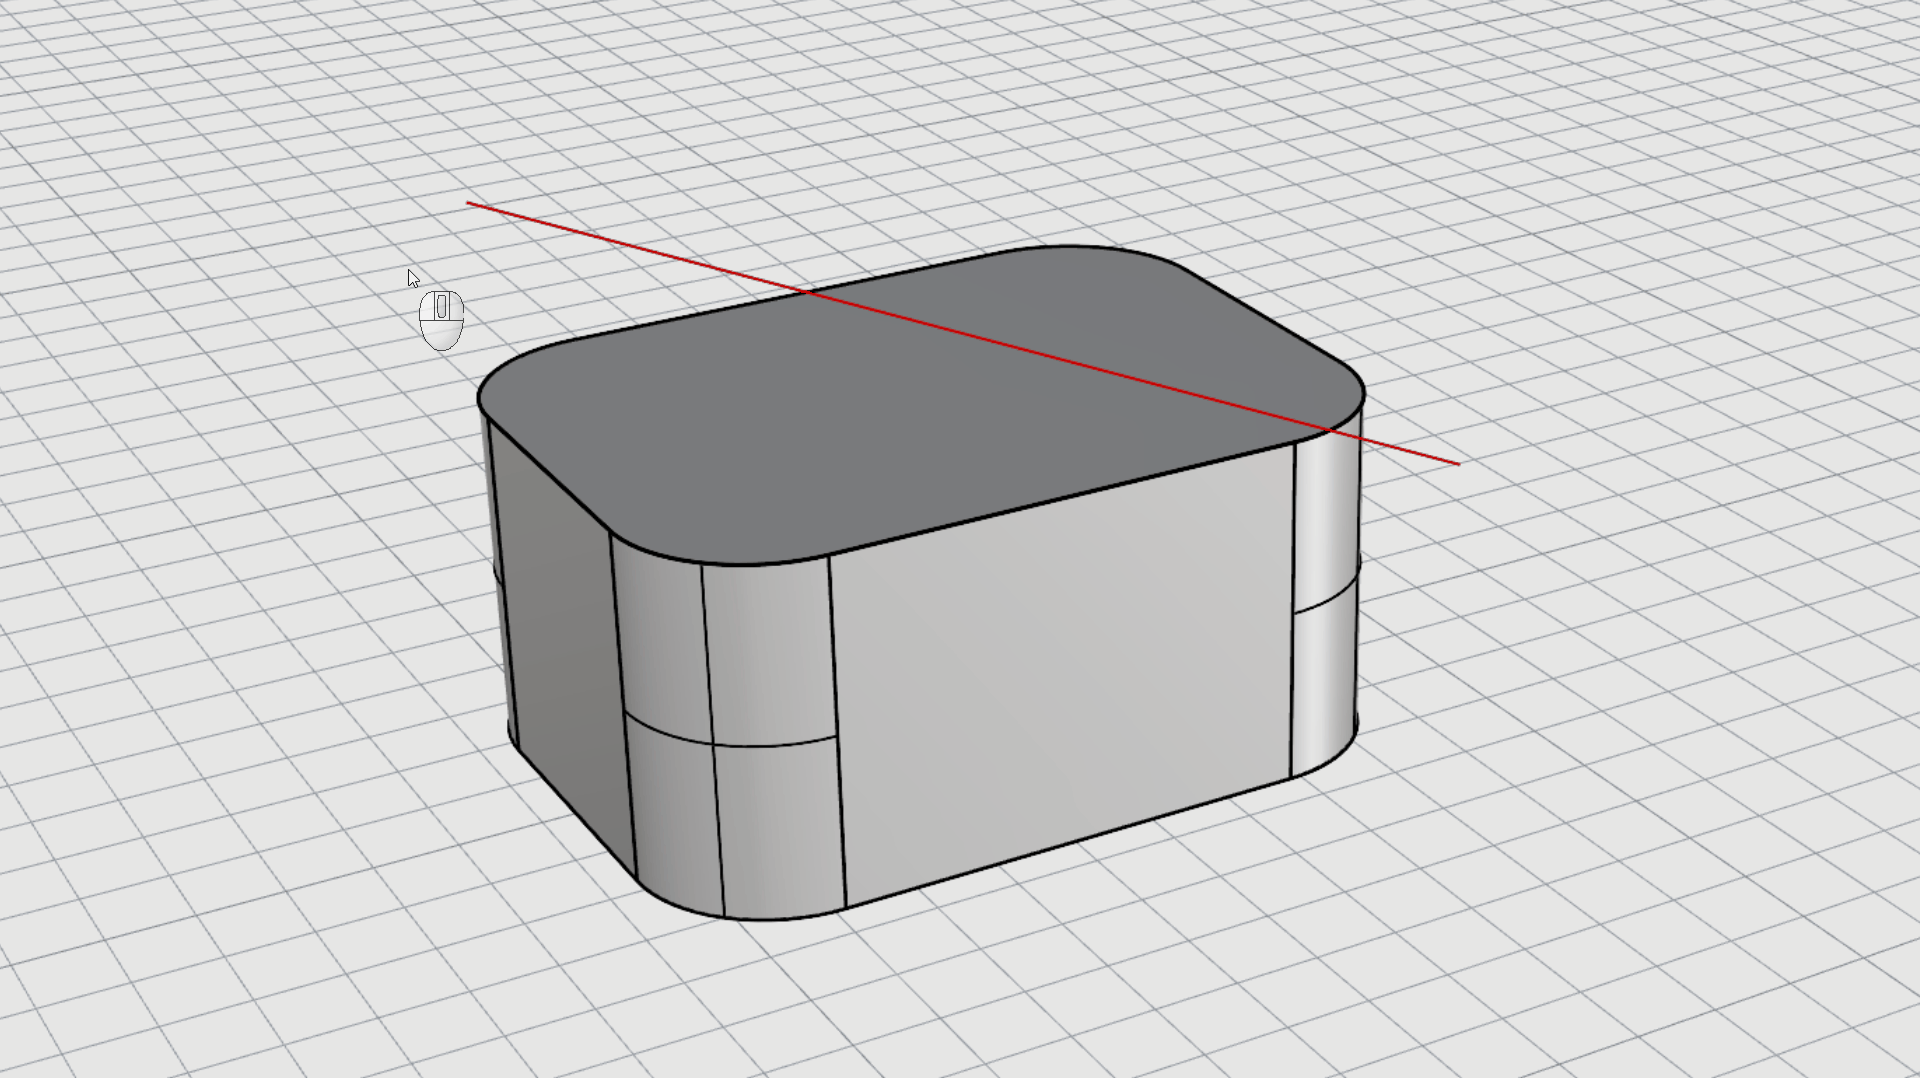
3. Handles
The Gumball is composed of multiple handles and icons. Clicking or dragging on each one will enable a specific transform action. Here’s a cheatsheet to help you identify each of these.
These widgets are object-dependent. Some widgets, such as the Cut tool, only work on curves; thus, it won’t appear when selecting a face. The Extrude dot only appears on points, curves, and faces (not on 3D objects). You’ll sometimes observe a halo surrounding the Extrude dot as well. This is the Gumball Extend option that appears upon faces that can be extended (e.g., extend in space while preserving the taper). To learn more about each Gumball Handle, visit the Gumball topic on our Help File.
4. Transforms
The
![]() Gumball
widget is an easy way to
Move
,
Rotate
,
Scale
and
Copy
objects in Rhino. It provides a quick way of transforming selected objects without having to go through the linear steps of the
Command Prompt
.
Gumball
widget is an easy way to
Move
,
Rotate
,
Scale
and
Copy
objects in Rhino. It provides a quick way of transforming selected objects without having to go through the linear steps of the
Command Prompt
.
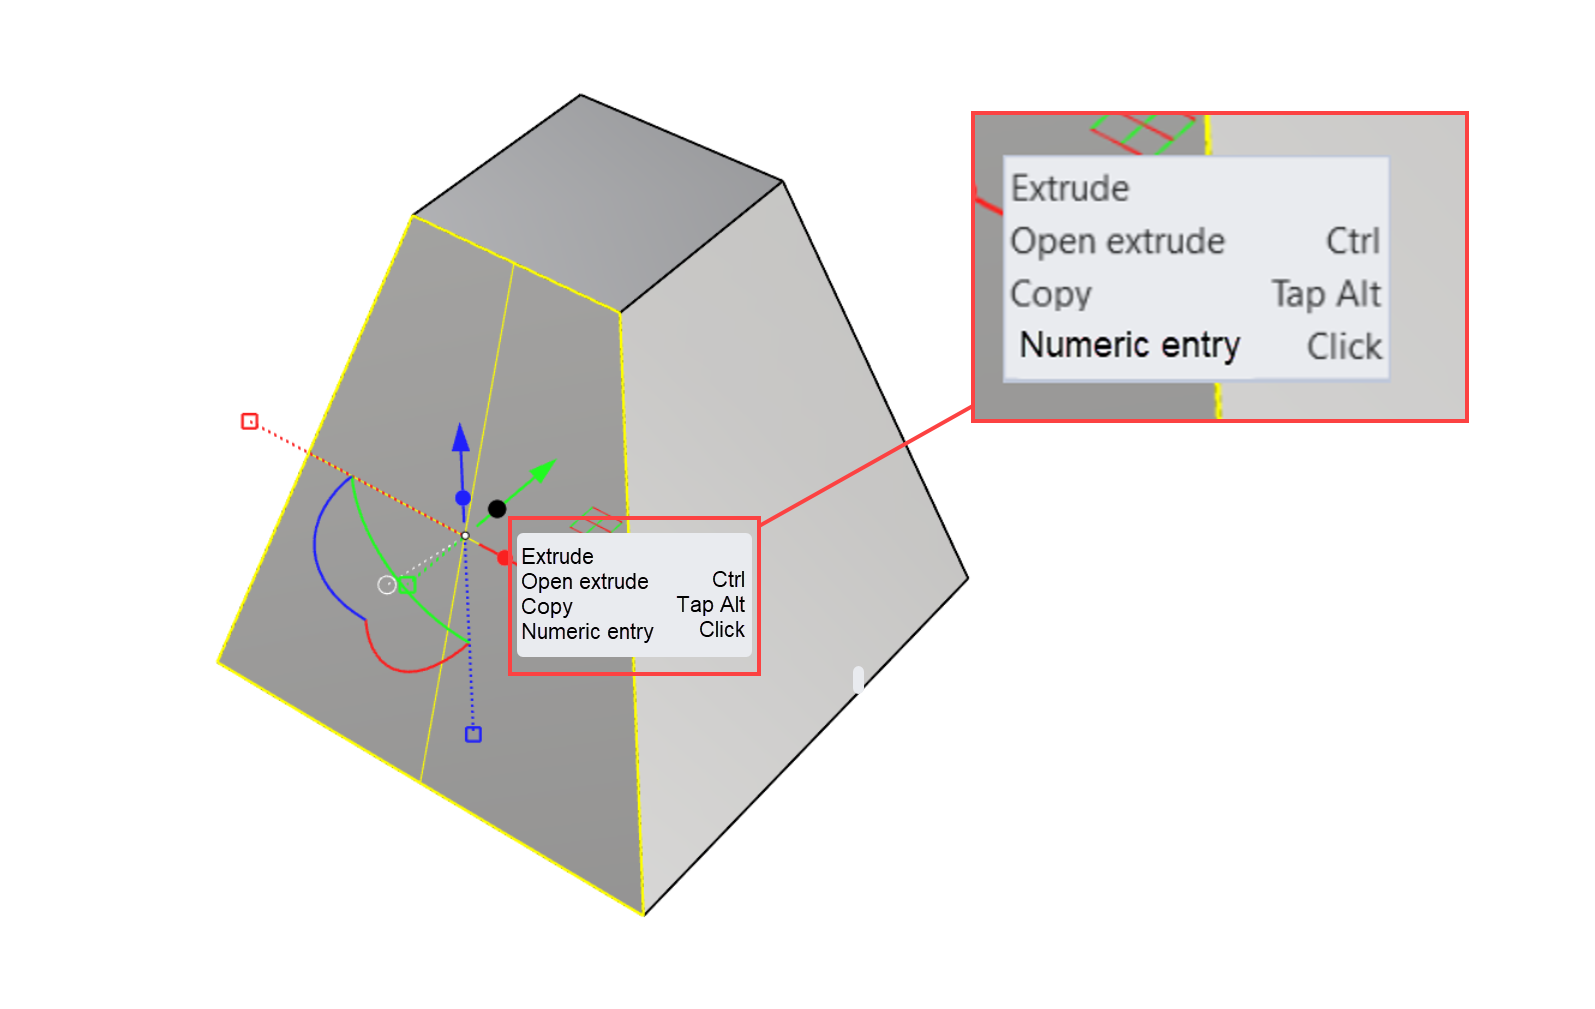
5. Solid Operations
The
![]() Gumball
also provides functionality for solid operations. You can
Extrude
,
Cut
,
Emboss
using curves or
Extend
faces. This functionality is dependent of the object selected and its orientation.
Gumball
also provides functionality for solid operations. You can
Extrude
,
Cut
,
Emboss
using curves or
Extend
faces. This functionality is dependent of the object selected and its orientation.
6. Tooltips
Some of Gumball’s tools can be modified to do more than the original transform tool offers. As explained above, this depends on the nature of the selected object. To help you identify these modifiers, you can hover over the different widgets to bring up the Tooltips. It will show the exact actions that can be performed and the modifier key press.
7. Relocation
Transformations such as move, scale, or rotate happen around the Gumball’s pivot point, called the Origin. It refers to the central point where all the handles meet. When selecting an object, the Gumball will appear on the object’s center bounding box by default.
What if you need to move the object from a midpoint on its side edge? Or scale it from its bottom corner? Learn about the different ways to reposition the Gumball on the object:
-
Use the
 GumballRelocate
command.
GumballRelocate
command. -
Access the Relocate Gumball option through the Gumball’s Settings or Menu ball.
-
Use the
 GumballDynamicRelocate
command.
GumballDynamicRelocate
command. -
Double-click on the Gumball’s Origin or any of its handles to enter into the dynamic relocation mode. At this point, any movement on the handles will not affect the object but rather reposition the Gumball on it.
You can always reset the Gumball to its default location/orientation by selecting Reset Gumball in the Settings panel.
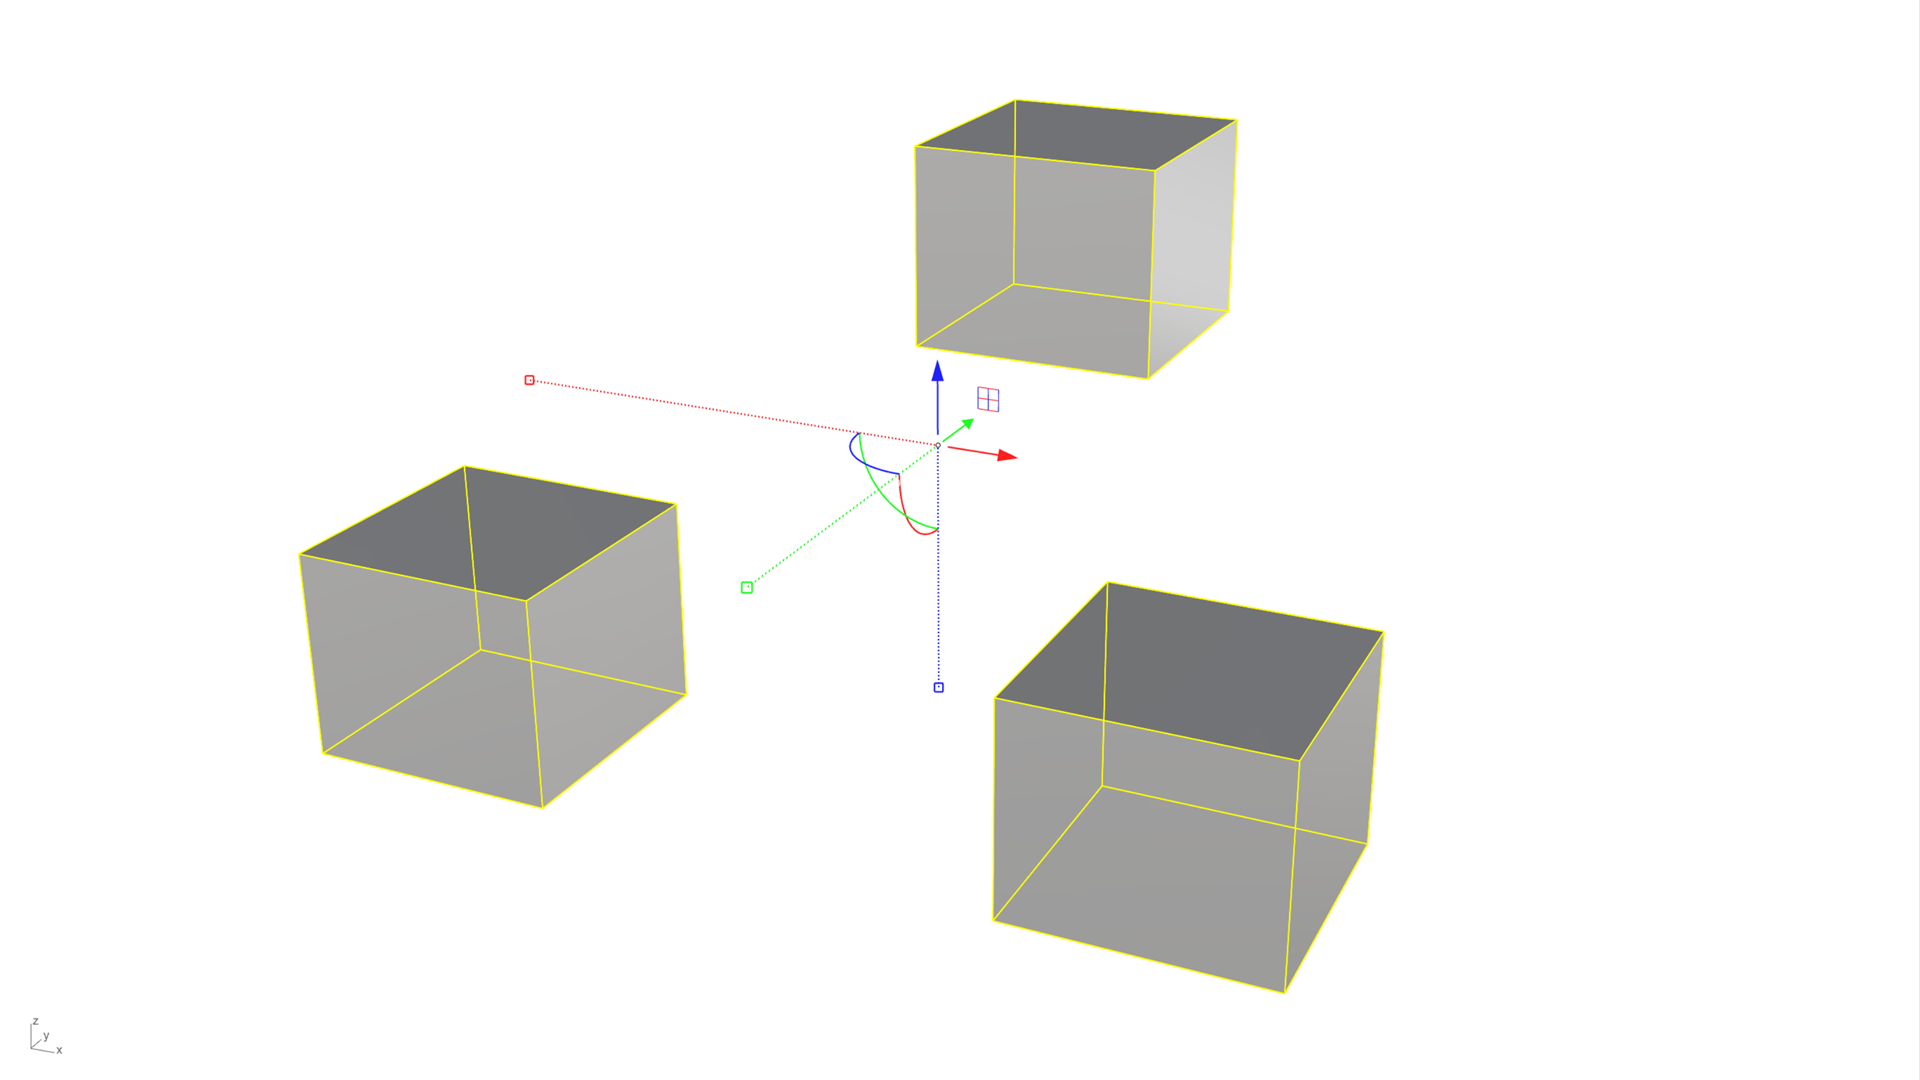
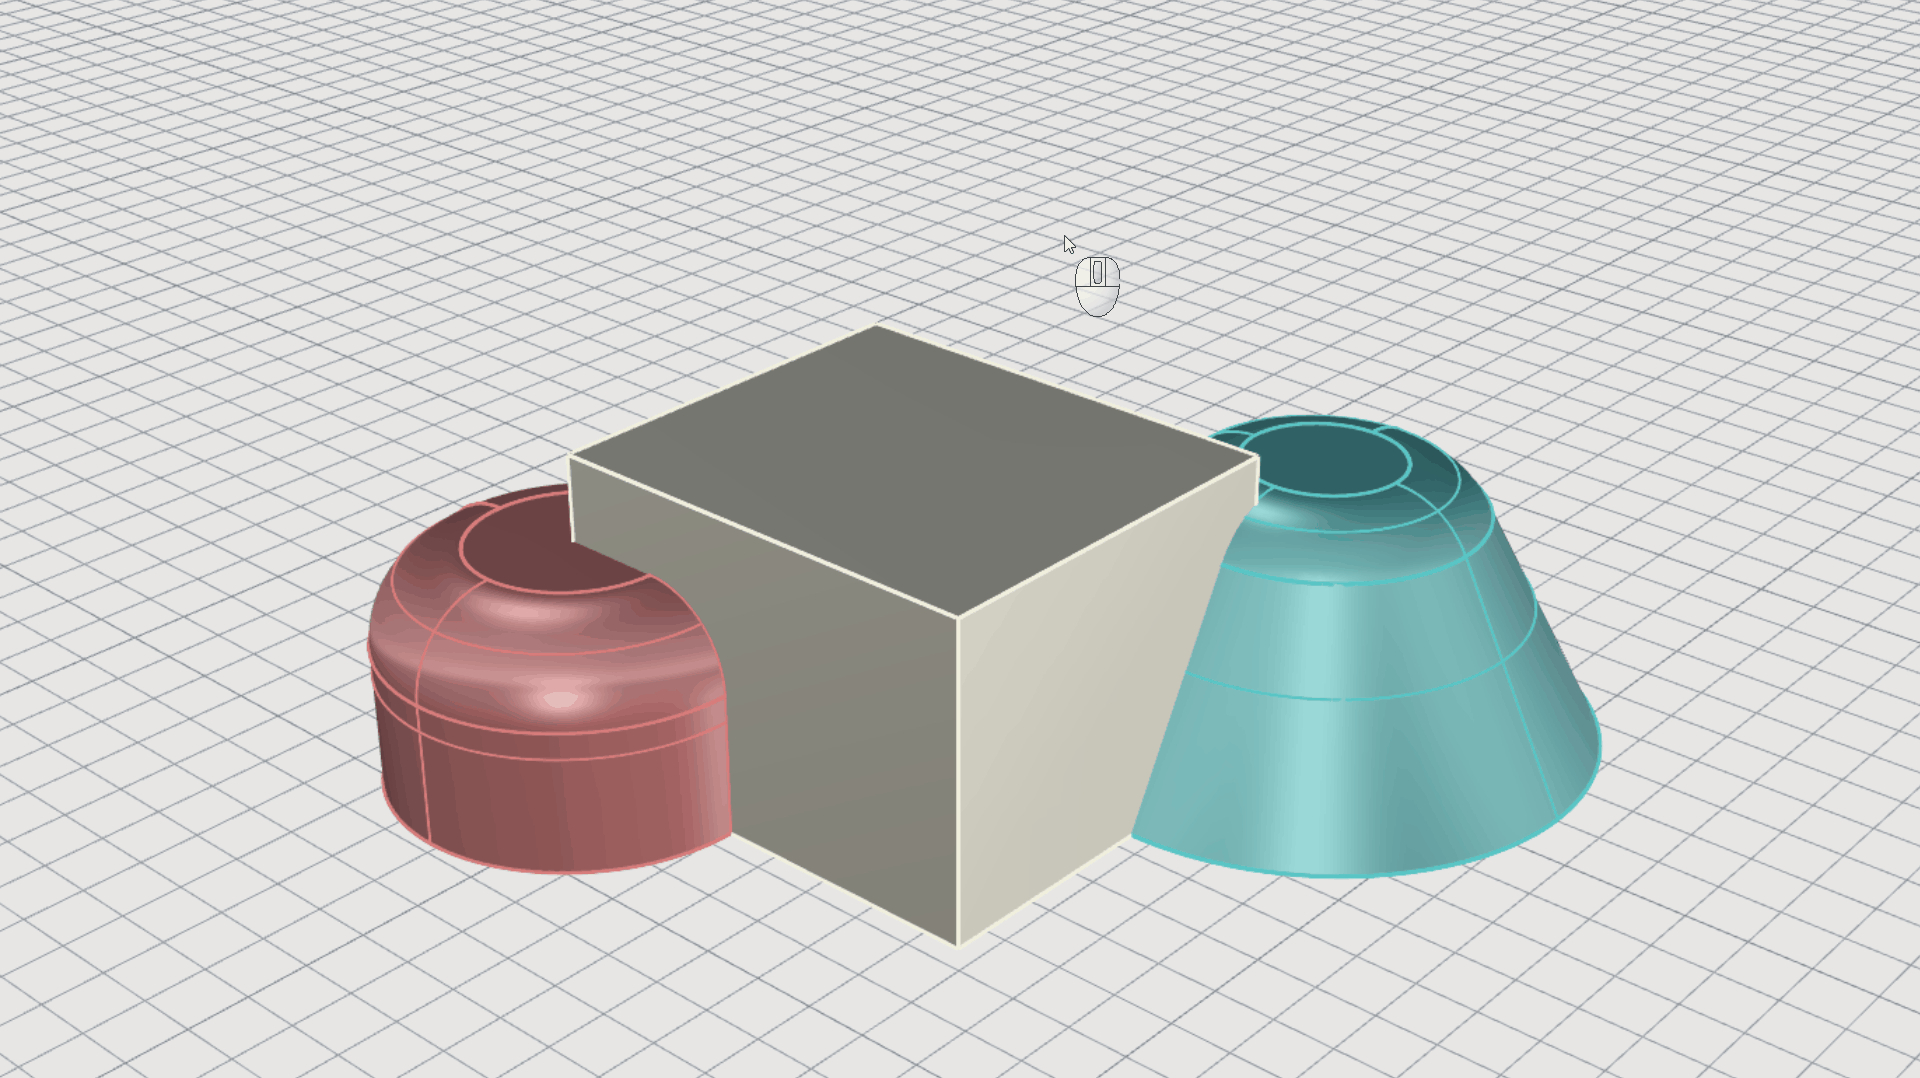
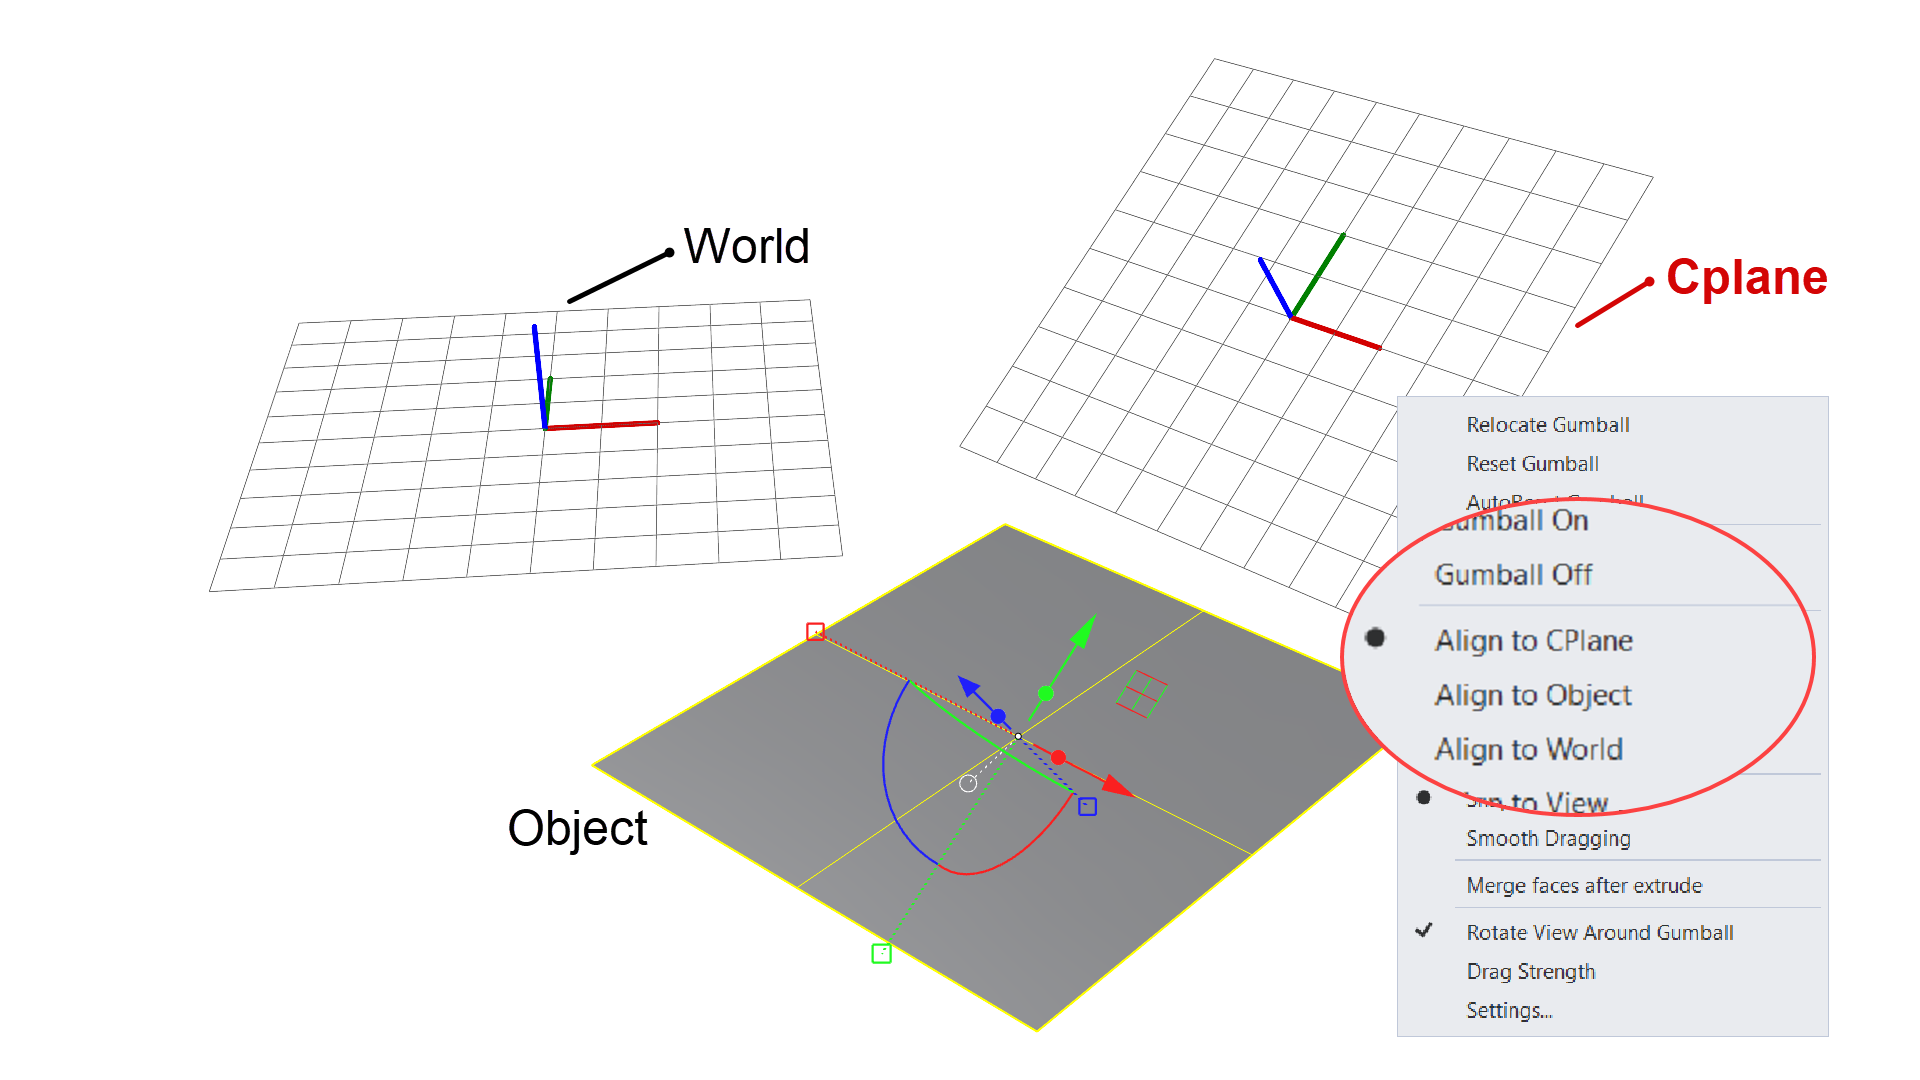
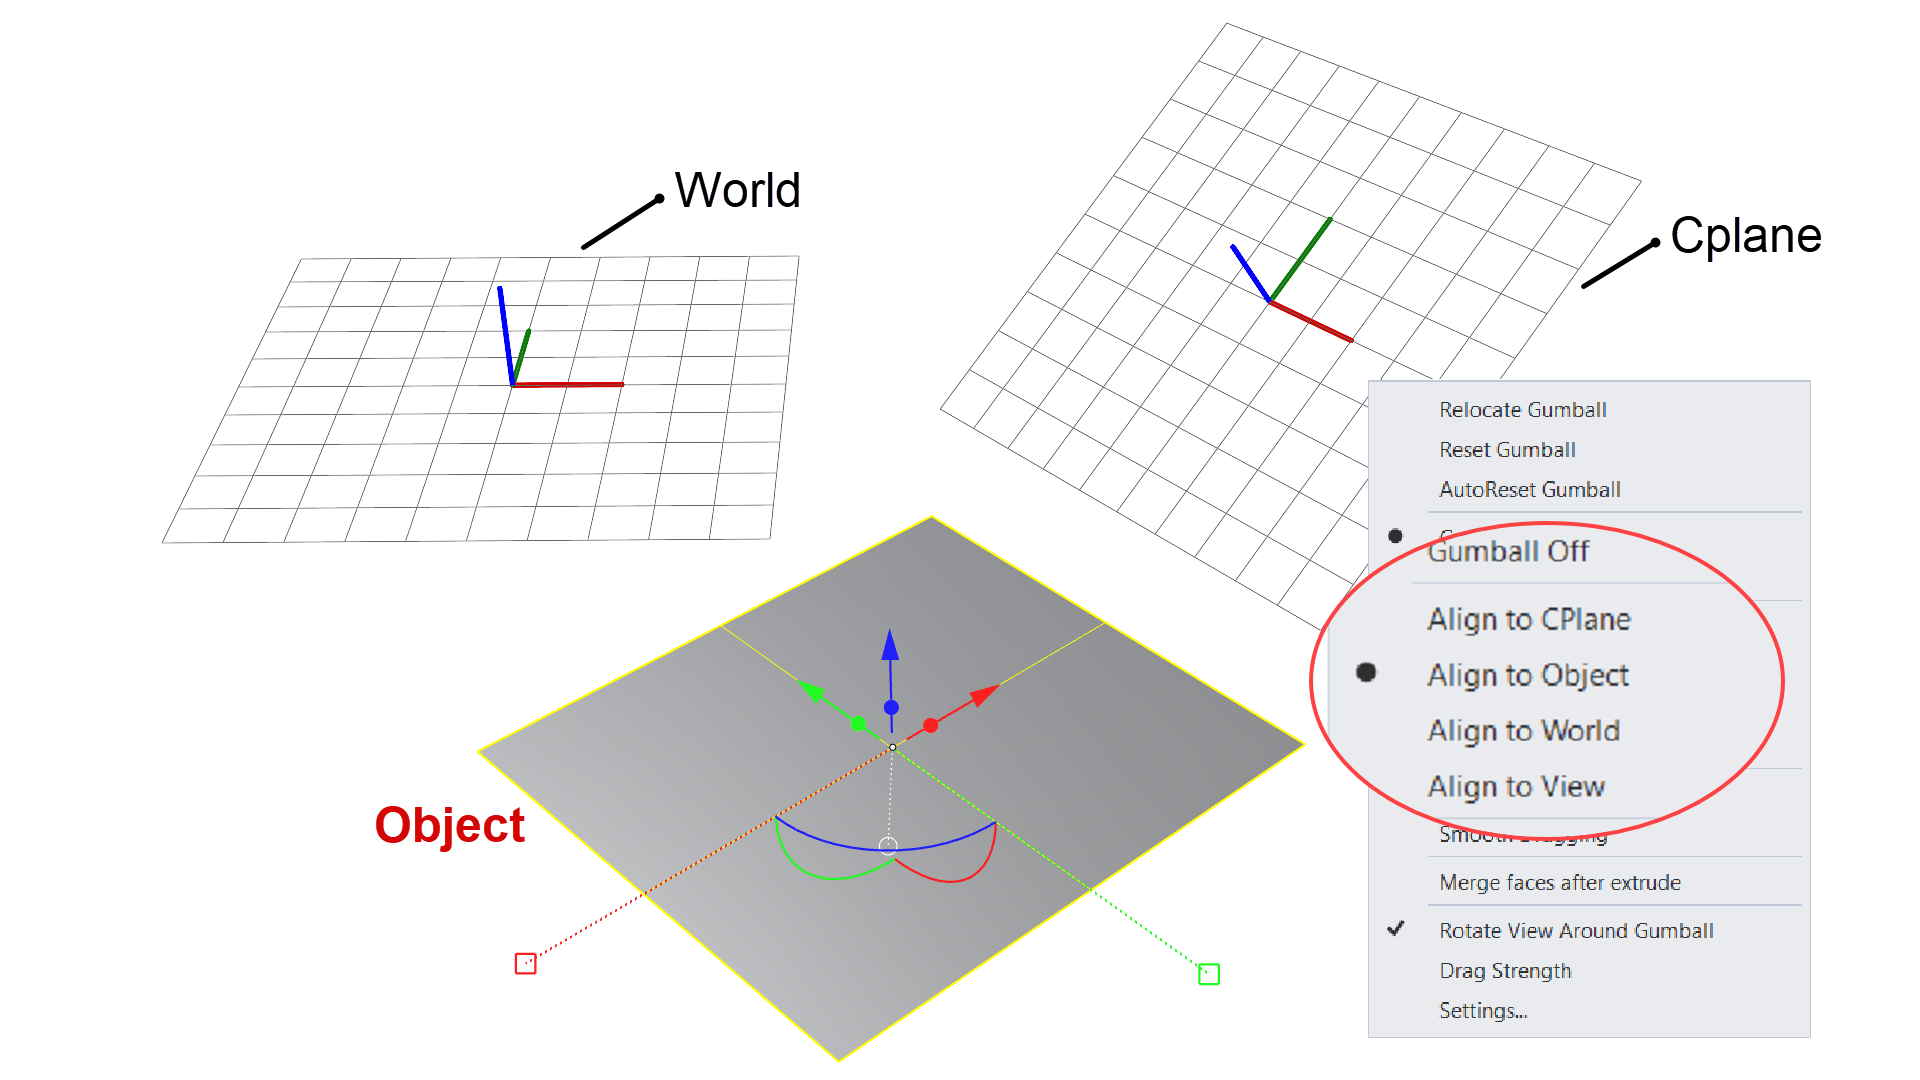
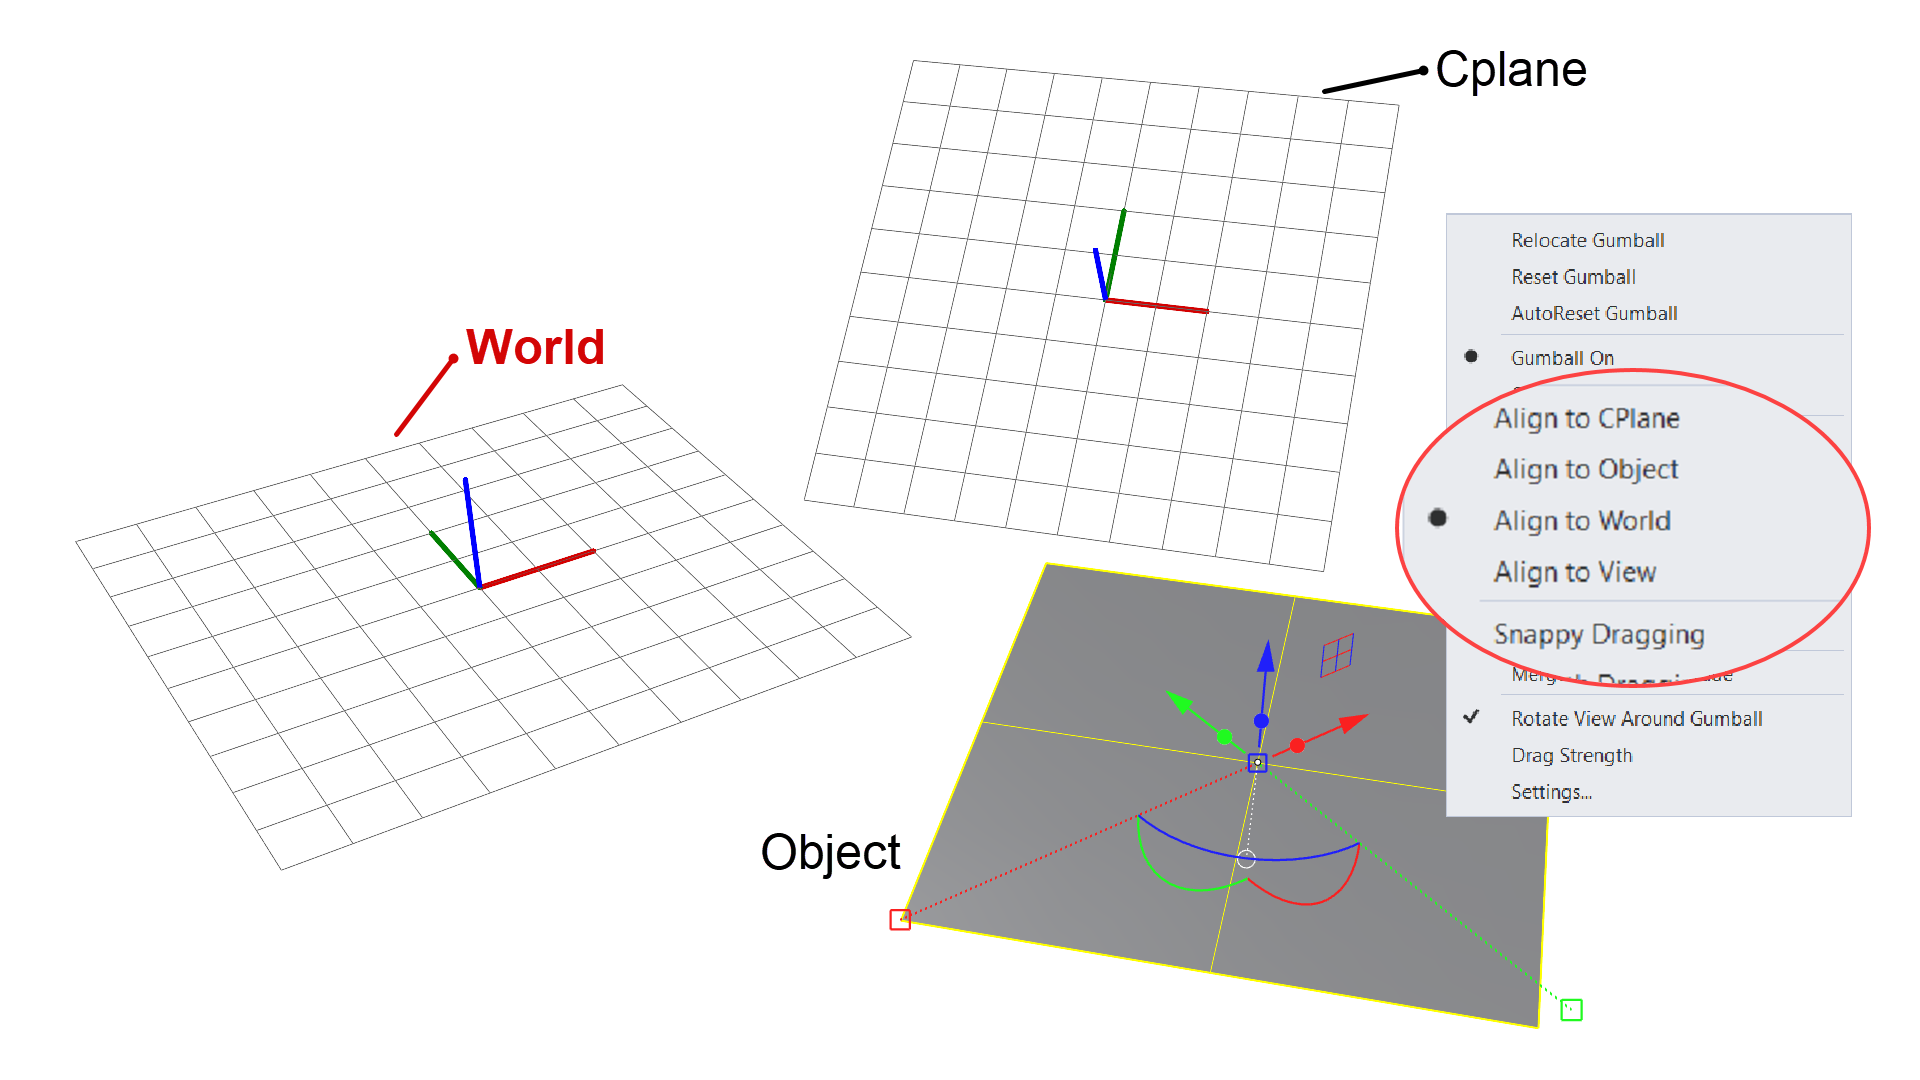
8. Alignment
The Gumball’s axes are aligned to an object based on the active
![]() Cplane
. This means that its axes (arrows) are parallel to the Cplane’s axis, independently of how the object is placed in space. However, there are other alignment options. In the images below, note how the Gumball’s axes switch to align to the various options.
Cplane
. This means that its axes (arrows) are parallel to the Cplane’s axis, independently of how the object is placed in space. However, there are other alignment options. In the images below, note how the Gumball’s axes switch to align to the various options.
Similar to relocation, sometimes you need to customize the handle’s orientation or size on the object. You can double-click the desired handle and rotate or stretch to your needs.
9. Sub-Object Selection
Rhino has diverse object types, which you can learn more about in our Getting Started: Object Types | Rhino for Windows or Getting Started: Object Types | Rhino for MAC. Some of these objects are singular in nature, such as a point, line, surface, mesh, or SubD face. Others are composed of joined end-to-end lines or surfaces, making them polylines or polysurfaces. To continue with the latter example, when you select a polysurface and you edit it using the
![]() Gumball
, your modifications apply to the overall object. Sub-Object selection allows you to access one of these sub-parts (e.g., a surface within the polysurface) and modify it (move, scale, rotate) while maintaining the joined or glued nature of the adjacent faces.
Gumball
, your modifications apply to the overall object. Sub-Object selection allows you to access one of these sub-parts (e.g., a surface within the polysurface) and modify it (move, scale, rotate) while maintaining the joined or glued nature of the adjacent faces.
Hold the + (on Mac + ) + left-click to select a sub-object. You can also activate the
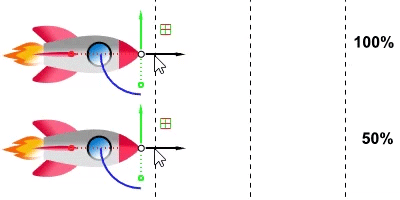
10. Snappy vs Smooth Dragging
The
![]() Gumball
can be set to drag an object in a Smooth Dragging mode (e.g., free movement) or to Snappy Dragging, which will allow the Gumball to align and reference other Object Snaps active on the object.
Gumball
can be set to drag an object in a Smooth Dragging mode (e.g., free movement) or to Snappy Dragging, which will allow the Gumball to align and reference other Object Snaps active on the object.
- Smooth Dragging is great for…
- Freely moving and editing geometry
- Form finding and sculpting faces, edges, points, vertices
- Snappy Dragging is great for…
- Precise modeling
- Aligning objects with others
- Referencing other object’s positions or geometrical spots
You can also set the Drag Strength through the Gumball’s Settings pane.
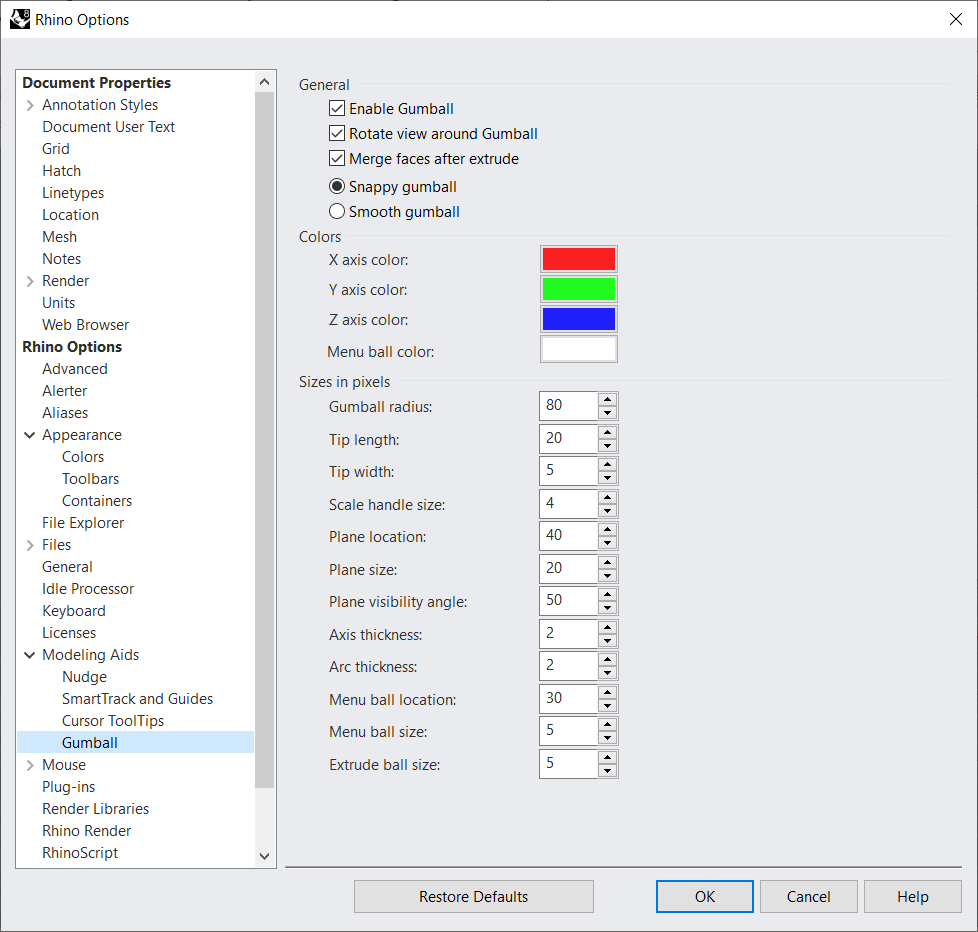
11. Accessing the Options
The Settings pane we have discussed up to now allows you to configure how the
![]() Gumball
behaves. The Gumball page in Rhino’s
Gumball
behaves. The Gumball page in Rhino’s
![]() Options
adds the ability to configure how the Gumball looks.
Options
adds the ability to configure how the Gumball looks.
Access it through the Tools menu > Options… > under Modeling Aids.
12. Want to learn more?
To learn more about these transformation techniques using the
![]() Gumball
, follow Brian James’ tutorial on Creating a Coffee Table.
Gumball
, follow Brian James’ tutorial on Creating a Coffee Table.
Check out these related topics on our Help Guide.
- Gumball
- Gumball Toolbar
- GumballAlignment
- GumballAutoReset
- GumballRelocate
- GumballDynamicRelocate
- GumballReset
- GumballScaleMode
Visit the Rhino 8 page to learn about other new features.
